The Render Came Back Looking Different: Why Farms Don't Match Your Scene
You pay for 300 frames of an animation sequence, wait a few hours, and download the finished output and find the entire sequence is rendered in hot pink, missing crucial environment textures, or crushed by entirely different exposure and color shifts. In the 3D production process, this results in higher-than-normal costs, not to mention missing project deadlines.
“The most expensive render isn’t the one that costs the most per hour,it’s the one you have to pay for twice because the output didn’t match your local preview.”
There are four primary causes leading to a local file renders differently on a remote farm: asset paths, version drift, color management, and subtle render setting discrepancies. Let’s dive in!
Why does the same file render differently on another machine?
The four causes are asset paths, version drift in software and plugins, color management differences, and render settings that were not locked down before the job shipped. Asset paths cause the most damage by far, because a single missing texture path can turn an entire sequence into unusable pink or black materials. The other three are quieter. They rarely destroy a job outright, but they shift color, contrast, or noise just enough that a client notices something is off.
Asset paths, the number one cause
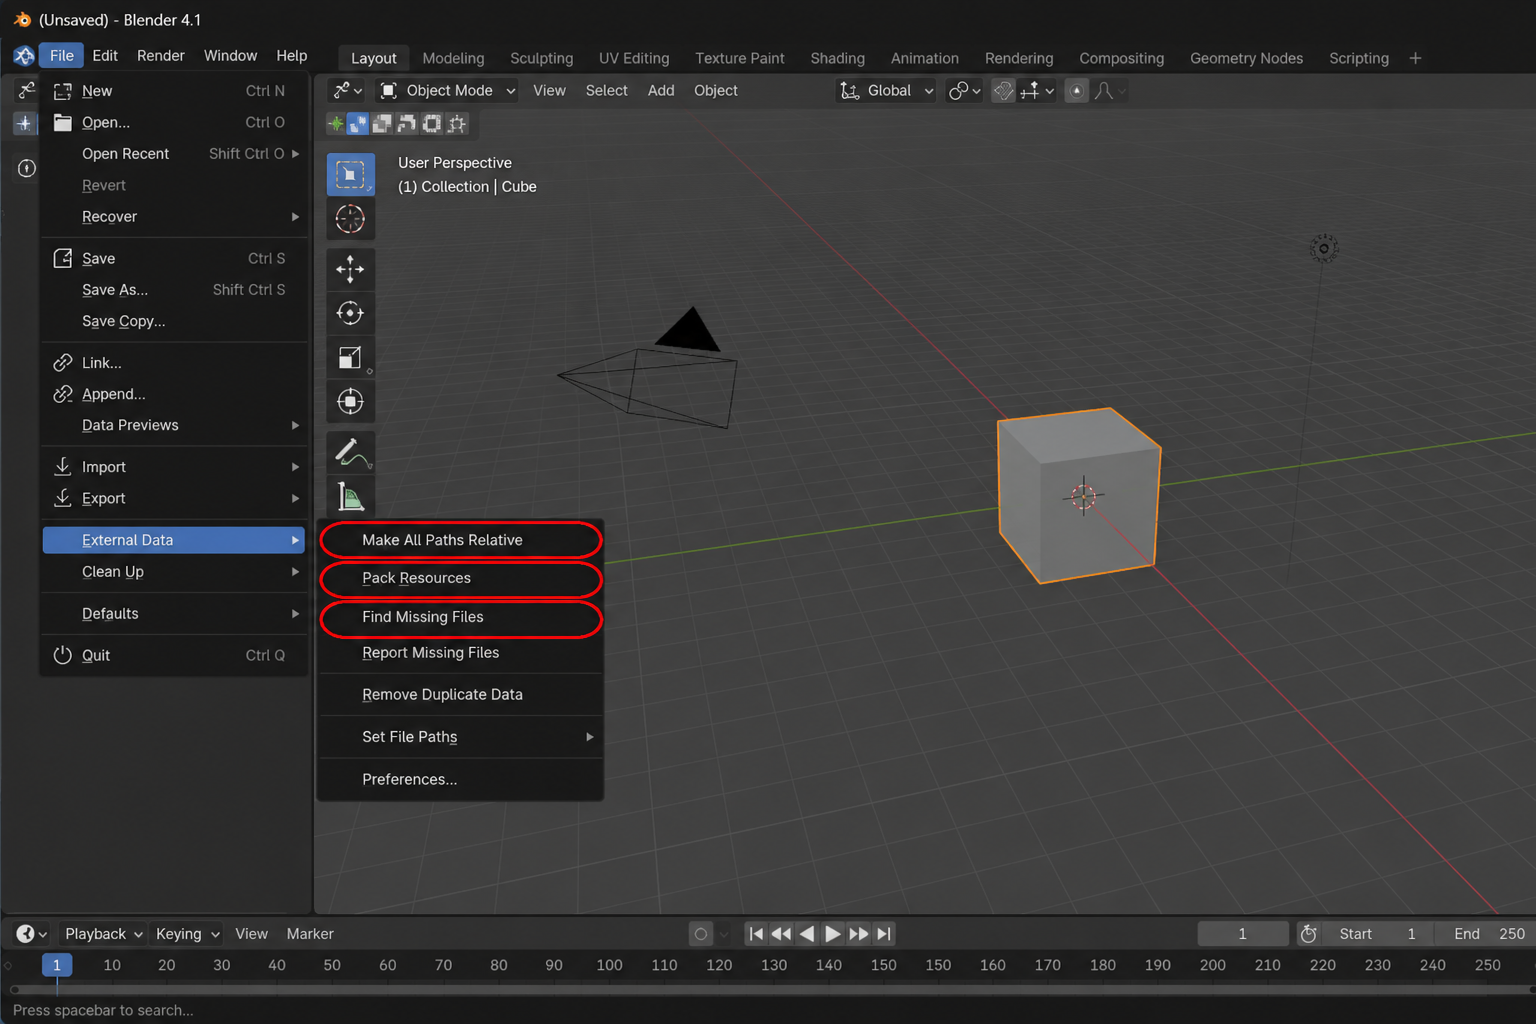
As you know, 3D scene file does not usually contain your textures, HDRIs, and proxy objects. It contains a path telling the software where to find them, and that path is frequently absolute, pointing straight at a folder structure that only exists on your machine. Move the file to a render farm without that folder, and the renderer cannot find anything, so it falls back to a default material instead. In Blender that default is famously hot pink. In other software it is often flat black. Either way, the symptom is the same: the scene renders, but with wrong or missing materials, and often with HDRIs or proxy geometry silently absent as well.
Blender ships three tools built specifically for this problem, all under File, External Data. Make All Paths Relative rewrites file paths so they are relative to the .blend file rather than tied to your personal folder structure. Pack Resources embeds textures and other external files directly into the .blend file itself, so the file becomes self contained. Find Missing Files lets you point Blender at a new location and it will attempt to relink anything it could not find.
Version drift in software and plugins
Even with every asset accounted for, a scene can still render differently if it was built in one software or plugin version and rendered in another. Default values change between versions, sampling algorithms get refined, and a plugin update can quietly alter how a material or effect resolves. It is not a bug at all.
The solution is to write down the exact version of your host software and every plugin you are using before you send a job anywhere, and make sure the render environment is built to match that exact set.
Color management, the cause people miss
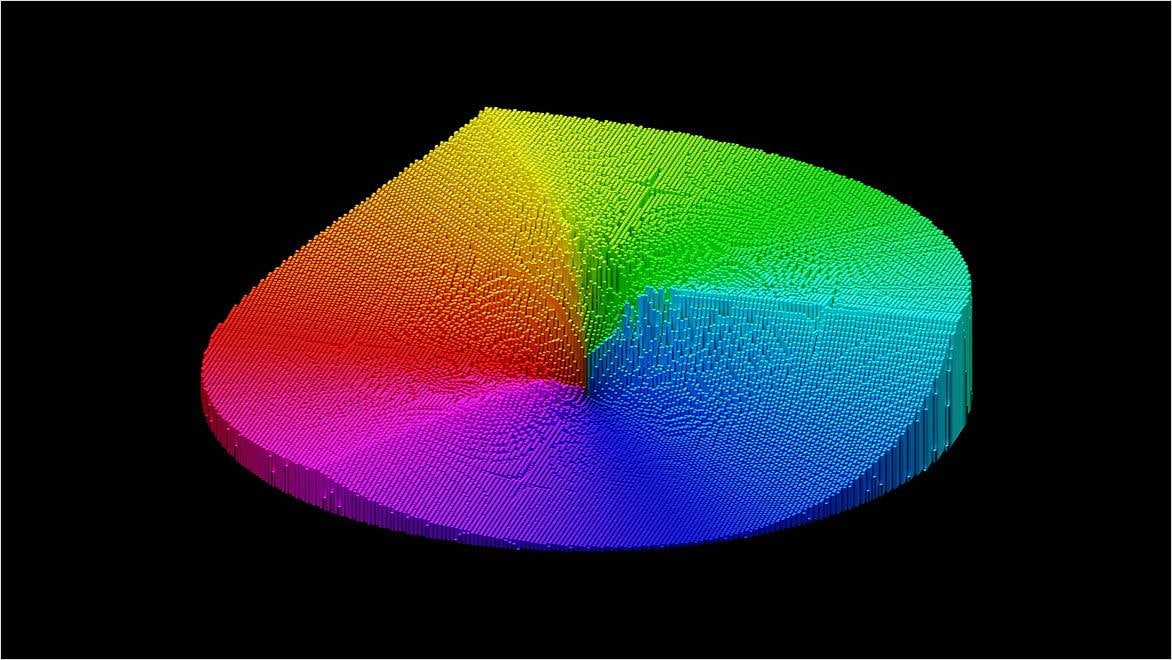
Image Source: Autodesk
Color management is the cause with the least visibility and the most confusion, because the render itself can be technically correct while still looking wrong on screen. Blender uses OpenColorIO for color management, and it is possible to point Blender at a custom OCIO configuration through an environment variable rather than using the default configuration that ships with the software. If the machine running your render does not have that same custom configuration loaded, the view transform applied to your image will differ, and the result can look darker, lighter, or shifted in contrast even though the underlying render data is identical.
This is also where file format choice becomes a real decision. A linear EXR file does not bake the view transform into the pixels, which means a color management mismatch can still be corrected afterward in compositing. A PNG or JPEG file has the color transform applied and written permanently into the file at render time, so if the wrong configuration was used, there is no fixing it in post. The only option is rendering the job again. That single difference is the practical argument for exporting EXR on any job where the client’s opinion of the final color actually matters.
Render settings that quietly differ
AI denoising (Image Source: Chaos Support)
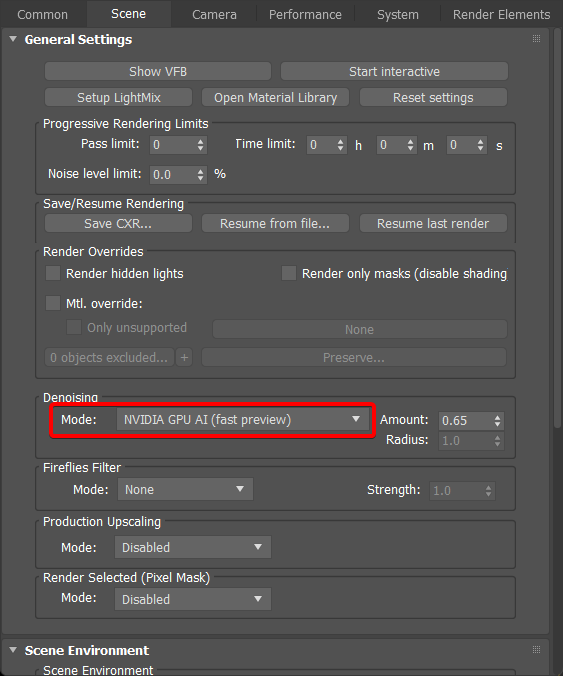
The last cause appears constantly in animation work: sample count, denoiser choice, and render device, meaning CPU versus GPU, can all produce subtly different results even from the same scene and the same software version. A single still image with a slightly different noise pattern is rarely noticed. The same small inconsistency across 300 frames of animation becomes visible flicker. Locking sample count, denoiser settings, and render device before the job runs is the difference between a clean sequence and one that needs a color correction pass just to stop flickering.
A pre flight check before you hand off a job
Most of the damage above is avoidable with a short checklist run before the job ships, not after it comes back wrong. You should pack your assets using your software’s own tools rather than assuming relative paths were already correct. Write down the exact software and plugin versions the scene depends on. Render a single test frame at the destination and compare it directly against the same frame rendered locally. For anything a client will actually see and judge, export EXR rather than PNG or JPEG, since it is the one format that still gives you a way out if color management does not match.v
Why controlling the environment removes the problem
All four causes share one root: your scene ran inside an environment that was not actually your environment. Rent a full machine instead of submitting a job into someone else’s fixed pipeline, and you install the exact software version and plugin set the scene was built with, set the same color configuration, and open the file yourself to check it visually before committing to a full sequence render. There is one tip: connect via remote desktop, switch to a shaded viewport, and look at the materials directly before queuing the render.
Elevate Your Workflow with High-Performance Cloud Workstations from iRender
If you are looking to streamline your rendering process without hardware bottlenecks, iRender provides the ultimate remote cloud solution. We provide direct-access workstations equipped with top-tier infrastructure, giving you full control over a powerful virtual rig to handle your most demanding 3D, VFX, and AI workloads.
Unmatched Hardware Built for Extreme Performance:
- GPU: NVIDIA GeForce RTX 4090 (24GB VRAM) – master heavy scene assets, complex path tracing, and massive AI models effortlessly.
- CPU: AMD Ryzen Threadripper Pro – maximize multi-threaded rendering efficiency and eliminate calculation slowdowns.
- RAM: 256GB System Memory – run memory-intensive applications and high-poly scenes without lag or crashing.
Explore our full range of server configurations below:
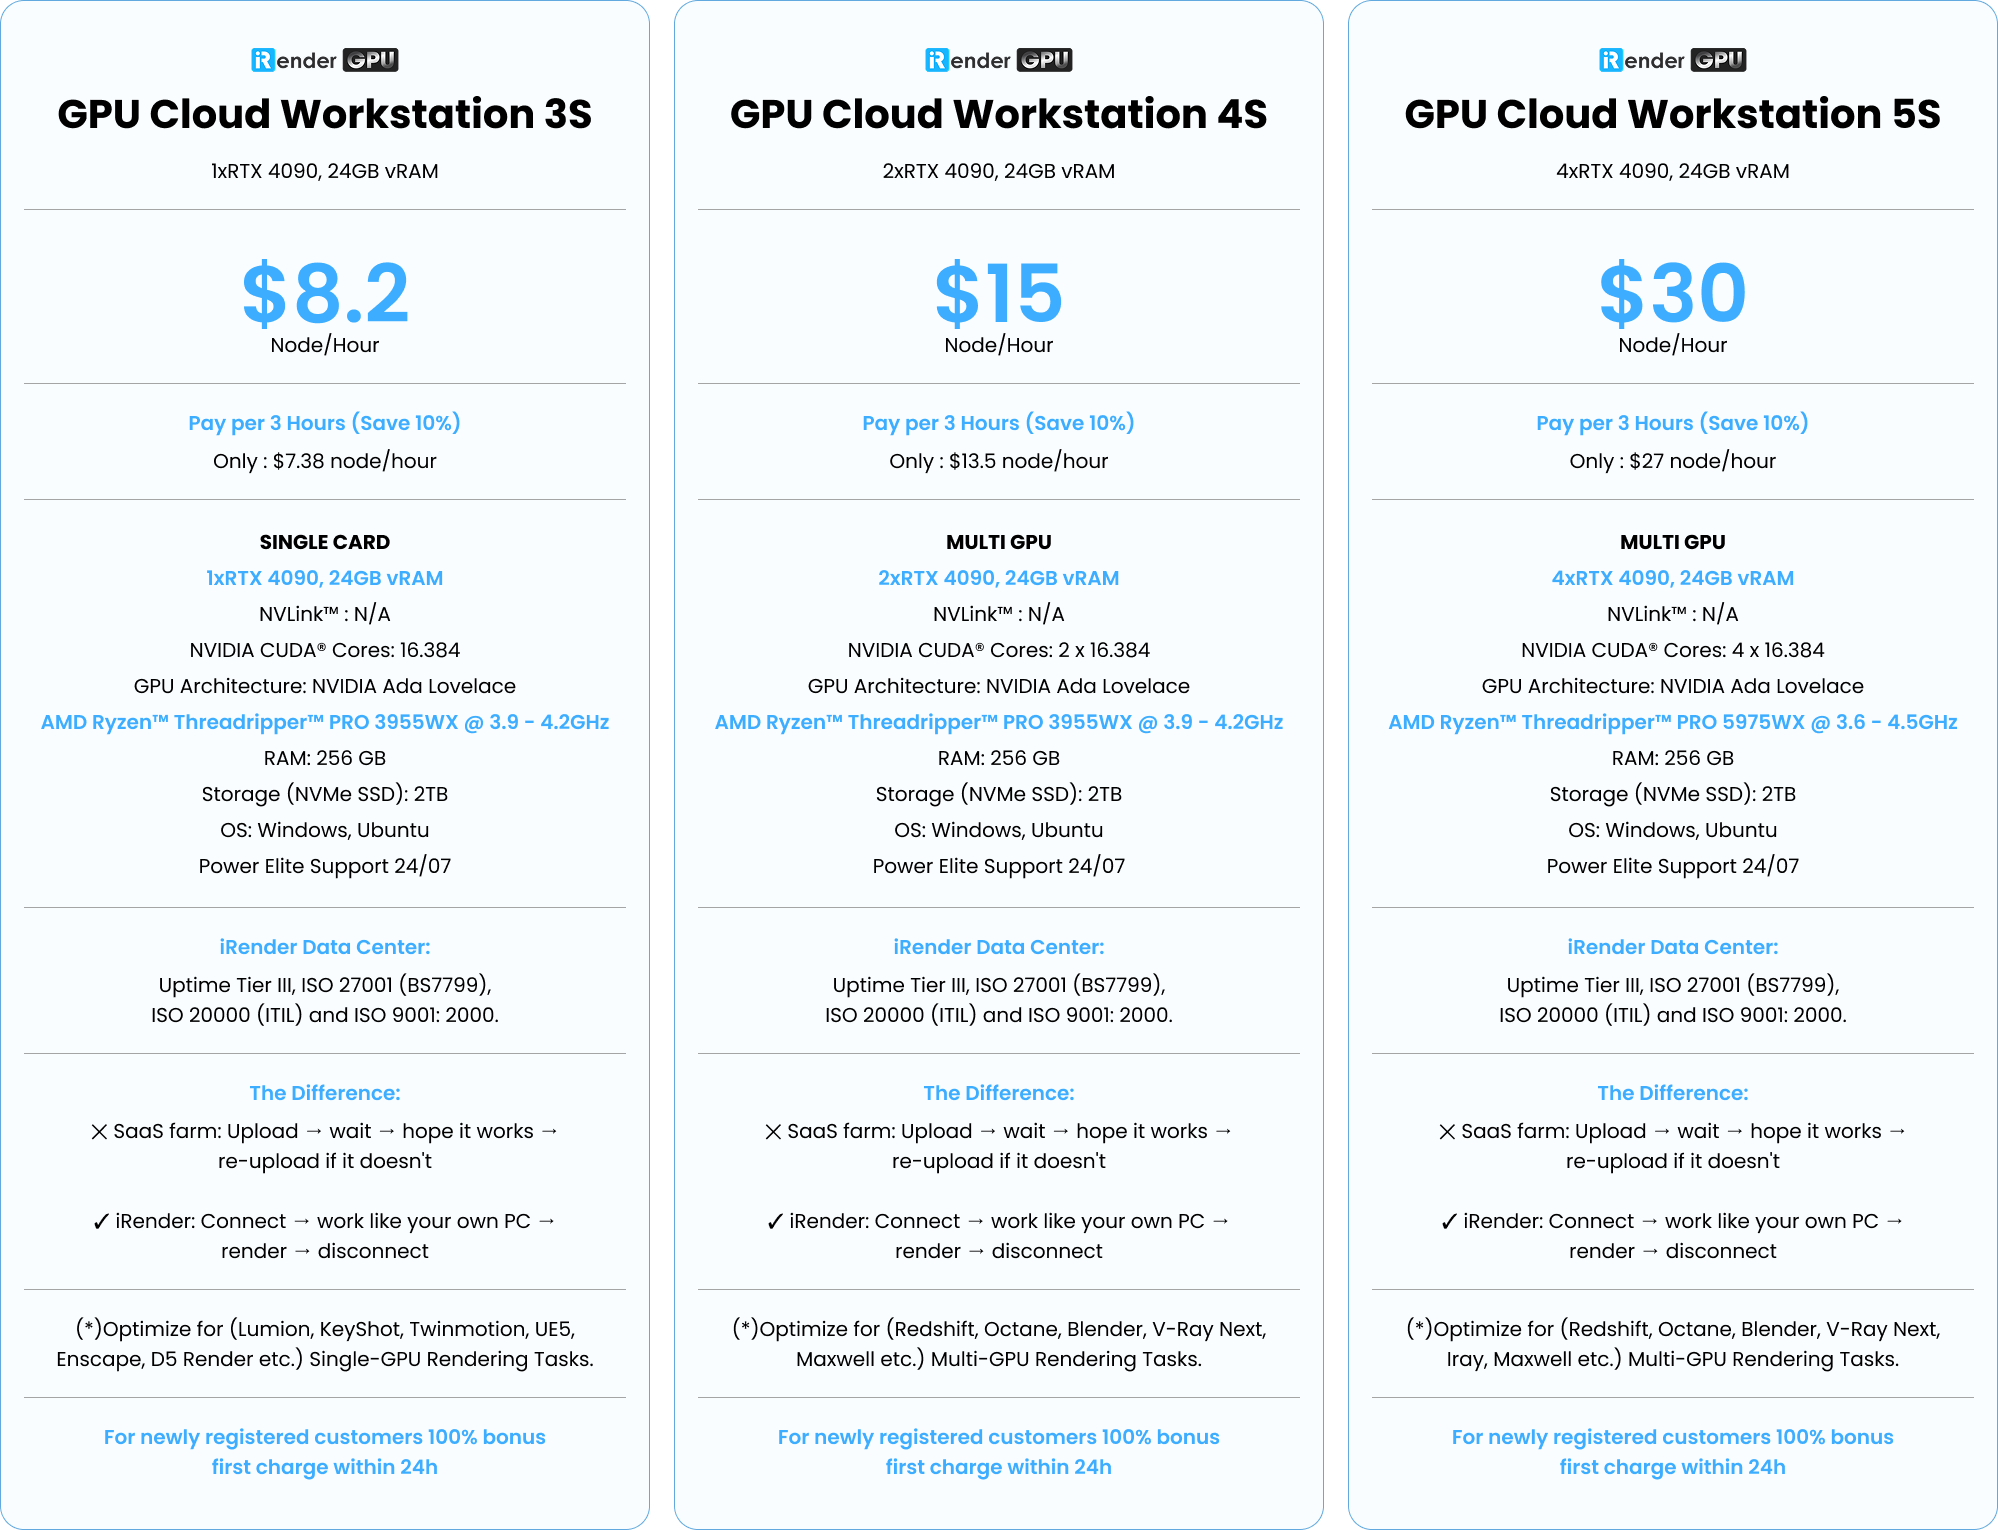
iRender can help when the cause has already been identified and the sequence simply needs a fresh render. A Windows RTX 4090 machine can handle the job, while multiple machines can process separate frames in parallel. Because you control the environment, you can install the same software and versions used for the approved render.
Don’t hesitate, start render now!
Let’s watch the tutorial video to see how our service works:

Maximum Speed – Absolute Freedom
Frequently Asked Questions
Why does the same 3D file render differently on another machine?
How does color management cause a render to look wrong when moved to a different machine?
How does a cloud workstation prevent renders from coming back different from the local preview?
Related Posts
The latest creative news from Blender Cloud Rendering.