Rendering Houdini on Cloud GPU: A Setup Walkthrough
Running Houdini on a cloud GPU is much easier when you treat the remote machine like a second workstation, not a render button. A reliable Houdini cloud GPU rendering setup starts before the machine is powered on: prepare your scene and assets, match the software environment, test one frame, then run the full job. This walkthrough covers that process step by step, including the checks that help prevent missing assets, version conflicts, failed renders, and unnecessary machine time.
What actually happens when you rent a machine for Houdini
When you rent a cloud machine for Houdini, you are essentially getting a remote workstation that you can configure for your project. You install the required software, transfer your files, set up the environment, and run Houdini much as you would on a local machine.
Before you start, remember two things: software licenses are still your responsibility, and paid machine time begins once the machine is running. That makes preparation important, because every task you can complete before starting the machine reduces unnecessary rental time.
Step 1: prepare before you start the clock
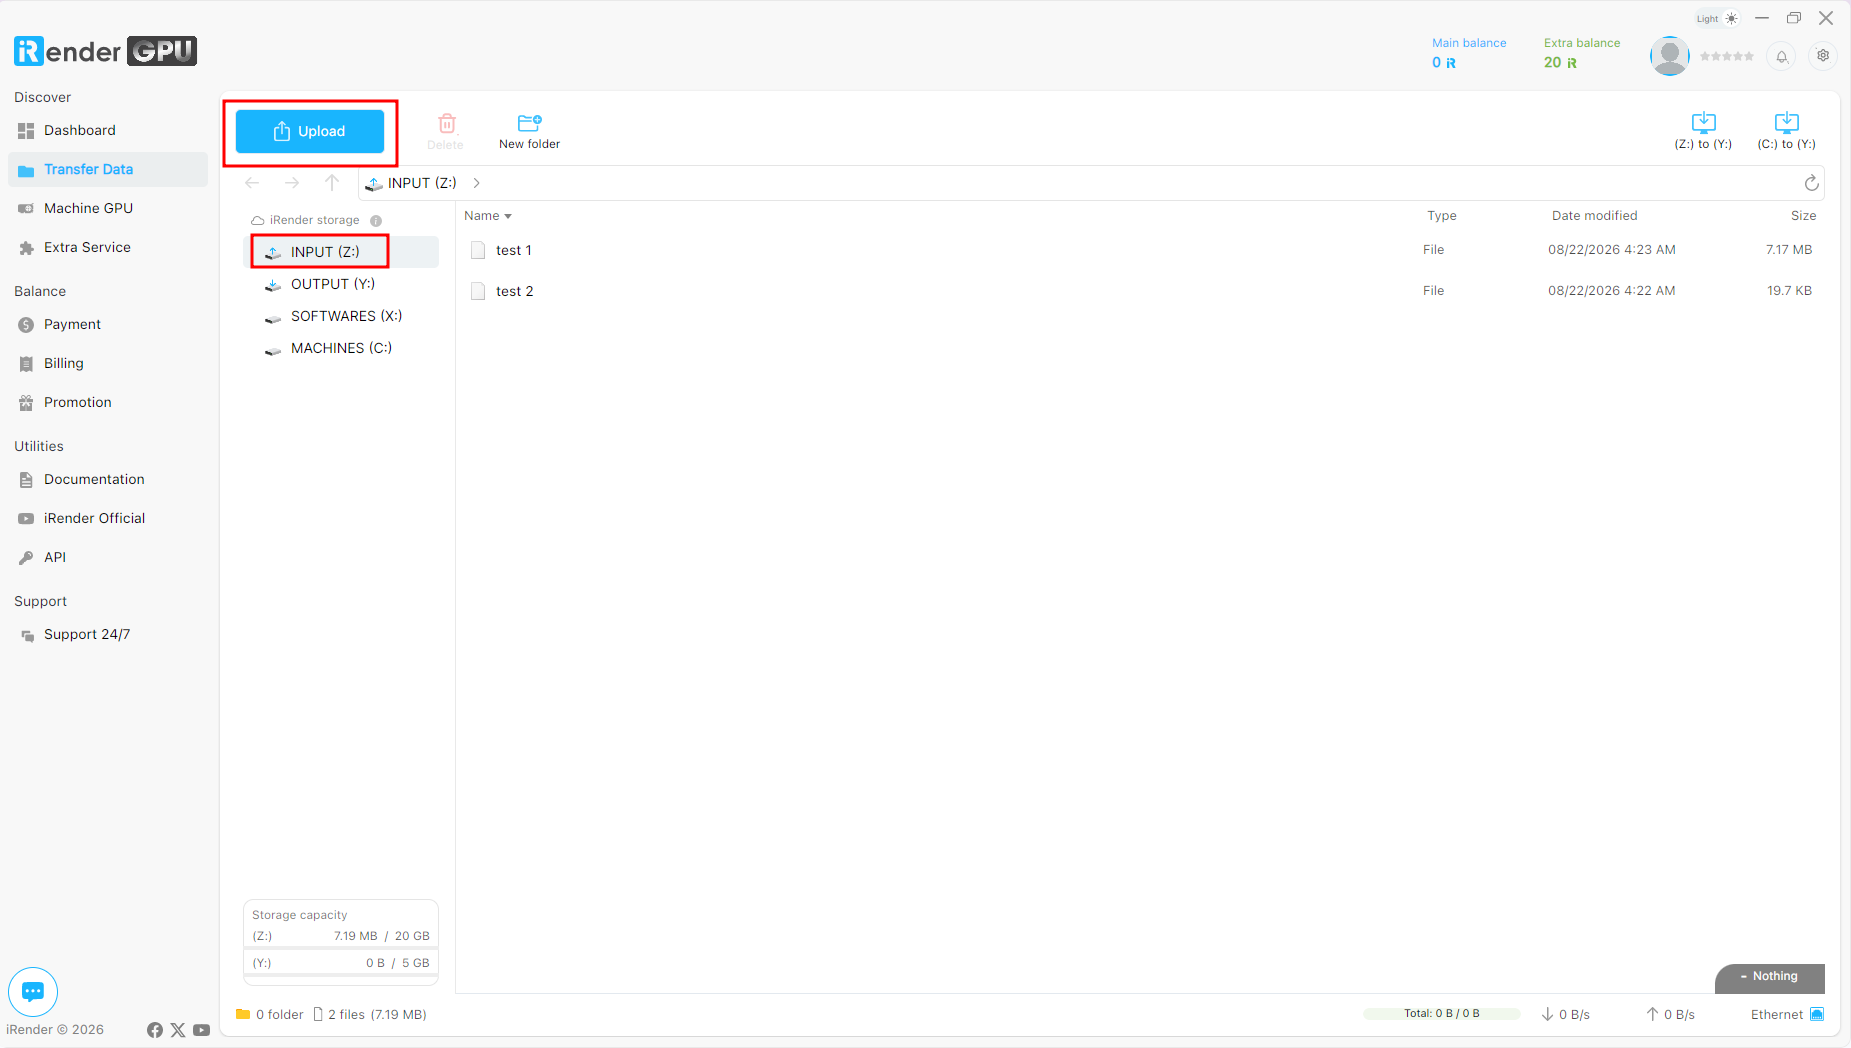
Before starting the cloud machine, clean up your Houdini scene and collect everything the project depends on, including textures, caches, HDAs, and other external assets. Also note the exact Houdini version and renderer version used by the project so you can reproduce the same environment on the remote machine.
Upload the project data in advance whenever your cloud workflow allows it. The goal is to finish as much file preparation as possible before paid machine time begins, leaving only the tasks that actually require the remote workstation.
Step 2: build the environment once
Install the same Houdini version used for the project, then install the required renderer and plugins. Activate your own Houdini and third-party renderer licenses according to their licensing requirements before opening the production scene. SideFX allows specific Houdini builds to be selected during installation, which helps you reproduce the project environment instead of automatically using the latest build.
Next, restore the project structure and dependencies. Make sure HDAs, textures, caches, and other assets resolve to the correct locations. Houdini can automatically discover HDAs stored in hda or otls directories on the Houdini Path, and project-specific assets can be placed under $JOB/hda.
If you are using a GPU renderer, check that the required NVIDIA driver is installed and compatible with your renderer version. Do this before the test render so a driver or GPU detection problem does not surface after the full job has started.
Step 3: test one frame before the full job
Before launching the full render, open the scene and spend a few minutes checking it visually. Look for missing textures, broken asset paths, unresolved HDAs, or anything else that did not transfer correctly to the cloud environment.
Then render one representative frame and compare it with the same frame rendered locally. Check the render log for missing files, undefined nodes, plugin errors, or other warnings. If you are using a GPU renderer, also confirm from the renderer or log that the expected GPU is detected and being used. This short test can catch setup problems before they affect an entire frame range.
Step 4: run the job and keep it recoverable
For an animation, render to an image sequence rather than directly to a video file. If the job stops partway through, completed frames remain usable and you can restart from the missing frame instead of rendering the entire sequence again.
For long jobs, split the frame range into manageable batches where practical. Once rendering starts, monitor the first few frames to confirm that output files are being written correctly and render times remain reasonable before leaving the job to run unattended.
Step 5: save the image and shut down
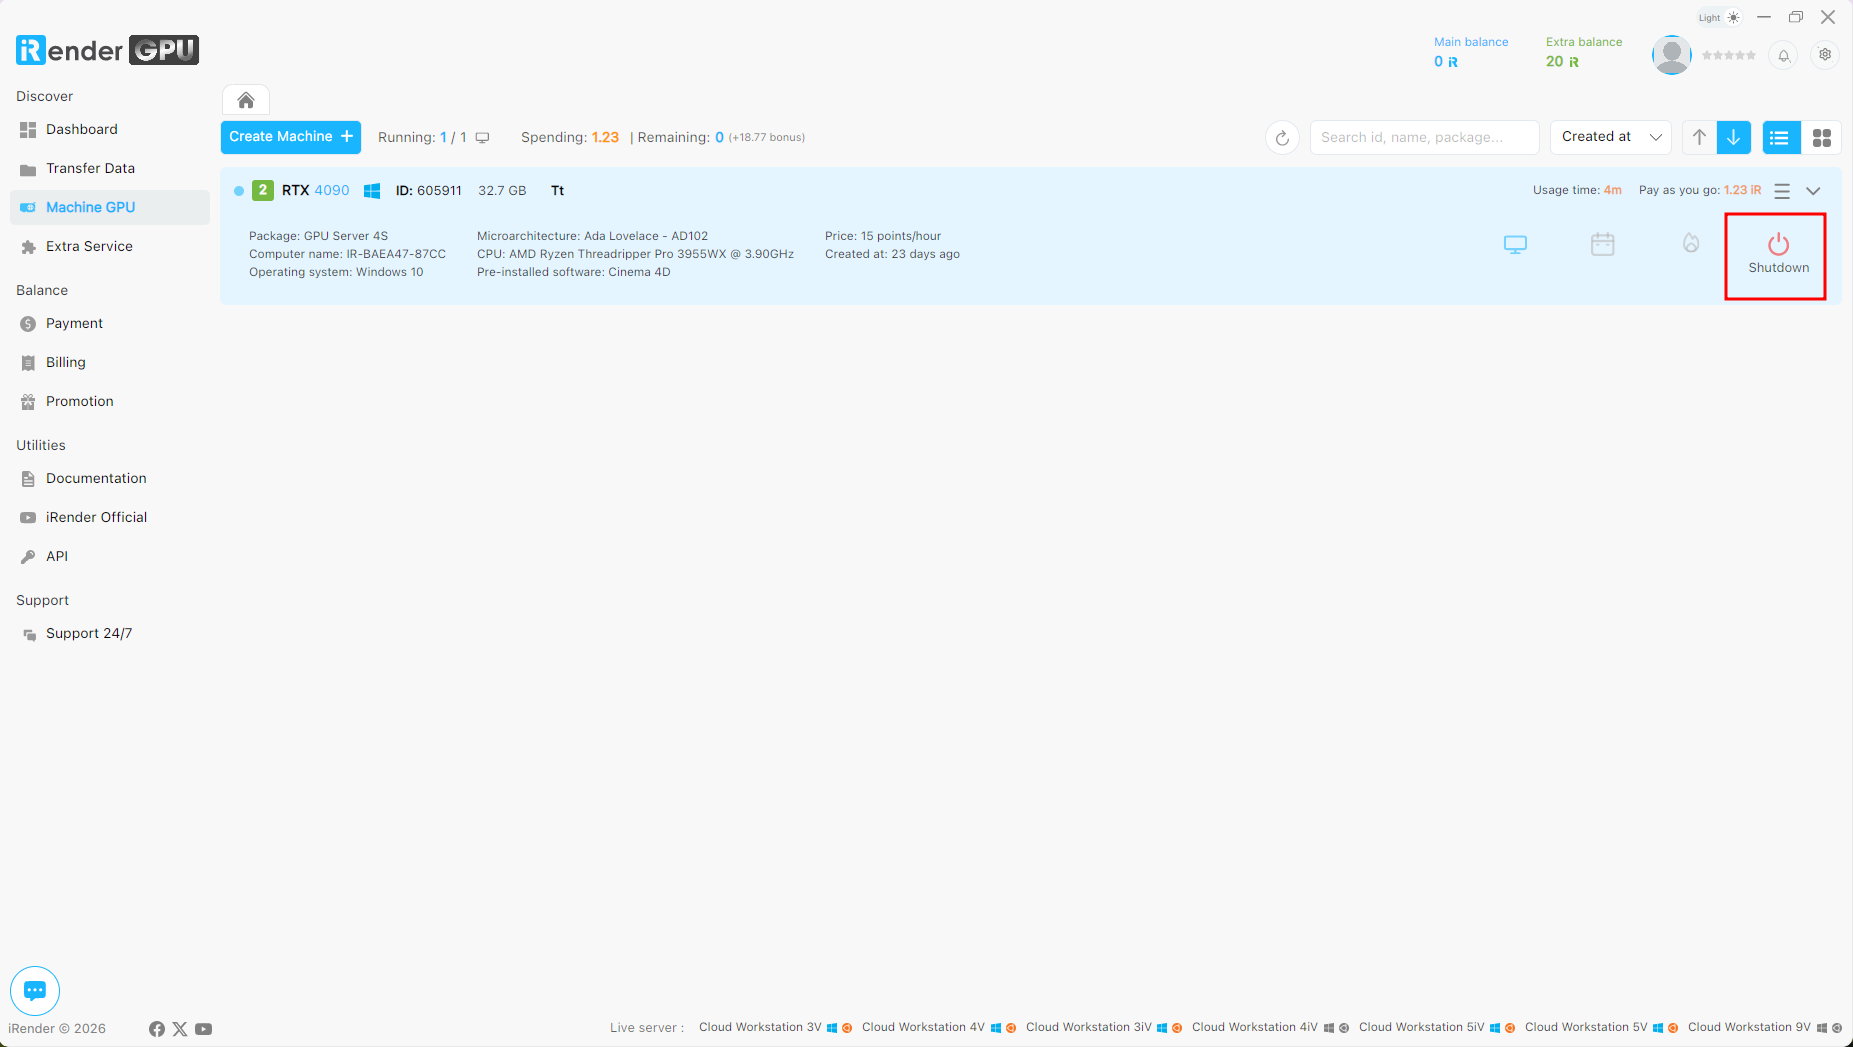
Once the job is complete, download and verify your render output before shutting down the remote machine. If your cloud provider supports saving the configured machine as an image, save it so you can reuse the Houdini environment in a later session instead of reinstalling and configuring everything again.
Finally, shut down the machine when you no longer need it. If auto-shutdown is available, configure it in advance so the machine does not continue running after the render finishes and generate unnecessary rental costs.
If you are running simulations too
If you plan to run the simulation on the cloud machine instead of uploading a finished cache, the workflow needs an extra step. The simulation must generate and store its cache on the remote system before rendering, so make sure there is enough RAM and disk space for both processes.
For a detailed caching workflow, see Caching Simulations to Disk the Right Way in Houdini, which covers memory caching, Allow Caching to Disk, File Cache SOP, cache formats, and recovery strategies for long simulations.
Make each cloud session more efficient
The first Houdini cloud setup may take around 15 to 30 minutes as you install the required software, configure licenses, restore project dependencies, and verify the environment. Saving the configured machine image can make later sessions much faster to start because you do not need to rebuild the same environment each time. Since billing continues while the machine is running, prepare files before booting when possible and set up auto-shutdown in advance.
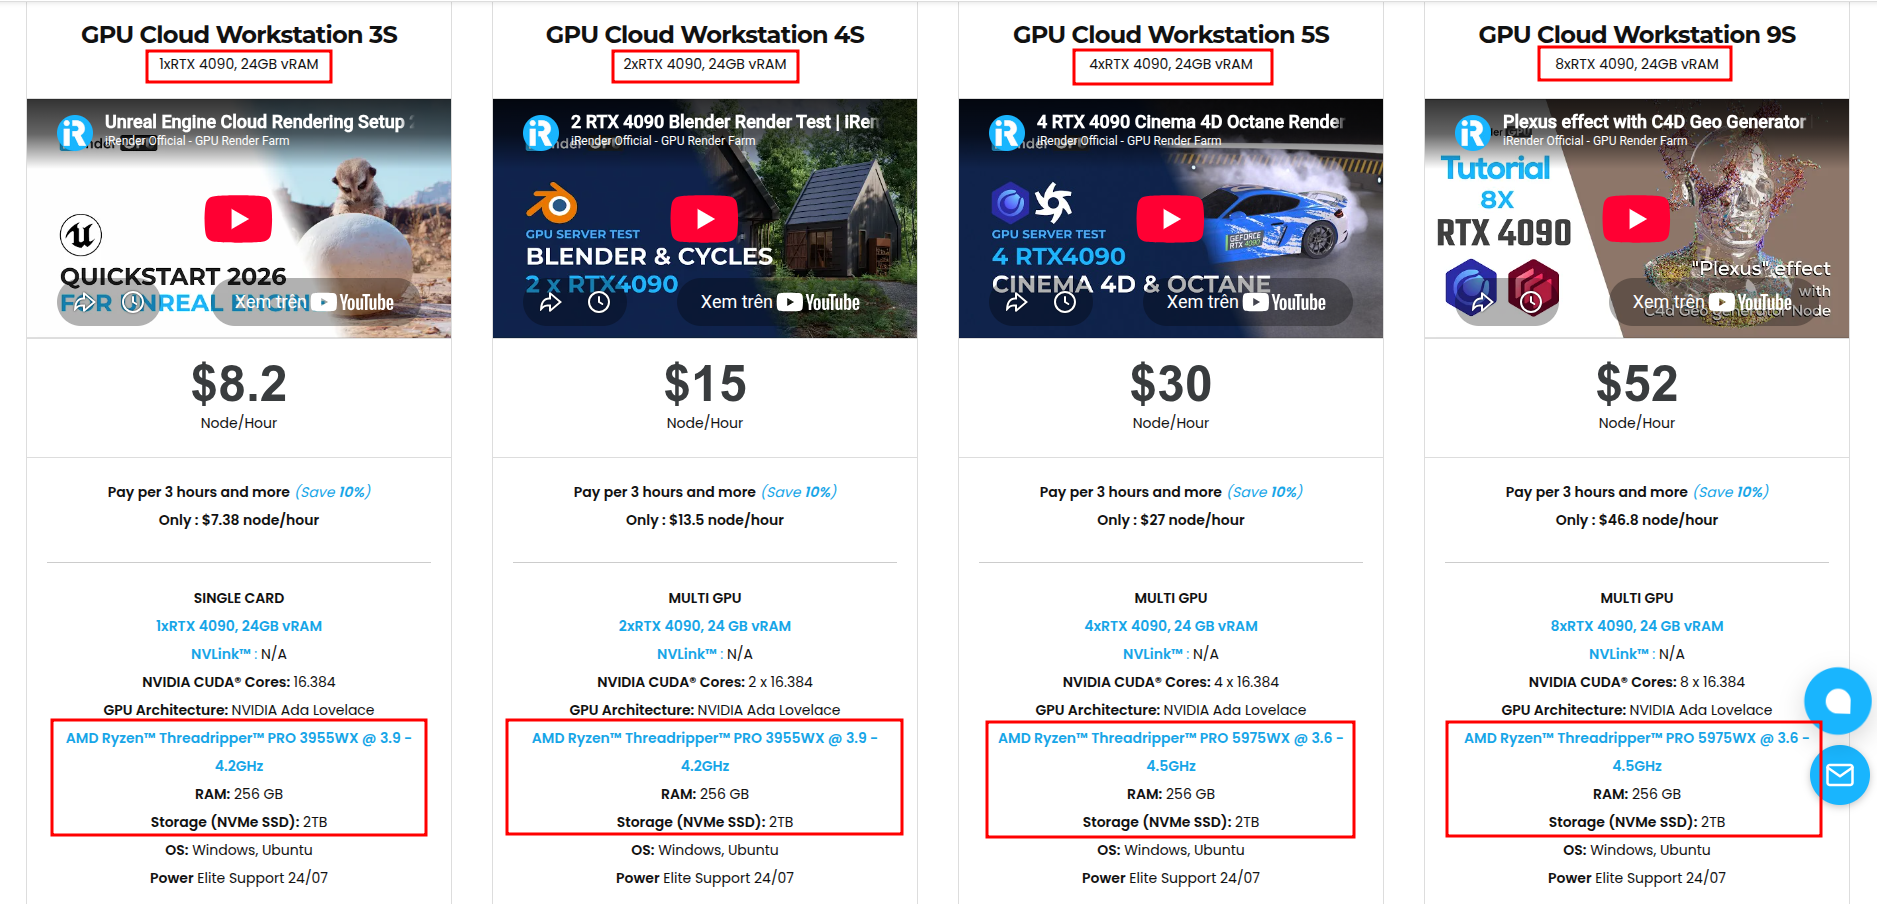
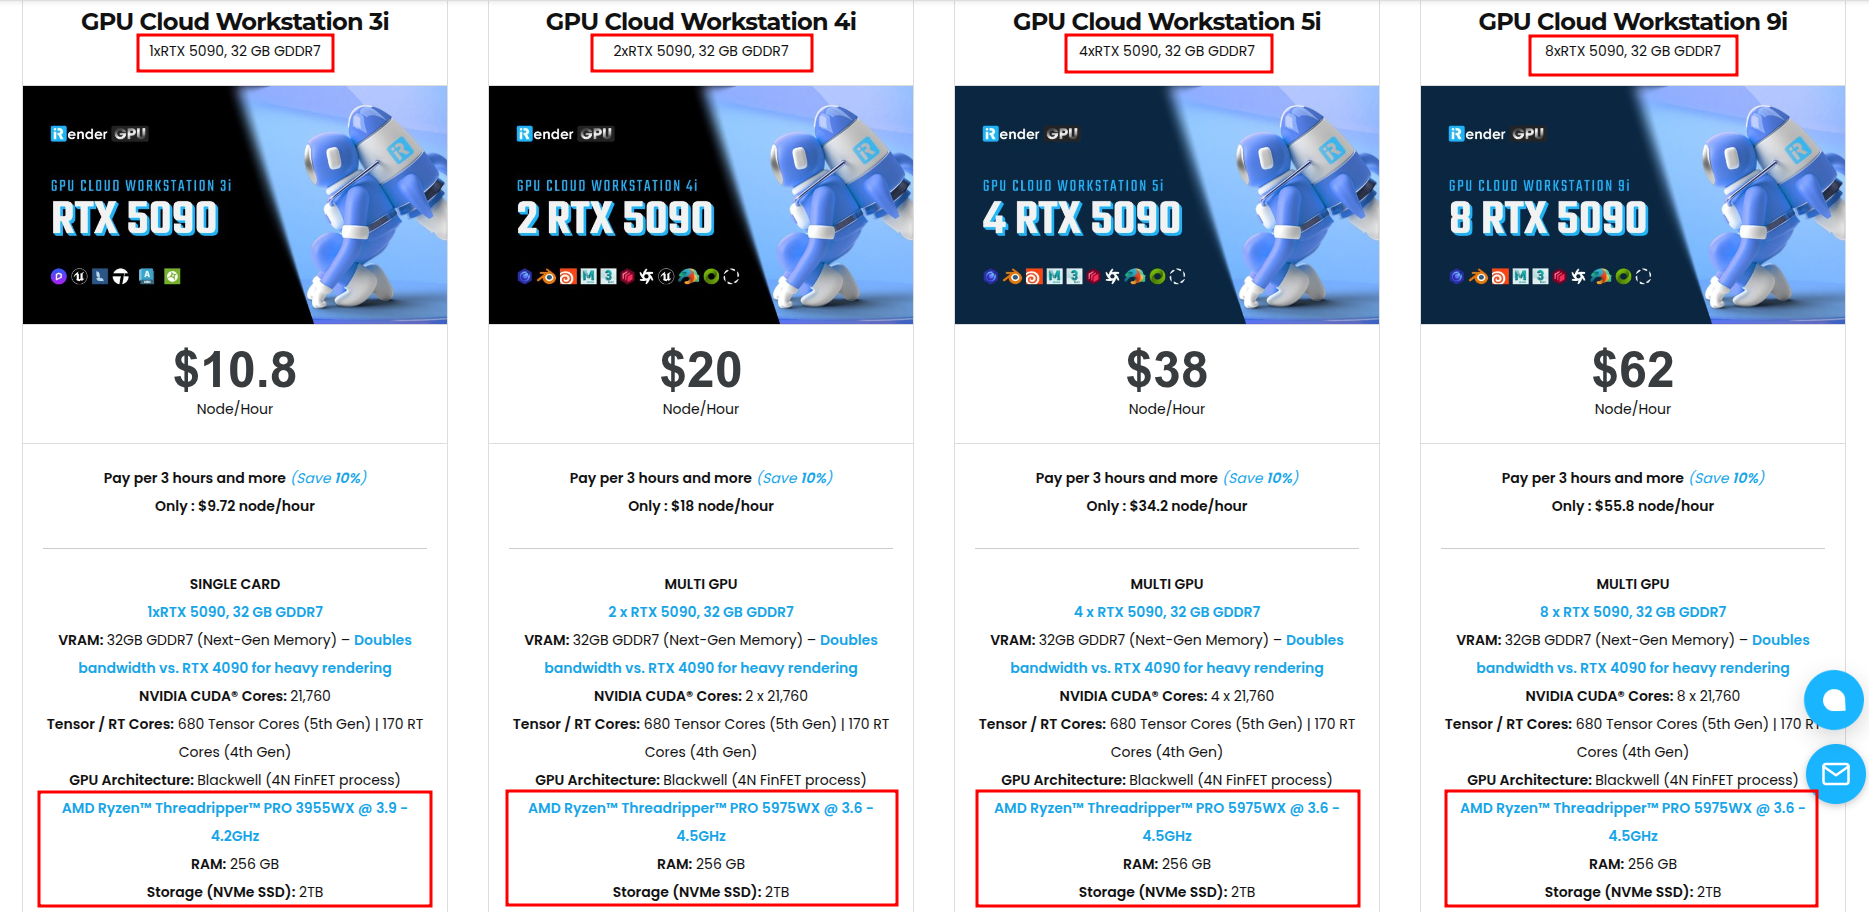
Available configurations include:
- CPU: AMD Ryzen™ Threadripper™ PRO 3955WX (3.9-4.2GHz) and AMD Ryzen™ Threadripper™ PRO 5975WX (3.6-4.5GHz)
- GPU: 1/2/4/8 RTX 4090 with 24GB vRAM and 1/2/4/8 RTX 5090 with 32GB vRAM
For new users, iRender currently offers a 100% bonus on the first deposit within 24 hrs of registration, giving you additional rendering credits to get started with larger projects.
Maximum Speed – Absolute Freedom
Source: SideFX Docs
Right now, iRender is launching a bonus promotion from September 5 to 20, 2026:
- 50% bonus on deposits from $1,000
- 100% bonus on deposits from $1,500

Let’s see how our service works:

FAQ
1. How do I set up Houdini on a cloud GPU machine?
Prepare and upload your project files before starting the machine when possible. Then install the correct Houdini and renderer versions, activate your licenses, restore HDA and asset paths, and render one representative frame to verify the setup before launching the full job.
2. Do I need my own Houdini license to use a cloud machine?
Yes. You are responsible for your Houdini license and any third-party renderer licenses required by the project. Check the license terms to make sure your existing license can be used in the cloud or on a remote machine.
3. How do I avoid paying for idle time on a cloud render machine?
Prepare and upload files before starting the machine when possible, save the configured machine image for later sessions, and set up auto-shutdown in advance. These steps reduce the amount of paid machine time spent on file preparation, repeated setup, or an idle machine.
Related Posts
The latest creative news from Houdini Cloud Rendering , 3D VFX Plugins & Cloud Rendering.