Uploading 20GB Scenes Takes Forever: Speeding Up Render Farm Transfers
You paid for the render, the machine is running, and you have spent the last two hours watching a progress bar that has nothing to do with rendering at all. It is still uploading.
With a 20GB scene on a 20Mbps upload connection it takes roughly two hours and thirteen minutes to transfer under ideal conditions, before a single frame has been rendered. That number comes from your connection, not from the render farm.
The time your file spends traveling to a render farm is set almost entirely by your own upload speed, not by how fast the provider’s servers are.
In this article, we will explore how to speed up render farm transfers.
How long should a 20GB upload actually take?
Internet speed is usually advertised in megabits per second, written Mbps, while file size is measured in megabytes and gigabytes. Since one byte equals eight bits, you divide your Mbps number by eight to get your theoretical megabytes per second.
At 20Mbps, that works out to about 2.5MB per second in ideal conditions. A 20GB scene, at roughly 20,000MB, would then take about 8,000 seconds, which is close to two hours and thirteen minutes if absolutely nothing slowed it down.
In fact, real transfers run 20 to 30 percent slower than the theoretical number because of protocol overhead, connection sharing, and everyday network variability. This specific delay is a limitation of your upload path, the connection between your machine and the internet. No render farm, however fast their own infrastructure is, can make your upload path faster. What they can influence is how efficiently that path gets used.
Measure your real upload speed first
Most people have no idea what their actual upload speed is. Download speed, the number used to stream video and load web pages, is usually far higher than upload speed, the number that actually matters when sending a large scene out.
You should run an actual speed test and look specifically at the upload result, not the download one. Do this at the time of day you would actually be sending files, since upload speed on a shared connection can be noticeably slower during peak hours when everyone else in the office or household is also online.
Cut what you send

Three things inflate a scene’s real size far beyond what the render actually needs, and all three are fixable before you touch a render farm.
Textures are usually the biggest cause. A texture at a resolution far higher than the camera will ever get close enough to justify adds real weight. Reviewing texture resolution against actual camera distance before export is one of the highest step.
Simulation caches are the second source. Test frames, old simulation runs, and cached data from versions of the effect you no longer use have a habit of staying in the project folder long after they stopped being needed. Clearing these out before sending the project is a quick, mechanical fix.
Old file versions and unused assets are one of the cause. Project folders accumulate backup copies, discarded model versions, and assets that got swapped out early in production but never got deleted.
Compression is not a perfect fix. Zipping a folder full of already compressed formats like JPG or PNG textures will not meaningfully shrink them, since those formats are already doing most of the compression work themselves. Compression helps a lot with text based data and uncompressed formats, and does very little for image formats that are already compressed.
Stop sending the same thing twice
The single biggest time saver has nothing to do with any individual file and everything to do with how you structure repeat work. If your asset library, the models, textures, and materials reused across multiple projects, lives in the same folder as each individual scene, you resend that entire library every time you send a new project, even though most of it has not changed since last time.
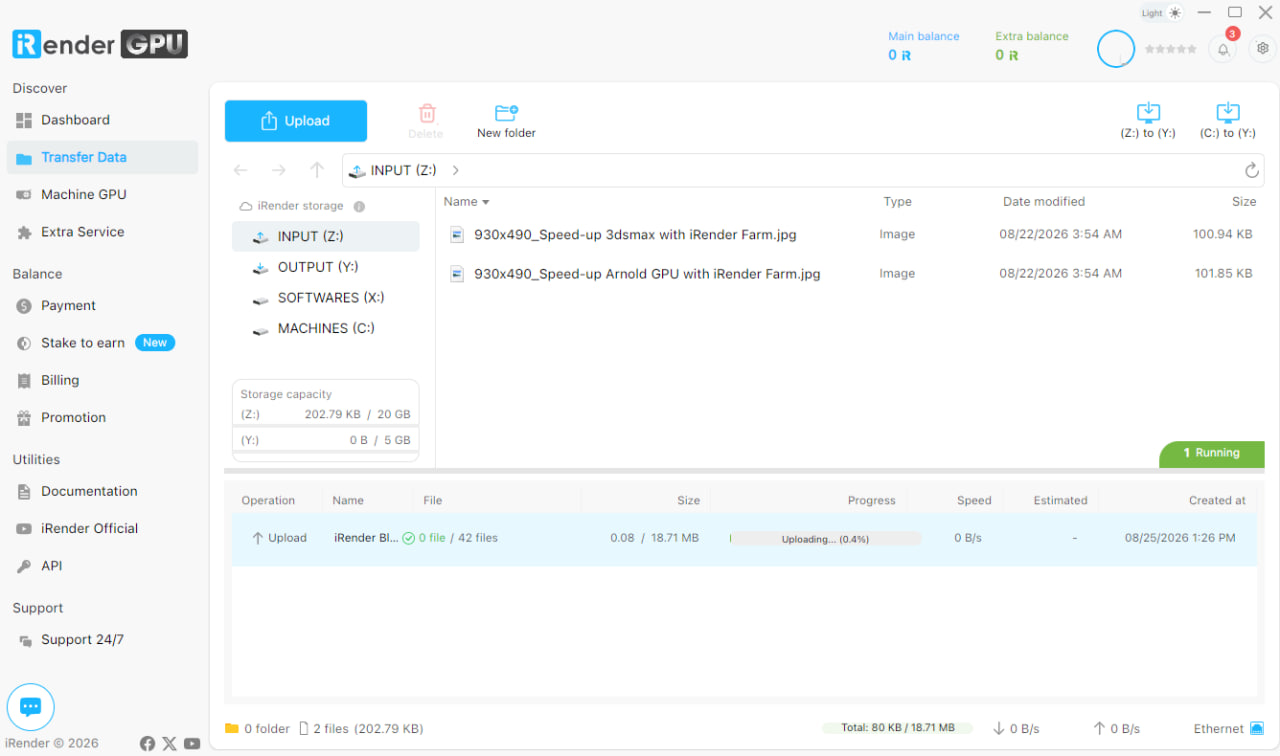
Separate the two. Keep your reusable asset library in one persistent location. This is exactly the solution iRender GPU app is built to close: a free app that lets you push your model and texture library up once, keep it in place on the machine, and only sync what actually changed on every project after that, instead of resending the same block of data from scratch. You can see this video about our iRender GPU app works:

For anyone doing iterative work, changing a few assets and re-rendering repeatedly, this single change removes more upload time.
Upload while you work, not while you pay
Uploading and rendering are two separate tasks, and treating them as one is where a lot of unnecessary cost creeps in. Upload your assets before you connect to the rented machine. On most cloud render setups, billing starts the moment the machine turns on, which means every minute spent watching an upload progress bar on a running machine is a minute you paid for without a single frame rendering. At iRender, we don’t charge for the upload/download time so it will save you a lot.
Upload overnight, or during time you would spend on other work anyway, and use whatever resume support your upload tool offers so a dropped connection does not force you to start the entire transfer over from zero. Then, and only then, start the machine.
A pre upload checklist
Run this before every job, not after something comes back wrong or costs more than expected:
- Check texture resolution against actual camera distance, and downres anything that does not need to be sharp
- Clear old simulation caches, discarded frames, and test renders from the project folder
- Remove old file versions and unused assets that are not part of the current build
- Keep your reusable asset library separate from the individual project, synced only for what changed
| Upload speed | Real world throughput | 5GB scene | 20GB scene |
| 20 Mbps | about 2 MB per second | about 40 minutes | about 2 hours 45 minutes |
| 50 Mbps | about 5 MB per second | about 17 minutes | about 1 hour 10 minutes |
| 100 Mbps | about 10 MB per second | about 8 minutes | about 33 minutes |
| 500 Mbps | about 50 MB per second | about 2 minutes | about 7 minutes |
| 1 Gbps | about 100 MB per second | about 1 minute | about 3 to 4 minutes |
iRender Farm - Solutions for Big Data processing
The first is iRender GPU app, the free storage app, which is the real fix for the repeat asset problem: load your library once, and stop resending it with every project.
The second is the infrastructure on the receiving end, Tier 3 datacenter built with high inbound bandwidth so the upload has a fast, stable place to land once it leaves your connection.
If your home or office connection has a slow upload speed, no render farm on either side of that connection can make it faster. iRender starts charging from the moment you see the Connect button appears, not when rendering actually begins, so treat upload and render as separate steps every time. We don’t charge for the upload/download files between your local PC and our server. You should upload your data up first, once it is totally synced then start the machine, and set schedule shutdown so an idle machine is not quietly billing while nothing is running.
Register account today to take advantage of a 100% bonus on your very first deposit!
Let’s check some our video test video:


Maximum Speed – Absolute Freedom
Frequently Asked Questions
Why does uploading a large render scene take so long even on a fast internet plan?
What is the fastest way to reduce a scene’s upload size before sending it to a render farm?
How can I avoid re-uploading the same assets every time I render on iRender?
Related Posts
The latest creative news from Blender Cloud Rendering.