Render Preview Looks Great but Final Render Takes Hours: Bridging the Gap
Why is your render preview fast, but the final render takes much longer? It’s a common question, especially when a scene looks clean in the viewport but suddenly needs minutes or even hours to finish the final render. In most cases, nothing is wrong with your project. Preview and final renders are designed for different purposes, so they use different quality settings behind the scenes. This guide explains what changes between the two, which settings have the biggest impact on render time, and how to speed up your final render without sacrificing image quality.
Why does my final render take so much longer than the preview?
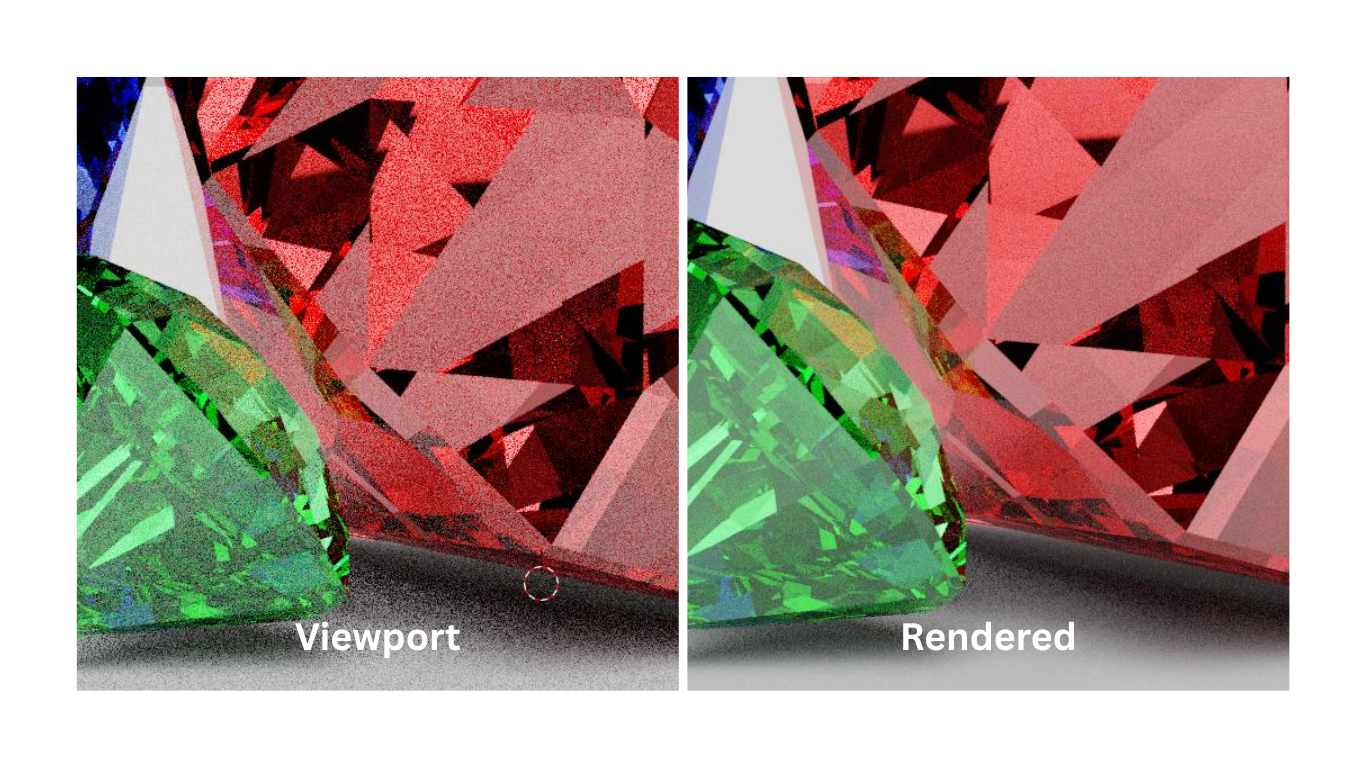
The short answer is simple: a preview render is designed for speed, while a final render is designed for image quality. During preview, your renderer uses fewer samples, a lower resolution, and more aggressive denoising so you can evaluate lighting, materials, and composition almost instantly. Final rendering removes many of those shortcuts to produce a clean, production-ready image, which naturally takes much longer.
Here are the biggest differences between a preview and a final render:
- Higher sample counts to reduce visible noise
- Full output resolution, often several times larger than the viewport preview
- Higher-quality effects such as motion blur, depth of field, volumetrics, and subsurface scattering
- More accurate lighting calculations, including additional light bounces and ray tracing
- Less aggressive optimization, since the goal shifts from speed to visual fidelity
In other words, nothing is “wrong” if your final render is significantly slower than your preview. The renderer is simply doing much more work for every frame. Once you understand which quality settings change between the two modes, you can make your previews more representative of the final output, optimize the settings that have the biggest performance impact, and decide when a cloud rendering solution makes more sense for demanding projects.
The settings that quietly multiply your final render time
If your preview render finishes in seconds but the final render takes minutes or even hours, the difference usually comes down to quality settings.
Sample count and noise threshold
For most path tracers, sample count is one of the biggest factors affecting render time. Each additional sample gives the renderer more information about how light behaves in the scene, helping reduce noise and improve image quality.
During look development, artists often use a relatively low sample count together with a denoiser to get fast feedback. For the final render, the maximum sample count is typically increased so the image can converge further before denoising is applied.
If you’re using Blender Cycles, Adaptive Sampling changes this workflow slightly. Instead of forcing every pixel to reach the maximum sample count, it allows cleaner areas to stop sampling earlier while noisier regions continue rendering.
The Noise Threshold determines when a pixel is considered clean enough to stop sampling. Lowering this value usually produces a cleaner image, but it also means the renderer spends more time refining difficult areas. The actual performance impact depends on the scene, lighting, and materials rather than a fixed percentage.
Resolution
Output resolution has a bigger impact than many artists expect. If you double both the width and height of the image, you’re rendering roughly four times as many pixels.
That doesn’t necessarily mean the render will be exactly four times slower. Render time also depends on factors such as scene complexity, sampling, memory usage, and the rendering engine. Even so, increasing output resolution generally results in noticeably longer render times because more pixels need to be shaded.
Motion blur, light bounces, and volumetrics
Some rendering features require more computation than basic surface shading, so they can increase the time needed for a final render.
- Motion blur requires the renderer to account for movement during the camera’s shutter interval instead of evaluating a single static moment. How much it affects render time depends on the renderer, the amount of motion in the scene, and the quality settings being used.
- Light bounces control how many times rays can continue interacting with the scene. Allowing more bounces can improve indirect lighting, especially in interiors, but it also gives the renderer more paths to evaluate. After a certain point, additional bounces often have a smaller visual impact than the extra render time they require.
- Volumetric effects, such as fog, smoke, or atmospheric lighting, are generally more computationally demanding because light must be evaluated as it travels through a volume instead of empty space.
- Subsurface scattering (SSS) simulates light travelling beneath the surface of translucent materials like skin, wax, or marble. This additional light transport adds computational overhead compared with standard surface shading.
When optimizing is no longer enough
Optimization should always come first. Lower unnecessary sample counts, use Adaptive Sampling where appropriate, review expensive render settings, and make sure you’re not spending time on quality you won’t notice in the final image.
Eventually, though, you may reach a point where further optimization starts to compromise visual quality instead of improving efficiency. If your scene genuinely needs high samples, complex lighting, large textures, or multiple 4K frames, the bottleneck is often your hardware rather than your render settings. At that stage, scaling up your computing resources usually makes more sense than continuing to trim quality.
This is where a managed GPU render farm can help. Instead of waiting for a single workstation to finish, you can run the same project on a more powerful remote GPU machine without changing your workflow. For artists working in Blender, Unreal Engine, Lumion, or other GPU-accelerated applications, this can be a practical way to handle demanding final renders while keeping the local workstation free for other tasks.
iRender - Powerful GPU Cloud Workstation
iRender provides dedicated remote GPU servers, giving you full control over the machine just as if you were working on your own workstation. You can install your preferred software, plugins, and project dependencies instead of adapting your workflow to a shared rendering environment.
Whether your workflow relies on CPU rendering, GPU rendering, AI training or VFX production, iRender provides high-performance cloud workstations designed to handle demanding professional workloads.
Available configurations include:
- CPU: AMD Ryzen™ Threadripper™ PRO 3955WX (3.9-4.2GHz) and AMD Ryzen™ Threadripper™ PRO 5975WX (3.6-4.5GHz)
- GPU: 1×, 2×, 4× RTX 4090
For new users, iRender currently offers a 100% bonus on the first deposit within 24 hrs of registration, giving you additional rendering credits to get started with larger projects.
Your Renders, Your Rules
Source: docs.blender.org
Let’s see some test video on our servers:


FAQ
1. Why is my final render so slow when the preview is fast?
Preview renders use lower samples, lower resolution, and faster denoising for quick feedback. Final renders increase image quality with higher samples, full resolution, and additional rendering calculations, so they naturally take longer.
2. How do I make the final render faster without losing quality?
Use Adaptive Sampling with an appropriate Noise Threshold, avoid unnecessarily high quality settings, and optimize only the features that have the biggest performance impact. If your hardware becomes the limit, a more powerful GPU or cloud rendering can help.
3. Does a preview time tell me the final render time?
Not reliably. Preview settings are usually much lighter than final render settings, so the best estimate comes from rendering a single frame using your final quality settings.
Related Posts
The latest creative news from Blender Cloud rendering.