How To Make A Game In Unity with Daz Studio
From inception, video games have blown us away with their fun, originality, and exploration of new ideas. Whether you are a hobbyist or an inspiring indie game dev, making a video game can be a rewarding endeavor. With tons of software and engines to choose from, Unity stands out as one of the most popular choices. Learning how to make a game in Unity with Daz Studio is easier than ever. This article consists of an overview of Unity and a few tips and tricks to help you get started.

Why Unity?
Unity is a powerful cross-platform game engine that enables you to make games in 3D or 2D. From FPS games to side-scrollers, Unity is flexible, and accessible to learn with a lot of documentation and learning materials available. Unity’s website has over 750 hours of learning material, and countless other tutorials provided by independent creators are available as well. It is easy to see why Unity is a smart choice for a new game dev.
Whether you have programming experience or not, Unity is an excellent choice. The engine supports the C# programming language, or, if that seems too overwhelming to learn, it is possible to make games in Unity without any programming knowledge at all!
Looking at the countless indie successes made in Unity over the past few years is proof enough. Whether you are working solo, or with a small group of friends and colleagues, Unity is the popular choice for making games.
Downloading Unity And Choosing A License
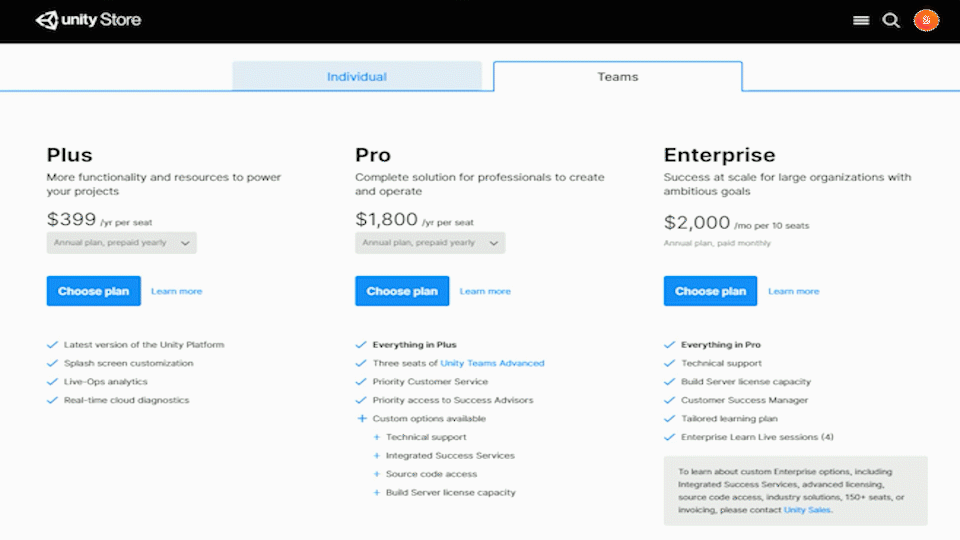
Before you can get started downloading Unity, it is important to understand the different licenses available. Unity offers business, individual, and student licenses. In most cases, an individual license will suffice. Individual licenses are free, as long as you haven’t received more than $100K in funding for a Unity project in the last 12 months. If you are planning to sell the game you make in Unity, it’s definitely worth the time and can save you a headache down the road to carefully review Unity’s licensing structure.
Building Your First Microgame In Unity
Unity offers a great way to learn and familiarize yourself with the engine, which they call Microgames. There are several different microgames to choose from, and each one will help you learn how to make a different style of game in Unity.
If you have an idea of what kind of game you want to make, be it a first-person shooter, an adventure RPG, or perhaps a retro side-scroller, be sure to select the Microgame tutorial closest to the game you want to make. Remember, these aren’t perfect cookie cutters. Every game is going to be unique and bring its own challenges to you as the designer; however, selecting the right microgame will save you a lot of time mastering basic concepts that may come in handy in your own game.
Access the Microgame tutorials by selecting the first lesson titled “Get Started” located on the far right of the screen. Follow along with the lessons, and most of all, have fun!
While Unity Microgame’s are excellent ways to learn basic game-making skills in Unity, eventually you are going to want to take things to the next level and start making your own unique game. Here are some tips to consider as you start the process.
Make A Game Plan
While Unity has done an excellent job making tutorials accessible for beginners, you may feel overwhelmed the first time you open a new project in Unity. While Unity has many capabilities, this can make it difficult to get started as a beginner.
Be prepared for a lot of work and a lot of learning! Every successful game dev will stress the importance of being resilient and not giving up. Making a game plan for yourself will be necessary to stay on task.
Break down tasks into sizeable chunks and set goals for yourself. One day your goal might be learning how to program basic input and movement. The next day you might tackle spawning collectible items into your game. After that, take a hand at creating an inventory system so your player can collect and interact with those items. Not only will this help you plan out the game, it will also help you learn and progress at a natural pace.
Unity GameObjects
A good way to categorize your game plan could be built around the basic building blocks of a playable game. In Unity, the most general of such is called the GameObject. Every object in your game is categorized as a GameObject, whether they are a character, NPC, item, environment, or even a special effect. While on their own they can’t do anything, they act as containers for what Unity calls Components. Most GameObjects are visible within the game world, but don’t let that mislead you, they can be invisible as well, like cameras for establishing the players’ POV.
Unity Built-In Components
Components are the instructions, or behaviors, that define and implement functionality within a GameObject. If you think of the GameObject as a physical shell, that would mean the Components are the programming or instructions that tell that object how to act or behave within your game. At the heart of everything, a game is still a program. You as the designer will have to establish the rules, or logic, by which GameObjects interact and behave to form a playable game. Components are the main vehicle that accomplishes this.
The Unity Editor has a large number of built-in components. Examples of these include the Transform Component which defines the GameObject’s position, rotation, and scale within your game; camera components that control the lens through which the player is able to see and view the game world; and the Rigidbody component that enables physics-based behavior for a GameObject, such as simulated gravity, collisions, and forces.
Taking advantage of built-in components will not only save time, but allow you to accomplish things that otherwise would be very difficult for a beginning game developer to accomplish. Refer to the Unity Manual often to brush up on each built-in component and how they are implemented into games.
Creating Custom Components
As you progress in making your game, you may find challenges that can’t be solved, or tasks that you can’t accomplish with Unity’s built-in components. Thankfully, Unity allows users to create custom components using Scripting.
Unity supports the C# programming language. This language is an industry standard, and though it will take time to master, the widespread support and learning materials will make the process much easier.
While the complexity of scripting and programming is beyond the scope of this introduction, be sure to identify which tasks in your game plan can’t be accomplished with built-in components. Break down each task in detail so you can better understand exactly what you would need the script to accomplish.
How To Insert A Character Into Unity From Daz Studio
Eventually, the time will come to tackle an equally large hurdle in making a game: handling art and assets. Whether you are working in 3D or 2D, at some point you need to fill your game world with assets. The best games have cohesive, attractive art styles that help immerse the player in the game.
Whether you are a skilled artist or not, DAZ Studio is a powerful resource to help you make a game in Unity. With thousands of assets available, you can find and customize characters, props, and environments to populate your game world.
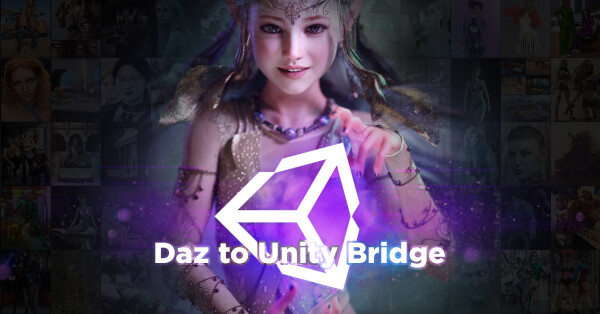
Bringing assets into Unity with Daz Studio is easy with the free open-source tool Daz to Unity Bridge.
Importing a character (or prop or environment) is easy.
- If you don’t yet have it, download Daz Studio for free, then download Daz Bridge to Unity, which is also free.
- Explore over 30,000 3D products in Daz shop, thousands of which are designed specifically for Unity. Even if it isn’t, the Bridge will enable a smooth transfer to Unity.
- Use the Studio’s built-in customization controls to personalize your content just the way you want it.
- When ready, open the Daz Bridge and import your project to Unity following the simple steps explained here.
Level Up Your 3D Game Making In Unity With Daz3D
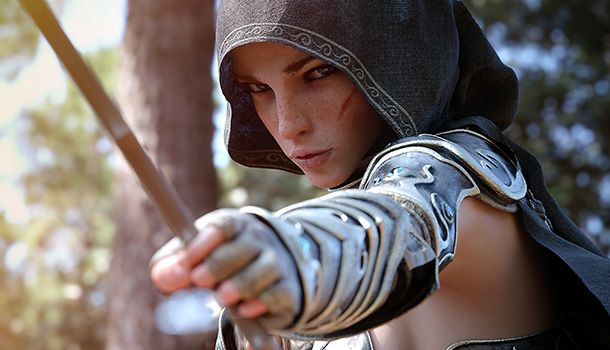
Daz Studio makes setting up a 3D character quick and easy. In just a matter of minutes, I had this character designed and ready to be imported into Unity.
Game Design is extremely difficult, especially if you are a solo developer or working in a small team. It is highly recommended to build a team with a diversity of skills: i.e., a programmer, an artist, a game writer, and a level designer. However, this is not always possible and that is when it is especially important to find the right tools to help you accomplish your tasks, without spending countless hours trying to learn skills that frankly can take a lifetime to master.
Save yourself the hassle by using Daz3D to source and create your 3D assets, which will take a massive weight off your shoulders as you make your first game in Unity.
The professional cloud rendering service for Daz 3D
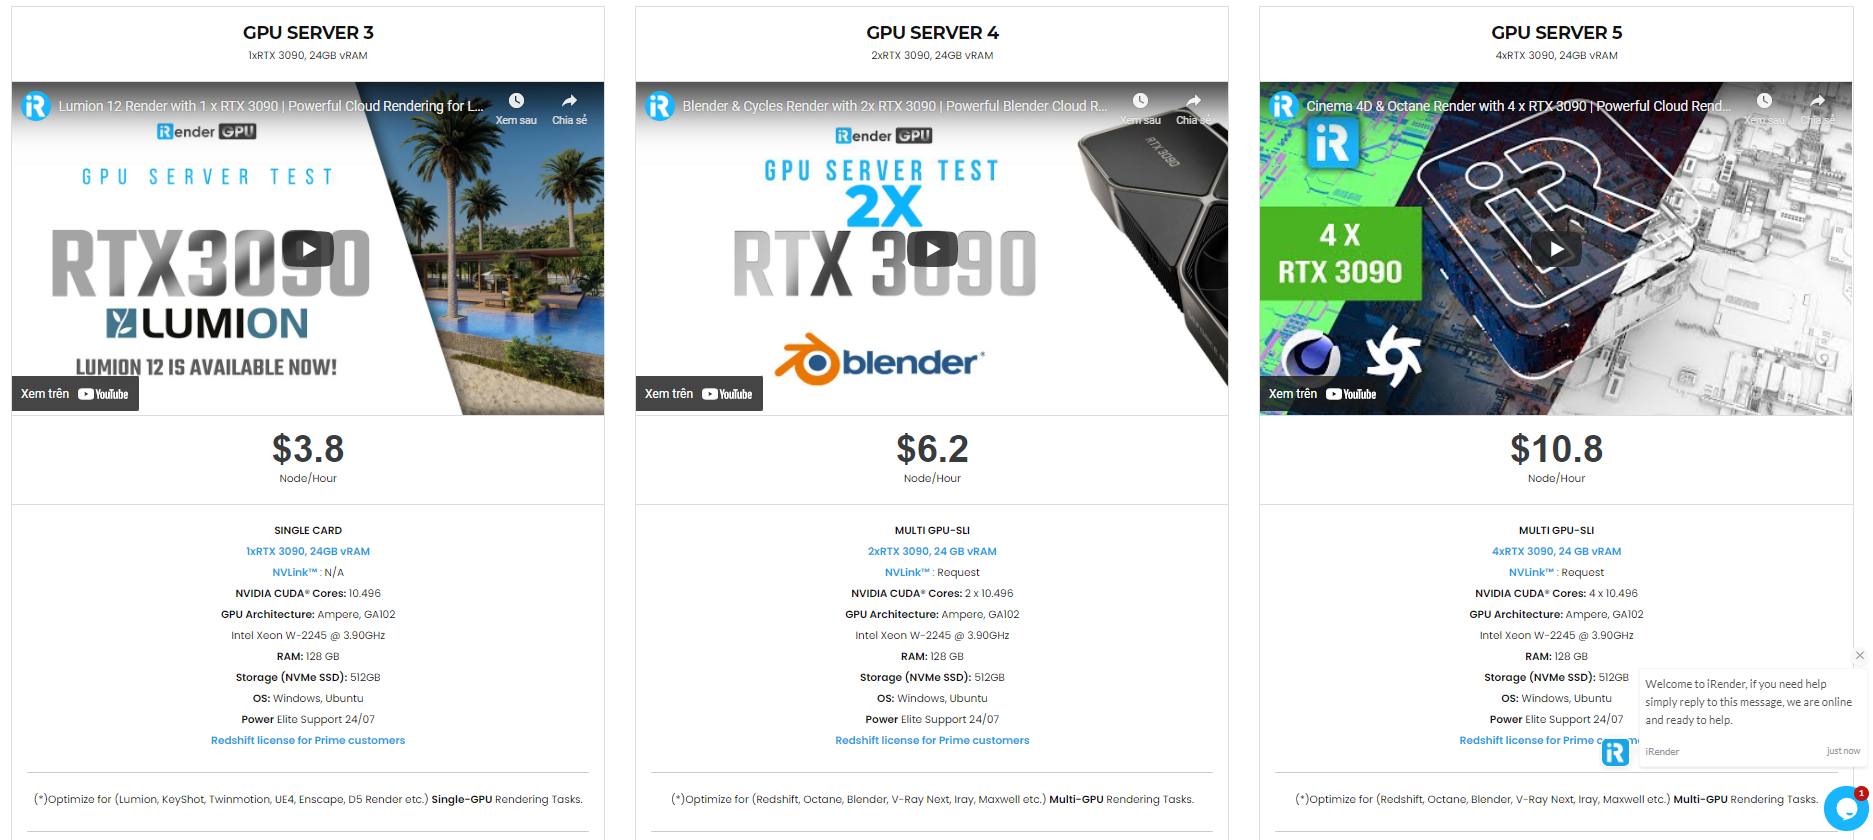
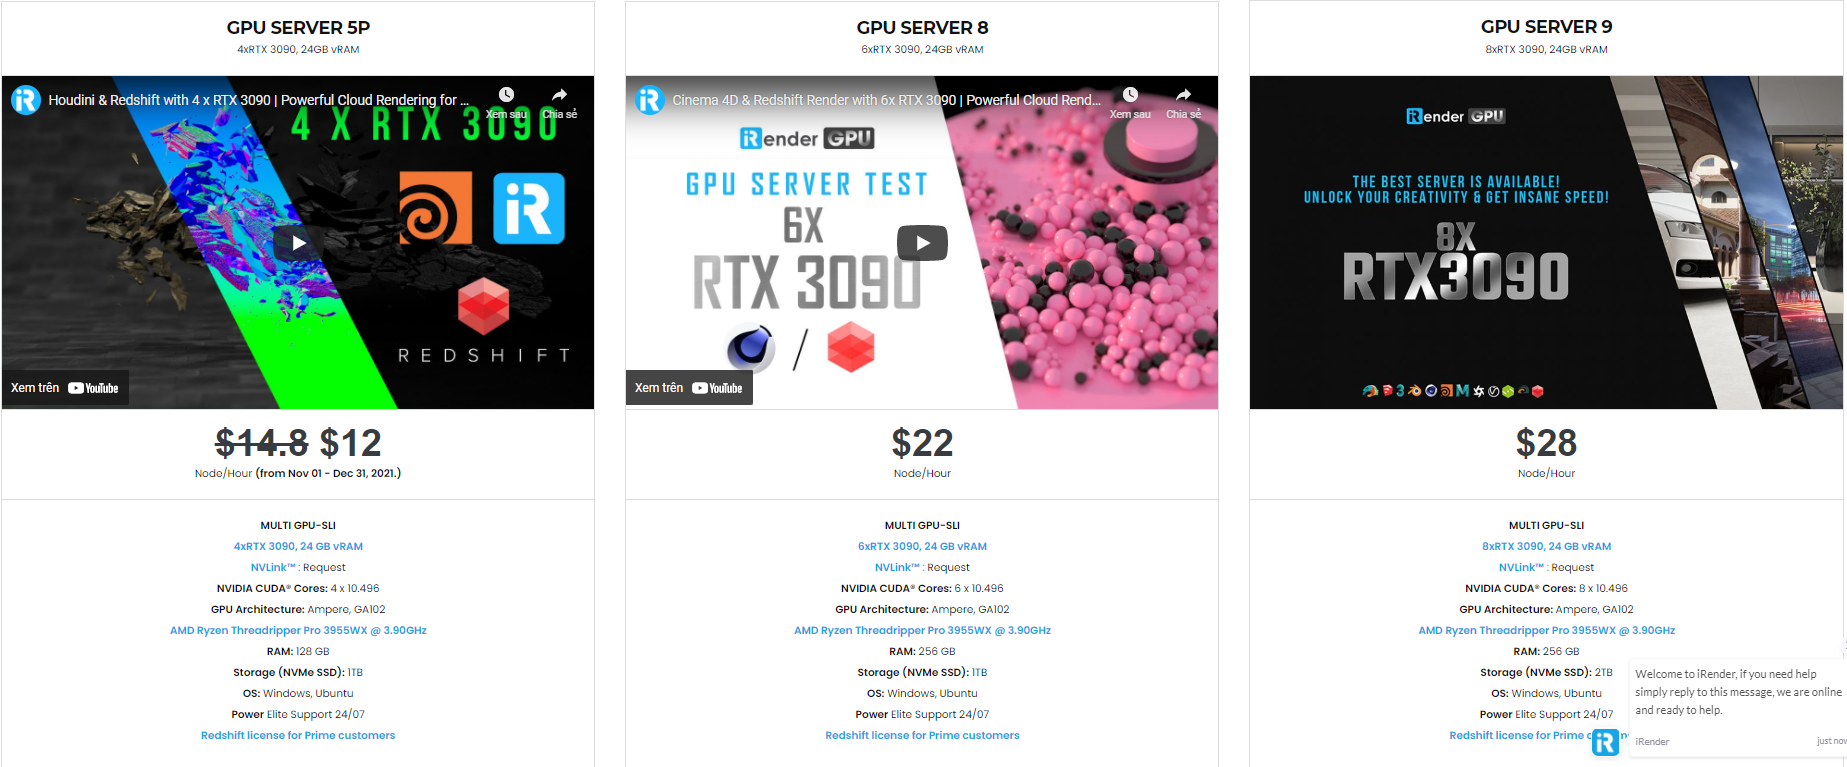
iRender is a GPU-Acceleration Cloud Rendering Service for Multi-GPU Rendering with Powerful Render Nodes: 2/4/6/8x RTX 3090/3080/2080Ti. iRender provides High-performance machines for GPU-based & CPU-based rendering on the Cloud. For Daz 3D users can leverage the power of single GPU, multi GPUs to speed up your render time. Users can easily choose their machine configuration from recommended system requirements to high-end options.

Why iRender?
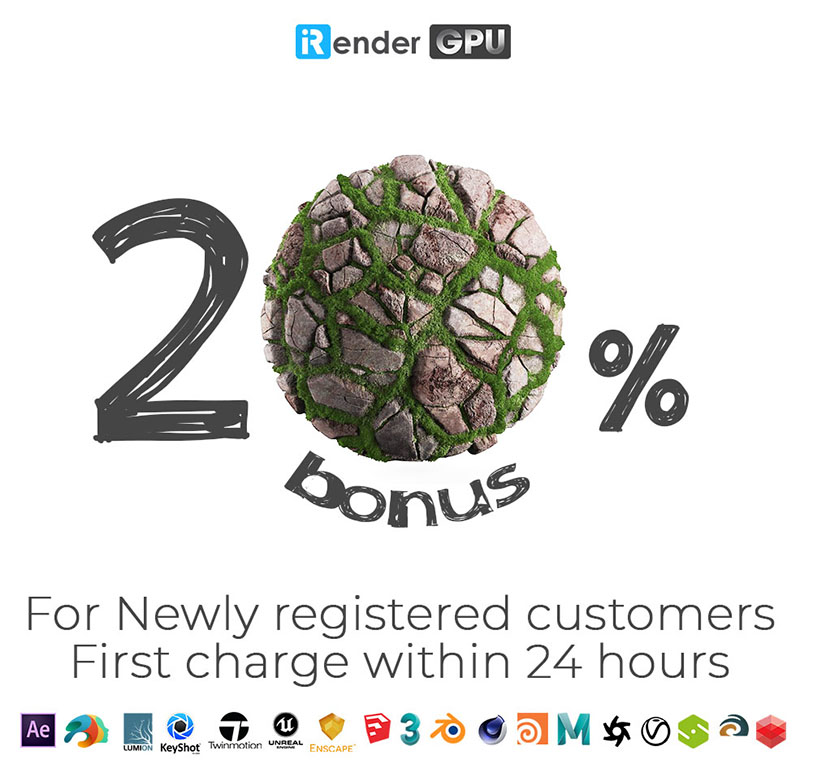
Reasonable price (lots of bonus)
You will be charged on a per-minute basis. However, you can always save up to 30% with our Fixed Rental feature. For those who are in need of the server for more than a day, or have extremely large projects, we advise choosing daily/weekly/monthly or even yearly rental packages. The discount is attractive (10% for daily packages, 20% for weekly and monthly packages)
Real human 24/7 support
Our support is always online 24/7, helping you to handle the problem quickly, effectively, saving you both time and money.
Conclusion
If you have any questions, please do not hesitate to reach us via Whatsapp: +(84) 972755742. Register an ACCOUNT today and get FREE COUPON to experience our service. Or contact us via WhatsApp: +(84) 972755742 for advice and support.
iRender – Happy rendering
Source & pictures: Daz3D blog
Related Posts
The latest creative news from Daz3d Cloud Rendering, Redshift Cloud Rendering, Nvidia Iray Cloud Rendering , Octane Cloud Rendering, 3D VFX Plugins & Cloud Rendering.