
How To Add Motion Blur In After Effects
Making a visual effects-heavy video look so natural takes a lot of work. Adding motion blur is one of the tools an editor may use to create stunning graphics. It gives your video more naturalness and realism, making viewers believe what they’re seeing happen. Additionally, using Adobe After Effects to add motion blur makes it simple to improve the film you’ve taken significantly.
In this article today, let’s learn how to add motion blur in After Effects with iRender!
1. What is Motion Blur?

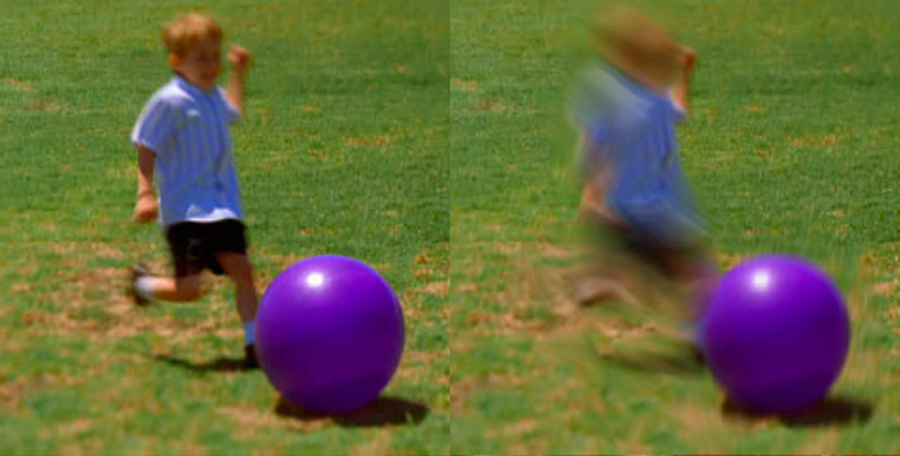
Motion blur is the visual effect created organically when things move and the shutter speed of the camera used to capture them combines.
Watching motion on a screen without any blurring effect can be jarring and unusual, especially when things are moving quickly. Because of this, digital motion blur is frequently added to effects by visual effects artists to approximate what the audience would expect to see if that particular element were there in the scene.
Motion blur can be used in After Effects to make sure your video appears normal and natural to the human eye. There are many ways to add motion blur in Adobe After Effects using various visual effects, motion graphics, and compositing methods.
2. How to Add Motion Blur in After Effects
Using the motion blur toggle in your layer settings is the earliest and most straightforward method of adding motion blur in After Effects.
2.1. Enable Motion Blur
First, open After Effects and import your clip.
Choose the moving layer in your timeline to which you want to apply motion blur once it has loaded.
You can click the motion blur layer switch after selecting the layer.
In your toolbar, you will find this above the layer menu. To enable motion blur, adjust this option. Next, you may select Enable Motion Blur from the layer toolbar. After that, Effects will apply motion blur to the chosen layer.
Keep in mind that you can use this effect on material that isn’t limited to action or live action. It can also be used with animation or text elements. Motion blur can be applied to it as long as you choose it as a moving layer. Pixel motion blur is the most effective method for adding motion blur to computer-generated motion.
2.2. CC Force Motion Blur Effect
Adding motion blur to your layers is easy with the Enable Motion Effect. CC Force Motion Blur is a useful effect if you want to add something a little more stylistic, or something that you have a little more control over.
Choose the moving layer to which you want to apply motion blur, just as you would do with Enable Motion Blur. Next, select Time and CC Force Motion Blur from the Effects menu. The dialog box for CC Force Motion Blur will then open after Effects.
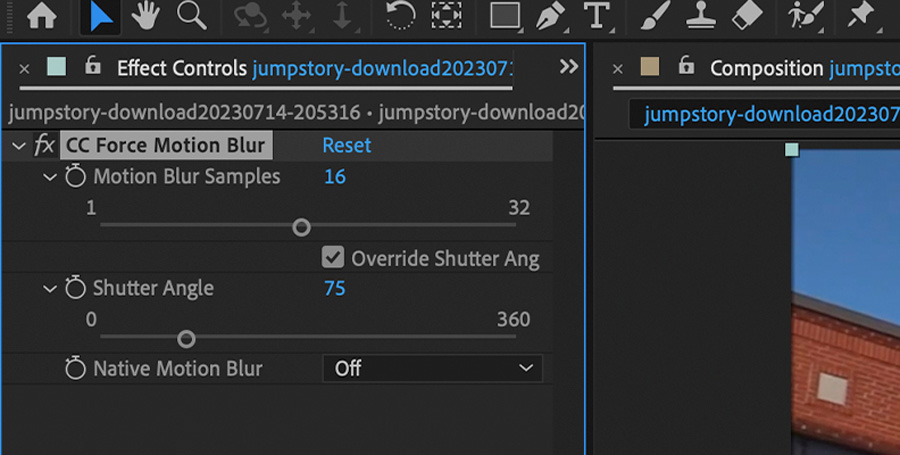
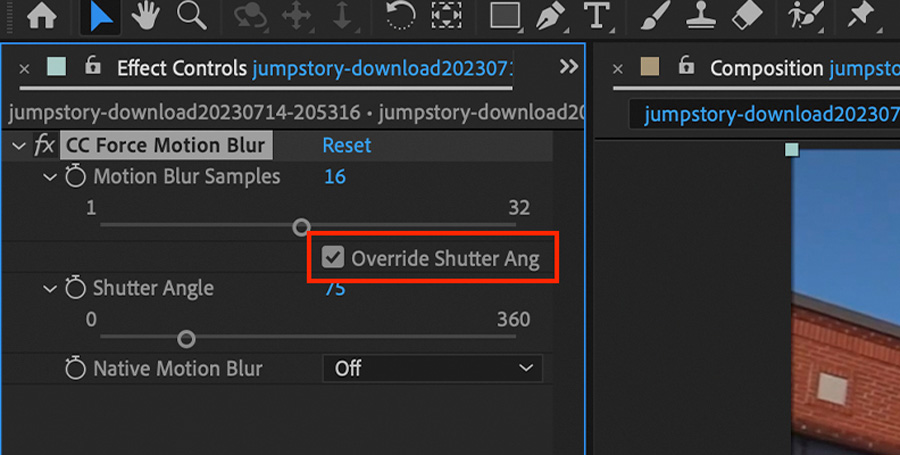
You can adjust the amount of motion blur applied to your footage by using the settings below. These are the following:
- Motion Blur Samples
- Shutter Angle
- Native Motion Blur
Additionally, there is also a check box called Override Shutter Angle.
2.3. Third-Party Plugins
Even while After Effects comes with two useful motion blur tools, you may get even more control over the motion blur you want to apply by adding third-party plug-ins.
Conclusion
A crucial technique for making action or fast motion on screen appear realistic and natural to the audience is motion blur. Although it’s simple to overlook, it can have a significant impact on how well your footage appears and convinces viewers.
Thankfully, motion blur can be easily added to any clip using After Effects, and you can easily modify the effects’ type and level of detail. All you need now are the ideal images to go with your style!
iRender - The Best Solution for rendering After Effects
iRender provide remote machine rental service, by offering flexible configurations of 1, 2, 4, 6, and 8 GPU machines using the top-tier RTX 4090 and RTX 3090. Built with powerful CPUs (AMD Ryzen™ Threadripper™ PRO 3955WX @ 3.9 – 4.2GHz and AMD Ryzen™ Threadripper™ PRO 5975WX @ 3.6 – 4.5GHz), 256GB RAM, and 2TB NVMe SSD storage, our machines can handle even the most demanding scenes in your 3D projects.
For After Effects, we provide a dedicated server 3S (1xRTX4090) because AE just utilizes 1 GPU. You can refer its configuration here:

Besides, iRender provides you with total workflow freedom. iRender allows users to use many servers on one account. Therefore, for big projects with tight deadlines and faster rendering, you can use multiple machines simultaneously just like using multiple independent computers.
For Windows users, we recommend using our all-in-one application iRender GPU to work, you don’t need to come to our website but still can transfer your data, recharge your account, and access the machine through the app.

With the above advantages and the machine configuration package that iRender has just released, we believe that users will have the most comfortable, quickest, and most effective rendering time.
Create an ACCOUNT now to experience our service and a 100% bonus for the first deposit of new users. If you have any comments about our article, please do not hesitate to reach us at [email protected] or Whatsapp: +(84) 916017116.
iRender – Happy Rendering!
References Source: BorisFX