How to take High-Resolution Screenshots in Unreal Engine 5
In Unreal Engine, taking high-resolution screenshots is a simple and quick procedure that is necessary for exhibiting the beauty of your game or scene. The most effective way to present your work is by mastering this process, whether it be for marketing materials, 3D assets, or specific scenarios. In this article, we’ll look at how to take perfect high-quality pictures that accurately capture all the details of your Unreal Engine productions. In Unreal Engine, there are various methods for taking high-resolution screenshots, so let’s start with iRender.
The client would like a feature that helps them get quick high-resolution screenshots of the scene from any given camera angle. The resolution of the screenshot is important to maintain high quality when editing the image.

Steps to take High-Resolution Screenshots in Unreal Engine 5
Step 1: Launch the desired Level or Scene
Launch Unreal Engine first, then open the level or scene that you want to capture in high quality.
Step 2: Set the Camera Angle
Next, set up your camera so that the desired scene is sensationally captured. To control the camera in your scenario, use the “Cine Camera Actor” or “Camera” component.
Step 3: Edit Camera Settings
For the most realistic screenshot from the camera, Unreal Engine offers a lot of options that you can adjust. Aperture, Filmback, and Exposure are some of these options. To get to them, first click on the “Cine Camera Actor” or “Camera” component in the details panel. This will take you to that component’s settings.
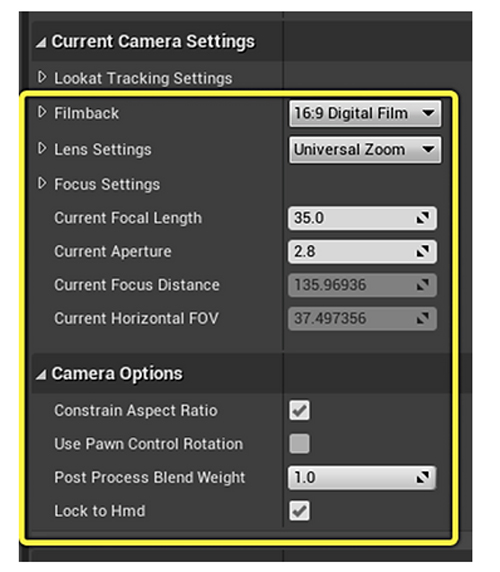
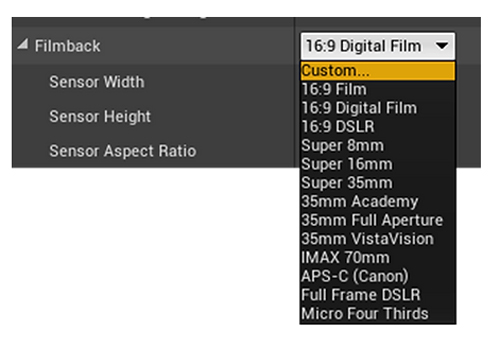
To boost the output’s resolution, use the “Filmback” setting in the “Film” section. The resolution will increase with the “Filmback” level. Additionally, you can use custom values or real camera sensor sizes.
Increasing the “Aperture” value is the next way to improve the quality. It essentially replicates a narrower aperture, resulting in a deeper depth of field and improved image quality.
In addition, you may play around with other camera settings like “Focal length” and “Exposure” as necessary for your scene.
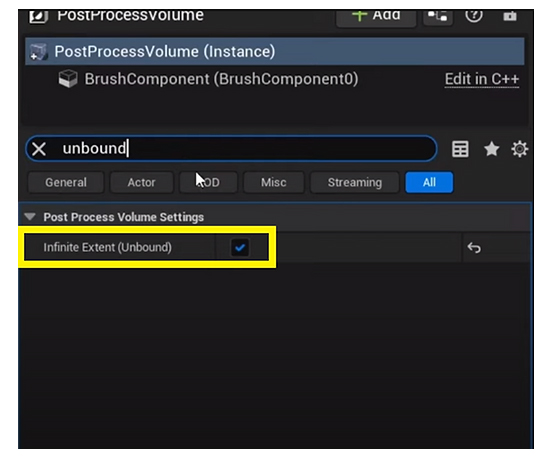
Step 4: Edit Post Process Volume settings
One of the crucial options that can make the final screenshot more exciting is postprocess. To make use of this, check first for the “Post Process Volume” menu item in the Details menu. In the “Post Process Volume” setting, look for the “Unbound” option and turn it on.
To make the scene more realistic, you may now easily modify with the post-processing parameters. Applying changes to the “Contrast” and “Saturation” settings will have the biggest influence.
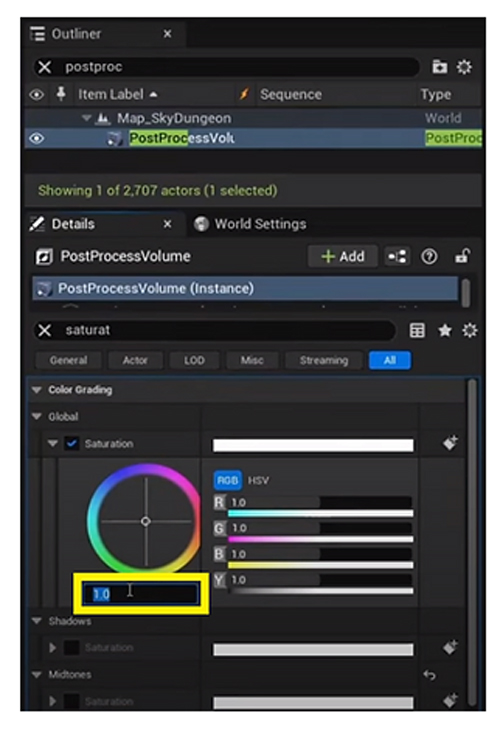
The output of the viewport will be significantly changed by adjusting one or both of these variables. To make the scene look as colorful as possible, adjust these parameters as necessary.
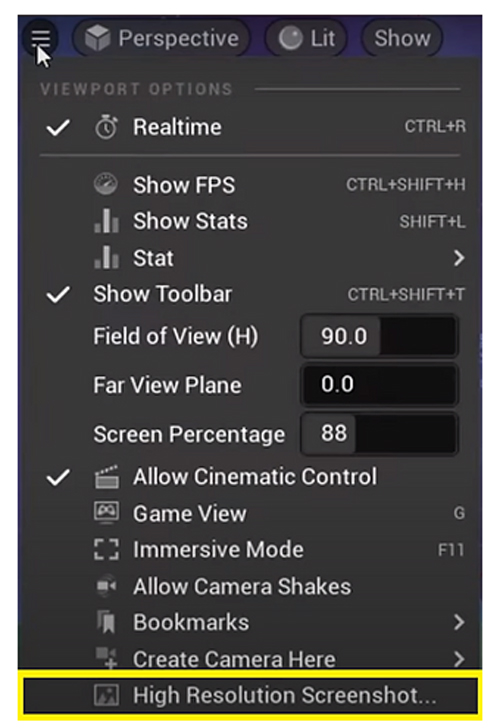
Step 5: Take the High-Resolution Screenshot
Now that everything’s set up, time to take screenshots. You can access the high-resolution screenshot settings by using the “Viewport settings” or the “F9 key” to take a high-resolution screenshot.
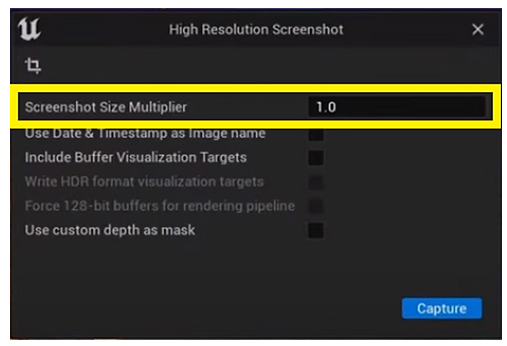
Another feature in the settings called “Screenshot Size Multiplier” can be used to improve the overall resolution and quality of the output image. However, making use of this setting requires a lot of hardware, so use it wisely so you get the best possible balance between quantity and quality.
Conclusion
Take a screenshot by pressing the F9 key after everything is finished, then check it up in the default saving location for Unreal Engine. So now you’ve started taking a professional approach to show your sceneries or assets.
iRender - The Best Solution for rendering Unreal Engine 5.3
We provide remote machine rental service, by offering flexible configurations of 1, 2, 4, 6, and 8 GPU machines using the top-tier RTX 4090 and RTX 3090. Built with powerful CPUs (AMD Ryzen™ Threadripper™ PRO 3955WX @ 3.9 – 4.2GHz and AMD Ryzen™ Threadripper™ PRO 5975WX @ 3.6 – 4.5GHz), 256GB RAM, and 2TB NVMe SSD storage, our machines can handle even the most demanding scenes in your 3D projects.
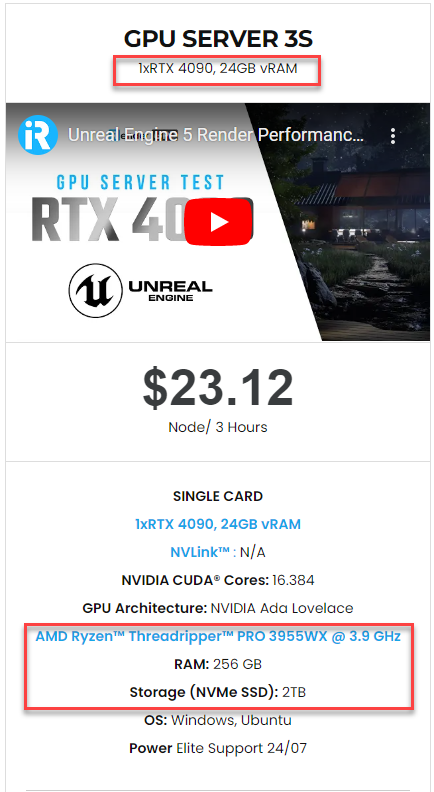
For Unreal Engine, we provide a dedicated server 3S (1xRTX4090) because UE just utilizes 1 GPU. You can refer its configuration here:
Besides, iRender provides you with total workflow freedom. iRender allows users to use many servers on one account. Therefore, for big projects having tight deadlines and needing faster rendering, you can use multiple machines simultaneously just like using multiple independent computers.
Let’s check out how our single RTX 4090 machine helps speed up Unreal Engine 5 rendering:

For Windows users, we recommend using our all-in-one application iRender GPU to work, you don’t need to come to our website but still can transfer your data, recharge your account, and access the machine through the app.

Besides, right now we have a Halloween promotion:
With the above advantages and the machine configuration package that iRender has just released, we believe that users will have the most comfortable, quickest, and most effective rendering time.
Create an ACCOUNT now to experience our service and a 100% bonus for the first deposit of new users. If you have any comments about our article, please do not hesitate to reach us at [email protected] or Whatsapp: +(84) 916017116.
iRender – Happy Rendering!
Reference sources: unrealengine.doc, unreal- university.blog
Related Posts
The latest creative news from Unreal Engine Cloud rendering.