Rendering from Multiple Camera Angles in Unreal Engine 5
When rendering with Movie Render Queue, it may be necessary to render from multiple Cinematic cameras inside a single sequence or shot. For instance, you may be rendering a product demonstration video or training material that needs different angles. Rendering from multiple angles inside a single shot could be better than using Takes because Takes create new Level Sequence assets, diverging your content.
This article provides an overview of how to render multiple camera angles in Unreal Engine 5 within a single shot using Movie Render Queue. Let’s together have a look at how.
1. Rendering from Multiple Camera Angles in Unreal Engine 5
1.1 Prerequisites
-
-
-
- You need to understand the fundamentals of creating and opening a Level Sequence.
- Movie Render Queue is a Plugin that must be enabled before use. Go to Edit > Plugins in Unreal Engine’s main menu, find Movie Render Queue in the Rendering section, and check the box to enable it. After that, restart Unreal Engine.
-
-

1.2 First Camera Setup
Assuming that the Sequencer is already open within the Level you would like to render, the first step is to create your Cinematic Cameras.
-
-
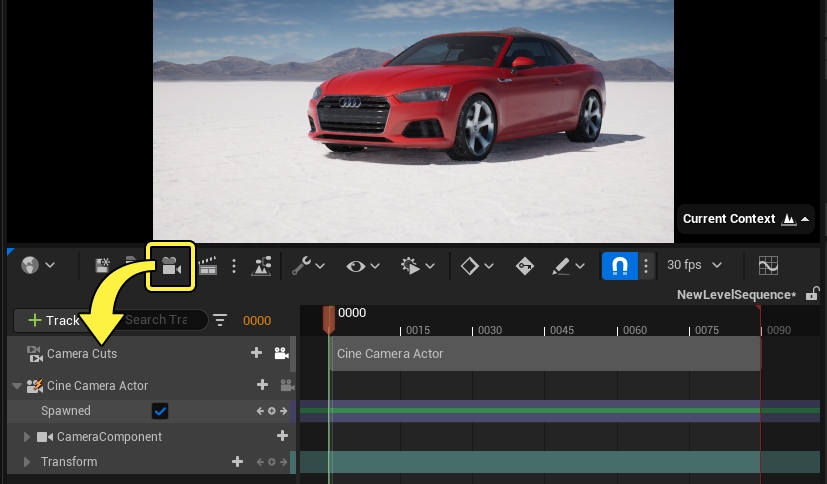
- In the Sequencer Toolbar, click Camera. This creates a Cine Camera Actor, Camera Cuts Track, and then binds the Cine Camera Actor to the Camera Cuts section.
-
-
-
- Next, move and keyframe the camera to get the appropriate framing and animation for this shot.
-
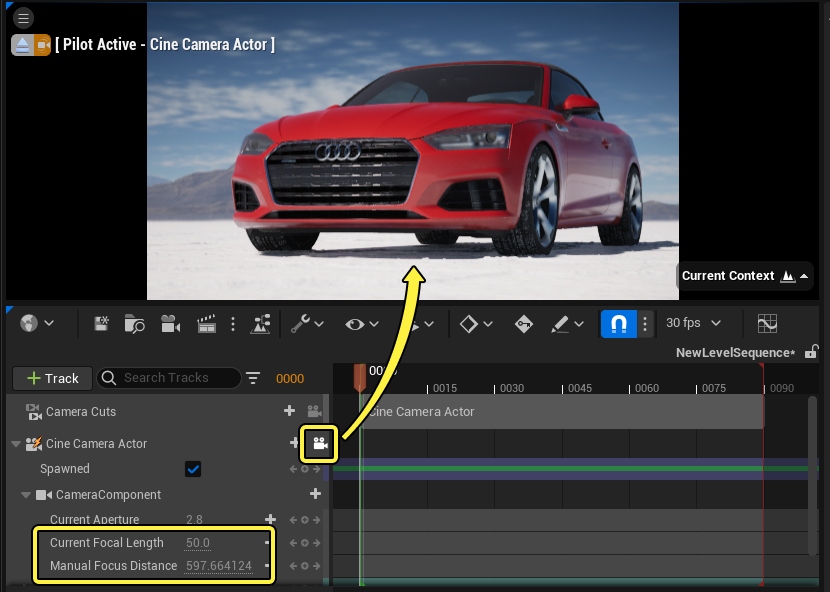
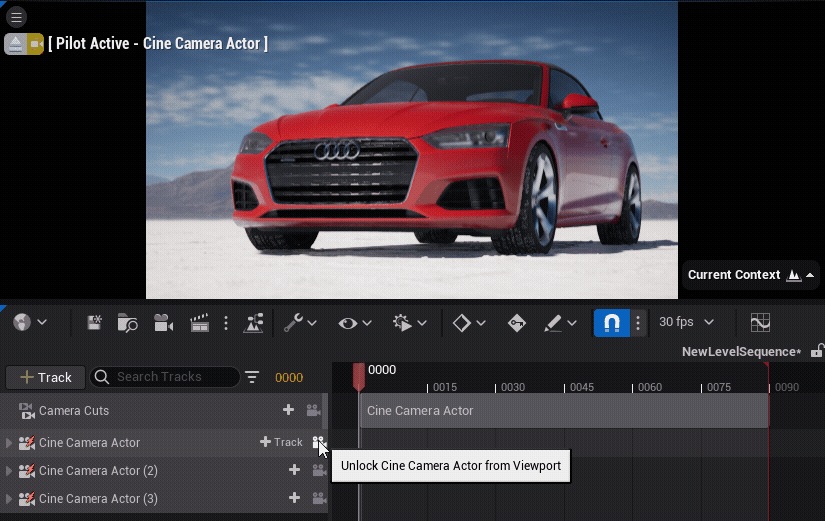
- Enable the Camera symbol on the Cine Camera Actor track, which controls the camera.
- You can also change camera-specific properties like Aperture, Focal Length, and Focus Distance to help with shot composition.
-
- Next, move and keyframe the camera to get the appropriate framing and animation for this shot.
-
1.3 Additional Camera Setup
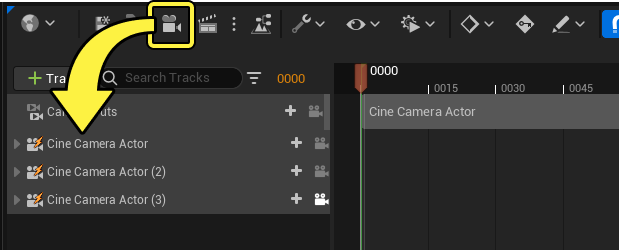
You can start adding new cameras to the sequence. Repeat the process of adding the first camera by clicking Camera on the Sequencer Toolbar. Each click will create a new camera, so you can add as many as you need. Although the Camera Cuts Track is still tied to the first camera (giving the impression that this shot has only one camera), the other cameras will be rendered correctly with Movie Render Queue in the last steps of this guide.
Enable the Camera icon on each new camera track, as you did with the first, to pilot it and set up your composition.
Note: Although it is not necessary, we recommend that you rename your camera tracks to better represent their content or usage. Rename a track by right-clicking it or pressing F2. If two cameras have the same name, Movie Render Queue renames them automatically to avoid a filename conflict.
1.4 Open Movie Render Queue
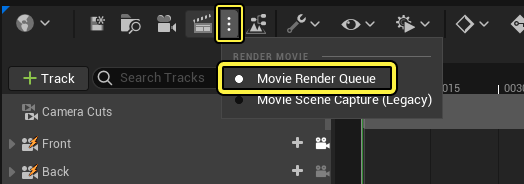
After you’ve composed and animated all of your cameras in the sequence, you can render them using Movie Render Queue (MRQ). Click Render in the Sequencer Toolbar to open MRQ.

Note: If MRQ does not open properly when you click this button, make sure the dropdown menu next to Render is set to Movie Render Queue.
1.5 Render Settings
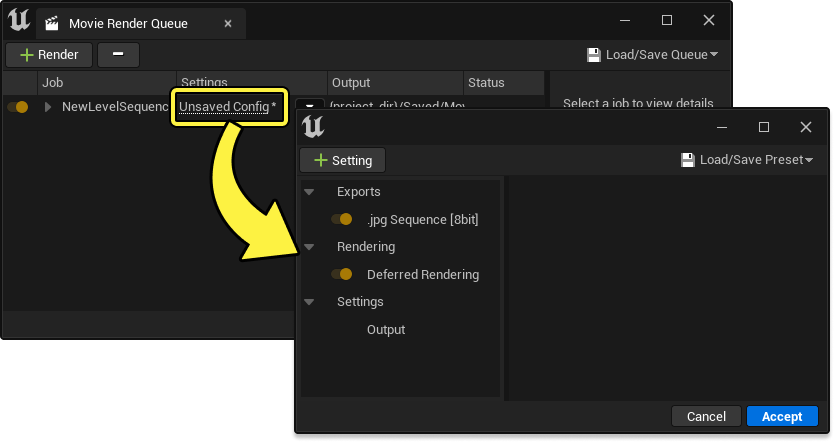
With the MRQ window open, click the Settings entry to enter the Render Settings window.
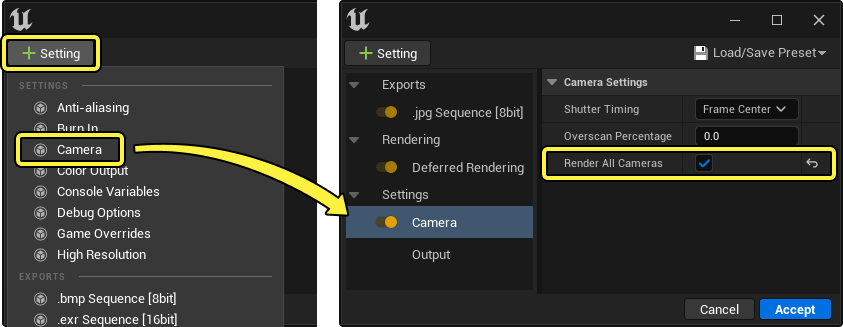
Click Add Setting (+), choose Camera, then select the newly created Camera item and enable Render All Cameras.
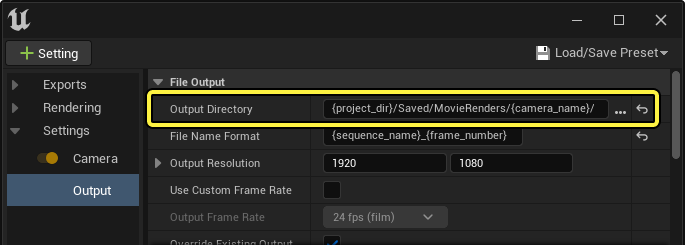
Note: Although it is optional, you may choose to use the {camera_name} Format String to change the Output Directory or File Name Format in the Output options. This gives you further control over how your output renders are named or grouped. Setting Output Directory to {project_dir}/Saved/MovieRenders/{camera_name}/, for example, outputs each camera angle to a separate folder.
If you don’t use {camera_name}, MRQ adds the camera name as a suffix to the file name when Render All Cameras is enabled to avoid file name conflicts.
1.6 Render and Results
Once your render settings are complete, click Render (Local) to start the MRQ rendering process.

When the render is finished, click the Output entry to open a file explorer window to the output directory. Your multiple angles should be rendered here. Using the processes described above, different angles were divided by folder in this example.

2. iRender - The best render farm for Unreal Engine
iRender is proud to be a professional GPU Accelerated Cloud Rendering Service provider for 3D Render, CGI, and VFX tasks with more than 30,000 clients. We are appreciated in many global rankings (e.g. CGDirector, Lumion Official, Radarrender, InspirationTuts CAD, All3DP, BlenderBaseCamp, VFX Rendering.)
We provide remote machine rental services, specifically, high-configuration dedicated servers (RTX 3090 and RTX 4090 physical machines/computers) for you to control via the Microsoft Remote Desktop application. You will set up your creative working environment on our servers to optimize and render projects whenever/wherever you want.
Our cloud rendering services for Unreal Engine
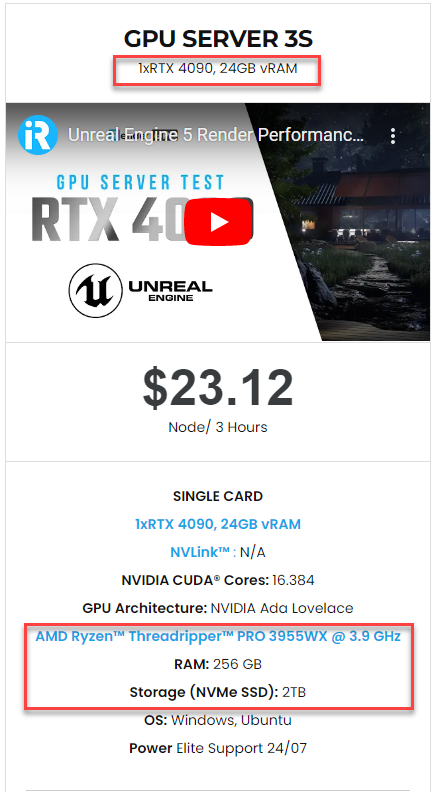
Unreal Engine utilizes the video card primarily to display the graphics on the screen. A faster video card will give you a higher FPS in the viewport or in a stand-alone game. At iRender, we have a single RTX 4090 server package that is the most suitable for Unreal Engine rendering. Its detailed configuration is as the following image.
-
-
-
- One GPU – NVIDIA GeForce RTX 4090 24GB: With 24GB of VRAM and terrific performance, RTX 4090 is one of the best GPUs to use for game development, Virtual Production, Architectural Visualization, and even VR content.
- One CPU – AMD Ryzen™ Threadripper™ PRO 3955WX 3.9 GHz: A strong 16-core processor for heavily threaded tasks.
- 256GB RAM: exceeds the amount of RAM needed for the Unreal Editor by itself. It allows you to do RAM-intensive tasks and work with other programs in addition to Unreal Engine at the same time.
- 2T storage SSD: A fast NVMe drive for the OS and applications and a large project drive.
-
-
For big projects having tight deadlines and needing faster rendering, you can use several servers simultaneously. iRender allows users to use multiple servers on one account. The installation is also simple: Just set up Unreal Engine on one server (machine) and clone it to many other machines.
Let’s check out Unreal Engine 5 rendering performance on our single RTX 4090 server:

Let’s get started!
Create an account now to try our RTX 4090 server for your Unreal Engine! For further information, please do not hesitate to reach us at [email protected] or mobile: +84 915 875 500.
iRender – Happy Rendering!
Reference source: unrealengine.com
Related Posts
The latest creative news from Unreal Engine Cloud rendering.