Troubleshooting Lumen-related issues in Unreal Engine
Lumen solves Global Illumination and Reflections using multiple ray-tracing methods. First, screen traces are done, followed by a more reliable method. In today’s article, let iRender guide you through troubleshooting Lumen-related issues in your scene.
1. Troubleshooting Lumen-related issues in Unreal Engine
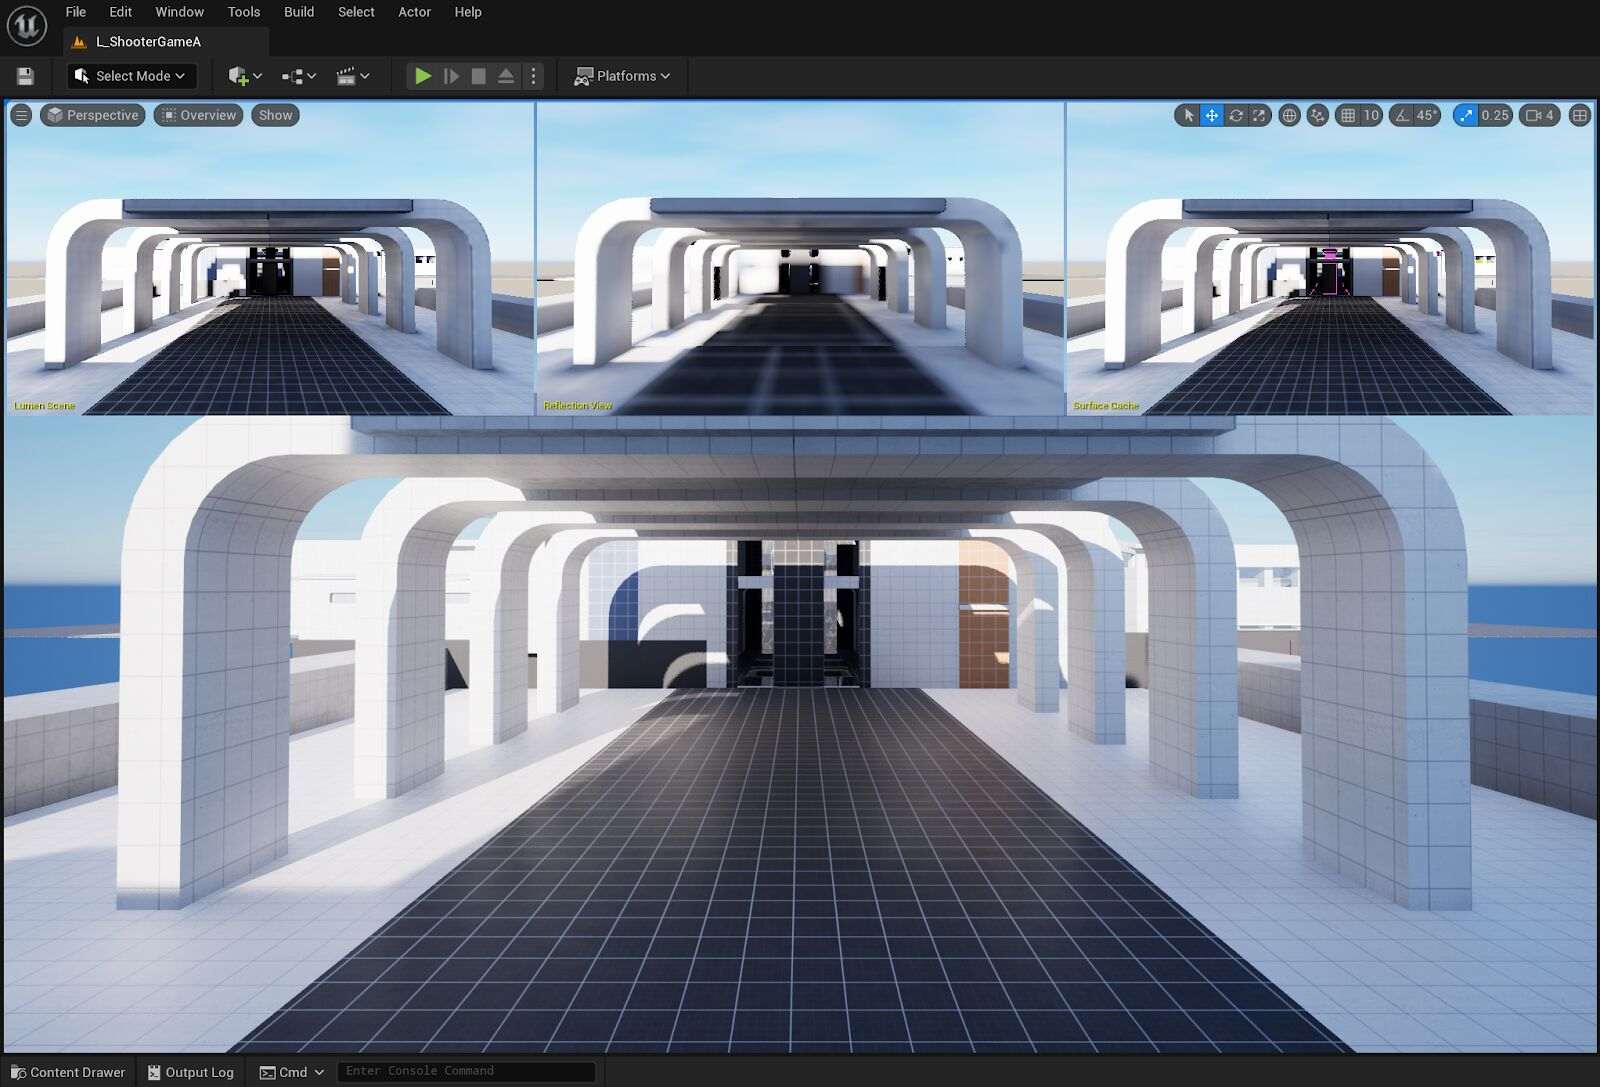
For troubleshooting Lumen-related issues in your scene, the Lumen Overview view mode is a good place to start.
Lumen Scene should match the main scene view in ways that have a visible impact on indirect lighting. Large pink areas in Lumen Surface Cache view mode should be resolved by increasing the Max Lumen Mesh Cards in the Static Mesh settings or separating the mesh into multiple parts.
Troubleshooting Lumen-related issues in Unreal Engine
1.1 Problem-Causing Meshes
If you have meshes that are causing problems with indirect lighting, you can remove them from Lumen Scene by using the Level instance’s Details panel to disable one of the following:
-
-
-
- Unchecking the box for Affect Distance Field Lighting removes them from Software Ray Tracing.
- Unchecking the box for Visible in Ray Tracing removes them from Hardware Ray Tracing.
-
-
1.2 Mismatch between Shadow Maps and Ray-Traced Shadows
Lumen shadows the Lumen Scene by reusing the Renderer’s shadow maps. They are, however, only available for on-screen positions. Lumen uses ray tracing for shadowing off-screen surfaces. When there is a significant mismatch between these two techniques, Lumen Global Illumination becomes highly view-dependent, similar to screen space techniques such as Screen Space Global Illumination.
This type of problem can be resolved by determining what is causing the mismatch to arise. To see the ray-traced shadows, disable the Reuse Shadow Maps show flag under Show > Lumen while in the Lumen Scene view mode.
Problem 1: Splotchy Artifacts seen in Mirror Reflections Indoors
Splotchy artifacts in mirror reflections occur because Lumen calculates multi-bounce global illumination using very low-quality settings due to a limited budget. To reduce artifacts, increase the Lumen Scene Quality in the Post Process settings.
Source: unrealengine.com
Problem 2: Small Meshes are black in mirror reflections
Because Lumen Scene culls small objects for performance, small meshes appear dark in mirror reflections. Raise the Lumen Scene Detail in the Post Process Settings to capture smaller meshes over greater distances.
Source: unrealengine.com
Problem 3: Sky Occlusion and Global Illumination disappears at 200 meters
Lumen Scene only keeps sky occlusion and global illumination for the first 200 meters. Increase the Lumen Scene View Distance in the Post Process settings to keep Lumen Scene over farther distances.
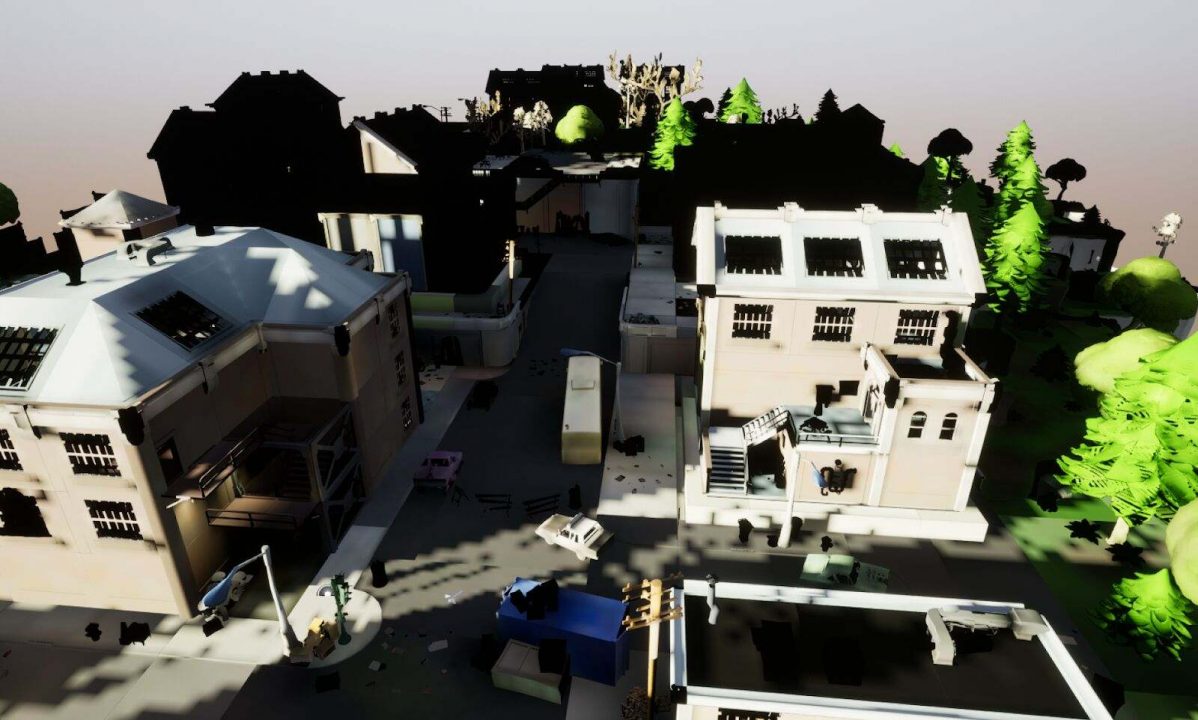
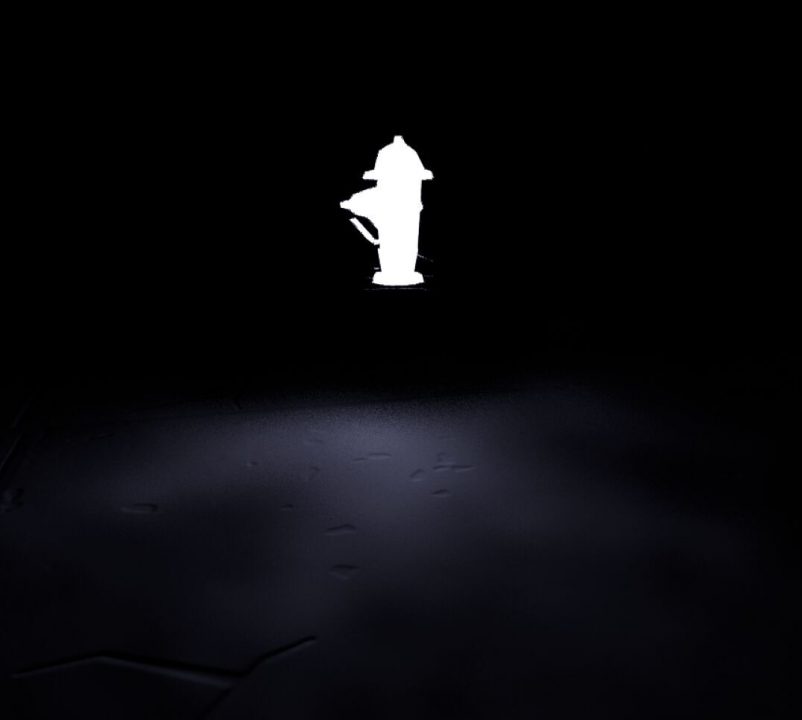
Problem 4: Light leaking in large cave-like areas
If light leaks in cave-like or enclosed areas, it is because Lumen limits how far rays are traced to increase performance, yet missing an occluder causes light leaking => Increase the Lumen Scene Detail and Max Trace Distance in the Post Process Settings.
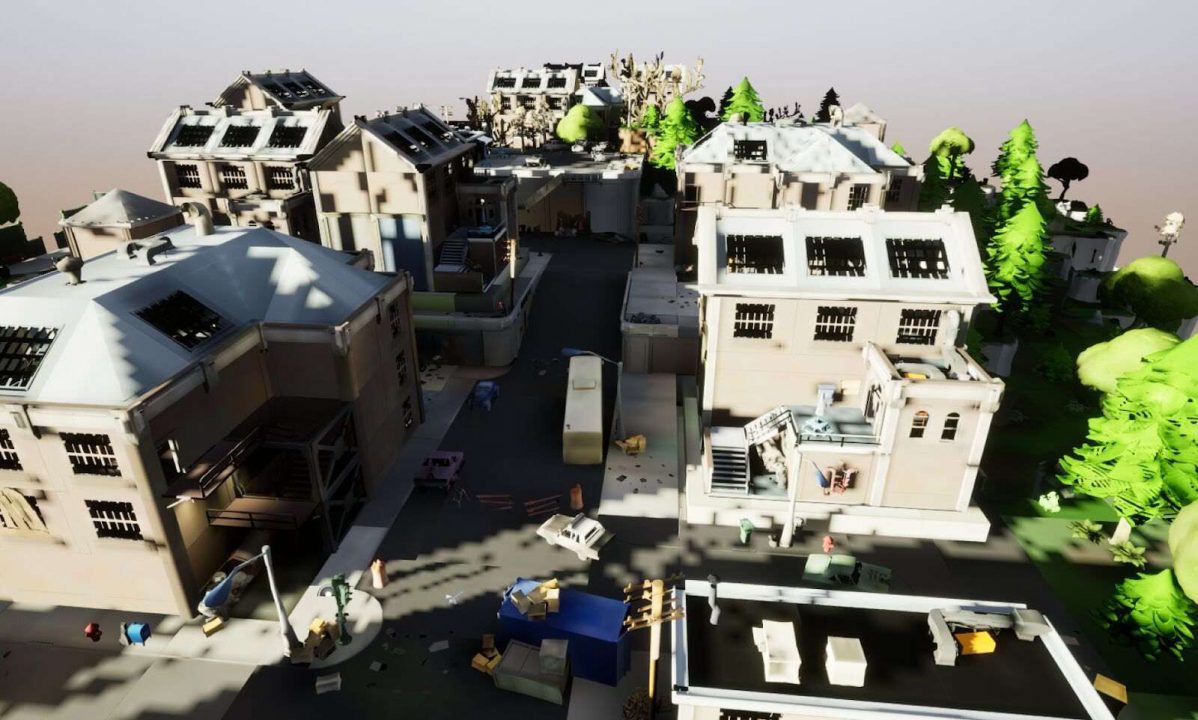
The mesh below, for example, is an enclosed box with no holes visible from the outside.

Skylighting is leaking throughout the scene inside the box.
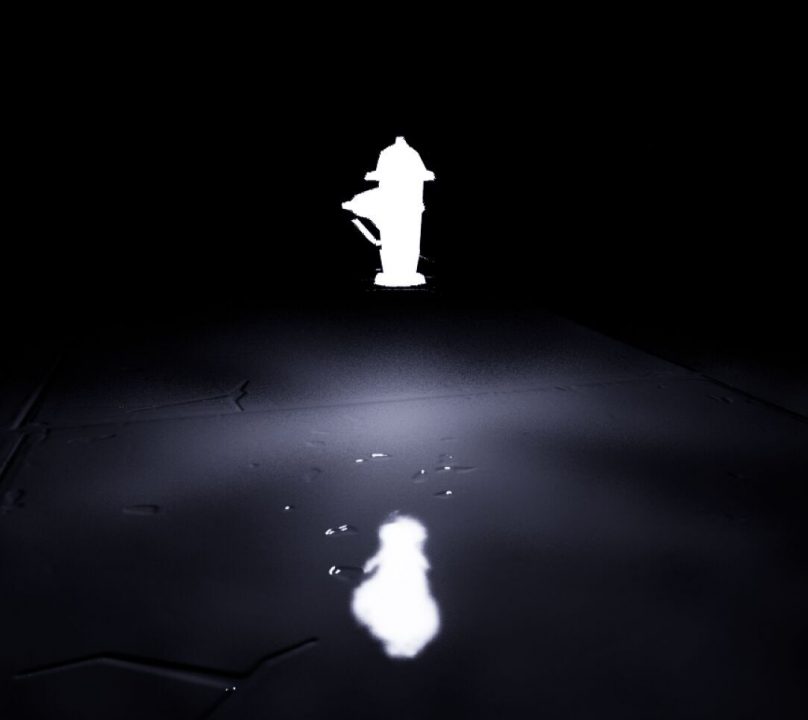
By raising Lumen Scene View Distance and Max Trace Distance values, the light leaking is now fixed.
Problem 5: Lighting changes propagate too slowly to Global Illumination
When you turn off Lumen Global Illumination, the lighting in the scene changes very slowly, causing it to fade rather than switch on or off quickly. Toggling the Sky Light off in the following scene, for example, causes the lighting to gradually fade out (the left image).
By increasing the Post Process Volume setting for Final Gather Lighting Update Speed, you can speed up the rate at which Lumen Global Illumination changes. See how the skylighting turns off more rapidly than before (the right image).

Source: unrealengine.com
Problem 6: Small emissive meshes do not light the scene consistently
Small objects are removed from the Lumen Scene, leaving only the Screen Traces to pick up small emissive meshes. As a result, their lighting in the scene is inconsistent. Set the Level instances Emissive Light Source from the Details panel.
Source: unrealengine.com
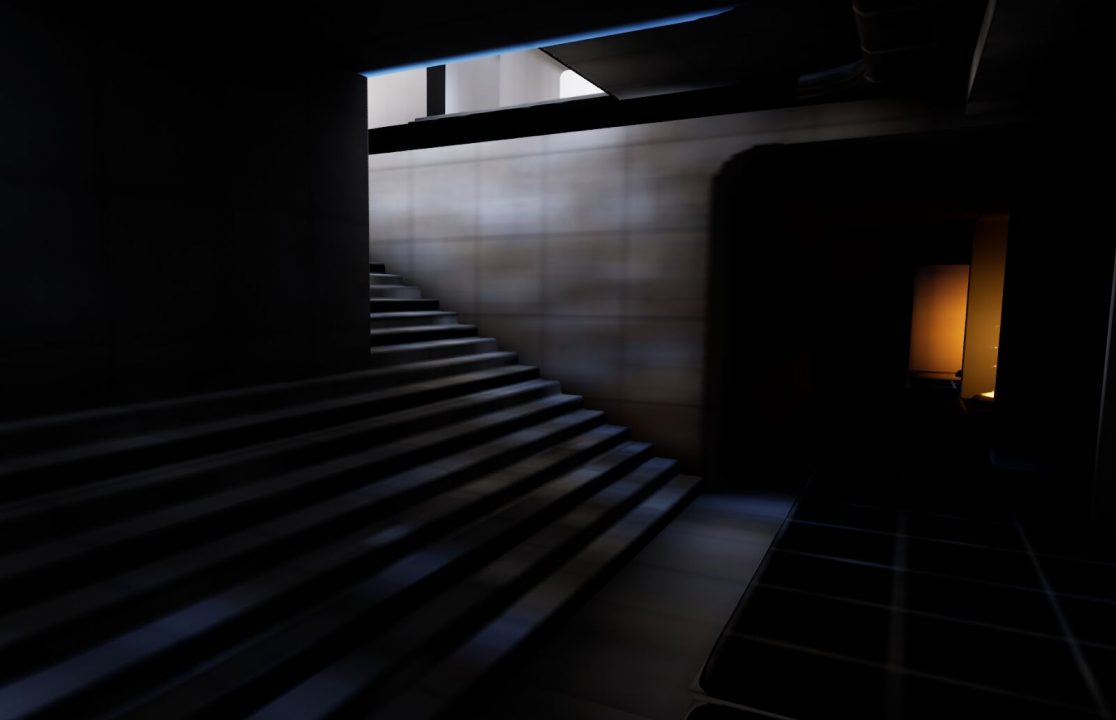
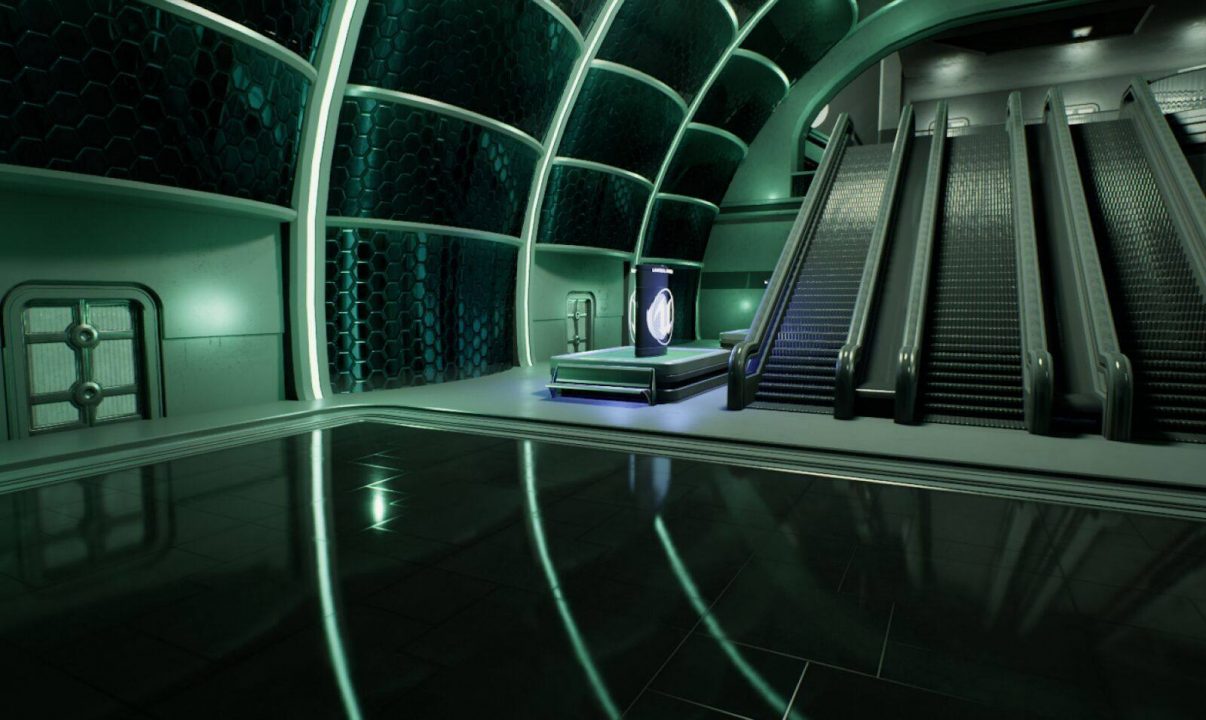
Problem 7: Wanting highest quality mirror reflections even if not performant
Lumen’s Surface Cache is used by default for lighting reflection rays because it is substantially faster to render. Lighting, on the other hand, can be configured to assess the ray hit by selecting one of the following options:
-
-
-
- Lumen’s Surface Cache is used by default for lighting reflection rays because it is substantially faster to render. Lighting, on the other hand, can be configured to assess at the ray hit by selecting one of the following options:
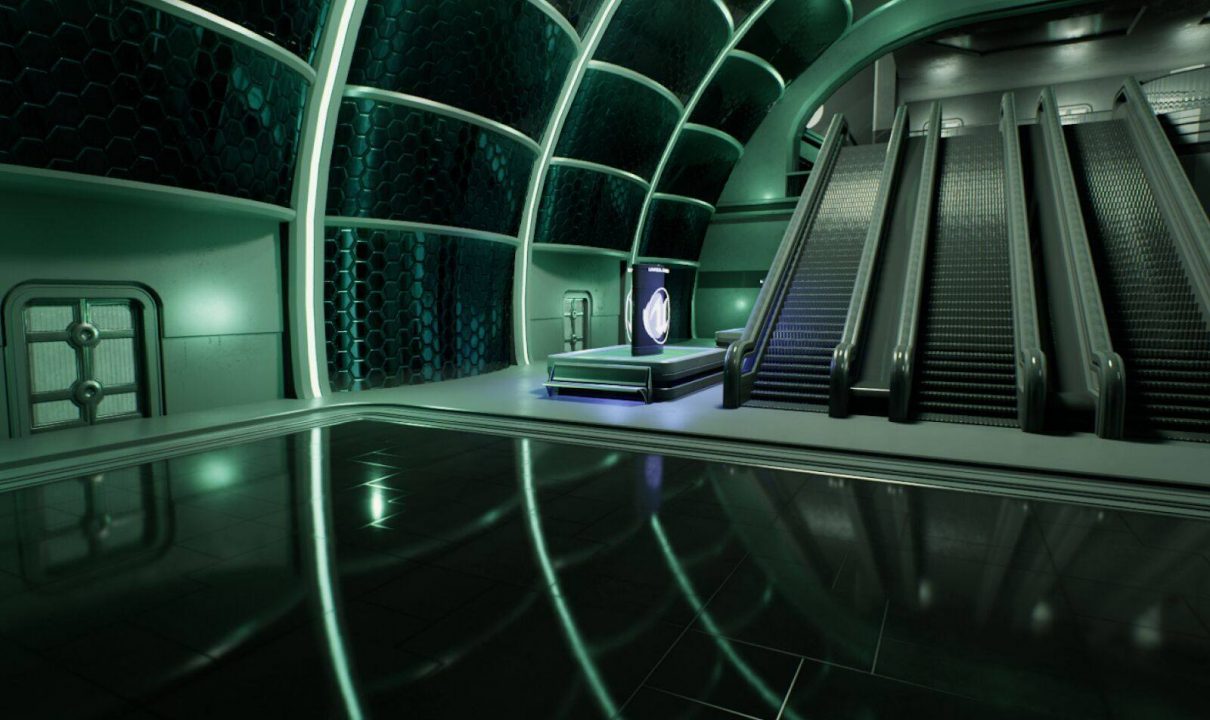
- Set Ray Lighting Mode to Hit Lighting for Reflections in the Project Settings. This changes the lighting for the whole project.
- Set Ray Lighting Mode to Hit Lighting for Reflections in the Post Process Volume. (Ideal for individual changes where you need it just for a single shot or viewpoint.)
-
-
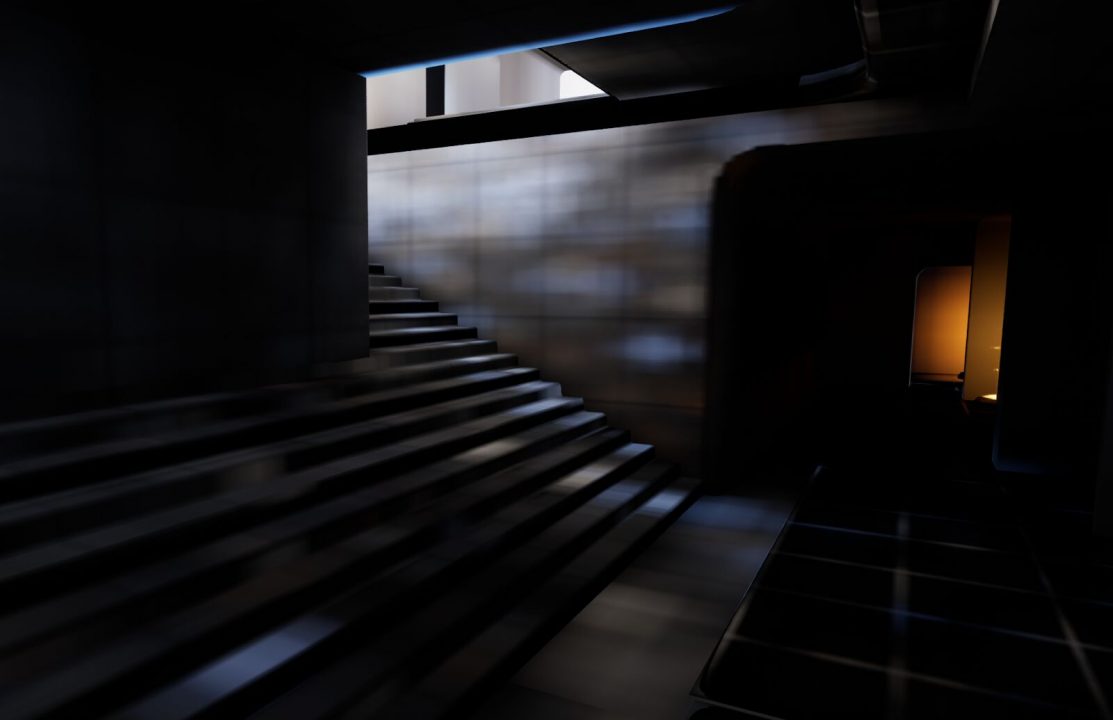
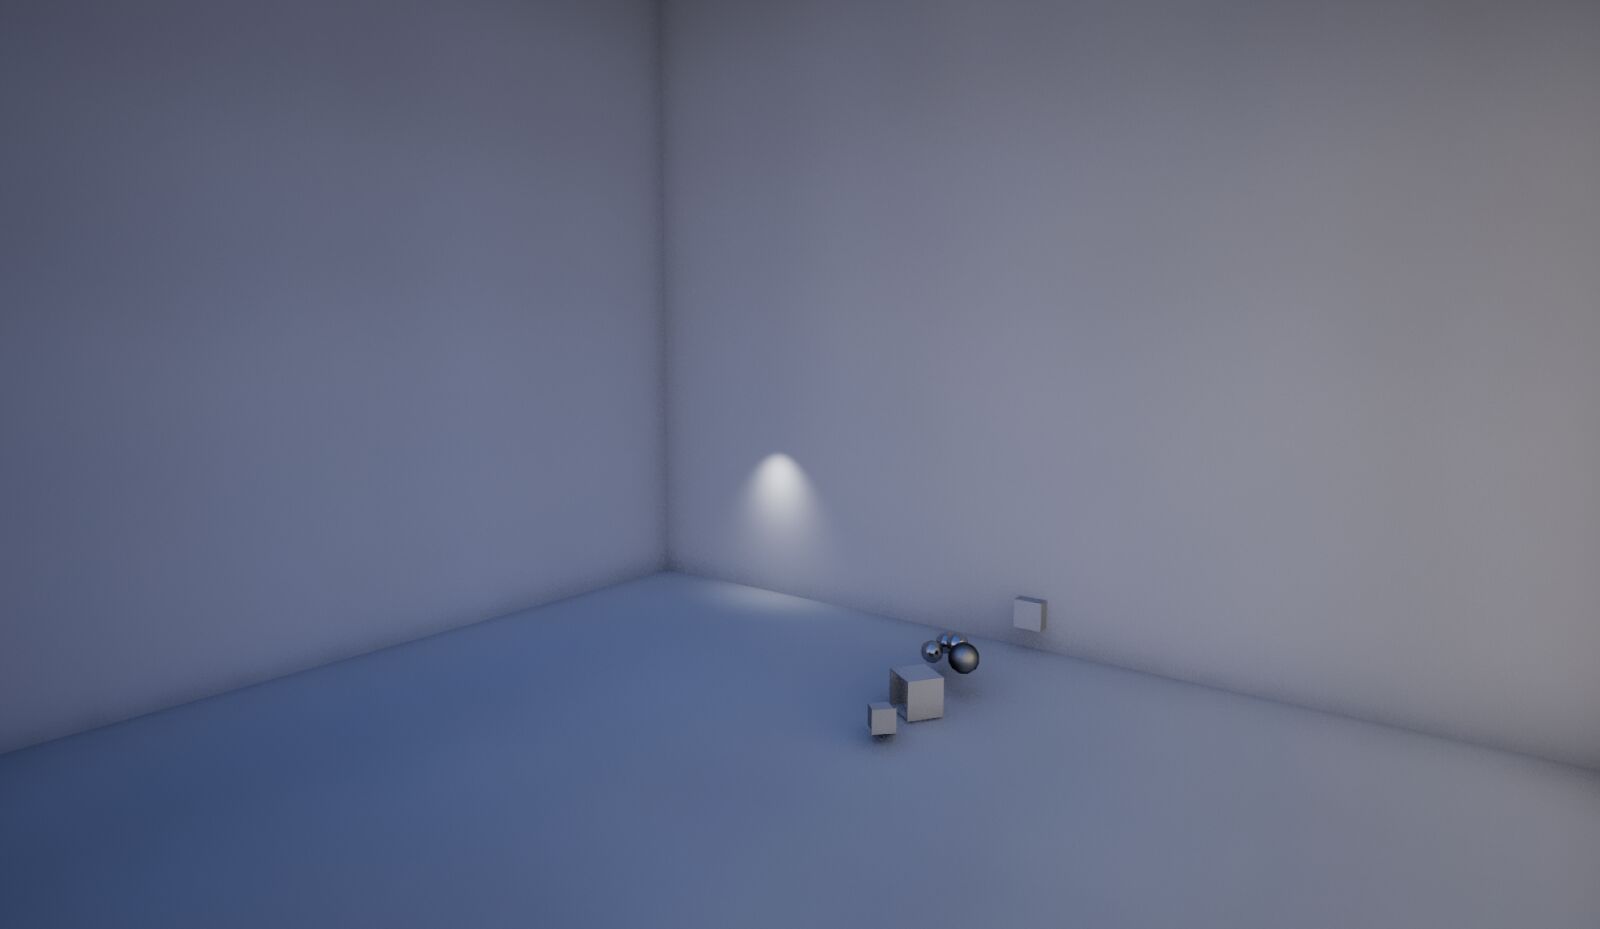
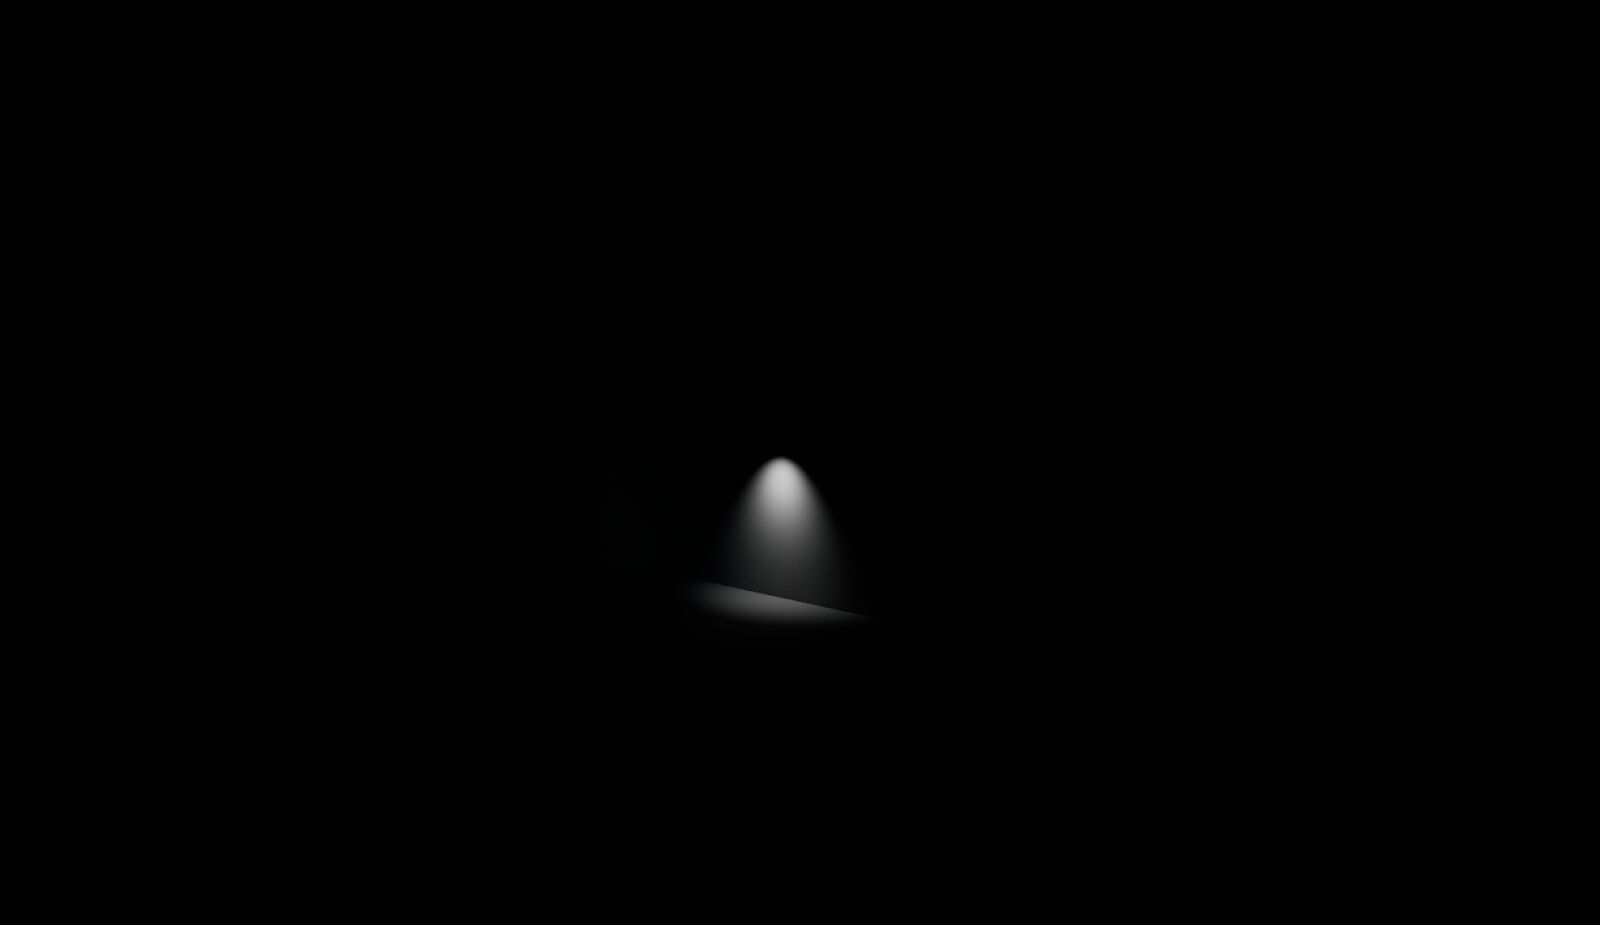
Notice how the specular highlights on the wall and stairs are lacking in the reflection in the example scene below.
Source: unrealengine.com
2. iRender - The best render farm for Unreal Engine
iRender is proud to be a professional GPU Accelerated Cloud Rendering Service provider for 3D Render, CGI, and VFX tasks with more than 30,000 clients. We are appreciated in many global rankings (e.g. CGDirector, Lumion Official, Radarrender, InspirationTuts CAD, All3DP, BlenderBaseCamp, VFX Rendering.)
We provide remote machine rental services, specifically, high-configuration dedicated servers (RTX 3090 and RTX 4090 physical machines/computers) for you to control via the Microsoft Remote Desktop application. You will set up your creative working environment on our servers to optimize and render projects whenever/wherever you want.
Our cloud rendering services for Unreal Engine
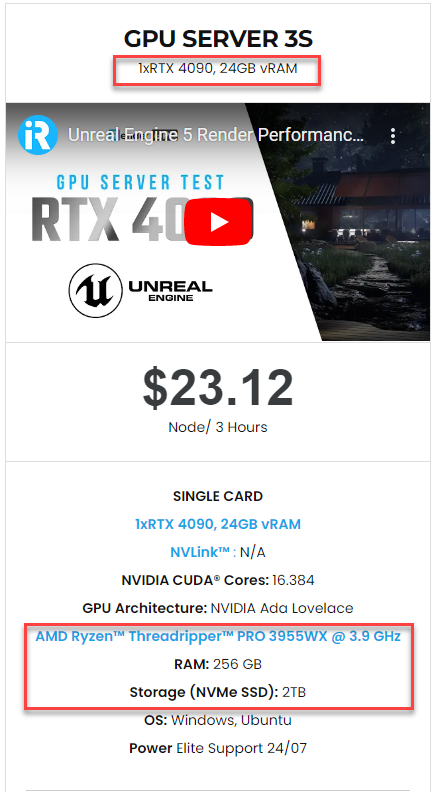
Unreal Engine utilizes the video card primarily to display the graphics on the screen. A faster video card will give you a higher FPS in the viewport or in a stand-alone game. At iRender, we have a single RTX 4090 server package that is the most suitable for Unreal Engine rendering. Its detailed configuration is as the following image.
-
-
-
- One GPU – NVIDIA GeForce RTX 4090 24GB: With 24GB of VRAM and terrific performance, RTX 4090 is one of the best GPUs to use for game development, Virtual Production, Architectural Visualization, and even VR content.
- One CPU – AMD Ryzen™ Threadripper™ PRO 3955WX 3.9 GHz: A strong 16-core processor for heavily threaded tasks.
- 256GB RAM: exceeds the amount of RAM needed for the Unreal Editor by itself. It allows you to do RAM-intensive tasks and work with other programs in addition to Unreal Engine at the same time.
- 2T storage SSD: A fast NVMe drive for the OS and applications and a large project drive.
-
-
For big projects having tight deadlines and needing faster rendering, you can use several servers simultaneously. iRender allows users to use multiple servers on one account. The installation is also simple: Just set up Unreal Engine on one server (machine) and clone it to many other machines.
Let’s check out Unreal Engine 5 rendering performance on our single RTX 4090 server:

Let’s get started!
Create an account now to try our RTX 4090 server for your Unreal Engine! For further information, please do not hesitate to reach us at [email protected] or mobile: +84 915 875 500.
iRender – Happy Rendering!
Reference source: unrealengine.com
Related Posts
The latest creative news from Unreal Engine Cloud rendering.