
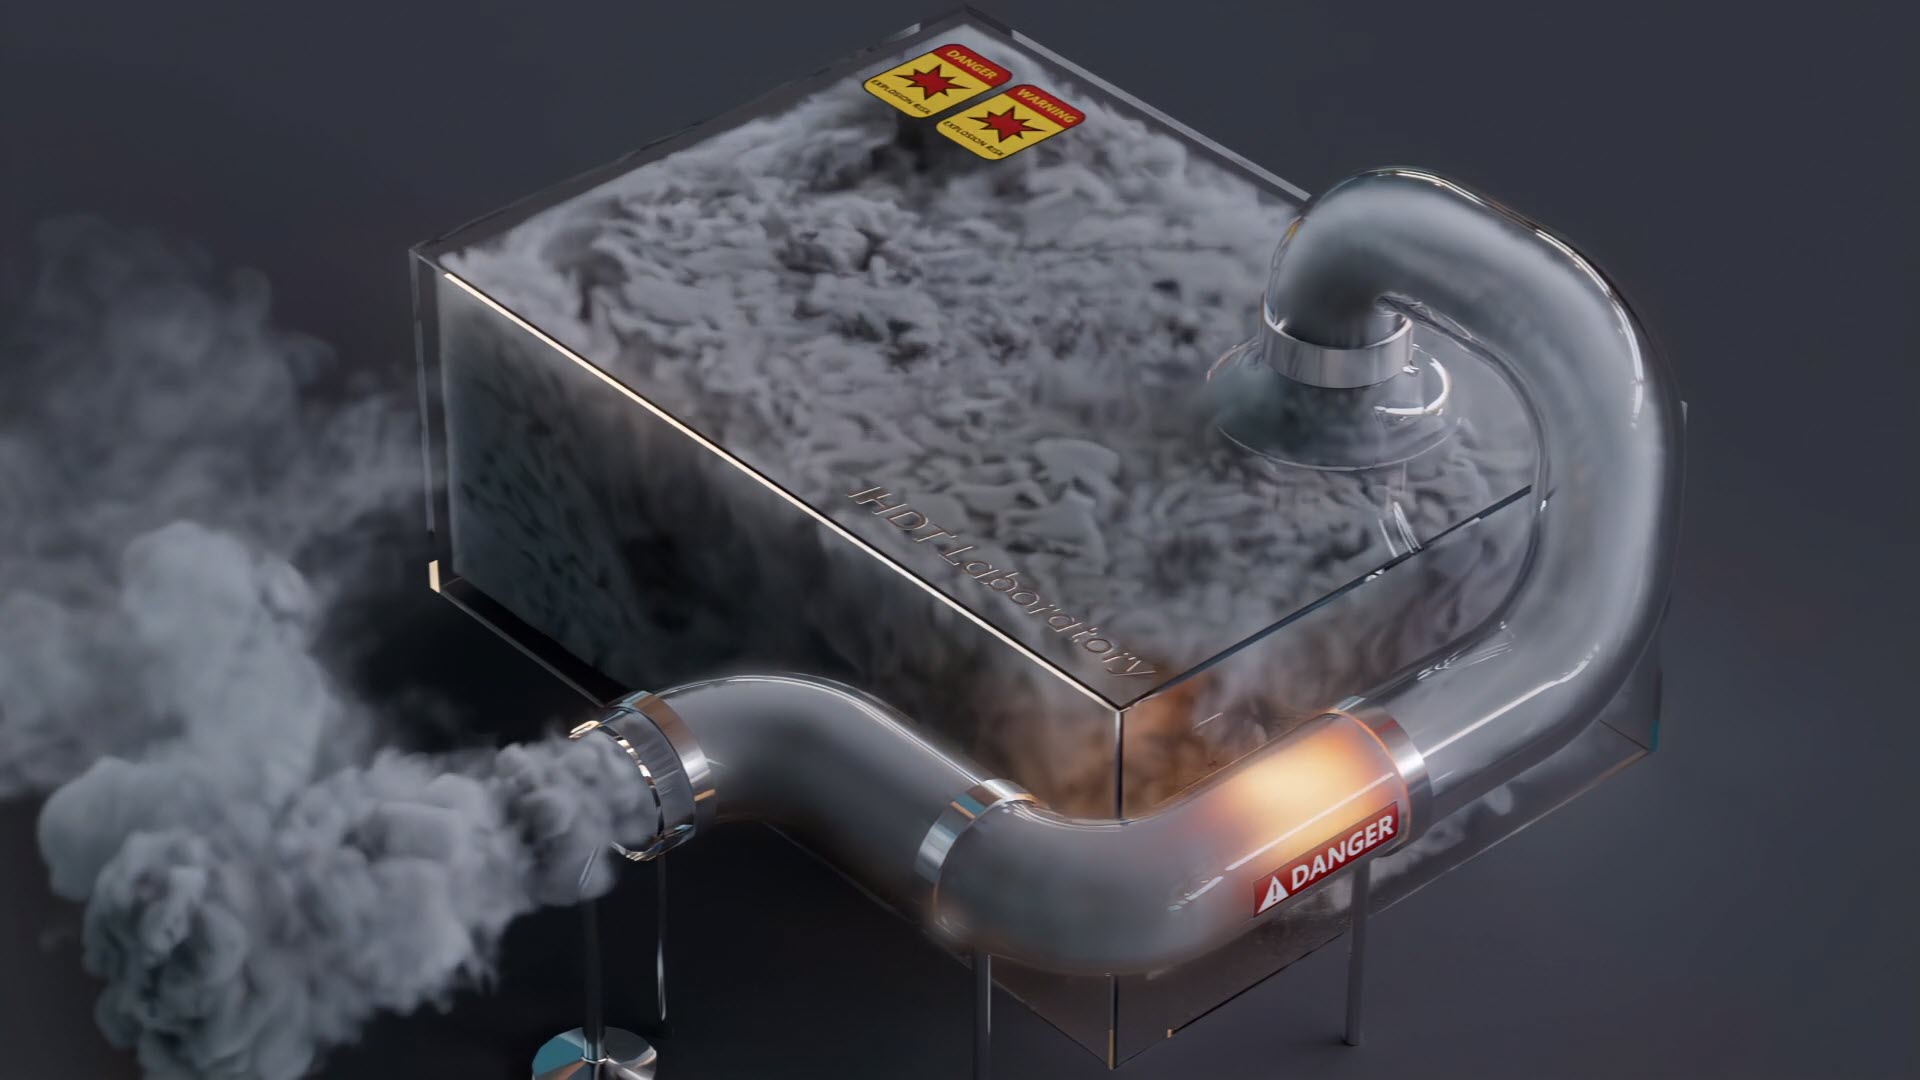
Using Pyro Simulation with Octane
Introduced in C4D 2023.1, Pyro is a new tool for creating realistic smoke and fire simulations. When using Octane in Cinema 4D, Pyro simulation can be rendered directly without caching. However, for Octane Standalone or Octane The Render Network, a Pyro VDB cache file is required to port the simulation data outside of C4D. Pyro allows the new C4D particle-based simulation system to generate smoke and fire simulations and you can finally unleash your inner pyromaniac -natively- inside of C4D. In this article, iRender will walk you through using Pyro Simulation with Octane in Cinema 4D.
What’s Pyro in Cinema 4D?
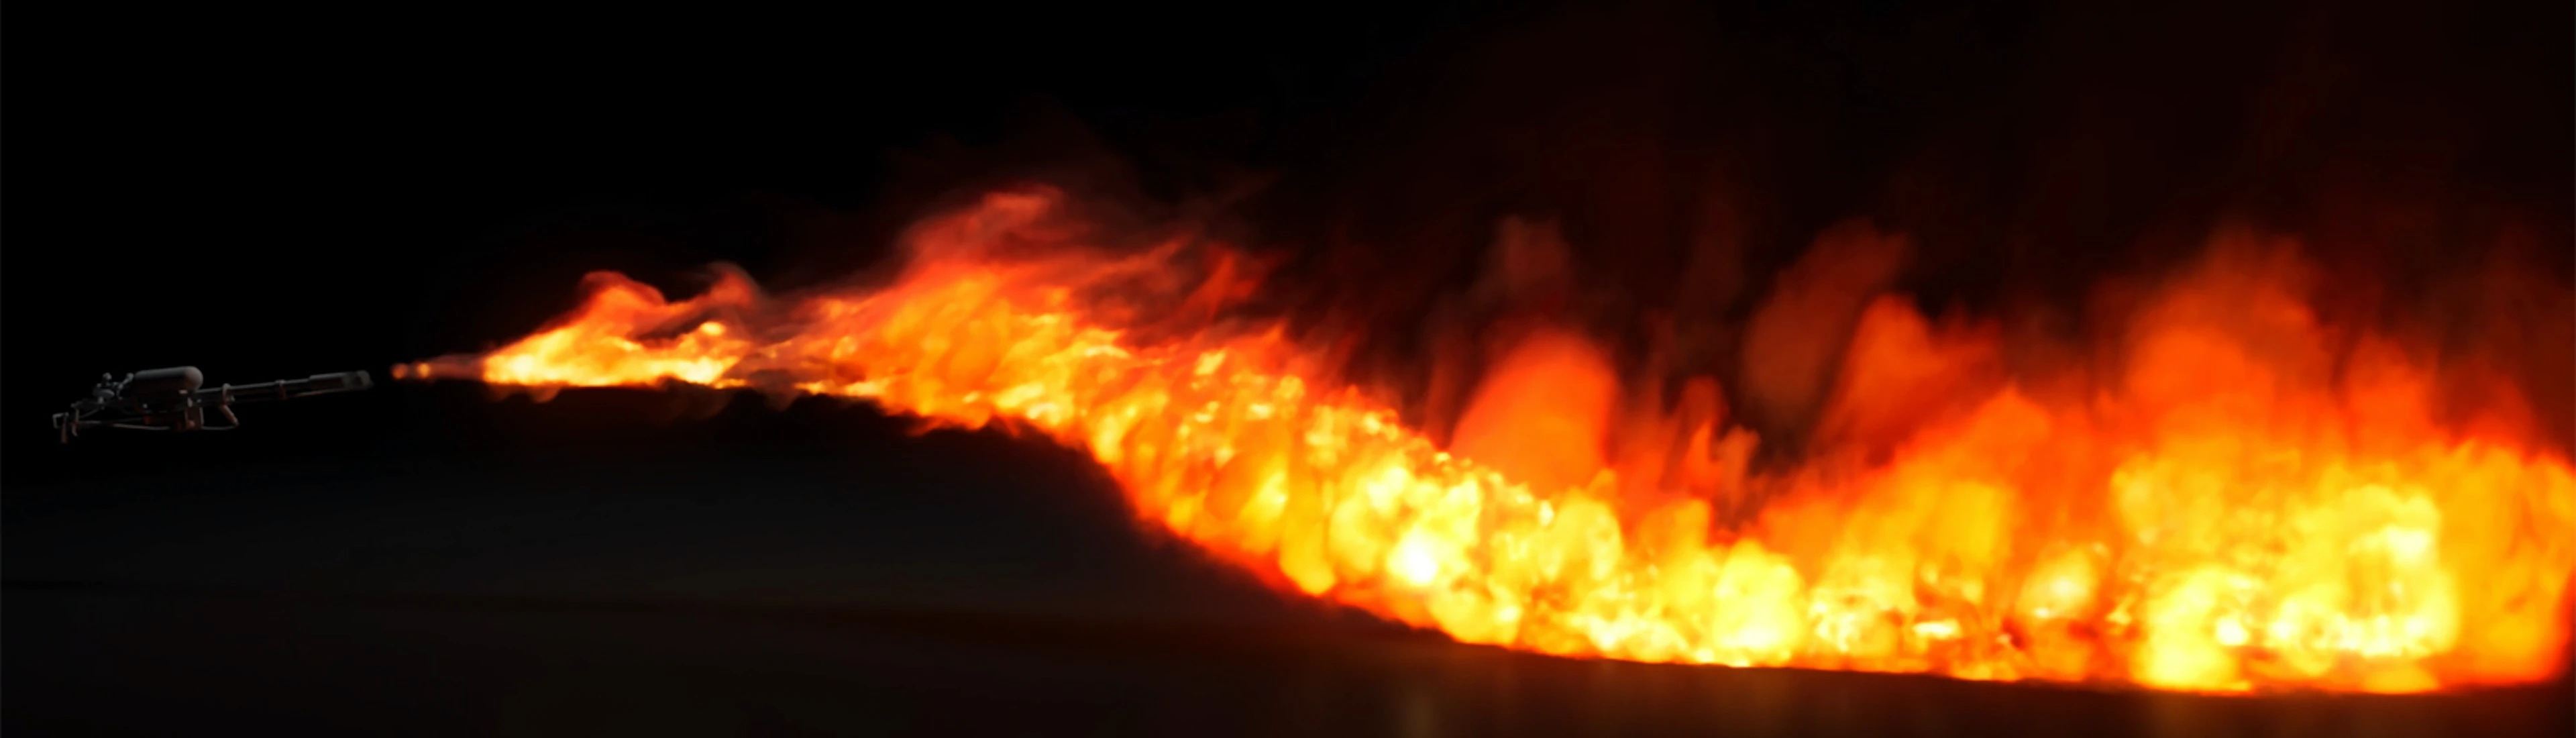
Pyro is a smoke and fire simulator for Cinema 4D. It was first released in C4D 2023.1. With Pyro, you can easily create fire, smoke and explosions (which are then simulated on the GPU or CPU) in Cinema 4D.
Source: maxon.net
The Pyro tags allow you to make any C4D object emit smoke and fire effects. You can control properties like smoke density, fire temperature, and more. The Pyro object determines which volumetric data (voxel grids) get exported for rendering and other effects in Cinema 4D. Additionally, it makes caching the simulation data in the volumetric database (VDB) easier. Pyro also lets you directly apply fire emissions to deforming meshes while creatively directing and controlling how the flames behave over time.
There is no problem if you need fuel. Adding fuel for your fire simulation is simple with Pyro Tags. Just attach tags to objects you want as fuel. The fire will light and grow and expand dynamically as it encounters tagged objects, igniting burning trails that serve as new fuel for the inferno to grow.
Source: maxon.net
Pyro integrates seamlessly with Cinema 4D’s Unified Simulation System. This allows you to set things like Cloth and Soft Bodies ablaze easily. By default, everything is combined into a single simulation. However, with the Simulation Scene object, effects and forces can be split into separate simulations if needed.
Adding Pyro tags to standard particle emitters, deforming particle geometries, and matrix cloners enables them to now emit fire and smoke. This allows you to create cinematic scenes with elements like fire, smoke trails, and explosions, or visualize beautiful fireworks displays.
With the help of UpRes, you can use a lower-resolution simulation for quicker test runs and concept development. Then, you can render the final simulation at full quality.
Source: maxon.net
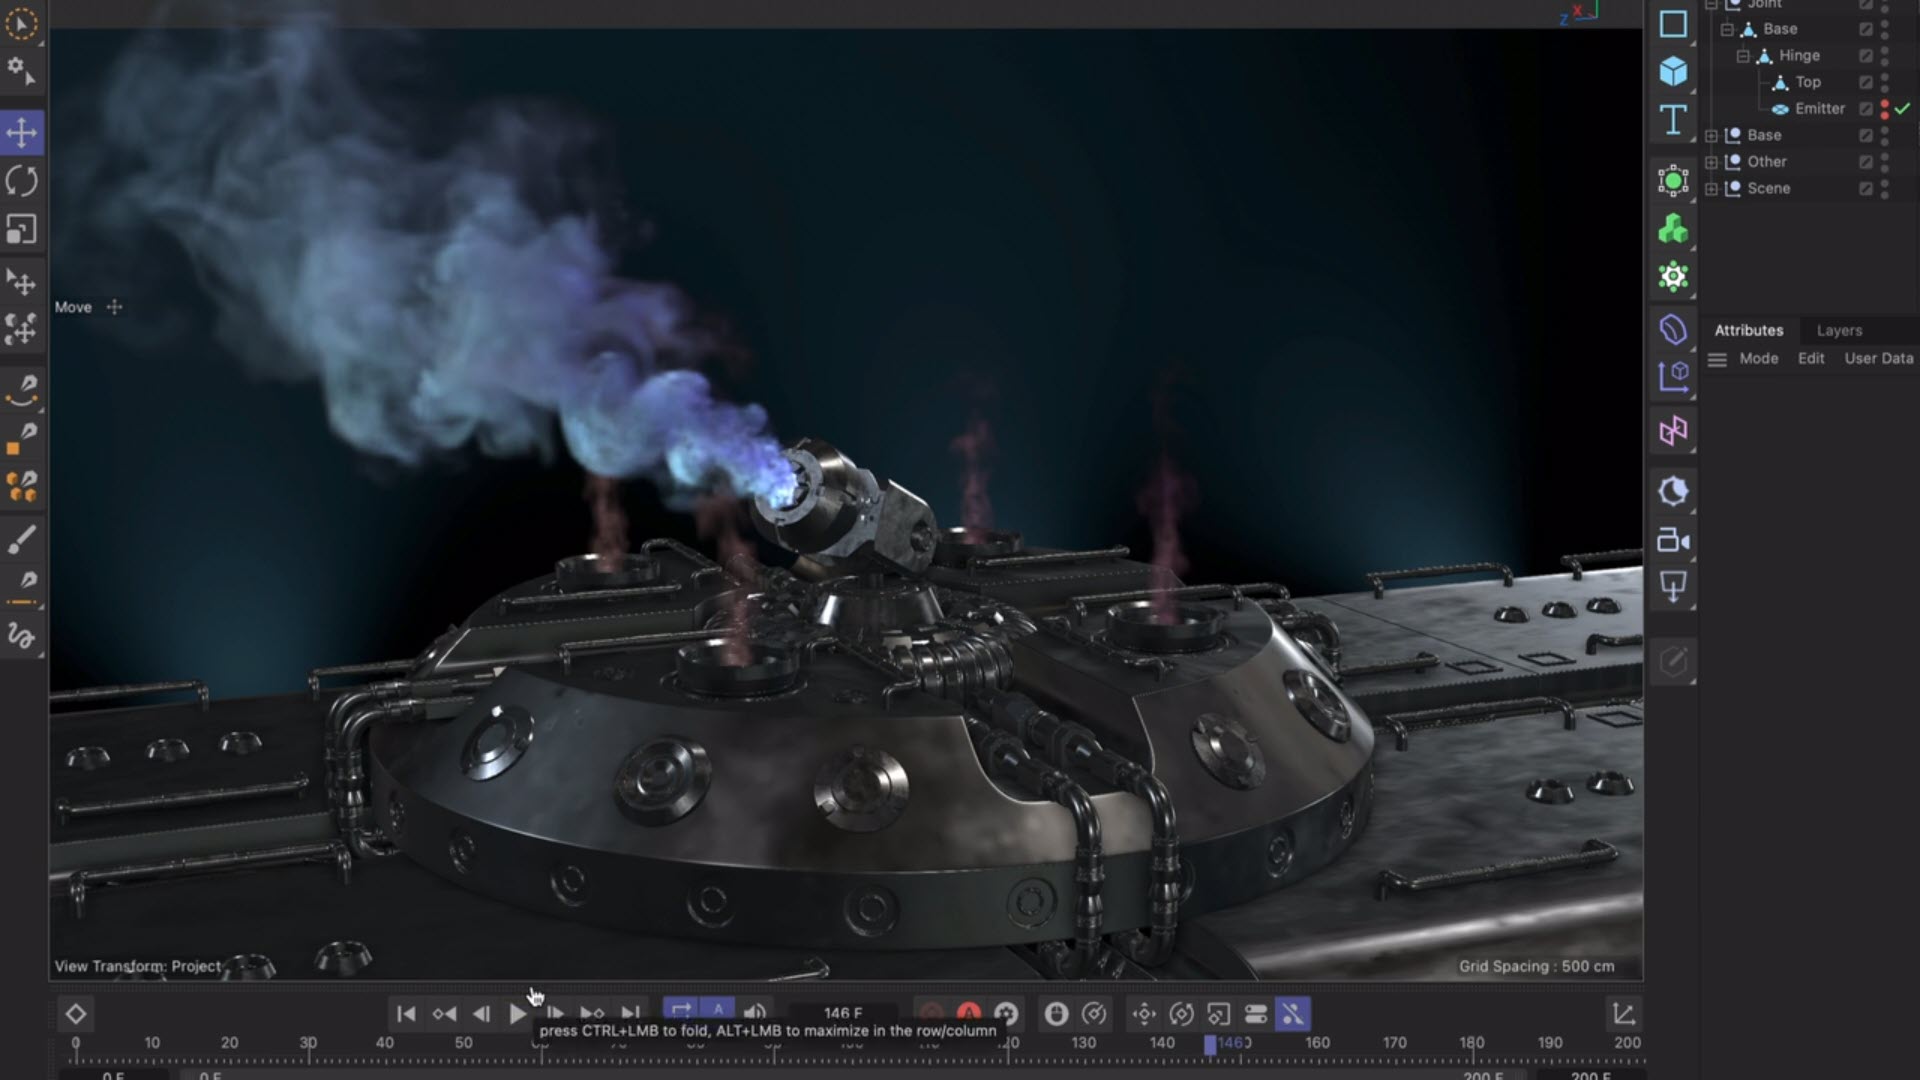
When developing pyro effects, being able to preview the simulation is very important for the artistic design process. With Pyro, you can get fantastic previews directly in the viewport of both Pyro and Fog simulations, showing smoke and fire based on density and temperature. Thanks to NanoVDB, previews extend beyond just Pyro objects to any Fog volume in Cinema 4D as well.
In Pyro emitters, the colors can be controlled using Vertex Colors. By default, simulations are unlimited in size but performance can be improved by using a destructor force to restrict the simulation to a bounded space.
Using Pyro Simulation with Octane

Source: otoy.com
The image above shows a Pyro simulation output rendered in Octane using the Standard Volume medium. The rest of the settings seen in the following illustrations pertain to this image. (The 3D model of the tall ship used in the simulation is from the Kitbash 3D Treasure Island set).
Add the Pyro simulation output object to the scene
Source: otoy.com
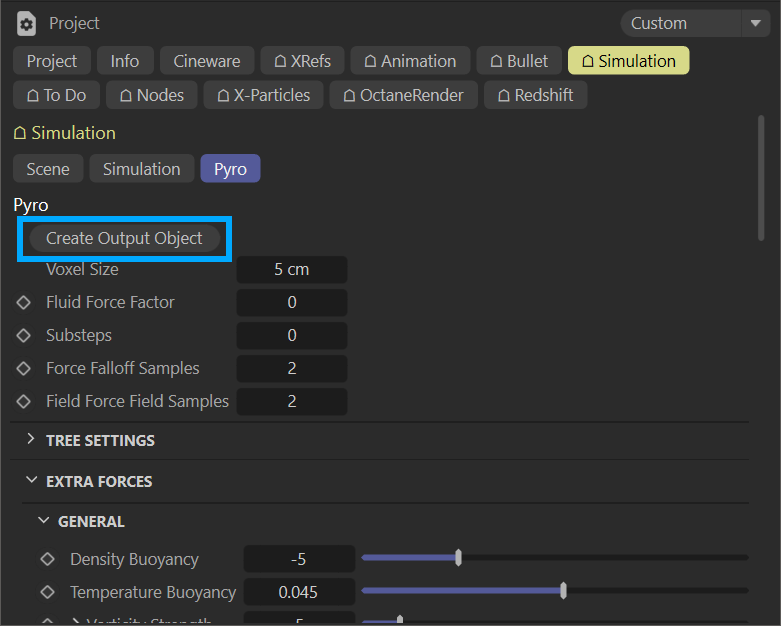
Go to the Project Settings >> open the Simulation tab >> and select the Pyro tab >> click the Create Output Object button.
This will add a Pyro Output (Default) object to the Cinema 4D Object Manager.
Set up the Pyro output object in the Object Manager

Source: otoy.com
In the Object Manager, select the Pyro Output (Default) object. Then, in the Tags menu, go to Tags >> Extensions >> C4DOctane Tags >> Octane Object Tag >> add an Octane Object tag to the Pyro Output object. The Octane Object tag contains the necessary shading information to correctly render the Pyro simulation results in Octane.
Set up the Emitter
For any object you want to act as an emitter in your Pyro simulation, you need to add a Pyro Emitter tag. Each Pyro simulation effect needs an emitter. Any 3D object in your Cinema 4D scene can be designated as the emitter.
In this example, a Sphere object sized 40cm is being used as the emitter.
Set up any Collider Objects
Any objects you want to interact with the Pyro simulation need Collider tags. These can be found under Tags >> Simulation Tags >> Collider. In this scene, Collider tags were applied to a non-rendering polygon object representing the cannon barrel. This object is a solid mesh with correctly aligned normals and no openings (“watertight”). It is aligned with the cannon barrel asset.
A Collider tag was also applied to a rendering Cannon Ball object so it could interact with the smoke plume from the cannon firing. In this render, the Cannon Ball is out of frame.
Set up the Octane Object Tag
As mentioned, the Octane Object tag applied to the Pyro Output (default) object allows rendering in Octane. Select this tag and navigate to the Particle Rendering tab as shown below:
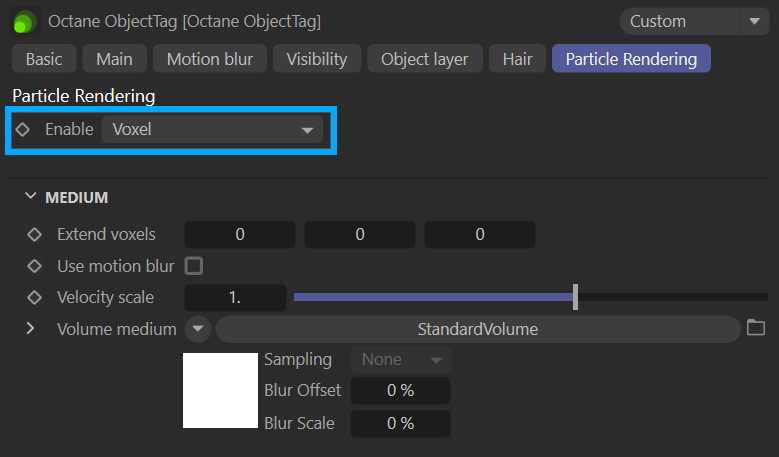
Source: otoy.com
In the Particle Rendering tab, set Voxel in the Enable menu. This will add a Standard Volume Medium to the Volume Medium slot. Now when adjusting the following settings, you can see the changes live in the Live Viewer.
Pyro Output (Default) object
Select the Pyro Output (Default) object, then go to the Object tab. In this Object tab, you can configure which data to include. There are three states you can choose:
-
-
- “On” – Enables the channel in the viewport and Live Viewer when working interactively.
- “On Export” – Includes the channel when exporting the Pyro object as a VDB file, exporting it as a grid.
- “Off” – Disables the channel from being shown in live or included in exported VDB files.
-
To speed up the simulation process while working, you can enable just the specific channel(s) you need visible, leaving the others for rendering.
These channels are available to the Standard Volume Medium, by name. You must manually enter each channel name into the corresponding field for the Standard Volume Medium to act on it. If a channel name is referenced by the Standard Volume Medium, but its data is not enabled via the “On” or “On Export” settings, Octane can ignore the Pyro volume.

Source: otoy.com
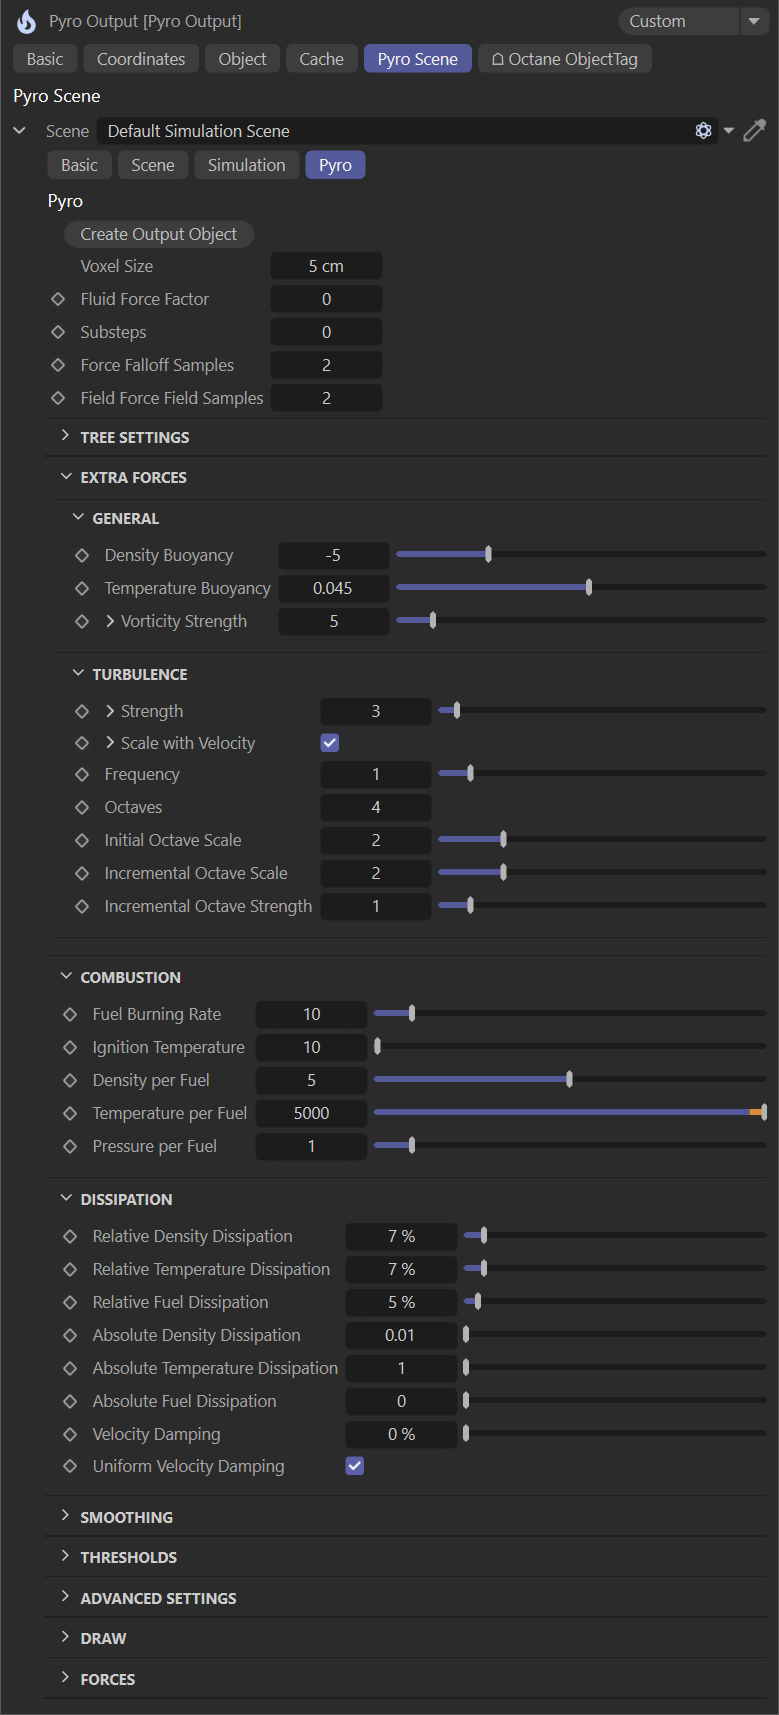
Pyro Output (Default) Pyro Scene - Pyro Tab
The Pyro tab (in the Pyro Output > Scene panel) contains simulation settings that allow you to configure how the Pyro simulation behaves. Take note – the Voxel Size value impacts collision tests in the Collider tag. You may need to decrease this value if your simulation appears to get “stuck” during collision tests.
Source: otoy.com
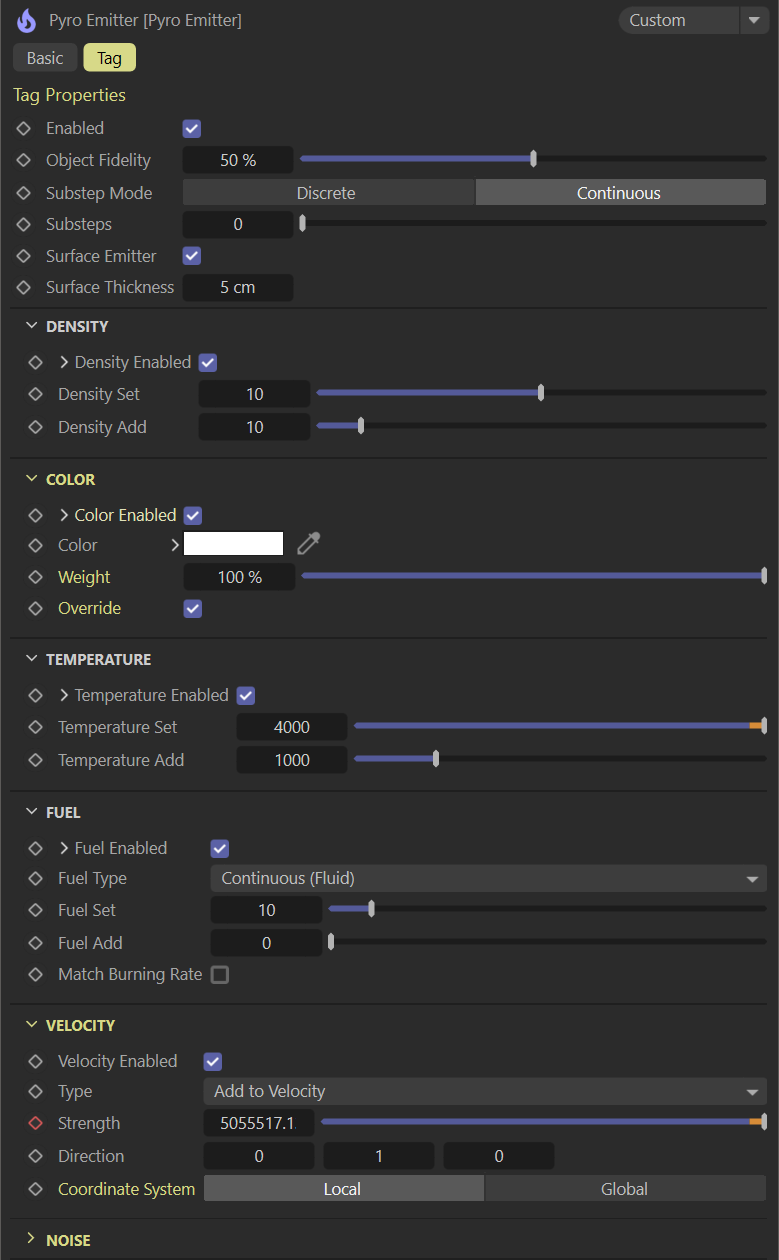
Pyro Emitter/Pyro Fuel tag
The Pyro Emitter or Pyro Fuel tag must be applied to any object that emits particles into the Pyro simulation. It is important to note that each data channel also needs to be explicitly enabled in the tag’s settings for that channel to be accessible to the Standard Volume Medium for rendering purposes. In this example, we are examining the settings of the Pyro Emitter tag specifically.
Source: otoy.com
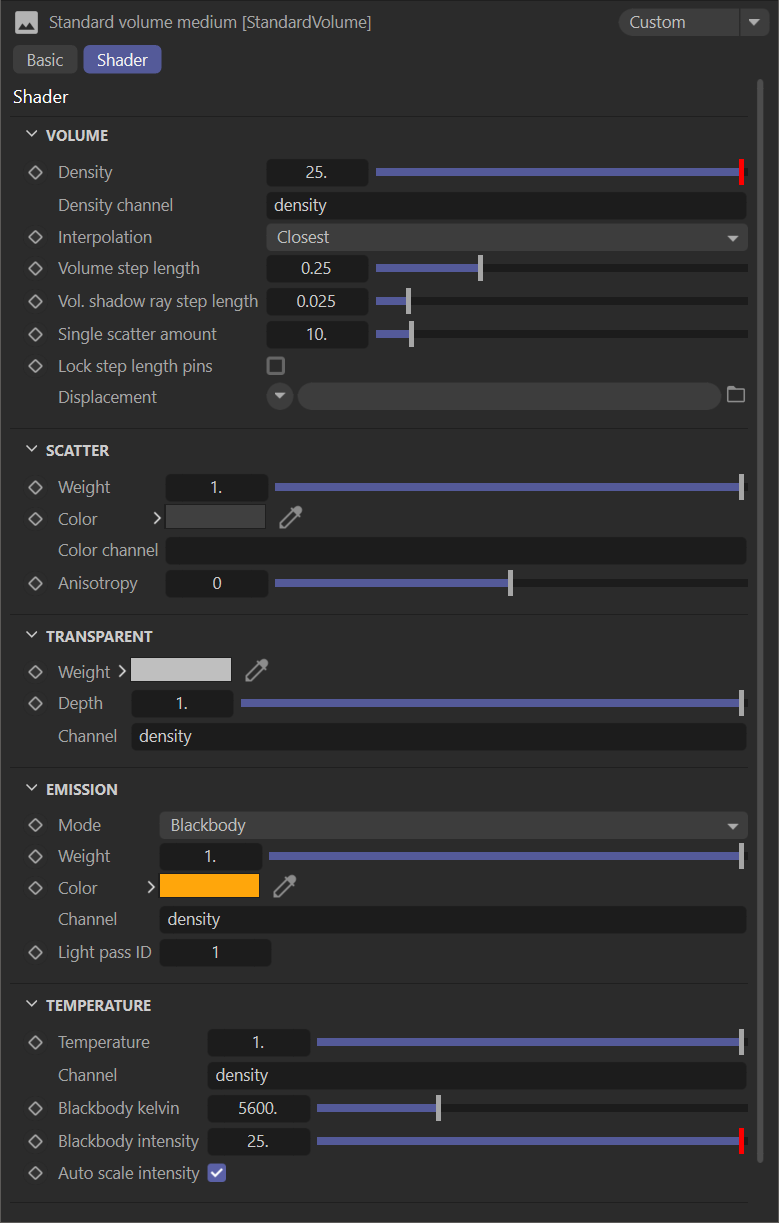
Pyro Standard Volume Settings
The Standard Volume Medium settings control the final look of the Pyro simulation results. Not every channel needs to be specified to achieve a visible effect. In the earlier ship image, the Color Channel for Scatter was intentionally left empty while the color swatch was used instead to tweak the colorization (the density values alone did not match the desired appearance). Experiment with different channel combinations across the attributes to find the ideal overall style.
Also, note that enabling Auto Scale Intensity can produce unpredictable results; it works best when keeping the Black Body Intensity value low to avoid an overdriven appearance. The illustration used this setting as shown in this image.
Source: otoy.com
Some Limitations
-
- The Velocity Scale attribute (in the Pyro Output object’s Octane Object tag) may need to be adjusted to 0.1 if the motion blur from Pyro looks unusual.
- For the most reliable and realistic results, the scene needs to use proper real-world units.
- Large simulation values can cause the GPU to exceed its VRAM or produce inconsistent results, as Cinema 4D will warn about. Real-world units work best here. It also may help to minimize other scene assets.
![]() iRender provides powerful render machines supporting all Octane (and its plugins) versions. Our GPU render farm houses the most robust machines from 1 to 8 RTX 4090/RTX 3090, AMD Threadripper Pro CPUs, 256GB RAM and 2TB SSD storage to boost rendering Octane projects of any scale. Check out our Octane GPU Cloud Rendering service to have more references and find the best plan for your Octane projects.
iRender provides powerful render machines supporting all Octane (and its plugins) versions. Our GPU render farm houses the most robust machines from 1 to 8 RTX 4090/RTX 3090, AMD Threadripper Pro CPUs, 256GB RAM and 2TB SSD storage to boost rendering Octane projects of any scale. Check out our Octane GPU Cloud Rendering service to have more references and find the best plan for your Octane projects.
Reference source: maxon.net, otoy.com
Related Posts
The latest creative news from Octane Cloud Rendering.


