Animating Blender Models With Mixamo
In Blender, animations with Blender’s Non-Linear Animation editing system not only allow us to blend clips but also edit them according to the transformation of each bone. This creates unique individual features when working with animations. Mixamo, Adobe’s web-based tool, offers a large collection of pre-made animations that can be easily applied to 3D objects. This seamless integration of Mixamo and Blender allows users to easily create interesting and dynamic animations while saving important time in the animation creation process.
In this article today, let’s go with iRender to animate Blender models with Mixamo.
About Mixamo
Create Rigged And Animated 3D Character with Mixamo (Image Source: MK Graphics)
Mixamo is a 3D animation software that can create 3D characters for movies and video games. Mixamo offers many high-quality 3D characters and hundreds of character animations. Mixamo ensures that characters are ready-to-use by automatically implementing human skeletons. Characters and animations can be exported in various formats, including Unity, Unreal Engine, and Blender.
The online library, which is currently free to anyone who signs up for an Adobe account, does not require a Creative Cloud subscription and features over 2,500 motion-capture-based clips, such as poses, motion cycles, combat movements, and idle animations. Mixamo data is commonly utilized in motion graphics and, increasingly, augmented reality, with Adobe including a button on the Mixamo website that sends animations directly to Aero, their own AR authoring app.
How to install Mixamo on iRender’s server?
To install Mixamo in Blender, you can follow these steps:
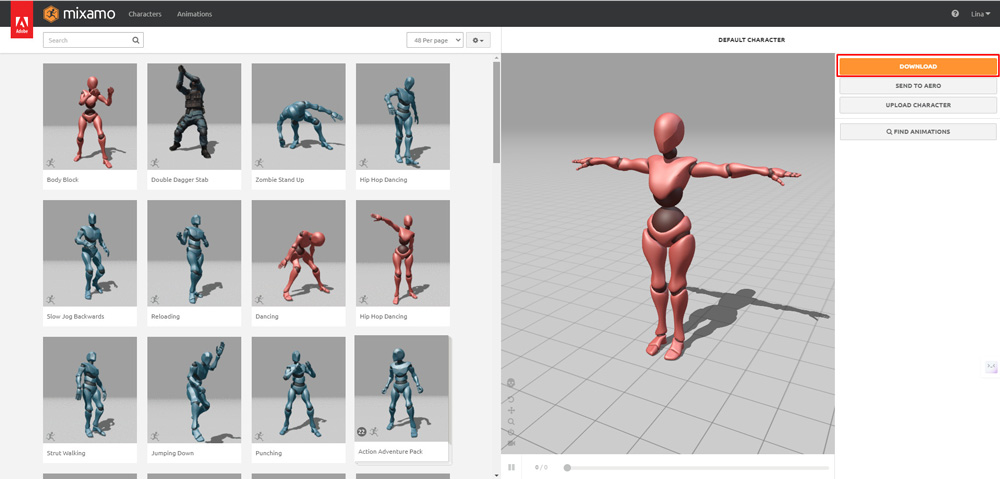
- First, go to the Mixamo website (mixamo.com) and sign in to your Adobe account. If you don’t have an Adobe account, you will need to create one.
Once you are logged in, you can browse through the available animations and characters to find the ones you want to use in Blender.
After downloading your desired Mixamo character and animation in FBX format, you can easily import them into Blender. The add-on simplifies the process, allowing you to bring in rigs and animations effortlessly.
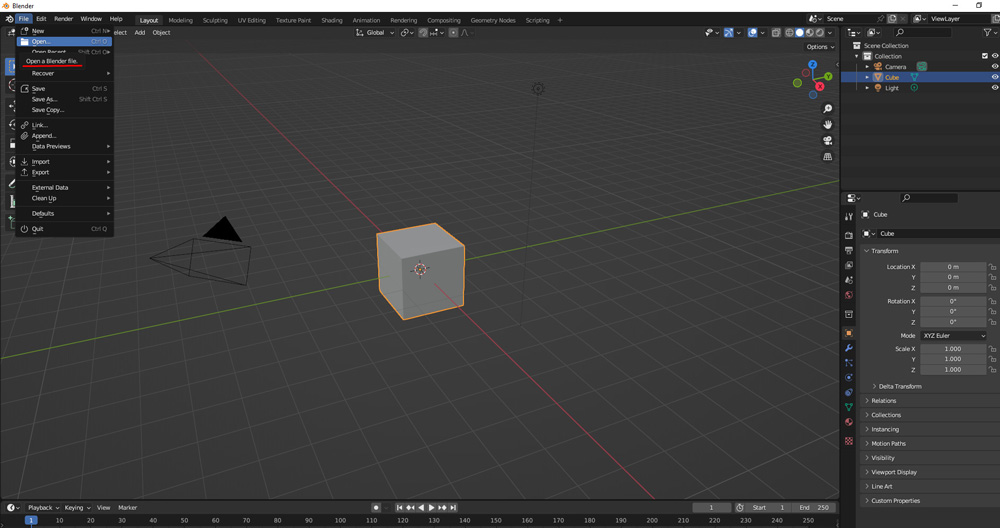
Open Blender and go to the “File” menu, then select “Import” and then “FBX.”
- Importing the Model: Use the “File > Import > FBX” option in Blender to import the downloaded FBX file containing the Mixamo character.
- Creating a Control Rig: Set up a control rig for the character by assigning a source skeleton and generating a control rig to manipulate the model efficiently.
- Applying Animations: Easily apply Mixamo animations to the control rig by importing the animation files and linking them to the character.
Remember to ensure that you have the necessary licenses and permissions for any assets you download from Mixamo for use in your projects.
Use the NLA Editor to blend Mixamo animations in Blender
Once the animations are imported, switch to the “Animation” workspace in Blender. Select your imported rig/armature and navigate to the NLA Editor by clicking on the Editor Type menu in the top-left corner of the timeline window and choosing “Nonlinear Animation.”
Image Source: MK Graphics
In the NLA Editor, you can locate and arrange the Mixamo animations on separate tracks, each representing a different animation clip. To blend the animations, you can overlap the end of one animation clip with the beginning of another on the same track. This will create a smooth transition from one animation to the next.
You can also use the blending and transition features within the NLA Editor to adjust the influence and timing of each animation clip, allowing for seamless blending between different actions. Additionally, you can create new actions in the Action Editor and add them to the NLA Editor for further blending and editing.
Conclusion
Finally, integrating Mixamo assets into Blender via the Adobe-developed add-on opens up a world of creative possibilities for 3D artists and animators. By importing characters and animations efficiently, you can boost project quality and streamline your workflow.
iRender - The Best Cloud Rendering For Animating Models in Blender
Our iRender GPU Render Farm offers from 1/2/4/6/8 RTX 4090s and 8 RTX 3090 servers. All servers at iRender are also equipped with AMD Ryzen™ Threadripper™ PRO 3955WX @ 3.9 – 4.2GHz or AMD Ryzen™ Threadripper™ PRO 5975WX @ 3.6 – 4.5GHz, 256GB RAM, 2TB Storage NVMe SSD. The high-end configuration is extremely suitable for complex Blender projects. Right now, we have pre-installed Blender 4.1 option.
We just released our GPU Server 9S, with 8x RTX 4090s, powered with AMD Ryzen™ Threadripper™ PRO 5975WX @ 3.6 – 4.5GHz, let’s see how our RTX4090 performs when rendering with Blender scenes:
Besides, we also have flexible prices for all small to big projects. You can check out this video to estimate the cost with us:
Enjoy our new beast and boost your multiple GPUs rendering now! If you have any comments about our article, please do not hesitate to reach us at [email protected] or Whatsapp: +(84) 916017116.
iRender – Happy Rendering!
Related Posts
The latest creative news from Blender Cloud rendering.


