Basic fundamentals of Control Rig in Unreal Engine
Unreal Engine is the world’s most open and advanced real-time 3D creation tool for photorealistic images and immersive experiences. In the article today, we will have a look at overview of Control Rig and find out how to create and animate rigs in Unreal Engine.
1. What is a Control Rig?
Character animation within Unreal Engine is made possible via Control Rig.
You can design unique controllers, channels, and other manipulators for your characters with the Control Rig Editor. Following the creation of a rig, you can animate these controls in other Unreal Engine modules, including Sequencer.
Control Rig Assets must be developed for Control Rigs, and these assets are done so and saved in the Content Browser.
2. How to create and open a Control Rig
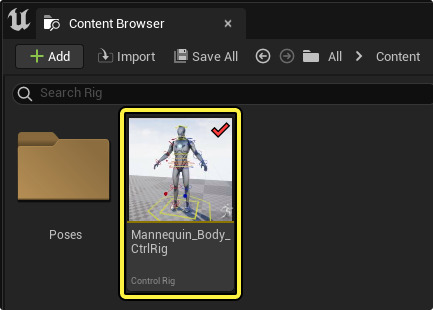
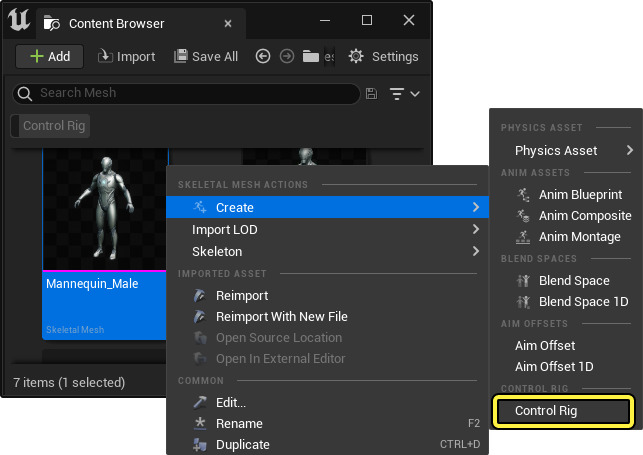
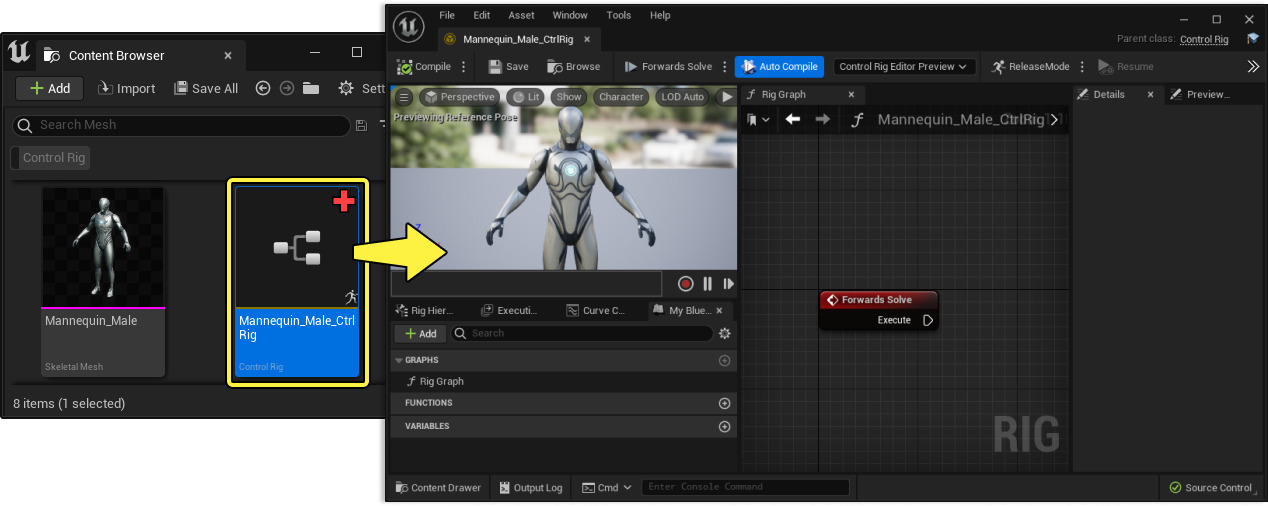
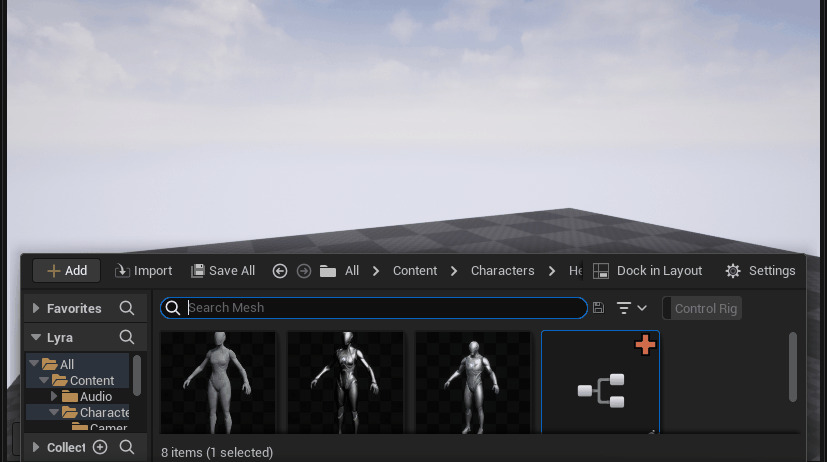
Right-clicking a Skeletal Mesh in the Content Browser and choosing Create => Control Rig are the primary methods for producing new Control Rig assets. By doing this, a Control Rig asset with the postfix “_CtrlRig” is created in the same directory.
The Control Rig Editor will then open after you double-click the Control Rig item.
3. How to rig and animate with Control Rig
An FK Control is one of the most basic control kinds you can make. This tutorial explains how to design and animate this control in Sequencer.
Create Control
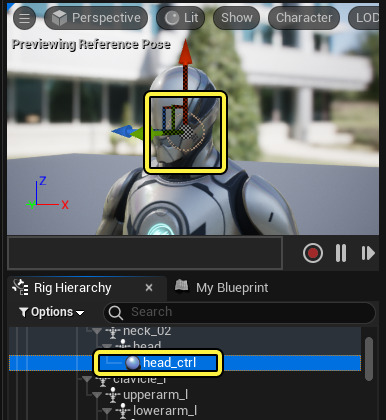
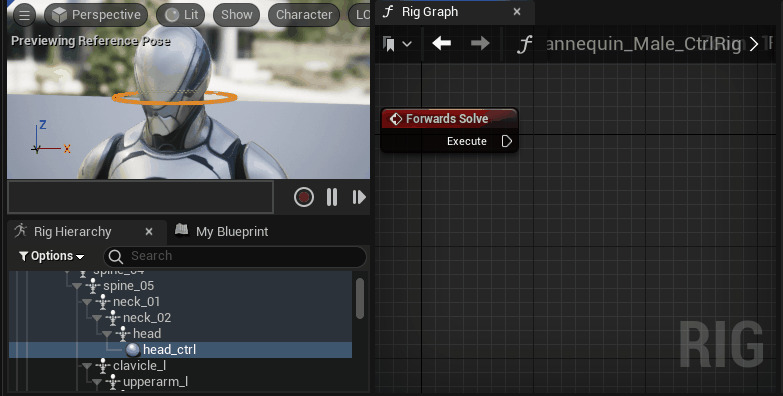
To view the skeleton structure for your character, choose the Rig Hierarchy tab in the Control Rig Editor. To animate a bone, locate it, right-click it, and choose New => New Control.
By doing this, a control is established at the same bone location and orientation. The postfix “_ctrl” is added to the control’s name, which is the same as the bone’s.
Edit Control Shape
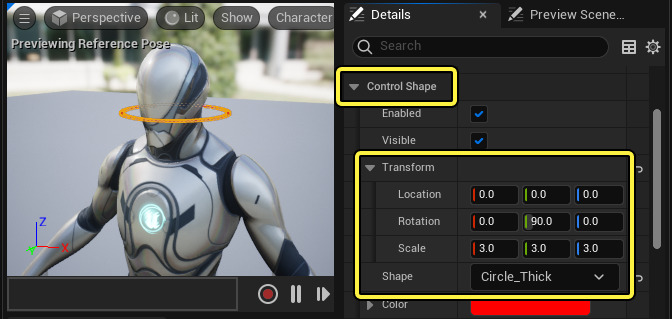
You can alter the Control Shape to make it easier to see and choose the control in the viewport. To achieve this, find the Control Shape property category in the Details panel by navigating there. Here, you may establish a new shape using the Shape property and then use the Transform attributes to change its scale and offset.
In this case, all Scale axes are set to 3.0, Rotation Y is set to 90, and the shape is set to Circle Thick.
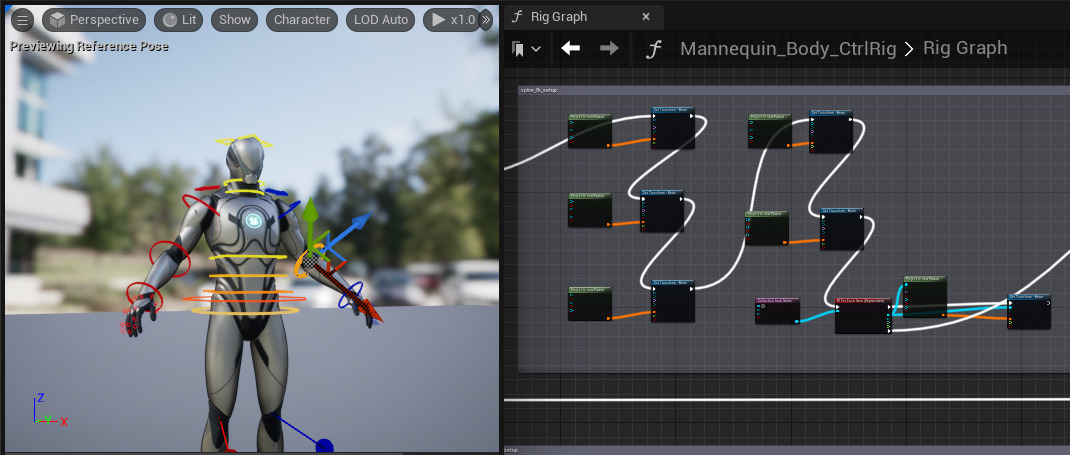
Drive Bone with Control
Refer to your control and bone in the rig graph after that. Drag the appropriate control into the graph using the Rig Hierarchy panel, and then choose Get Control.
Refer to your control and bone in the rig graph after that. Drag the appropriate control into the graph using the Rig Hierarchy panel, and then choose Get Control.
For the bone you want this control to influence, repeat the process. Select Set Bone after dragging the bone from the Rig Hierarchy panel into the graph.
Link the Execute output pin from the Forwards Solve node to the input execution pin of the Set Transform – Bone node, and then connect the Transform output data pin from the Get Transform – Control node to the Transform input data pin of the Set Transform – Bone node.
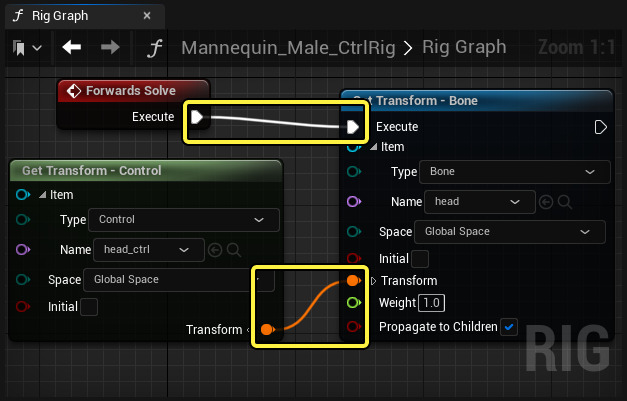
Now that the control is manipulable in the viewport, you can see how it drives the bone.
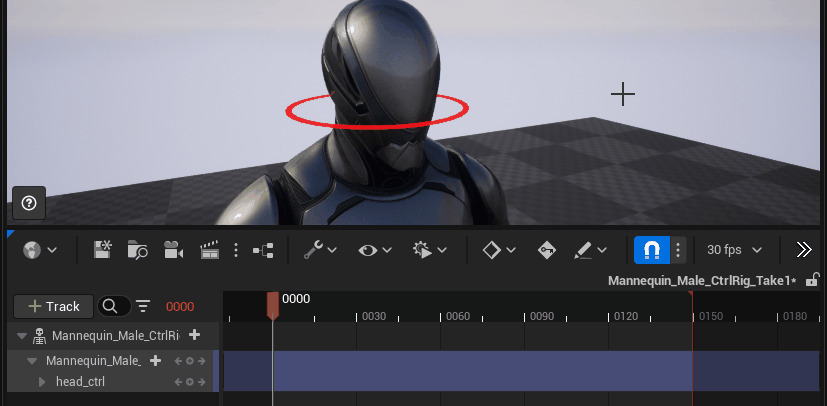
Animate Control in Sequencer
You can now begin animating a character in Sequencer once your control is successfully manipulating its bones.
Drag the Control Rig Asset into the Level viewport from the Content Browser. Following this, Sequencer will launch with the character inserted as a Track.
To find the controls you built, expand the Control Rig track. Either this area or the viewport can be used to pick them.
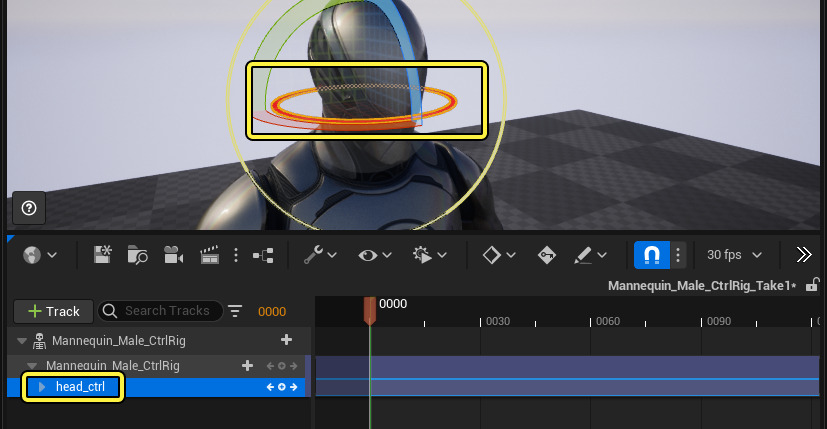
Press the S key to create a transform Keyframe for the selected control at the Playhead while the control is selected in the Viewport. After that, move your control and move the Playhead to a different spot in the sequence. Finally, hit S once more to set a second Keyframe.
Why should you choose iRender cloud rendering service for Unreal Engine?
We bring the power of Cloud GPU Computing directly to your desk
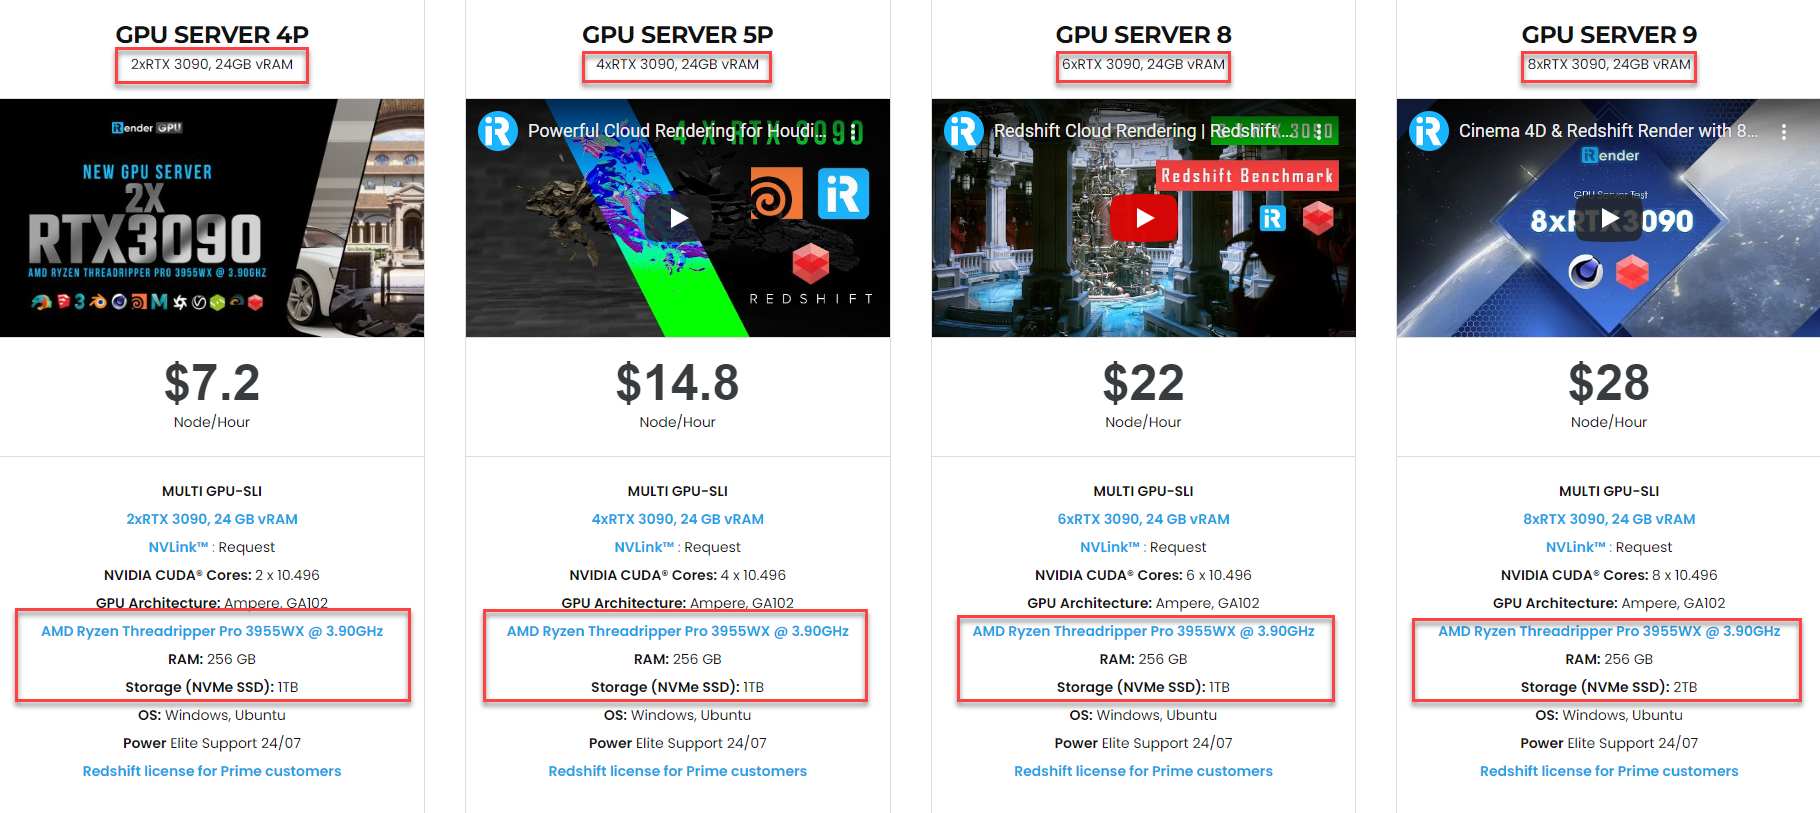
iRender Render Farm is a Powerful GPU-Acceleration Cloud Rendering for almost softwares including Unreal Engine. We offer a choice of server packages ranging from single GPU to 8 GPU RTX 3090, allowing you to pick the best server package for your demand. Other than that, server 4P with NVlink can be helpful when your Unreal Engine project is big and requires more Vram.
You can install any software and use our servers as your own computers
Once connecting to your iRender computer via Windows Remote Desktop, you will have full control over the machine as if you were owning a powerful computer rig of your own. You can install any software and plugins you want just once, and all will be saved for future use. In addition, iRender also provides you with a lot of useful features such as NV Links so that you can take full advantage of our service for your work.
Our customer support and technical team is available 24/7
In case you have any problems or questions, don’t hesitate to contact the 24/7 support team. We will be happy to help you with your questions and problems at all times.
iRender, in particular, is running a fantastic deal for you: new clients will receive a 20% bonus on their first purchase within 24 hours of enrolling.
Besides, we are committed to providing you with a rendering experience unlike any other. iRender has appreciated in many global rankings (e.g: CGDirector, Lumion Official, Radarrender, InspirationTuts CAD, All3DP, VFXRendering). To learn and enjoy more, please create an account here.
iRender – Happy Rendering!
Source: docs.unrealengine.com
Related Posts
The latest creative news from Unreal Engine Cloud Rendering, V-Ray Cloud Rendering , Octane Cloud rendering, Houdini Cloud rendering, 3D VFX Plugins & Cloud Rendering.