Capture High-Quality Screenshots in Unreal Engine 5
High-quality screenshots in Unreal Engine 5 are essential when presenting your work to clients, building a standout portfolio, or promoting your game or design project. A well-composed screenshot not only documents your progress but also communicates your artistic vision and skill. Fortunately, UE5 offers various tools and features that allow you to capture clean, professional screenshots directly from your scenes. In this article, we’ll show you how to take screenshots in Unreal Engine 5 and explore practical tips to help you improve the quality of your screenshots.
Image source: developer.nvidia.com
How to Capture Screenshots in Unreal Engine 5?
Unreal Engine 5 offers many ways to take screenshots, from simple one-click shortcuts to advanced high-resolution options. Here are the most common methods:
Simple Way
For a simple screenshot at default resolution, just hit the F9 key on your keyboard. UE will save the image, which you can then access by clicking the prompt at the bottom of the screen. This will open the folder containing your screenshot.
Using High-Resolution Screenshots
The high-resolution screenshot console command is a great cross-platform tool for taking very high-resolution screenshots. It can take screenshots at any size thanks to its ability to increase the Size Multiplier of the image. That way, we can take screenshots at a much higher resolution than your screen resolution.
- Select the ‘High Resolution Screenshot’ option
- Click ‘Capture’ to save the screenshot to your computer.
High-resolution screenshots are essential for creating promotional materials such as banners, posters, or website images where image quality is important. Using this feature ensures that the screenshot remains sharp and clear even when zoomed in or displayed on a large screen.
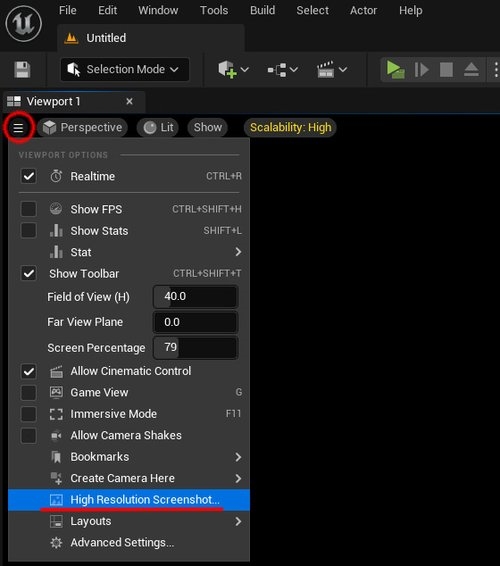
Image source: realbiomes.com
Capture Screenshots via Blueprints
If you want to capture a specific moment during gameplay, you can automate the process using Blueprints:
- Add an ‘Execute Console Command’ node to your Blueprint.
- Use the command ‘HighResShot’ along with your target resolution
- Customize the command with additional options to suit your preferences.
Note: By default, screenshots taken in Unreal Engine are saved in the ‘Saved’ folder in your project folder. You can access this folder by clicking the prompt that appears at the bottom of the screen after taking a screenshot.
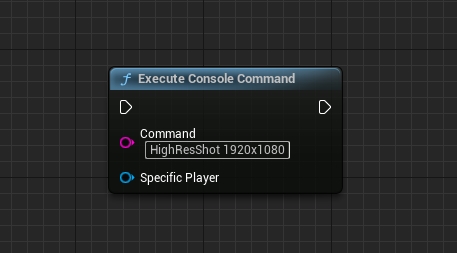
Image source: unreal-university.blog
Tips to Take High-Quality Screenshots in Unreal Engine 5
Taking screenshots in Unreal Engine is pretty simple, but there are a few important factors to keep in mind if you want the sharpest, highest quality capture possible.
Turn Off Anti-Aliasing (AA)
When capturing still images, the goal is to get a clean, unedited frame that looks exactly as it appears in the engine. To achieve this, turn off Anti-Aliasing to ensure that no filters are messing with our pixels. While AA helps smooth out jagged edges in gameplay, it can also blur fine details in screenshots. This is especially important when using Nanite, which generates assets on a per-pixel basis. Additionally, some anti-aliasing methods like TSR (Temporal Super Resolution) can interfere with the rendering of Nanite assets. So, turning off AA ensures that every pixel is rendered sharp and accurate, preserving the true details of your scene.
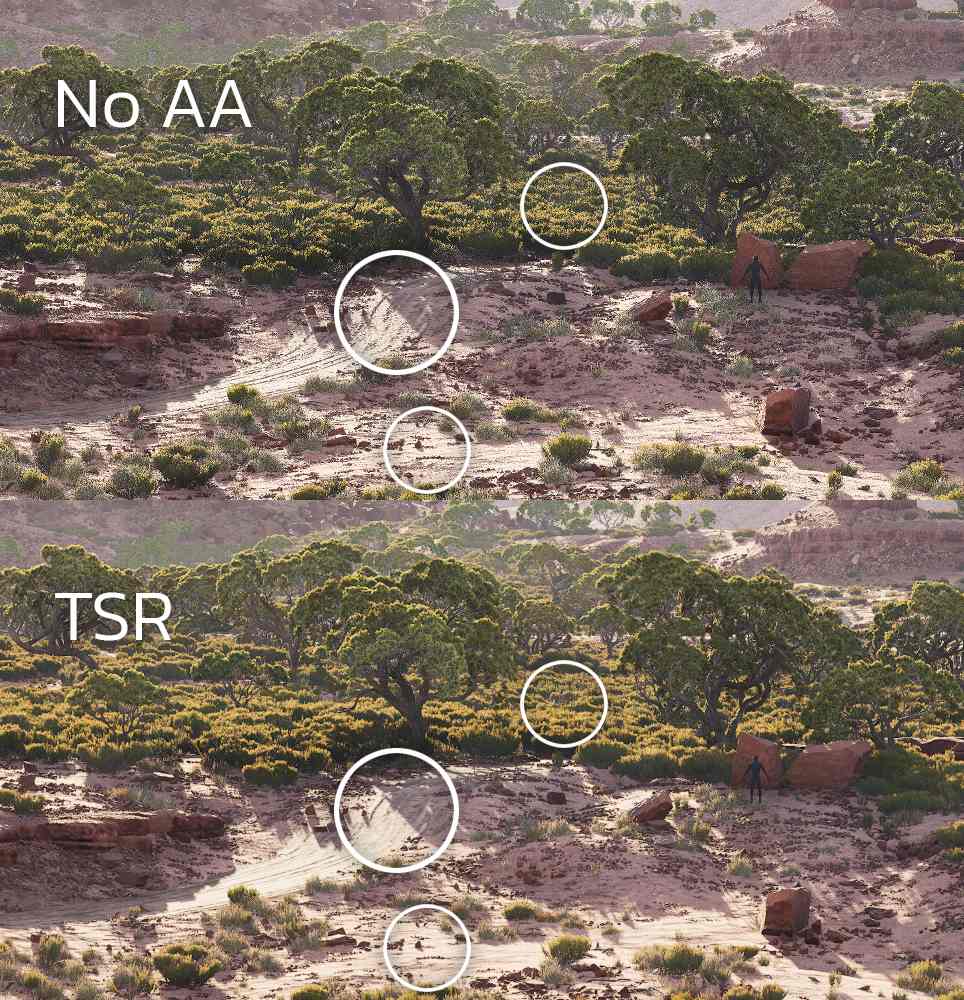
Image source: realbiomes.com
Use Cinematic Camera Actor
Unlike a standard camera, the Cine Camera Actor has additional parameters for cinematic purposes, including focus, focal length, aperture, and many other settings that will help when creating the perfect shot. Once you have found the angle you want, you should position the actor to avoid accidentally moving him or her.
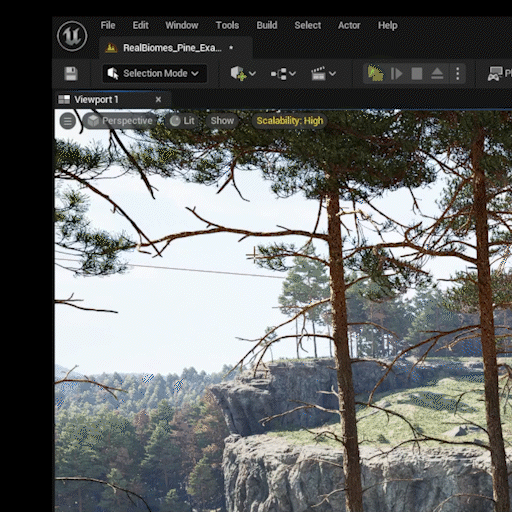
Image source: realbiomes.com
Another important factor to remember is to adjust the Manual Focus Distance using the Draw Debug Focus Plane feature. The reason for this is to ensure maximum sharpness on the subject in focus. Without this feature, important details may appear slightly blurry or fuzzy, an issue that is often not noticed until you zoom in on the final image.
High Resolution Screenshots Tool
To take better screenshots with the High Resolution Screenshots tool, consider the following:
- Adjust the resolution multiplier relative to your base screen resolution. But don’t set it too high, or it may crash Unreal. Experiment with different multipliers to find the optimal balance between quality and performance for your system. For example, the ideal raw render resolution should be 1.5-2 times the target resolution. That is, if your screen resolution is 1920×1080 and your target resolution is 3840×2160, you can render with a Size Multiplier of 3. You will end up with a raw render of about 5760×3240, then lower the resolution to 3840×2160. However, the problem can be that the render looks different from the viewport, especially if the AO/Global Illumination is changed or not set up properly. The only solution is to take multiple screenshots until you get one that fits.
- Optimize the viewport aspect ratio for a better layout, aim for 16:9, or use full-screen mode (F11). You will get a screenshot that fits most modern screens and social media platforms.
- Press the ‘G’ key when the viewport is active to hide UI elements and collision box borders. This gives the screenshot a clean, uncluttered look, focusing on the main world instead of the dev tools.
Supersampling Your Screenshots Using Screen Percentage
Another great way to improve image quality is to adjust the Screen Percentage setting. This technique effectively supersamples the scene, rendering it at a higher resolution and then scaling it down to your screen size to create a sharper, cleaner image.
For example, if your screen resolution is 1920×1080, setting the Screen Percentage to 200 will cause Unreal to render the scene at 3840×2160, then automatically scale it down to 1920×1080. This is similar to rendering at high resolution and manually resizing in Photoshop, but built directly into the engine.
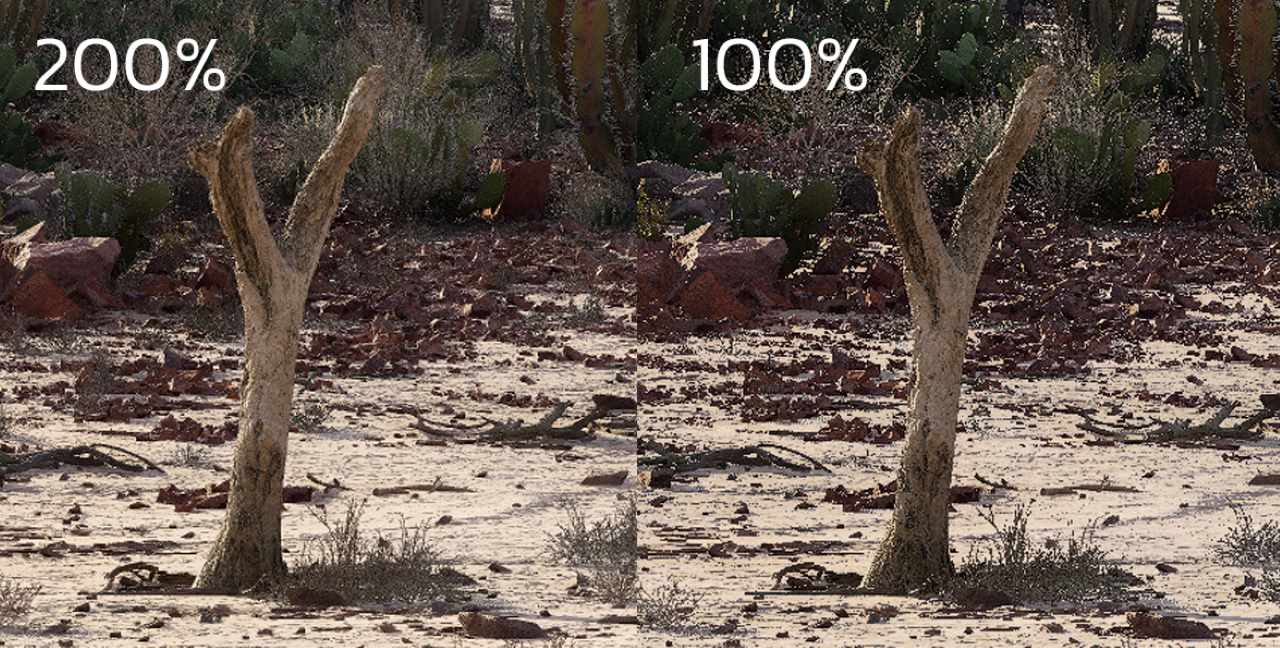
Image source: realbiomes.com
This also acts as a form of high-quality anti-aliasing, removing jagged edges and improving image clarity. We recommend combining 200% Screen Percentage with a higher Screenshot Size Factor (depending on your system and target resolution). This is simple to get high-quality results without post-processing.
Adjust LOD
If you feel that the image, especially the surfaces viewed at an angle, is not sharp enough, you can improve it by reducing the LOD (Level of Detail) of the texture to use a higher quality mipmap and increasing the Anisotropic Filtering to preserve detail on inclined surfaces. Use the following CVARs:
- r.MipMapLODBias = -2
- r.MaxAnisotropy = 16
Note: Reducing LOD too much can cause image noise, so apply it on a case-by-case basis.
Preserving Distance Details
When shooting at wide angles or from a distance, such as overhead or large biome panoramas, you may find that objects such as trees or bushes are blurred or disappear. This usually happens because:
- Preserve Area mode is not enabled on foliage objects
- Anti-aliasing, such as TSR, is used to blur details
- Nanite or LOD of textures automatically degrades at long distances
To fix this, you can reduce Nanite culling (the removal of unwanted details) by using the following CVAR:
- r.Nanite.MaxPixelsPerEdge 0.5
However, if this value is set too low, you may experience buffer overflow or thrashing. If that happens, you need to increase Nanite’s buffer limits by adding CVARs to your DefaultEngine.ini:
- r.Nanite.MaxVisibleClusters=10485760
- r.Nanite.MaxCandidateClusters=16777216
- r.Nanite.MaxNodes=10485760
- r.Nanite.RasterIndirectionMultiplier=1.1
Warning: Increasing these limits can cause the engine to exceed hardware limits and crash.
In some cases, keeping r.Nanite.MaxPixelsPerEdge at 1 while reducing the texture mip ratio is more beneficial in terms of keeping foliage density at a distance. You can use:
- r.MipMapLODBias=-3 (can be reduced even lower)
Final Thoughts
Taking high-quality screenshots in Unreal Engine 5 doesn’t have to be complicated. With the right tools and a few tweaks to your settings, you can capture sharp, professional-looking images from your footage. No matter you’re building a game, showcasing a portfolio, or preparing images for a client, clean screenshots make your work stand out. Try these tips and see the difference your next shoot will make.
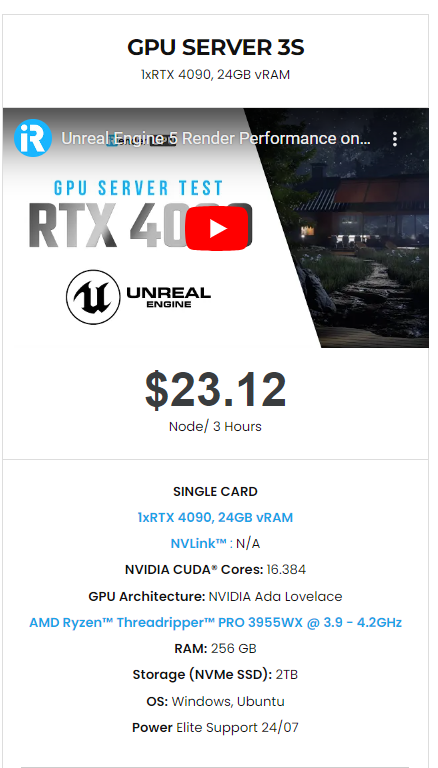
iRender - The Best Render Farm for Unreal Engine 5
If you need more power than your local machine can handle, especially for large scenes, high-resolution screenshots, or heavy cinematic rendering, iRender is here to help. As one of the best cloud render farms for Unreal Engine, iRender offers high-performance RTX 4090 and CPU servers optimized for real-time workflows. All servers are equipped with:
- AMD Ryzen™ Threadripper™ PRO 3955WX (3.9-4.2GHz) or
- AMD Ryzen™ Threadripper™ PRO 5975WX (3.6-4.5GHz)
- (1/2/4/6/8x) – RTX 3090/4090
- 256GB RAM
- 2TB NVMe SSDs
With Unreal Engine 5, a 3S (1xRTX 4090) server is the best choice with the most affordable price. You have full control over a powerful remote machine, with support for UE5 and all its plugins, so you can render faster, scale larger, and focus on being creative.
Why choose iRender?
Unlike other services, iRender lets you upload and download files without starting the server, saving you both time and money. We offer a Desktop app for Windows with a full feature set and a simple Drive app for macOS for easy file transfers. Here’s why iRender is a top choice for your rendering needs:
- 100% Software Support: We support all 3D software, their plugins, and render engines.
- Full Control: Our service will give you full control over the servers you rent. Therefore, you are free to create your own working environment.
- Go Green: We are committed to using 100% solar renewable energy towards environmental sustainability.
- Real-human 24/7 Support: Our professional support agents and technicians guarantee to bring you the best rendering experience.
Let’s see how Unreal Engine performs on our servers. You’ll definitely see the difference!


If you still wonder if this is the right place for your project, REGISTER NOW to get a trial and receive a 100% bonus promotion for your first transaction within 24 hours of registration with us.

For more detailed information, please contact us via Live chat 24/7 or WhatsApp: +(+84) 912-785-500 or Email: [email protected]
iRender – Happy Rendering!
References: realbiomes.com, unreal-university.blog
Related Posts
The latest creative news from Unreal Engine Cloud rendering.