Exploring Particle System Basics in Blender 4.1
In the 3D industry, particles are small simulated objects used to create a wide range of effects such as fire, smoke, dust, rain, snow, etc. These particles usually follow physical models to create realistic simulations. With Blender, we can define our own physical rules to create amazing effects and a realistic feel. Blender is a potent 3D modeling tool that allows you to create and play with complex particle systems and unlike most other software, it is completely free to use.
In this article, we will explore Particle System Basics in Blender 4.1. Let’s get started!
Particle Types

Image Source: Blender Documentation
There are two main types of particle systems in Blender, “Hair” and “Emitter”.
While both have their own settings and parameters, Hair particles are usually lines, mainly used as hair and fur for your 3D models. They can also be used in animation to create realistic forests, cityscapes, or animals.
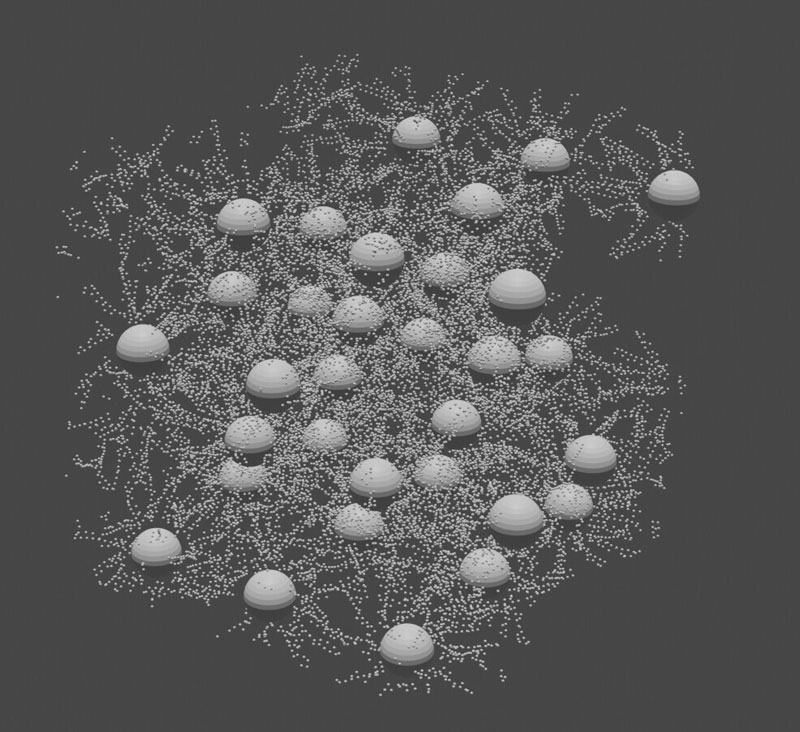
The second type is Emitter particles. This type of particle system can have abstract shapes and is often used for weather effects such as rain, snow, dust, etc. Emitter particles contribute to making the scene more vivid and close to life because it is related to natural phenomena. In particular, Emitter particles are extremely flexible.
Emitter in Particle Systems
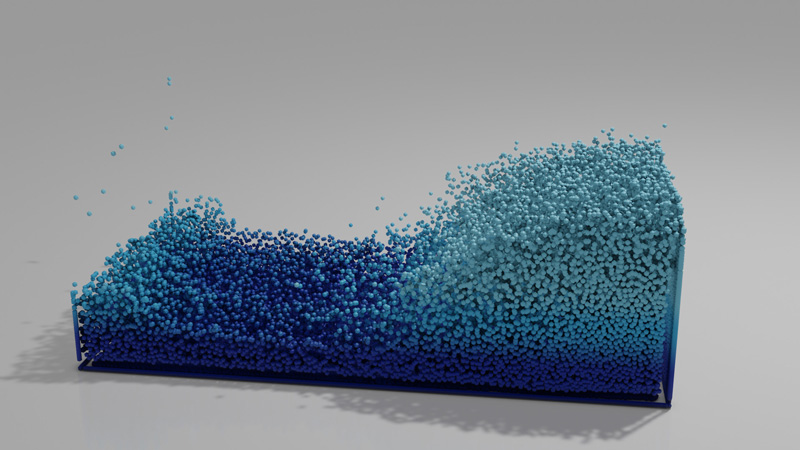
In Blender’s particle system, an “Emitter” is a type of particle system that emits particles from the surface of an object. Here’s how to use the emitter type in the particle system:
- Selecting the Emitter Type:
To use the emitter type in the particle system, select the object you want to emit particles from.
- Accessing Particle System Settings:
In the Properties Editor, navigate to the “Particles” tab for the selected object.
- Creating a New Particle System:
If a particle system has not yet been added, click the “New” button to create a new particle system. If a particle system already exists, select it to modify its settings.
- Choosing the Emitter Settings:
Under the “Emission” section of the particle system settings, set the “Emit From” dropdown to “Verts”, “Faces”, or “Volume” to determine where the particles should be emitted from the object’s surface. For the emitter type, you’ll typically choose “Faces” to emit particles from the faces of the object.
- Adjusting Emission Settings:
Control the emission rate, timing, speed, and other related parameters within the Emission section. You can also specify the number of particles to emit and adjust their lifetime.
- Fine-Tuning Emitter Behavior:
You can further refine the behavior of the emitter by adjusting settings related to velocity, rotation, and randomness, depending on the specific effect you want to achieve.
By setting an object as an emitter within the particle system, you can create effects such as dust, rain, sparks, or any other scenario where particles need to be emitted from a surface within your 3D scene.
Hair in Particle System
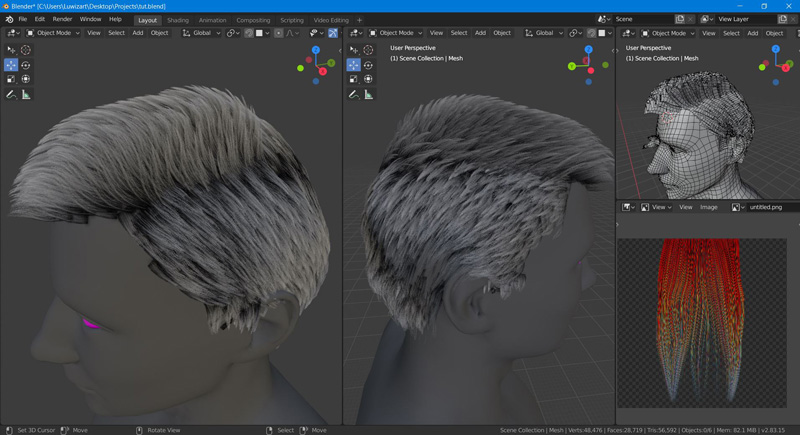
Image Source: Blender Nation
In Blender, the particle system can be used to create hair or fur effects on 3D models. Here’s a basic overview of using the particle system for creating hair:
- Applying the Particle System:
Select the object to which you want to add the hair (for example, a character model).
In the Properties editor, navigate to the “Particles” tab.
Click on the “New” button to create a new particle system or use an existing one if available.
- Hair Settings:
Under the Render section of the Particle settings, choose “Hair” as the render type. This will make the particles appear as strands, resembling hair or fur.
Adjust the Length and Thickness settings to control the appearance of the hair particles. Length determines the overall length of the hair strands, while Thickness controls the thickness of each strand.
- Children Settings:
The “Children” settings allow you to add complexity and volume to the hair/fur. For example, you can enable “Simple” children to add additional strands or use “Interpolated” or “Kink” children for more variations in the appearance of the hair.
- Styling the Hair:
After setting up the basics, you can use the “Particle Edit” mode to further refine the hair. In this mode, you can use tools such as “Comb,” “Cut,” and “Puff” to style and groom the hair particles to achieve the desired look.
- Material and Rendering:
To ensure the hair particles render correctly, you’ll need to assign a material to them. This material can include shader nodes for controlling the appearance and color of the hair.
By using the particle system for hair in Blender, you can create realistic-looking hair or fur for your models. This is particularly useful for character models, animals, and any other objects that require such details.
The advantage of the Particle System
The particle system in Blender offers several advantages for creating a wide range of visual effects in 3D scenes. It can be used to replicate a variety of natural phenomena such as smoke, fire, rain, dust, and more. This versatility allows for the creation of diverse and realistic visual effects. Instead of individually modeling and animating countless objects (such as individual raindrops or grains of sand), the particle system allows you to generate and control large numbers of particles using relatively few resources, improving efficiency and reducing production time. By simulating the behavior of a large number of particles, the particle system can create realistic effects, adding depth and detail to scenes. This can enhance the overall visual quality of the 3D environment. The particle system can interact with various forces and fields, such as wind, turbulence, gravity, and collision objects. This enables dynamic and interactive effects, enhancing the realism of the simulated phenomena. The particle system is widely used for creating motion graphics, visual effects, and dynamic animations in a wide range of projects, including films, gaming, simulations, and more. Through various settings and parameters, artists have substantial control over the appearance, behavior, and distribution of the particles, allowing for the creation of highly customized effects.
The Disadvantages of The Particle System

While the particle system in Blender is a versatile and powerful tool, it does come with some limitations and disadvantages. The particle system in Blender can be complex and may have a steep learning curve, especially for beginners. Understanding and mastering all the settings and parameters can take time and practice. Generating and simulating many particles can be computationally intensive, potentially slowing down the viewport performance or increasing render times, especially on less powerful hardware. While Blender’s particle system offers a variety of particle types and settings, it may have limitations compared to specialized particle systems or plugins dedicated to specific effects like fluid simulations or advanced physics. Integrating particle simulations with other dynamic simulations (such as rigid body physics or cloth simulations) in Blender can sometimes be tricky. It may require additional setup and careful coordination to achieve the desired effects. Rendering particle systems with high particle counts or intricate interactions may require additional rendering time and memory, particularly when using complex materials or shading that interact with the particles. While Blender’s particle system is robust, it may lack some advanced features found in dedicated simulation software specifically designed for complex particle effects.
Conclusion
Overall, the particle system is a powerful tool that enhances the visual storytelling capabilities of 3D scenes, offering flexibility and realism while optimizing workflow efficiency. Whether for creating natural phenomena or crafting stylized effects, the particle system is a valuable asset in the 3D artist’s toolkit.
Take your multi-GPU rendering in Blender 4.1 to the next level with iRender Farm
Our iRender GPU Render Farm offers from 1/2/4/6/8 RTX 4090s and 8 RTX 3090 servers. All servers at iRender are also equipped with AMD Ryzen™ Threadripper™ PRO 3955WX @ 3.9 – 4.2GHz or AMD Ryzen™ Threadripper™ PRO 5975WX @ 3.6 – 4.5GHz, 256GB RAM, 2TB Storage NVMe SSD. The high-end configuration is extremely suitable for complex Blender projects. Right now, we have pre-installed Blender 4.1 option.
We just released our GPU Server 9S, with 8x RTX 4090s, powered with AMD Ryzen™ Threadripper™ PRO 5975WX @ 3.6 – 4.5GHz, let’s see how our RTX4090 performs when rendering with Blender scenes:


Besides, we also have flexible prices for all small to big projects. You can check out this video to estimate the cost with us:

Enjoy our new beast and boost your multiple GPUs rendering now! If you have any comments about our article, please do not hesitate to reach us at [email protected] or Whatsapp: +(84) 916017116.
iRender – Happy Rendering!
Reference source: All3D
Related Posts
The latest creative news from Blender Cloud Rendering, Redshift Cloud Rendering, Houdini Cloud Rendering , Octane Cloud Rendering, 3D VFX Plugins & Cloud Rendering.