Exporting and Importing FBX files from Sequencer in Unreal Engine 4 with iRender
In Blog’s Today, we will show you how to export a scene from Sequencer in Unreal Engine 4 as an FBX file and make alterations to that file inside a third-party application like 3Ds Max or Maya. Once satisfied with your changes, you can then import the FBX file back into your Sequencer in Unreal Engine 4 (UE4) along with your updated changes.
There are some caveats to this process that you should keep in mind:
- When exporting, you can export all the objects with animations in your scene to your FBX file.
- Importing FBX files will only import animation. It will not create new objects.
- Export/Import does not work with Master Sequences, Shots within a Master, or Subscenes.
- Make sure that the time settings in your third-party application matches the time frame used for your scene in Unreal Engine.
As long as you export from a source Level Sequence and not a shot that sits inside a Master, and are only altering the animation of existing assets, you will be able to import your changes directly back into your scene inside UE4. Also, using the same time frames in both UE4 and your third-party application will ensure that they line up, and that the imported scene is not resampled at a different time rate.
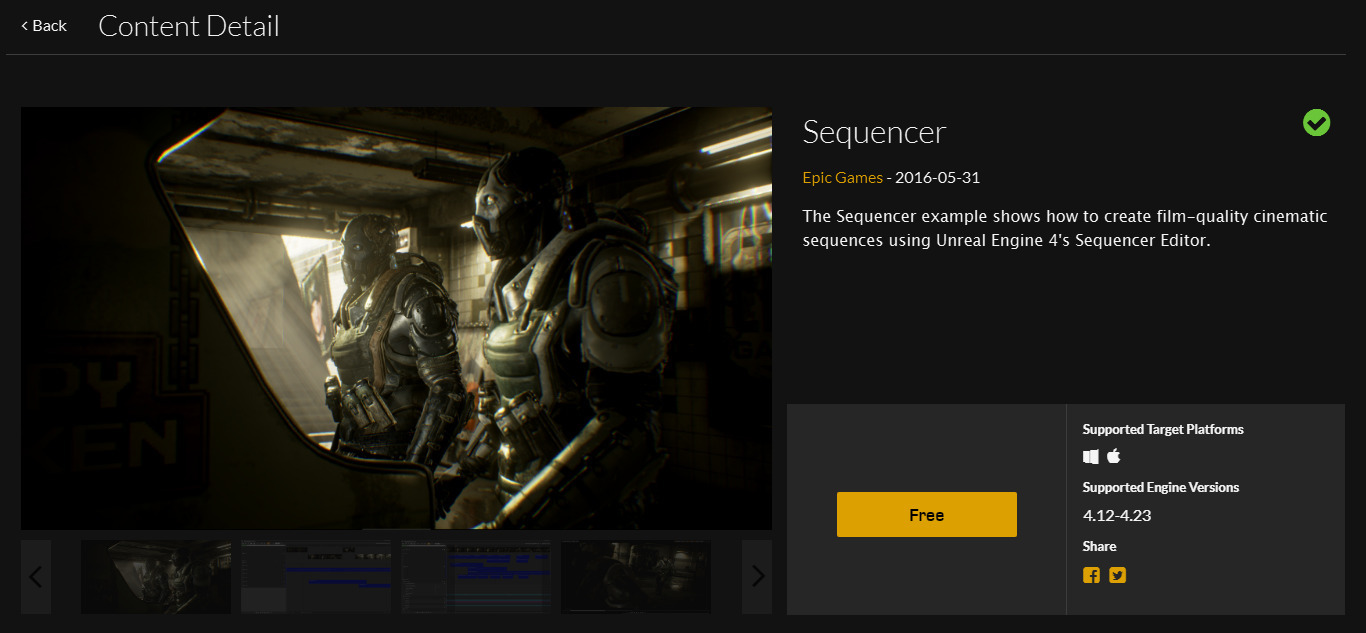
For example: This is a scene from the Sequencer Subway Project (pictured below) available for free from the Learn tab of the Launcher. We then take it into Maya and alter the camera movement in the scene, then import that FBX along with our changes back into UE4 where our existing scene is automatically updated with our changes.
1. Exporting from Sequencer in Unreal Engine 4
First, determine which Level Sequence to export.
In the clip below, we pick the shot we want to alter and open it up. We then go into the General Options and choose Export. We have a Master Track that includes shot0040_001 so we open that particular Level Sequence to export it.

Upon performing the FBX Export process, you will be shown the FBX Export Options window where you can define how to export your content.
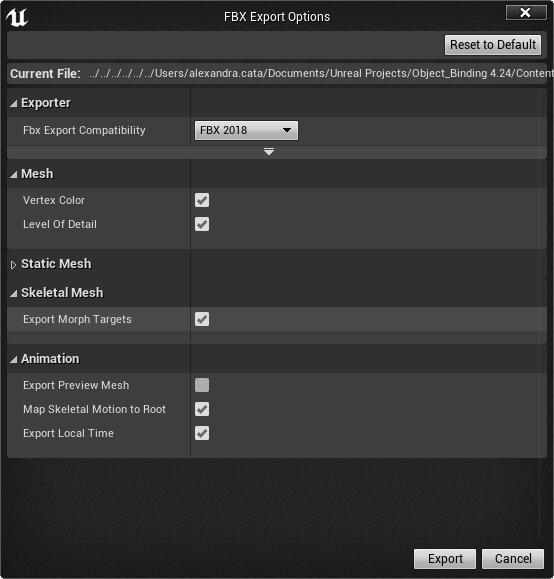
Use these options to choose the FBX Export Compatibility version as well as the option to export the Skeletal Mesh’s Vertex Color, Level of Detail or Collision settings.
There is also the option to Map Skeletal Motion to Root which will (if enabled) map the Skeletal Actor motion to the root bone of the Skeleton. For this example use the default settings and choose Export to export our content.
2. Exporting Shots by Local or Master Time
When exporting an object in a Shot or Subsequence, you can determine if you want to export the Shot by Master Sequence time or Local Sequence time. Master Sequence time is useful when you are looking at the animation holistically and in comparison to other shots. Local Sequence time is useful when you are working shot by shot. Exporting to either time maps to the shot keys in Maya, and in Sequencer you can move from Local to Master time easily.
The default setting is to Export Local Time (checked). To export by Master Time, uncheck the box.


And then import your FBX into Maya and set up our scene so that you can begin making edits. After importing:
- Set the Perspective under Panel to use the camera shotCamA in your scene.
- Hide any elements obstructing the view (such as the god ray mesh) by pressing Ctrl + H with it selected.
- Then, under View you Select Camera to display the properties and keyframes for shotCamA, which you can then begin to edit.

Next, you make edits to the movement of your camera. Below, you select the Translation and Rotation properties of our shotCamA. Then, right-click and select Break Connections. You then pick a new starting point for the camera to be in, to start your scene, pressing the S key to keyframe the new position. You scrub ahead slightly and move the camera to the ending position. Press the S key again to keyframe the end position so that our camera moves along a new path.

During the export process from Maya, you first change the export type to FBX export. Then, under Advanced Options and Axis Conversion, we change the Up Axis to follow the Z-axis to allow for a compatible import into Unreal Engine. Future versions of the engine may address this so that you do not have to convert the axis, but you will need to do this for now to avoid any importing problems.

3. Importing to Sequencer
Now that you have an edited version in FBX format you can import it and the changes into Unreal Engine, updating our scene.
Inside your shot0040_001 that you wanted to edit, you right-click on our shotCamA and select Import. This will take the transform data inside the FBX and apply it to the selected object in Unreal Engine. This can be useful if you want to apply the same transform data to multiple objects inside your scene.

Upon importing FBX we are presented with the Import FBX window.

This (if enabled) allows you to Force Front XAxis which will convert the scene from the FBX coordinate system to UE4 coordinate system with front X axis instead of -Y. If cameras do not already exist in the Level, go ahead and enable the Create Cameras option.
4. Cloud rendering service for Unreal Engine 4
iRender provides a high performance and configurable server system for 3D rendering, AI Training, VR & AR, simulation, etc. With our server, you can install any software you need, add your license, and do whatever you like with your project. These tools above are no exception. Most tools for fluids are computationally expensive. Understanding that, we have different config and package compatible with them, from CPU to single GPU, dual and even multi-GPUs.
Moreover, iRender has many more to offer.
- Free and convenient transfering tool: iRender offers a powerful and free file transfer tool: Gpuhub Sync. With fast file transfer speed, large data capacity, and completely free. You can transfer all the necessary data into our Gpuhub Sync tool at any time without connecting to the server. The data will be automatically synchronized in the Z drive inside the server, ready for you to use.
- Flexible price: You can always save from 10% to 40% with our Fixed Rental feature. For those who’s in need of server more than a day, or have extremely large project, we advise to choose daily/ weekly/monthly rental package. The discount is attractive (from 10 to 40% depends on your package), and you don’t have to worry about over-charging if you forget to shutdown the server. In this July, we offer a discounted price for GPU server 3 and other servers, users will take advantage of these to level up their renders.
- Real human 24/7 support service, helping you to handle the problem quickly, effectively, saving you both time and money.
If you have any questions, please do not hesitate to reach us via Whatsapp: +(84) 916017116. Register an ACCOUNT today and get FREE COUPON to experience our service. Or contact us via WhatsApp: +(84) 916017116 for advice and support.
Thank you & Happy Rendering!
Source: docs.unrealengine.com
Related Posts
The latest creative news from UE4 Cloud Rendering, Enscape Cloud Rendering, Lumion Cloud rendering, V-Ray Cloud Rendering , Twinmotion Cloud Rendering , 3D VFX Plugins & Cloud Rendering.