Getting started with Corona Decal for 3ds Max
Are you a 3D artist looking to add intricate details and realistic textures to your 3D models? Creating visually engaging and authentic 3D scenes involves attention to detail, and with the power of Corona Decal in 3ds Max, you can take your creations to the next level.
In this blog, iRender will guide you through the basics of using Corona Decal and provide essential tips to help you master this feature.
Understanding of Corona Decal for 3ds Max
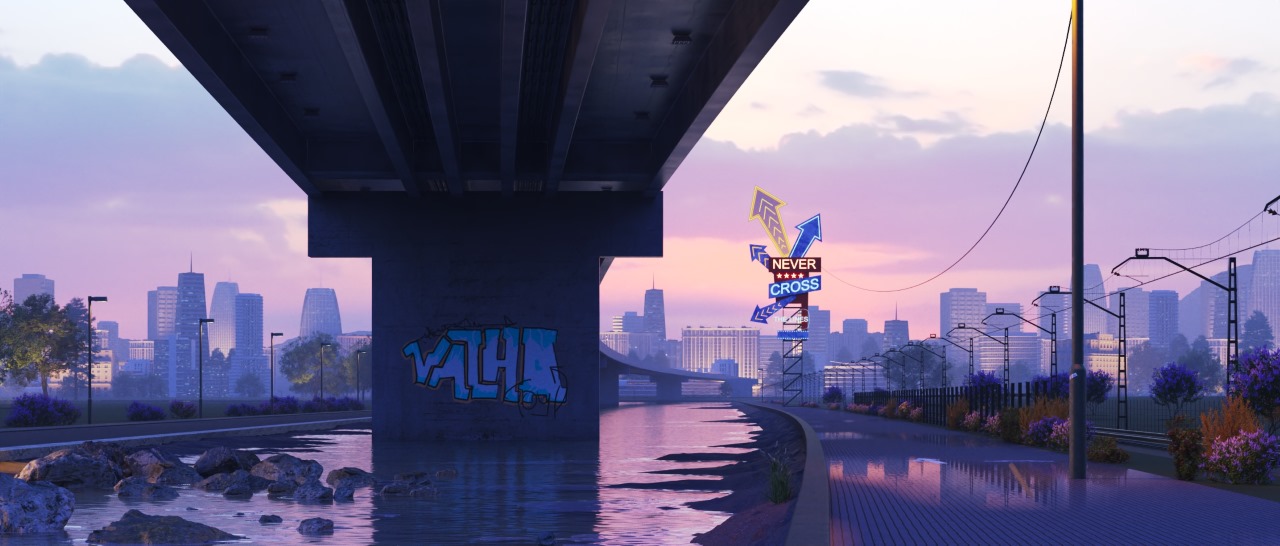
Corona Decal is a powerful tool in Corona Renderer for 3ds Max that allows artists to apply detailed textures and images to surfaces in a highly controlled and customizable way. Corona Decals are special box-shaped objects that you can use to project materials onto your geometry. Whether you want to add labels, stickers, dirt, or signs to your 3D model, this tool provides flexibility and precision in texturing that adds realism and believability to your scenes.
In other words, Corona Decal is a very convenient way to project textures and materials onto objects in your scene: graphics, surface defects, and potholes, all within the 3D viewport and without the need for UVW mapping.
Corona Decal Settings
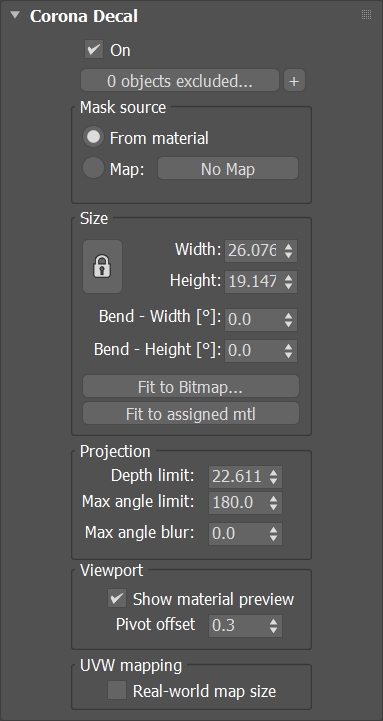
- On – Turns Decal On and Off.
- Include/Exclude – Enables Include/Exclude objects option.
- Mask Source – Source of Decal alpha (blending) mask.
- From Material – Assigned material’s opacity channel will be used.
- Map – Allows selected another, independent map to act as a mask.
Size:
- Lock – Toggle constraint of aspect ratio between width and height.
- Width – Decal width.
- Height – Decal height.
- Bend – Width [°] – Specifies bend angle of the decal in the width direction.
- Bend – Height [°] – Specifies bend angle of the decal in the height direction.
- Fit To Bitmap… – Fits the decal aspect ratio to match selected texture node or a texture inside selected material (use drag and drop) or a bitmap file (use drag and drop or click to select from HDD). The overall area of the decal is preserved.
- Fit To Assigned Mtl – Fits the decal aspect ratio to match one of the textures of the currently assigned material.
Projection
- Depth Limit – Limits the depth into which this decal is projected. Any surface beyond this distance will not receive the decal.
- Max Angle Limit – Maximum angle deviation between the surface normal and the decal direction for which the decal will be used. This can limit the projection to only facing surfaces. A value of 90 degrees will remove projection from backfaces, while 180 degrees will project on all backfaces.
- Max Angle Blur – Optional fuzziness (blending) on the edge of the max angel limit.w
Viewport
- Show Material Preview – Shows material preview on top of the decal in the 3ds Max viewport when a material is assigned.
- Pivot Offset – Changing this value shifts the decal in its Z axis by changing the relative position of its projection start and its pivot. With value 0 the decal projection starts at the pivot and with value 1 it ends there.
UVW mapping
- Real-world map size – Enables real-world size mapping for the textures used in the Corona Decal material.
Getting started with Corona Decal for 3ds Max
First, you can create a Corona Decal by clicking on the Decal icon in the Corona Toolbar and drawing a Decal in the viewport. It can also be accessed by typing Decal into the 3ds Max X menu or from the Command Panel > Create > Geometry > Corona > CDecal.
![]()
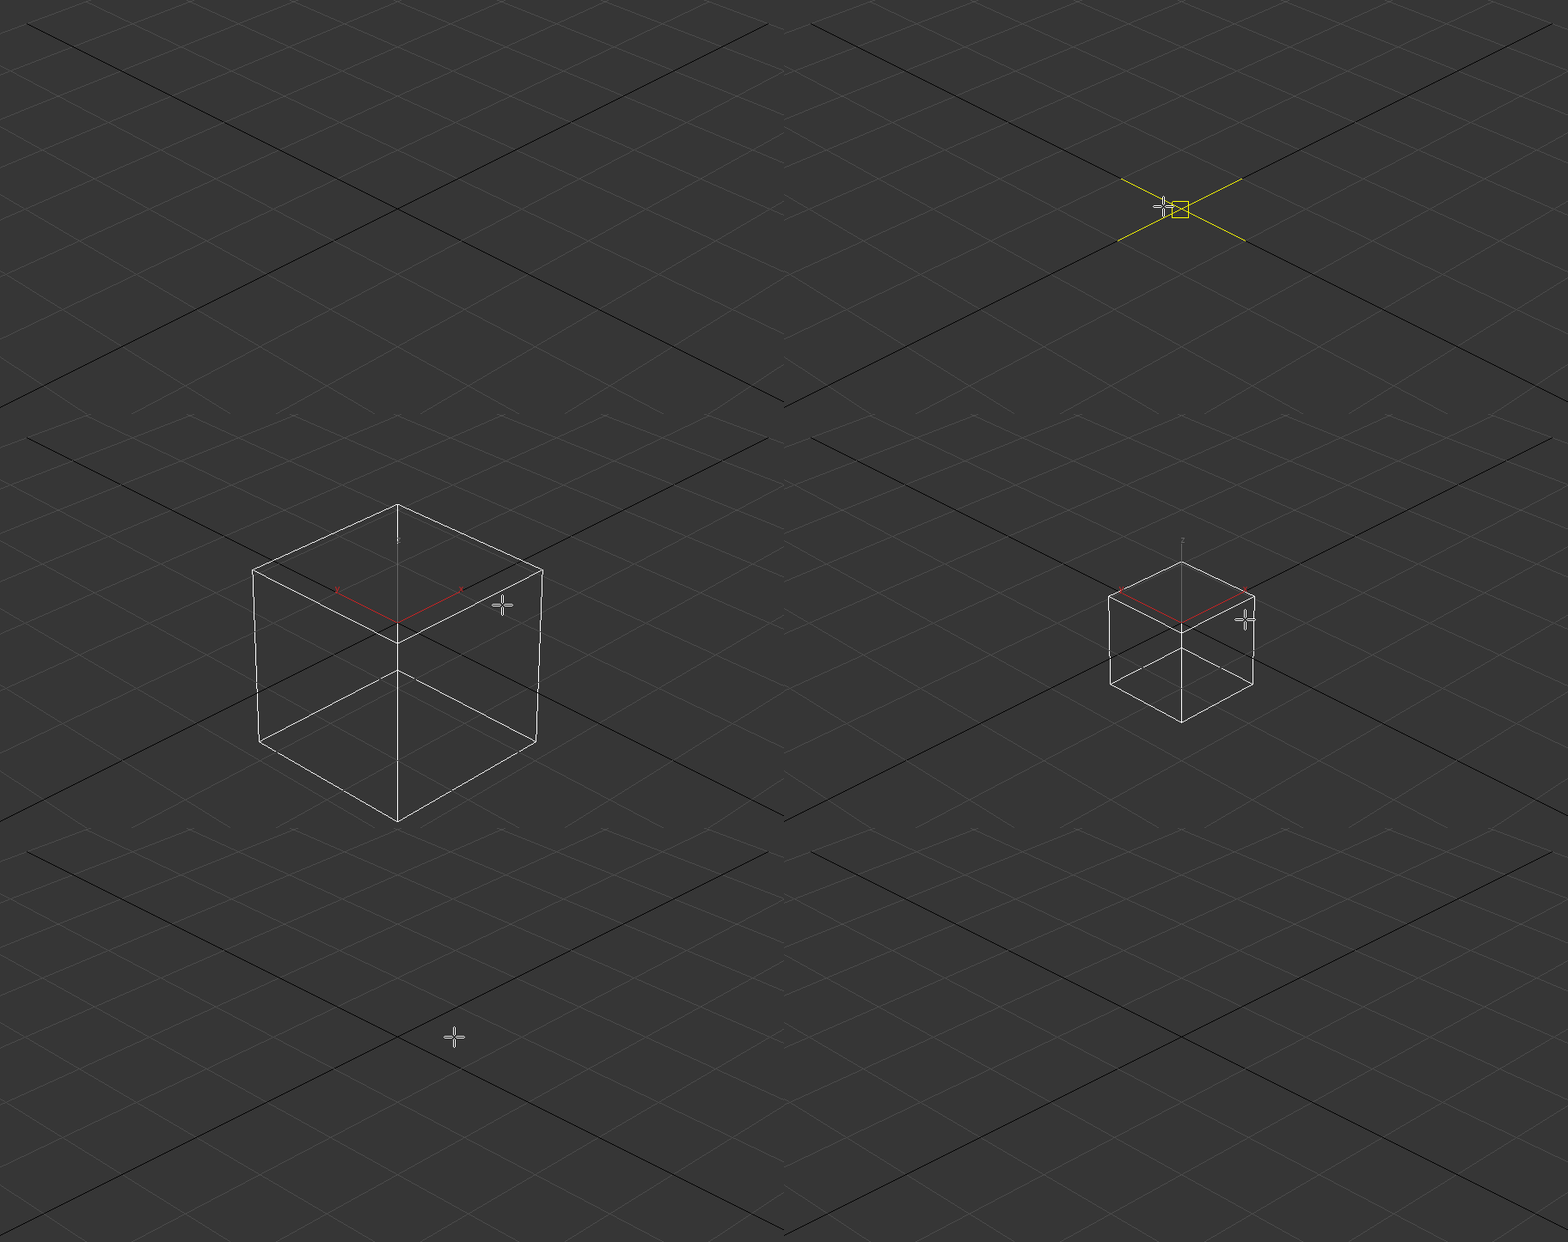
Pro tip: hold Ctrl while creating a decal to make it square-shaped.
Now you can adjust Decal Settings by configuring the settings of the Corona Decal map, including parameters such as the decal texture, scale, rotation, and placement. You can also adjust blending modes, opacity, bumpiness, and other properties to achieve the desired effect.
After adding the decal to your scene, apply the material to it and move it so that it overlaps your scene geometry where you want the decal to appear. You can drag and drop the material onto the object in the viewport.
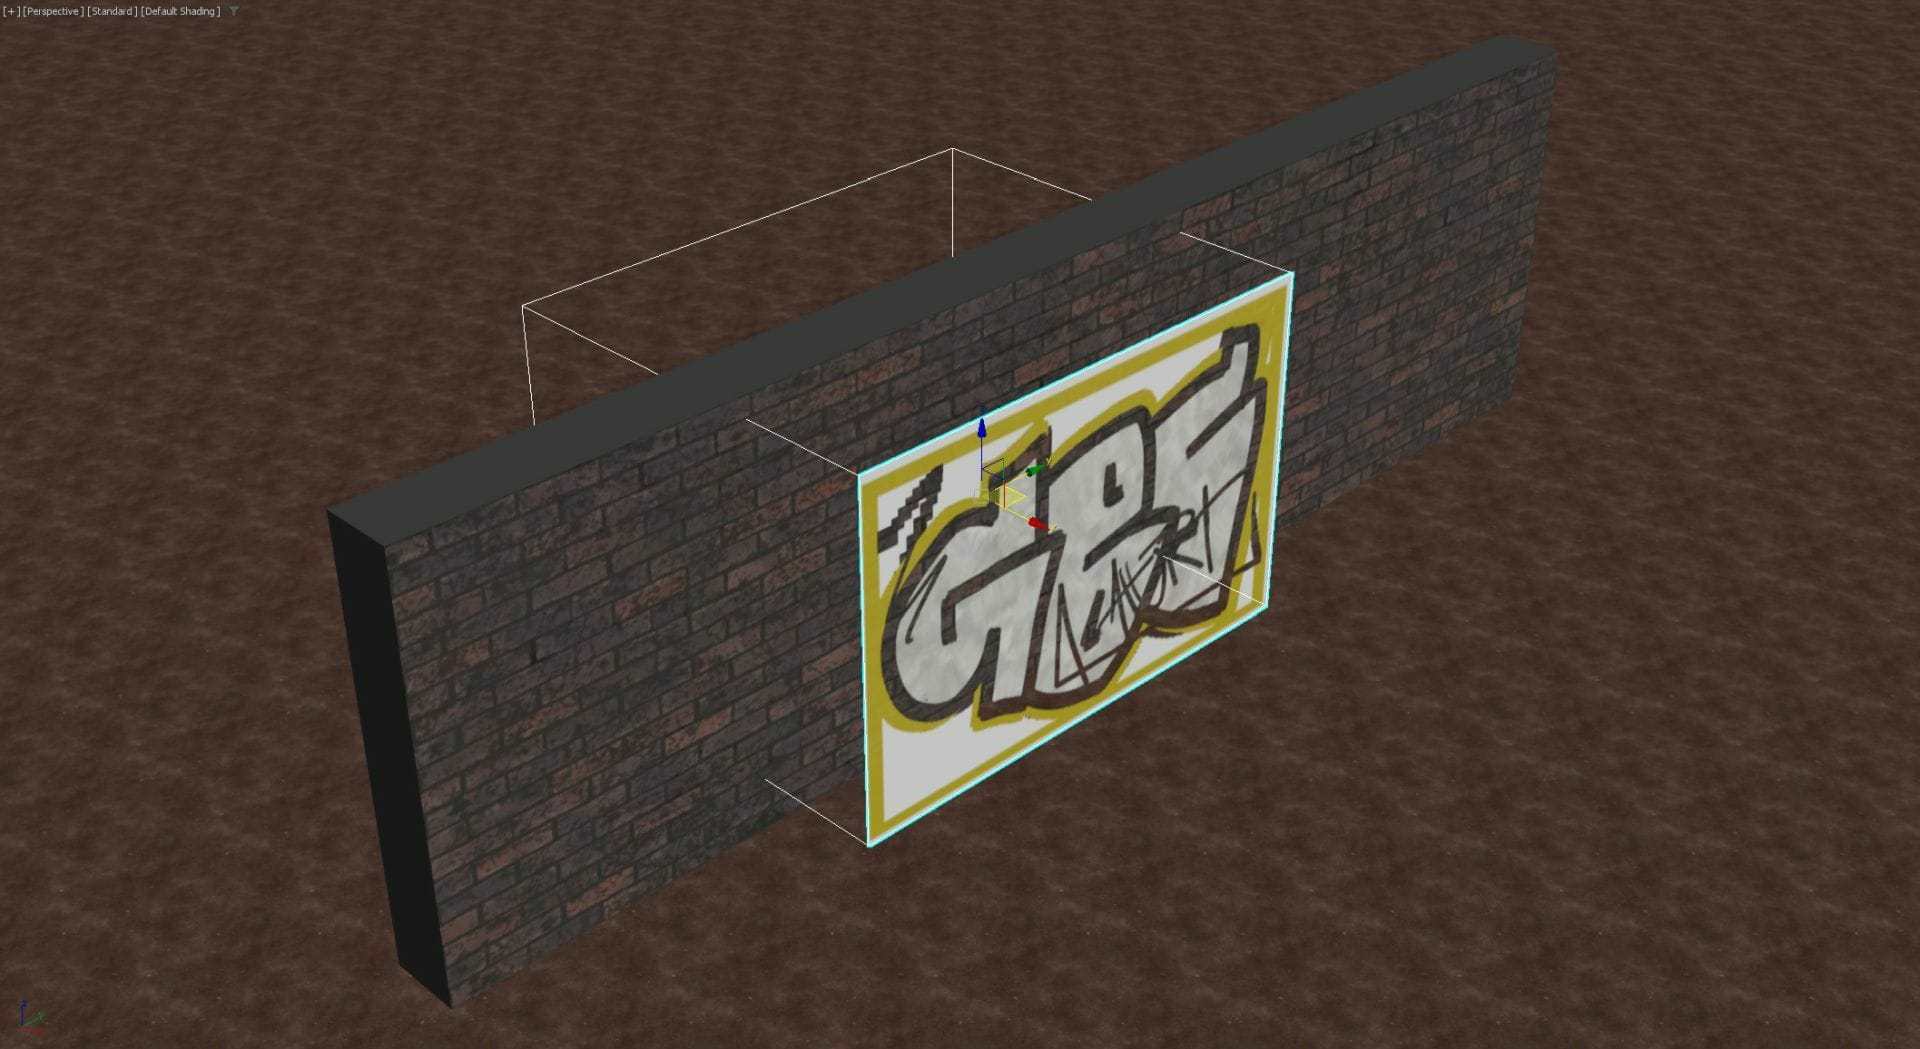
As a result, the decal’s material is projected onto your geometry. You can use the interactive rendering feature of Corona Renderer to preview how the decal looks on the object. Make adjustments to the decal settings as needed to fine-tune its placement and appearance.
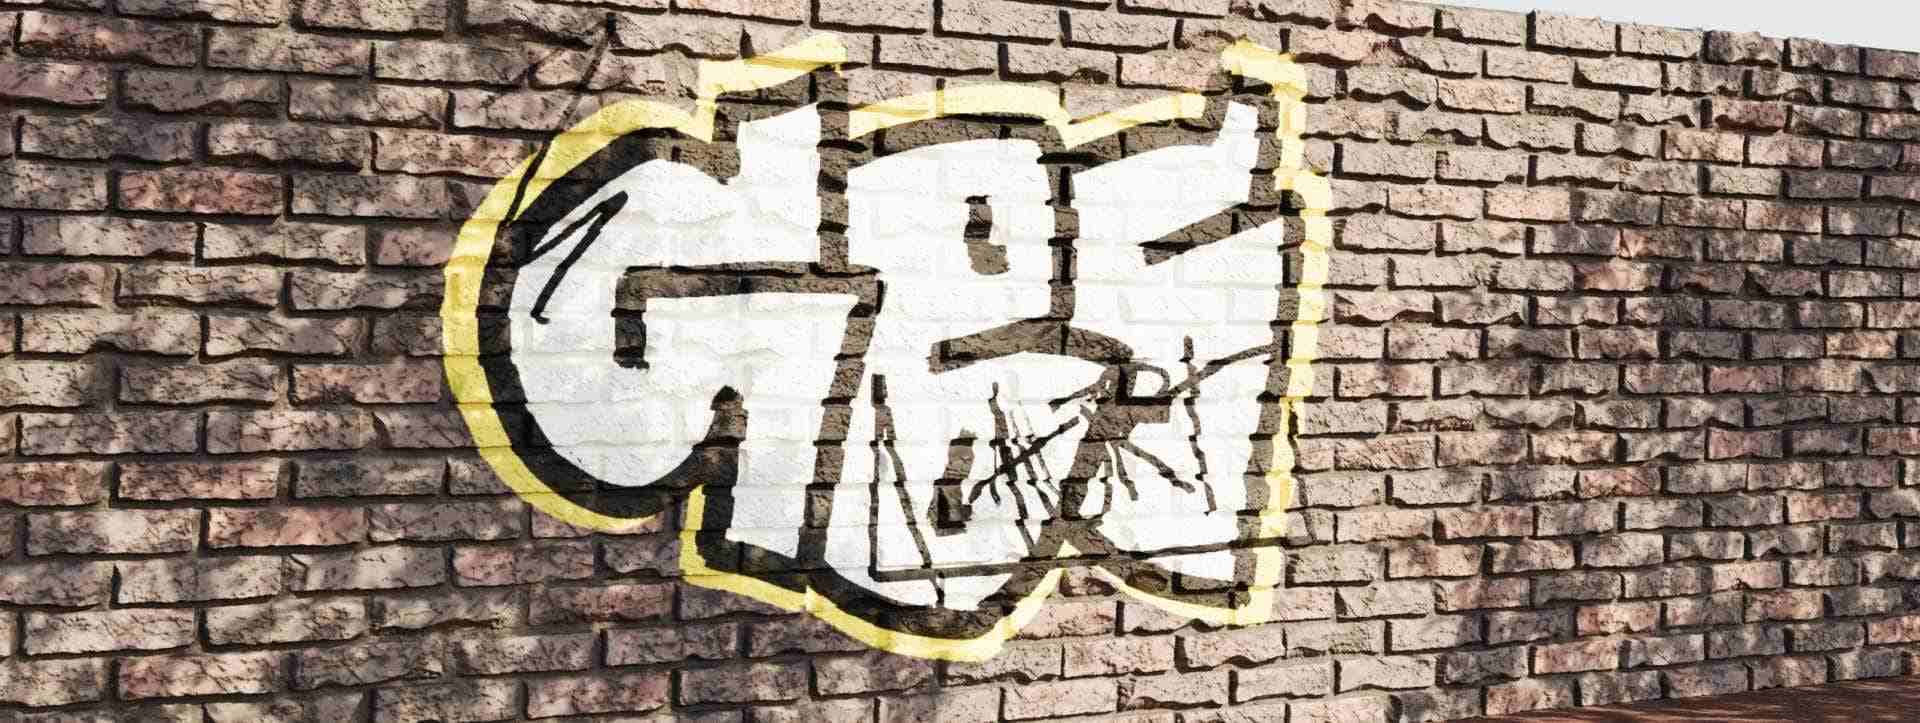
The greatest thing is that once you are satisfied with the decal on one object, you can duplicate the material setup and apply the decal to other objects in your scene!
After Base
One section you may notice in the Corona Decal options is “Affect Base”. You can use this to specify which material properties of the object you are projecting your decal onto will be affected by the decal. This seemingly simple option has many applications.
Advanced Tips for Mastering Corona Decal
Using Multiple Decals
Experiment with applying multiple decals to the same surface, layering different textures and details to create a more realistic and complex appearance. This can include adding decals for dirt, scratches, labels, and other surface imperfections to enhance the realism of your 3D models.
Tiling and Variation
Utilize tiling features within the decal settings to create seamless repetitions of decals across surfaces. Additionally, introduces variation in decal placement, rotation, and scale to avoid a repetitive appearance, especially in instances where the same decal is used across multiple objects.
Blend Decals with Surface
Experiment with the blending modes and opacity settings to seamlessly blend the decal with the underlying surface texture, ensuring that the decals look like they are a natural part of the material rather than appearing like stickers.
Utilize Masking
Explore the use of masks in conjunction with decals. Masks can be used to control where a decal is applied, allowing for precise placement and intricate detailing without affecting the entire surface uniformly.
Experiment with Bump and Normal Maps
Explore the use of bump maps or normal maps alongside decals to add a sense of depth and three-dimensionality to the decal details, especially when depicting surface irregularities or raised features.
Sum up
Corona Decal in 3ds Max offers a wealth of possibilities for adding depth and authenticity to your 3D models. By following the step-by-step guide and embracing advanced techniques, you can harness the full potential of Corona Decal, unlocking a new level of detail and realism in your 3D scenes.
With this newfound knowledge, we encourage you to experiment, practice, and push the boundaries of creativity with Corona Decals, ultimately enhancing the visual impact of your 3D artwork.
Boost up Corona and 3ds Max rendering with iRender
iRender – the best cloud rendering service supporting Corona and 3ds Max with all versions and needed plugins.
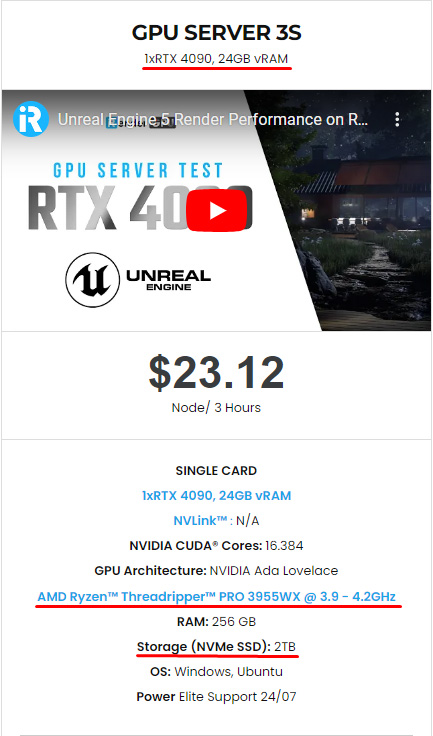
We provide high-configuration servers that increase CPU and GPU rendering speeds. We offer the most powerful RTX 4090 configuration packages on the market, all equipped with AMD RyzenTM ThreadripperTM PRO 3955WX @ 3.9 – 4.2GHz and AMD Ryzen™ Threadripper™ PRO 5975WX @ 3.6 – 4.5GHz processors, 256GB RAM and 2T NVMe SSD hard drive capacity. With a wide range of GPU servers (1/2/4/6/8x) – RTX 4090, you can choose the server that suits your needs to start the rendering process.
With Corona Render, this 3S (1xRTX 4090) with strong CPU AMD RyzenTM ThreadripperTM PRO 3955WX @ 3.9 – 4.2GHz will be the best choice at the most affordable price.
Simple Workflow
You just need to transfer your files, connect to the remote machine and install Corona and 3ds Max with your licenses. Then you can render yourself there like the way you do on your local PC. Setting up ONCE and your working environment will be saved and ready to use at any time.
Why choose iRender?
Transferring data may cost time and money on the remote server. However at iRender, you can upload and download your files without booting the server, then you can save a lot of money.
We have an iRender GPU app for Windows PC which integrates all features and is easy to use, and an iRender Drive app for MacOS users to transfer data only. Moreover, there are many reasons why this is the best render farm for your project.
- 100% Software Support: We support all 3D software, their plugins, and render engines.
- Full Control: Our service will give you full control over the servers you rent. Therefore, you are free to create your own working environment.
- Go Green: We are committed to using 100% solar renewable energy towards environmental sustainability.
- Real-human 24/7 Support: Our professional support agents and technicians guarantee to bring you the best rendering experience.
Check out how to estimate time and cost on our server:
If you still wonder if this is the right place for your project, REGISTER NOW to get a trial and receive a 100% bonus promotion for your first transaction within 24 hours of registration with us.
This October, let’s have a happy Halloween with ghoulishly great deals on your render!
- 50% BONUS for all transactions from $575
- 100% BONUS for all transactions from $1500

For more detailed information, please contact us via Live chat 24/7 or WhatsApp: +(84) 962868890 or Email: [email protected]
iRender – Happy Rendering!
Images and References: chaos.com
Related Posts
The latest creative news from Maya Cloud Rendering, 3ds Max Cloud Rendering , Redshift Cloud Rendering, Cinema 4D Cloud Rendering , 3D VFX Plugins & Cloud Rendering.


