How to Add Surface Dust in KeyShot
While it may appear that surface dust has no place in a product shot, some people enjoy the added realism that a little surface dust provides. Surface imperfections can be added to your KeyShot scene in a variety of ways. Some are quick, simple, and to the point, while others can get pretty convoluted, necessitating the use of numerous nodes in the KeyShot Material Graph. Today, we’ll explore how to do this using the Material Graph in KeyShot Pro. Using textures to add surface dust in Keyshot is a great starting point to create a more complex and intricate surface appearance for your future KeyShot projects.

1. Add a Layer for Dust
Right-click the Material Graph workspace, go to Materials and select Diffuse from the menu. Then, connect the Diffuse node to the Label input of your parent material. Now, change the Diffuse layer Color to something a little closer to white. This is going to be the color of your dust, so pick a color or value that works best for you.
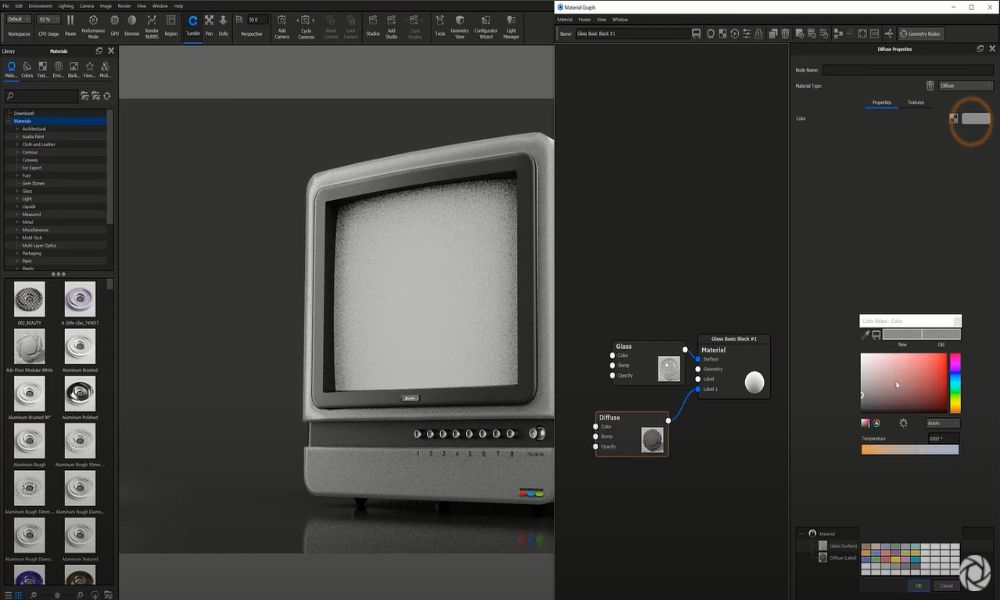
2. Add Opacity Map
At this point, we’re essentially going to mask out parts of the Diffuse layer to create a dust-like effect that will sit on the screen surface. To do this, right-click on the Material Graph workspace again and select Spots from the Textures menu and attach it to the Diffuse (dust layer) Opacity input. With the Diffuse node selected, hit the C-key to enable the Color preview.
Tip: Isolating a texture using the C-key to activate the Color preview makes viewing your texture as you make edits significantly easier! Add it to your normal workflow if it isn’t already.
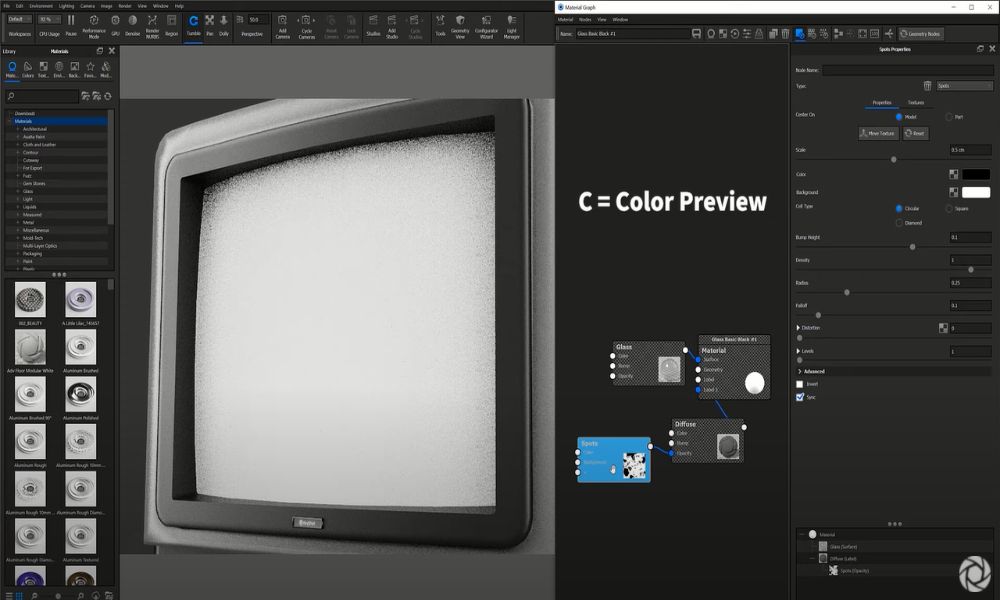
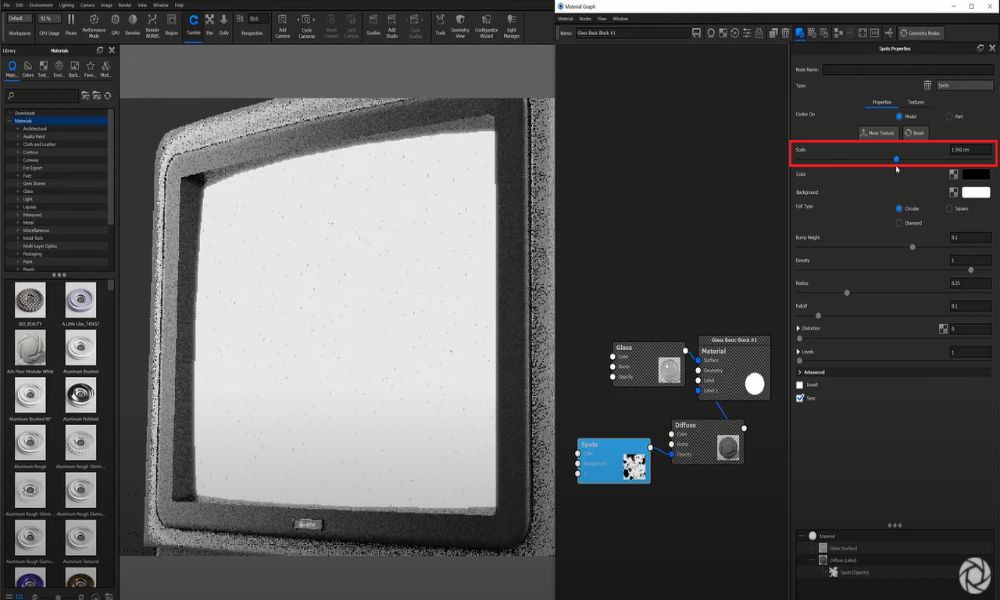
3. Adjust the Scale
So, in the Spots texture Properties, adjust the Scale value of the texture to something that looks accurate to the model. This will vary based on your individual scenes and model, so adjust as needed. For a subtle surface dust appearance, you’ll want a somewhat uniform, white noise type effect.
4. Invert the Colors
Next, change the Spots Color to white and the Background Color to black. When using Opacity in KeyShot, black is hidden while white is visible. The base layer of your dust material is complete. Next, we’ll mask some of the dust to look less like white noise and more like a dusty surface.

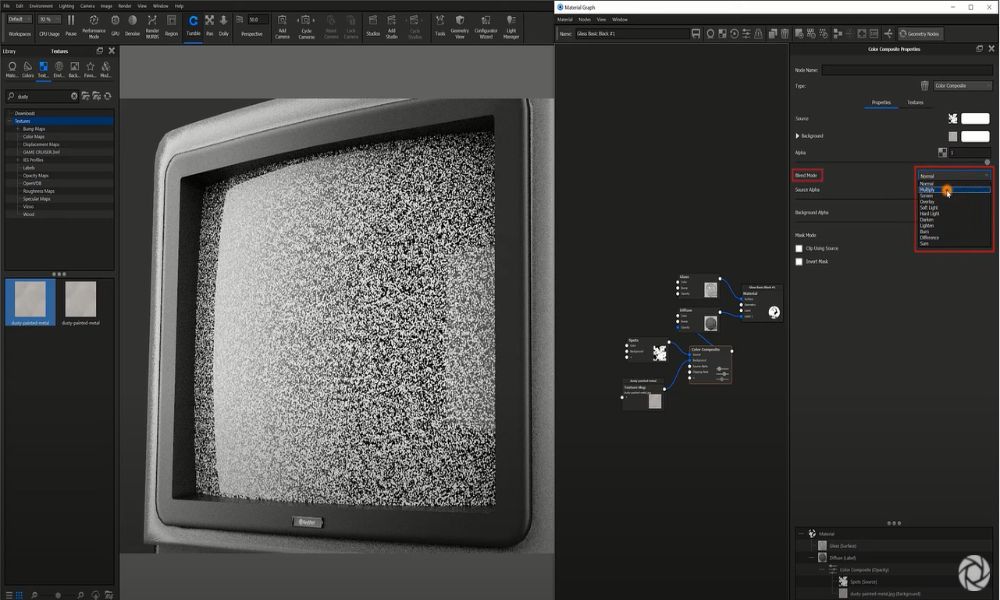
5. Add a Color Composite Node
First, add a Color Composite node by right-clicking the line between the Spots and Diffuse nodes and selecting Color Composite from the Utilities menu. Next, go to the Library, Textures tab and drag-and-drop the Dusty Painted Metal texture into the Material Graph. Then, connect it to the Background input of the Color Composite node. Finally, change the Color Composite Blend Mode to Multiply.
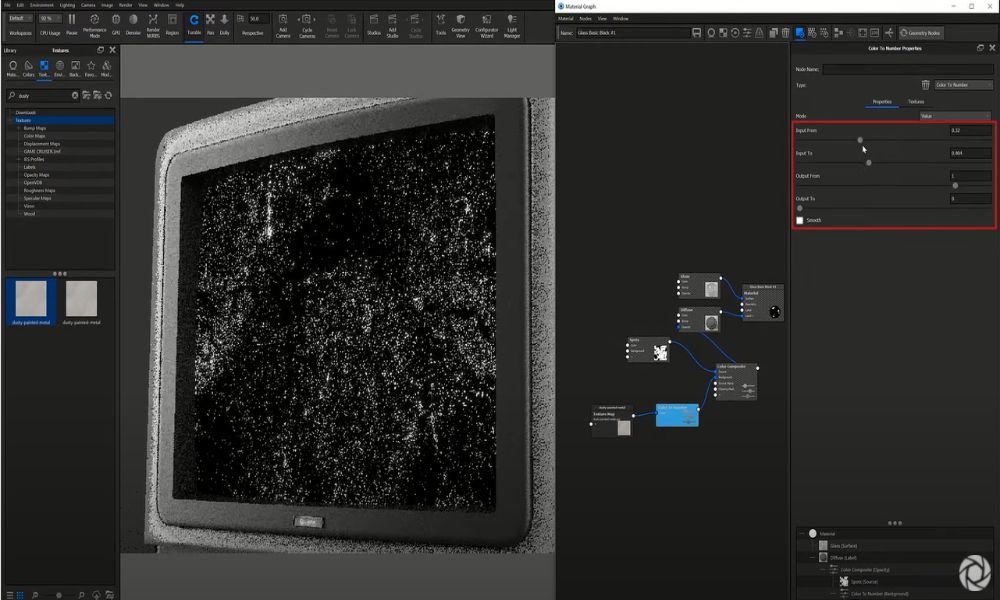
6. Add a Color to Number Node
At this point, you may notice that little has changed with the base dust layer. That’s because the texture map is predominantly white and, as mentioned earlier, black hides the material and white allows the material to show. So, to get the effect we want, right-click on the line between theDusty Painted Metal Texture Map and the Color Composite node to add a Color To Number node. Hit the C-key again to isolate and preview the node. Next, make adjustments to the Input and Output parameters until the desired dust coverage is achieved.
7. Apply to Other Surfaces
Now, that may seem like a lot of work but you now have a material you can apply to any other surface. To easily apply the dust to other surfaces in your scene, shift-click and select your Diffuse material along with all the nodes you just created, right-click and select Copy Selection. Now, open up the Material Graph for other materials, right-click and select Paste, and attach the Diffuse node to the Label input.

Again, this is by no means the only way to create dust effects in KeyShot but it is one way that offers a lot of flexibility and allows you to stack different textures to create even more realistic dust-covered surfaces. You can learn more about the Material Graph in the KeyShot Manual.
Wrap Up
Using textures to add surface dust is a great starting point to create a more complex and intricate surface appearance for your future KeyShot projects. A subtle amount of dust can provide just enough realism to the product shot to make it look more convincing while a lot of dust can be used to create a truly weathered appearance. With this technique, you can do the same for adding other types of imperfections to surfaces as well.
iRender - Powerful Cloud Rendering For Keyshot
iRender is a GPU-Acceleration Cloud Rendering Service for Multi-GPU Rendering with Powerful Render Nodes: 2/4/6/8x RTX 3090, provides high computing performance on the model of IaaS (Infrastructure-as-a-Service). Users will remotely connect to our server, install any version of Keyshot only one time and easily do any intensive tasks like using their local computers.
High-end hardware configuration
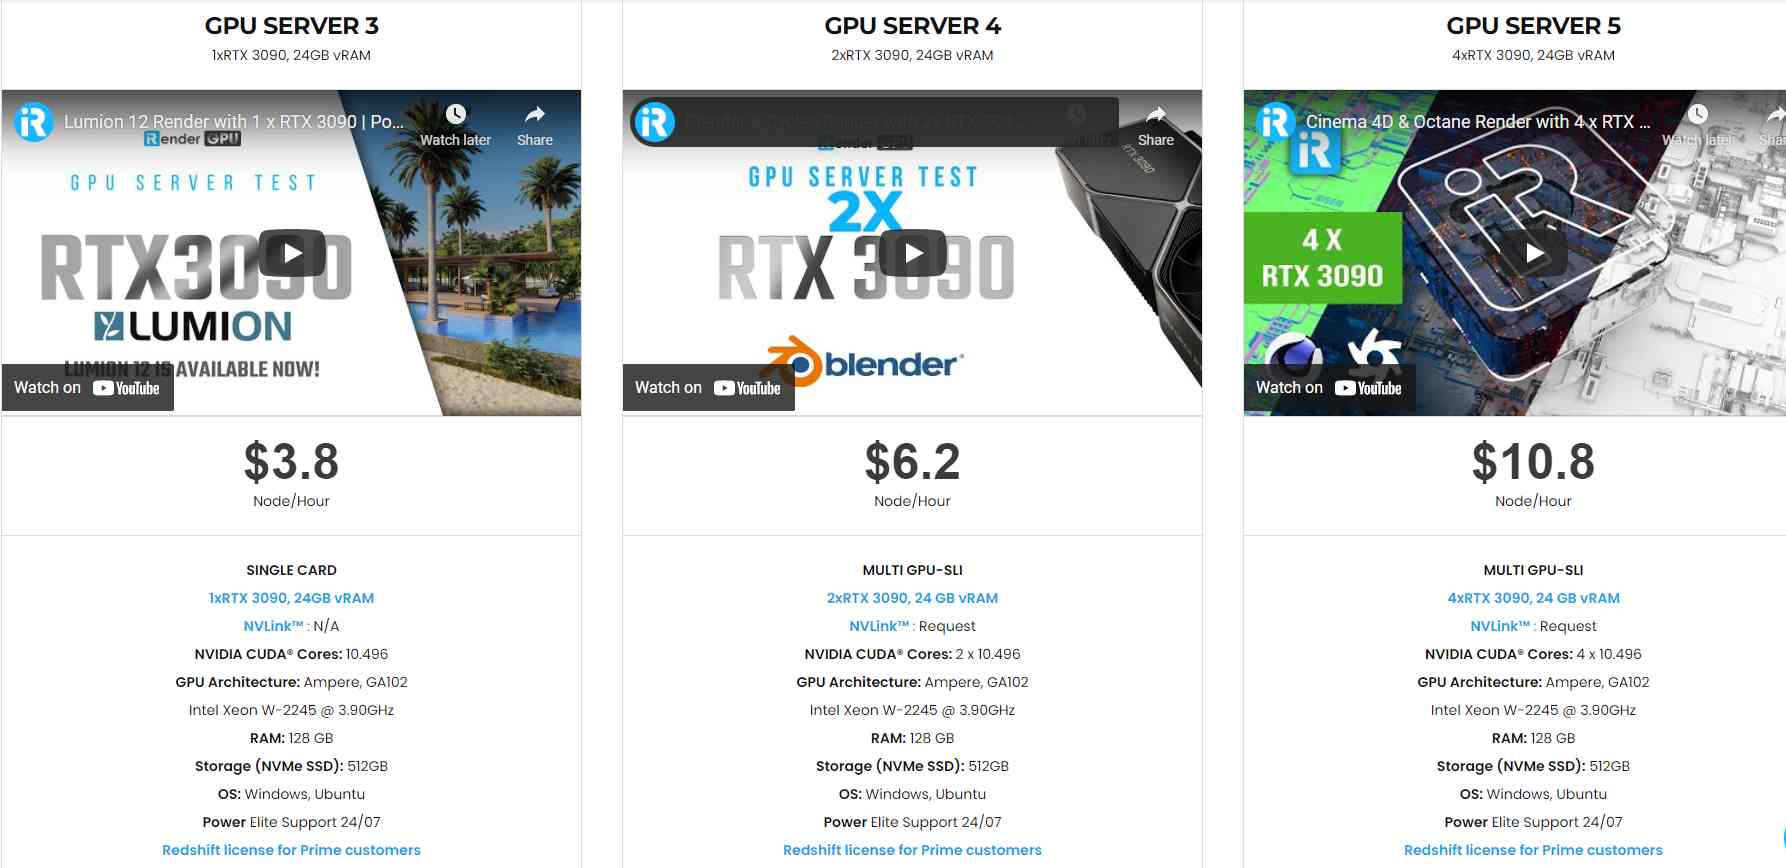
- Single and Multi-GPU servers: 1/2/4/6/8x RTX 3090. NVIDIA RTX 3090 – the most powerful graphic card.
- 24 GB vRAM capacity, fitting to the heaviest images and scenes. NVLink/SLI requested for bigger vRAM.
- A RAM capacity of 128/256 GB.
- Storage (NVMe SSD): 512GB/1TB/2TB.
- Intel Xeon W-2245 or AMD Ryzen Threadripper Pro 3955WX CPU with a high clock speed of 3.90GHz.

Incredibly, iRender supports NVLink (Request) which helps you increase the amount of VRAM to 48GB. This is a technology co-developed by Nvidia and IBM with the aim of expanding the data bandwidth between the GPU and CPU 5 to 12 times faster than the PCI Express interface.
Let’s look at Keyshot rendering test with NVLink on servers using graphic card RTX 3090 at iRender.

Reasonable price
With all the outstanding advantages mentioned above, you must have found yourself the perfect choice for Keyshot. We provide unmatched support tailored to your specific needs and goals. SPECIAL OFFER for this January: Get 20% BONUS for all newly registered users. Let’s CHECK IT OUT!

For more advice and support, please do not hesitate to reach us via Whatsapp: +(84) 915875500. Register an ACCOUNT today and get FREE COUPON to experience our service.
Thank you & Happy Rendering!
Source: blog.keyshot.com
Related Posts
The latest creative news from KeyShot Cloud Rendering , Cinema 4D Cloud Rendering , 3D VFX Plugins & Cloud Rendering.