How to Design a Level in Unreal Engine with Daz Studio
Level design is a crucial aspect of game development, from sides-scroller NES classics to modern open-world adventure games. How you approach a design will vary widely depending on the genre and medium you are working with. In a side-scroller adventure like Super Mario, for example, the level design consisted of various platforms and challenges that kept the game unique, surprising, and progressive. In an RPG title, a level design might be more about visual appeal, exploration, and the ability to uncover hidden secrets, quests, or treasure.
This is going to be a broad look at the topic from a technical standpoint to help beginners get started and to give Daz 3D users more insight on how they can take their 3D modeling to a new level with practical game design. To accomplish this, we will be looking at how to design a level in Unreal Engine with Daz Studio (Unreal Engine 4).
Getting Started
Here is what you will need to follow along:
Daz Studio
Daz Bridge to Unreal
Unreal Engine 4 version 4.25
Quixel Megascans
That said, this tutorial on how to design a level in Unreal Engine with Daz Studio will only get you started and prime your thinking. We want to show you what is possible, and ultimately, it will be up to you to fill in the rest. This tutorial allows you to follow along with any assets that you want!
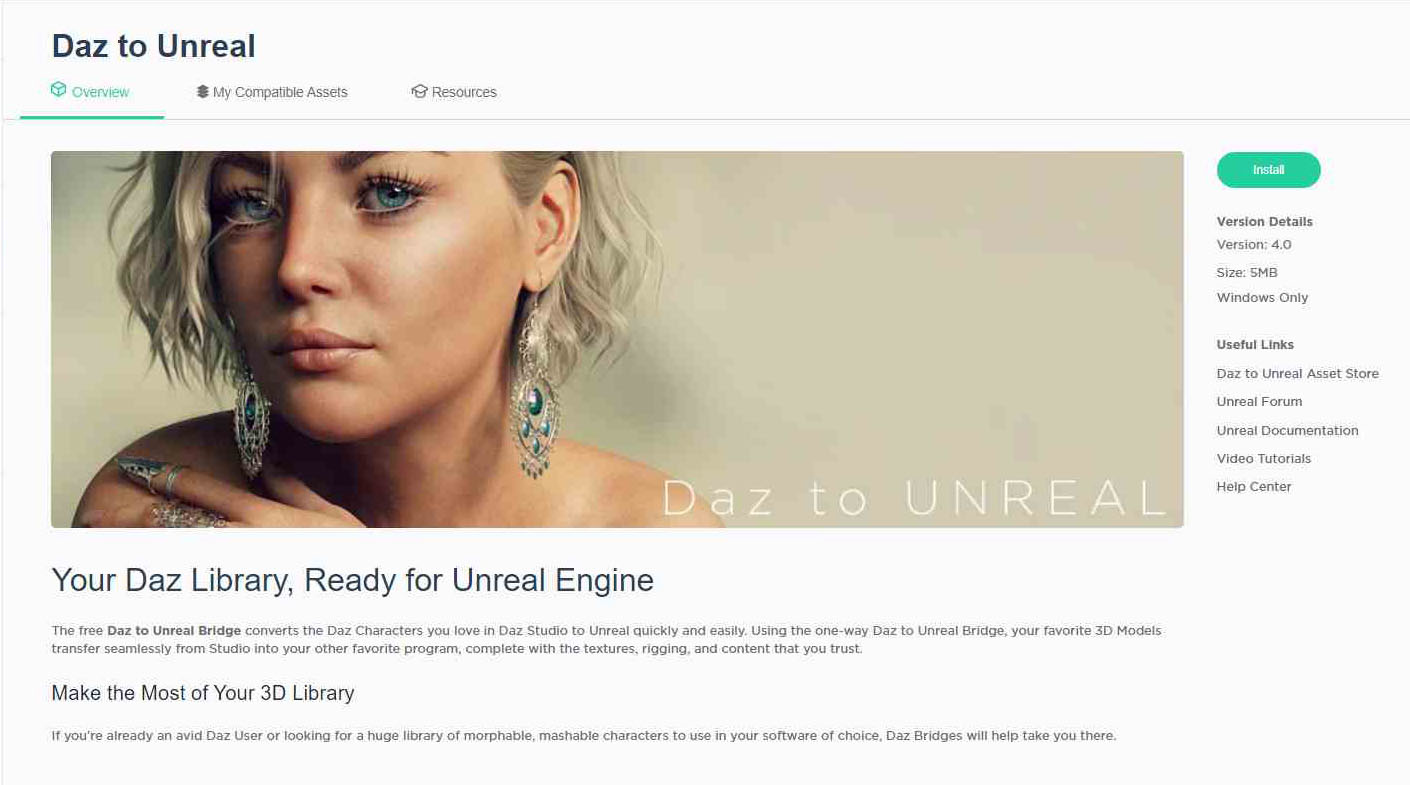
If you don’t have it yet, pick up the Daz to Unreal Bridge for free in Daz’s marketplace. Once you have it, open up Daz Central and hit install. However, if you have not yet installed Unreal Engine, you will want to do that first. Please note that currently, the Daz Bridge to Unreal is compatible with Unreal Engine version 4.25. While 4.26 rolled out recently, you will have to wait a little longer before you can take advantage of the new features and use the bridge.
After you install the Daz to Unreal Bridge, you will need to select a path for where the bridge should go. This is important and has to be right for Unreal Engine with Daz Studio to recognize the bridge as an installed plugin. The bridge needs to live in the same folder as your Unreal Engine 4 download. A typical path usually looks like this:
Before we move on, now will be a great time to sign up for a Quixel Megascans account if you haven’t yet. Use your Epic Games sign-in to link the two accounts. This will allow you to have full access to the Megascans library for free. You will have to install Bridge, which will import your environmental meshes into the game. More on that in a minute. While we are at it, we can go ahead and set a few things up in Unreal.
Setting Up Unreal Engine And The Bridges
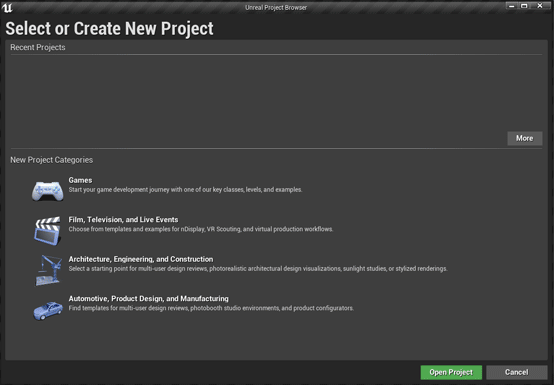
Now we can start getting into the fun stuff. Sort of. We still need to make sure a few things are working properly first. When you first open Unreal Engine, you will come to this first menu. Select Games > Next > Third Person > Next > Enter a Project Name > Create Project.
Because Megascans support is built-in, you should see the green Megascans icon automatically. To enable the Daz Bridge to Unreal, we will have to enable it manually. Navigate to Settings > Plugins > Installed. Make sure that the little checkmark next to enable is marked. It will prompt you to restart the editor. Hit Restart Now.
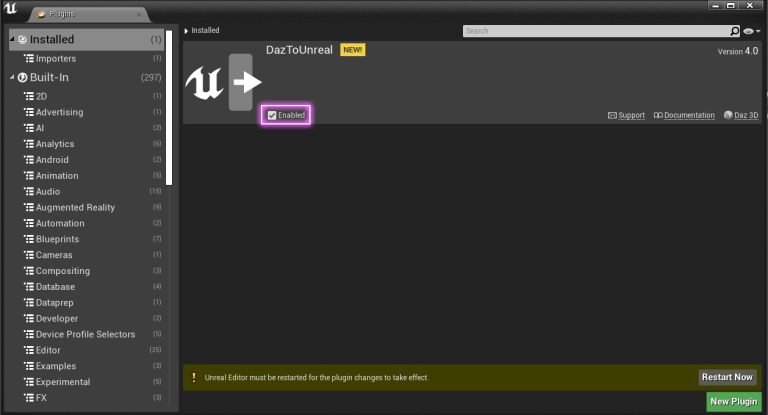
After the editor restarts, verify that you now see the plugin along the top of your editor window, which should now look like this:

If it is there, along with the Megascans plugin, then everything is ready to go, and we can start creating our very first level!
How To Design A Level In Unreal Engine
Now, while we are in Unreal Engine, we may as well get started on the foundation of our level! Unreal Engine has a powerful, intuitive landscape editor that is great for creating a starting point. First, delete all the geometry that is preloaded with the Third Person template. Don’t delete the Unreal character mannequin or the camera; you can leave the preloaded lighting information as well.
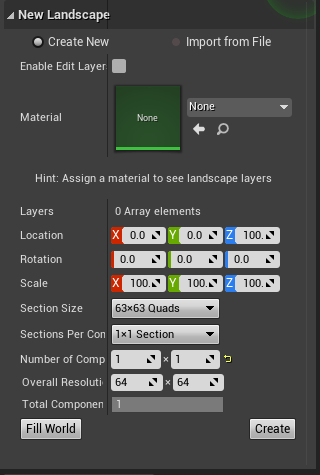
Once the level is cleared, navigate to Modes, then Landscape. You will notice your tools on the left-hand side of the editor change. We are going to initialize a new heightmap using the fillable setting under the New Landscape section, and then use built-in sculpting tools to prepare the land in the right direction.
All of the default settings will suffice. The more quadrants you do, the larger your landscape will be. Feel free to make this as big or small as you need. As you will see, just 1 quadrant will give you plenty of space for most beginner levels. Your settings should look like this screenshot.
How To Design A Level In Unreal Engine with Daz studio
If you already have a material that you want to use, you could also apply that now, but if not, that’s okay. As you set the size for the heightmap, you will see a green wireframe outline showing you a preview of what the landscape will look like. Once you are satisfied, click create, and a solid foundation will appear.
Designing The Environment
After you create the heightmap, Unreal Engine will automatically move you to the Sculpt tab. Above the editor window, you will see a series of tools like this:

While each tool is fairly explanatory, some are trickier to use than others. The sculpt tool will make broad and quick changes to your heightmap. Play with the brush size and tool strength to see different results. As you click and “paint” across your landscape, you will see the heightmap change accordingly.
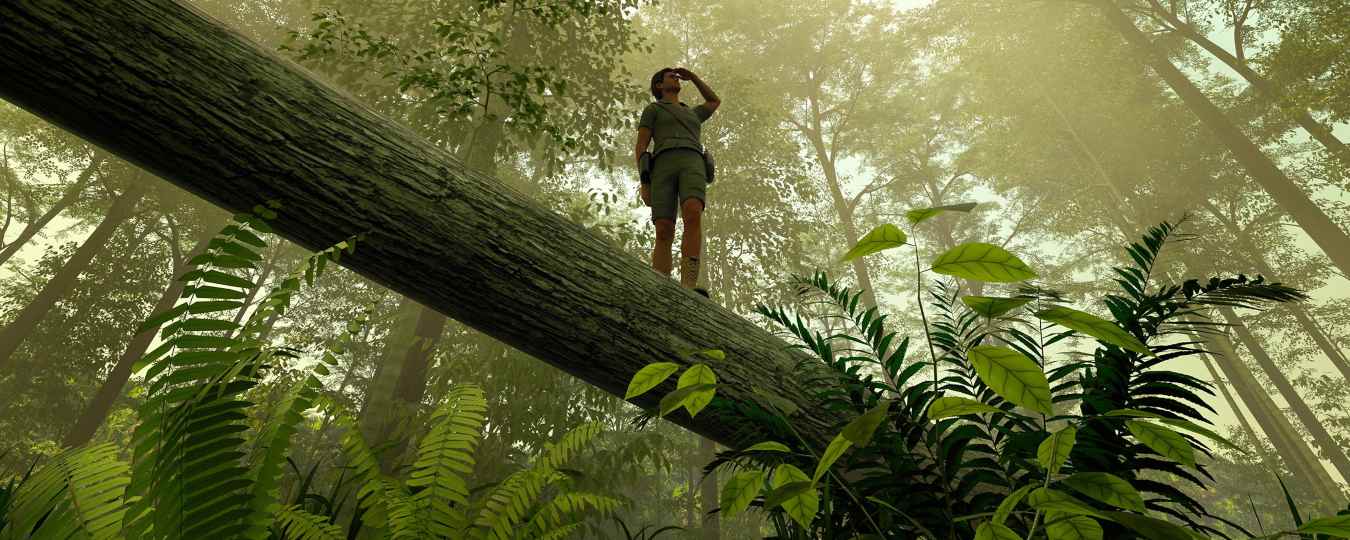
After looking through the Megascans library, you can try for your level to design something using the Canyons of Utah collection. If you are familiar with Southern Utah, that means arid desert, bright red rock, and interesting weather canyon and rock formations.
For now, you can just paint generally, not stressing too much about the exact, just get a feel for the flow of the level. Imagining a series of tight canyons that the player will have to explore. So, using the sculpt tool, start to shape out the maze-like canyons. Once you’re pleased with the layout, use the flatten tool to cap off the peaks and the erosion and hydro tool to make the slopes look natural. When all is said and done, here is a rough outline.

Now that we have a space to work with a general flow for our level, it is time to start putting it together. Save your project and hop into Bridge to start exploring the Megascans library.
Build The Details With Megascans Or Other Models
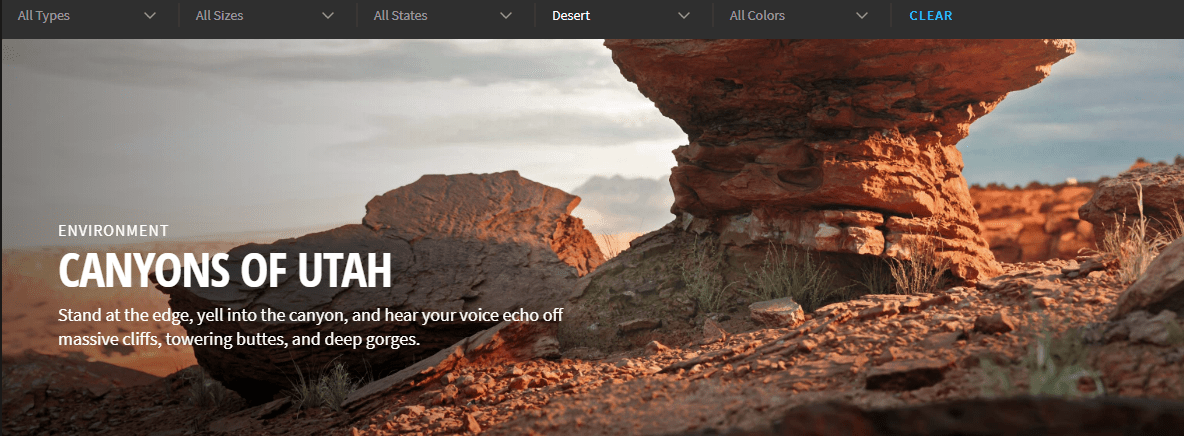
As it was mentioned before, we’d already scoped out the Canyons of Utah collection in the Megascans library and thought it could make a really cool sci-fi environment. The deep red rock gives a strong Mars vibe You can use the search filters above to help find a collection or specific assets. The Environments filter is extremely useful. Just type in Desert, and you will see Canyons of Utah, as well as countless other desert-themed assets that would suit well.
Once you are in Bridge and you’ve decided on the kind of environment you want to design for your level, start downloading the assets. Take into consideration that Quixel offers 2K, 4K, and sometimes even 8K resolution assets. For me, I felt like 4K was more than enough. Once you download an asset to your library, the little green download icon in the upper right corner of the asset’s preview will turn into a blue export icon. With your Unreal Engine project open, hit Export. If you didn’t set a path, you can go ahead and do that now from the Export Settings. Unreal Engine will recognize and start importing the meshes right away.
Once you are in Bridge and you’ve decided on the kind of environment you want to design for your level, start downloading the assets. Take into consideration that Quixel offers 2K, 4K, and sometimes even 8K resolution assets. But maybe 4K was more than enough. Once you download an asset to your library, the little green download icon in the upper right corner of the asset’s preview will turn into a blue export icon. With your Unreal Engine project open, hit Export. If you didn’t set a path, you can go ahead and do that now from the Export Settings. Unreal Engine will recognize and start importing the meshes right away.
As you select potential assets, now is a good time to start thinking about your desired layout. Look for assets that will help the natural flow you have created. Don’t be afraid to grab one or two options so that you can create variation in your level. You can choose a few large cliffs, various rocks, boulders, and two rocky ground materials. Some types of materials will be crucial to make your landscape look more real and natural, so make sure you don’t forget them.
Once you import everything into Unreal, you can start creating and figuring out how to design a level in Unreal that you like! First, apply the base material you chose to the landscape. In the Select mode, click on your landscape, then navigate to the right-hand Details menu and find Landscape. Take your material from the content panel (below the editor window) and drag and drop it into the Landscape Material slot. This will instantly apply the material to your landscape!
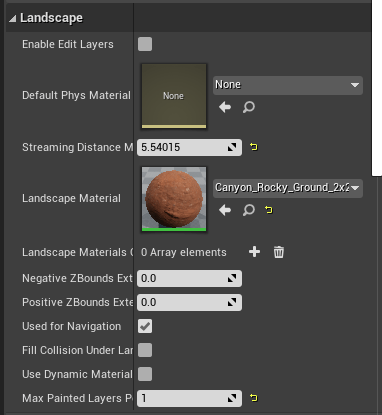
Don’t be dismayed if it looks a little silly. The material is simply being repeated over and over again across the whole landscape. You can tweak settings to find the look you like. You can even use multiple materials, so you can “paint” various materials onto the same heightmap. For example, you may need grass in some places and gravel in others to create paths.
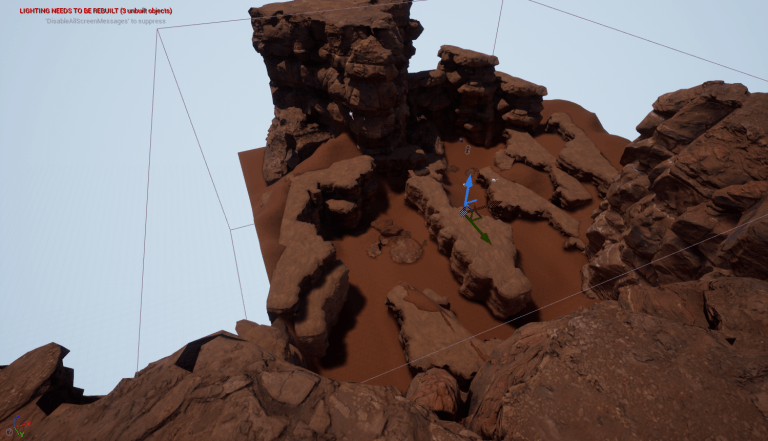
For now, we are going to start placing assets and building level. From the Megascans folder in the content tab, locate the assets and drag and drop them into the level. While in select mode, you can move selected objects along their X, Y, and Z access. You can scale them, and also rotate them. Start placing the big items first, then progressively get more detailed. As you work, you may need to return to the Landscape mode to sculpt and fill in the gaps, then add polish to make things look natural.

Have fun and experiment to see what you can create. This is a stage that you can spend as little or as much time as you like on it, progressively filling your level with details. As we continued to piece together the level, try to stay mindful of both how the level flowed, but also how it looked while actually down inside the canyons.We should work from a bird’s eye view, then dive down to tweak and perfect things from the perspective of the player. This means that some background models may essentially be floating in space, and that’s okay if the player has no possible way of ever seeing that, as long as it adds to the look you need and the extra detail that makes your level awesome.
Creating The Characters In Daz Studio
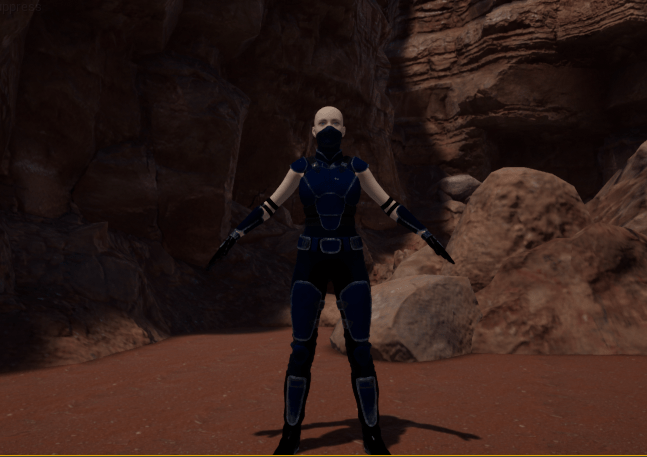
Now that you have learned how to design a level in Unreal that’s beautiful, why not take things even further and add a unique custom character into the mix! Time to hop into Daz Studio. Using your library’s favorite components or by browsing our massive library, build a Genesis 8 compatible character. You can choose to stick in line with the sci-fi theme going with this Genesis 8 Sci-fi Figure.
When you are ready, go to File > Send To > Daz to Unreal. Just like that, your models will import into Unreal Engine! Unreal Engine’s excellent rendering and post-processing effects could turn this into a truly stunning and totally playable game.
Here is all the answer to the question “How to design a level in Unreal Engine with Daz Studio”. iRender hopes this article is helpful for your work.
The professional cloud rendering service for Daz 3D
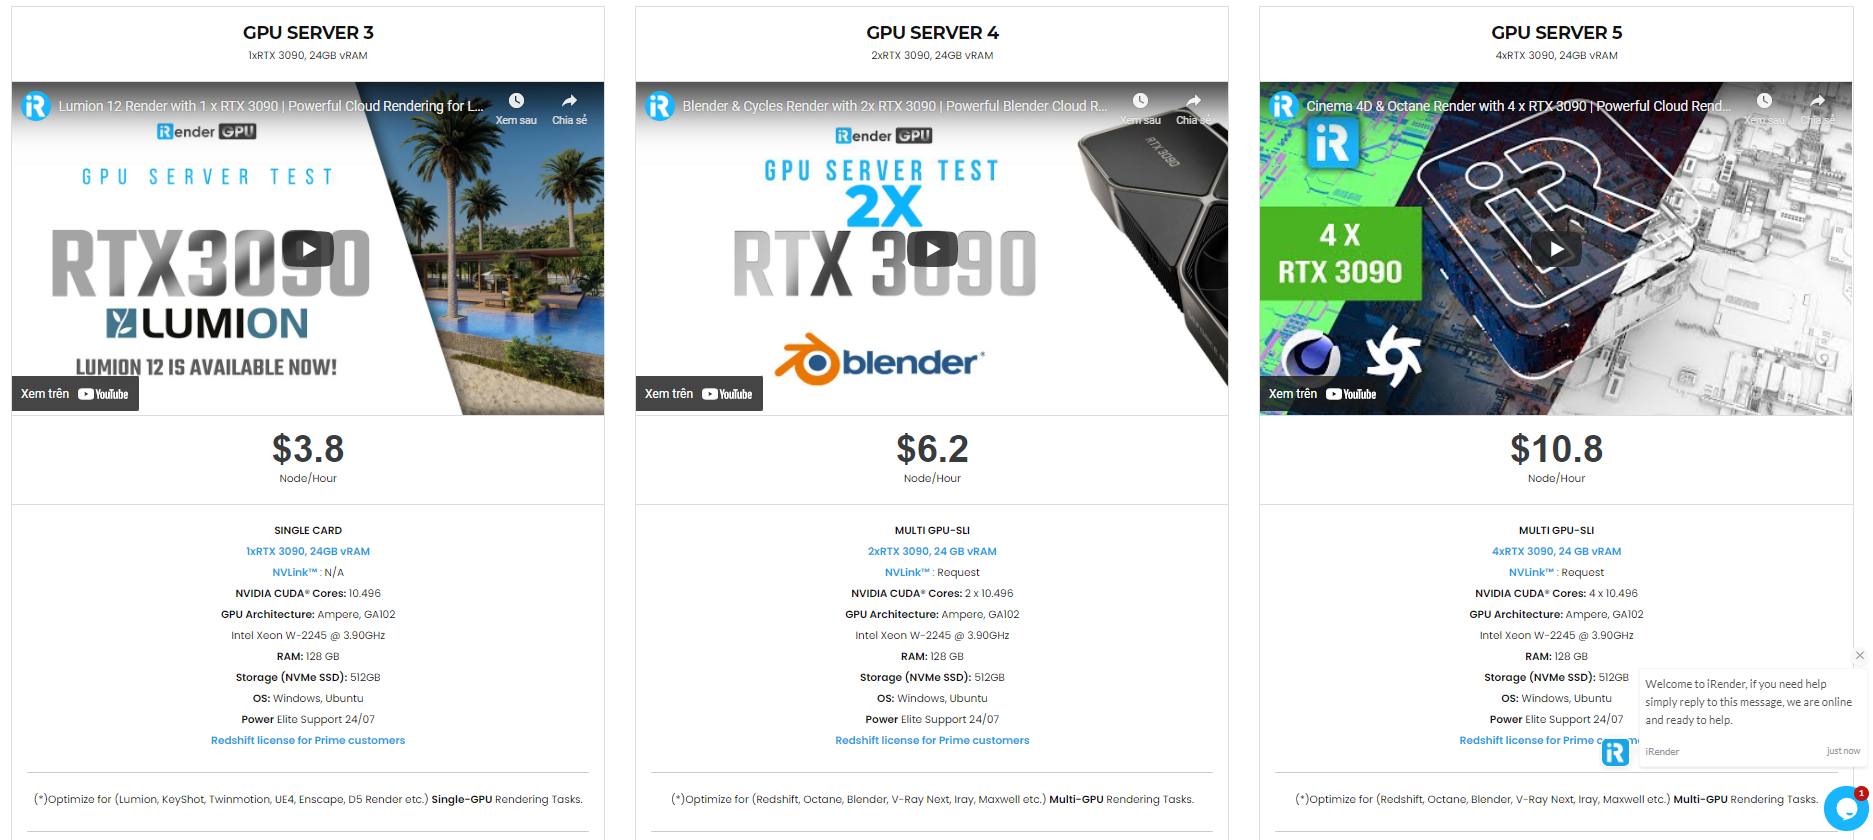
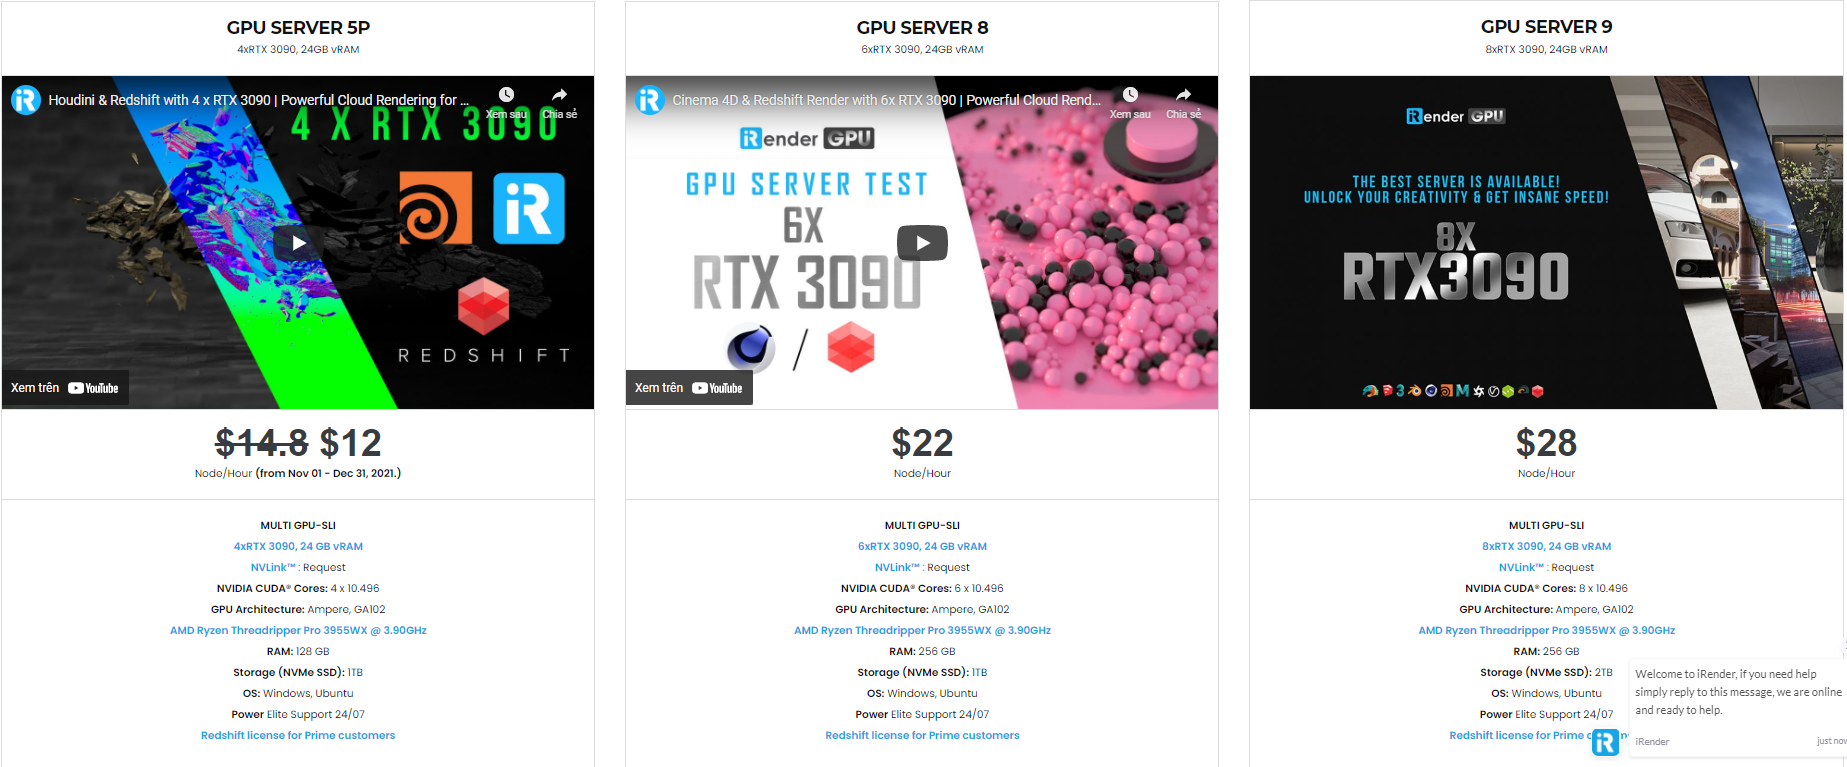
iRender is a GPU-Acceleration Cloud Rendering Service for Multi-GPU Rendering with Powerful Render Nodes: 2/4/6/8x RTX 3090/3080/2080Ti. iRender provides High-performance machines for GPU-based & CPU-based rendering on the Cloud. For Daz 3D users can leverage the power of single GPU, multi GPUs to speed up your render time. Users can easily choose their machine configuration from recommended system requirements to high-end options.

Why iRender?
Reasonable price (lots of bonus)
You will be charged on a per-minute basis. However, you can always save up to 30% with our Fixed Rental feature. For those who are in need of the server for more than a day, or have extremely large projects, we advise choosing daily/weekly/monthly or even yearly rental packages. The discount is attractive (10% for daily packages, 20% for weekly and monthly packages)

Real human 24/7 support
Our support is always online 24/7, helping you to handle the problem quickly, effectively, saving you both time and money.
Conclusion
If you have any questions, please do not hesitate to reach us via Whatsapp: +(84) 972755742. Register an ACCOUNT today and get FREE COUPON to experience our service. Or contact us via WhatsApp: +(84) 972755742 for advice and support.

iRender – Happy rendering
Source & pictures: Daz 3D blog
Related Posts
The latest creative news from Daz3d Cloud Rendering, Redshift Cloud Rendering, Nvidia Iray Cloud Rendering , Octane Cloud Rendering, 3D VFX Plugins & Cloud Rendering.