How to install Megascans Plugin for Cinema 4D
Megascans is a vast online scan library with desktop apps for organizing, combining, and exporting your downloaded scan data. It offers high-resolution, consistent PBR-calibrated surface, vegetation, and 3D images. It is the result of five years of scanning and a partnership with the biggest video game and movie studios in the world.
Today, iRender will guide you through 2 methods to install Megascans Plugin for Cinema 4D.
1. Installation during initial setup
Step 1: After installing Bridge for the first time on your machine, you launch it and will see initial setup options. To select the disk folder where you want your asset library to be, click the Library Path button.
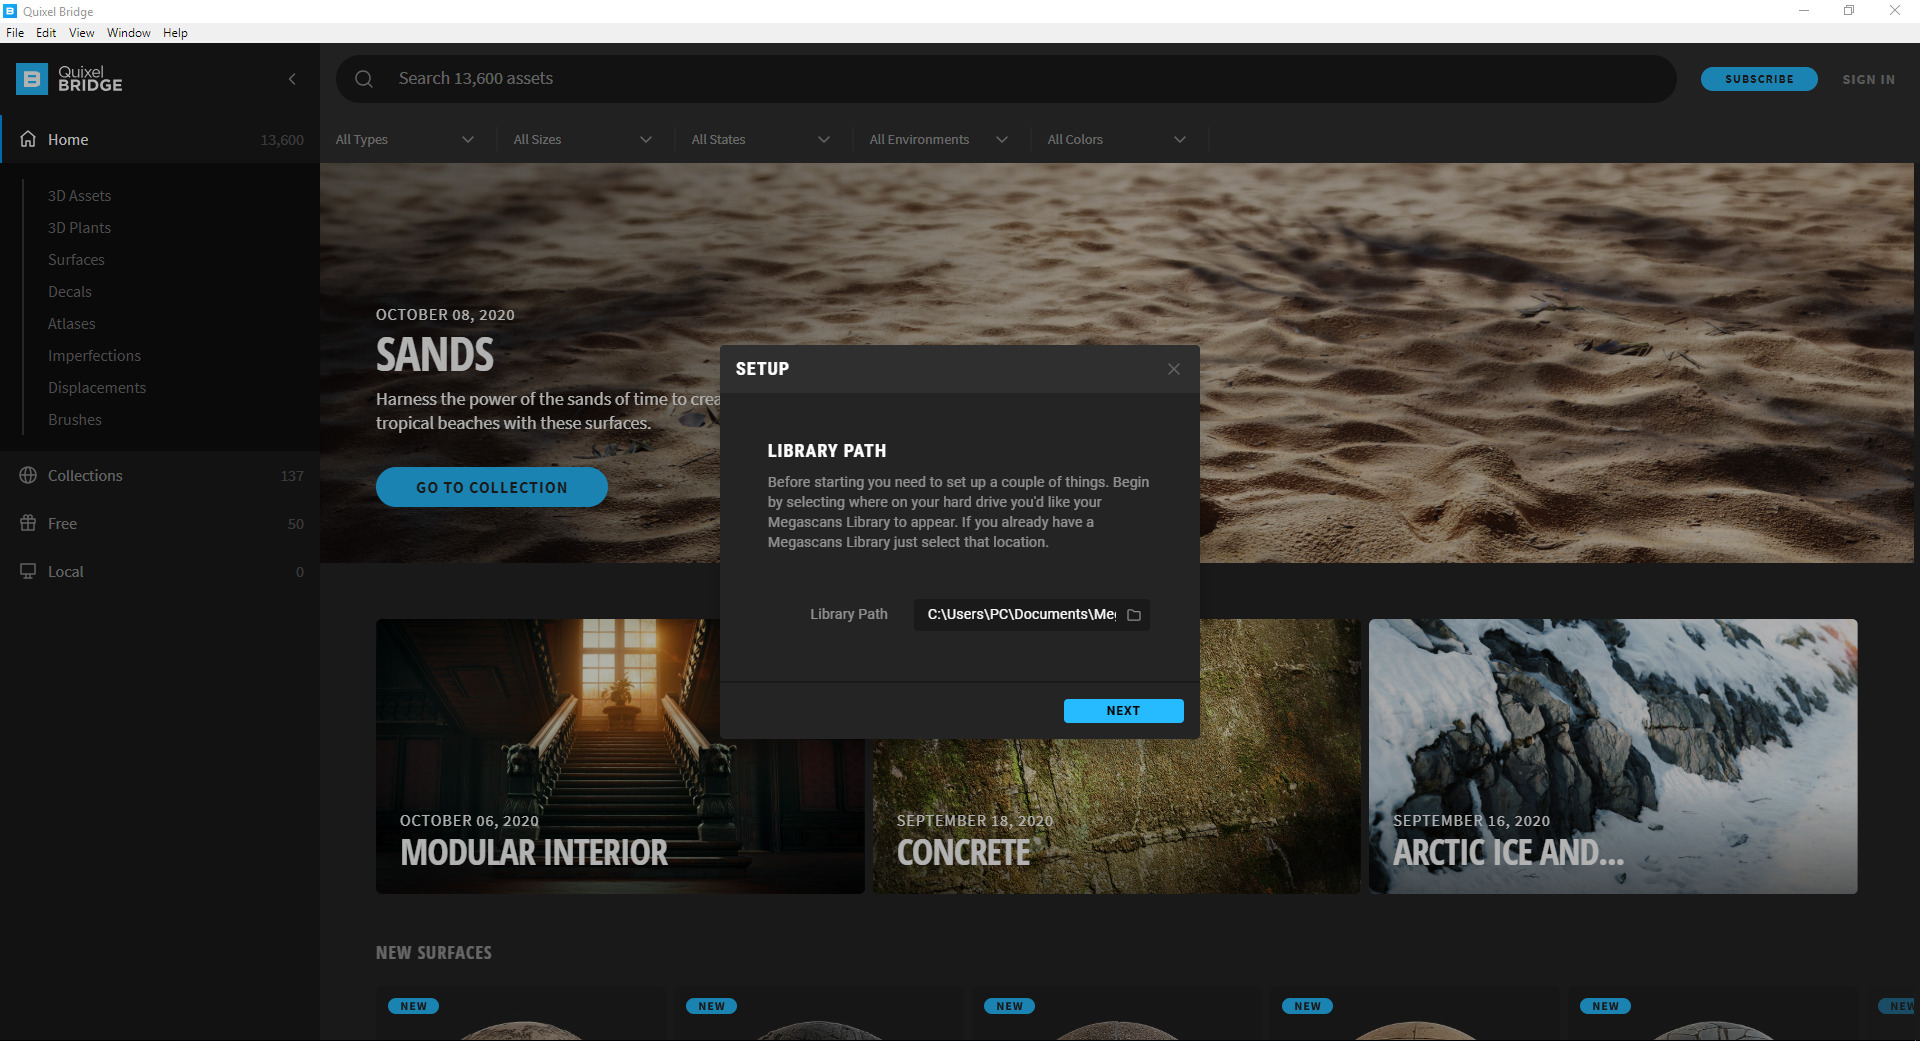
Since Bridge will store your files and plugins here, the Library Path is crucial. Bridge will make a folder for you if you don’t already have one for this purpose.
Step 2: Click Next
Step 3: Choose Cinema 4D from the Export Target drop-down
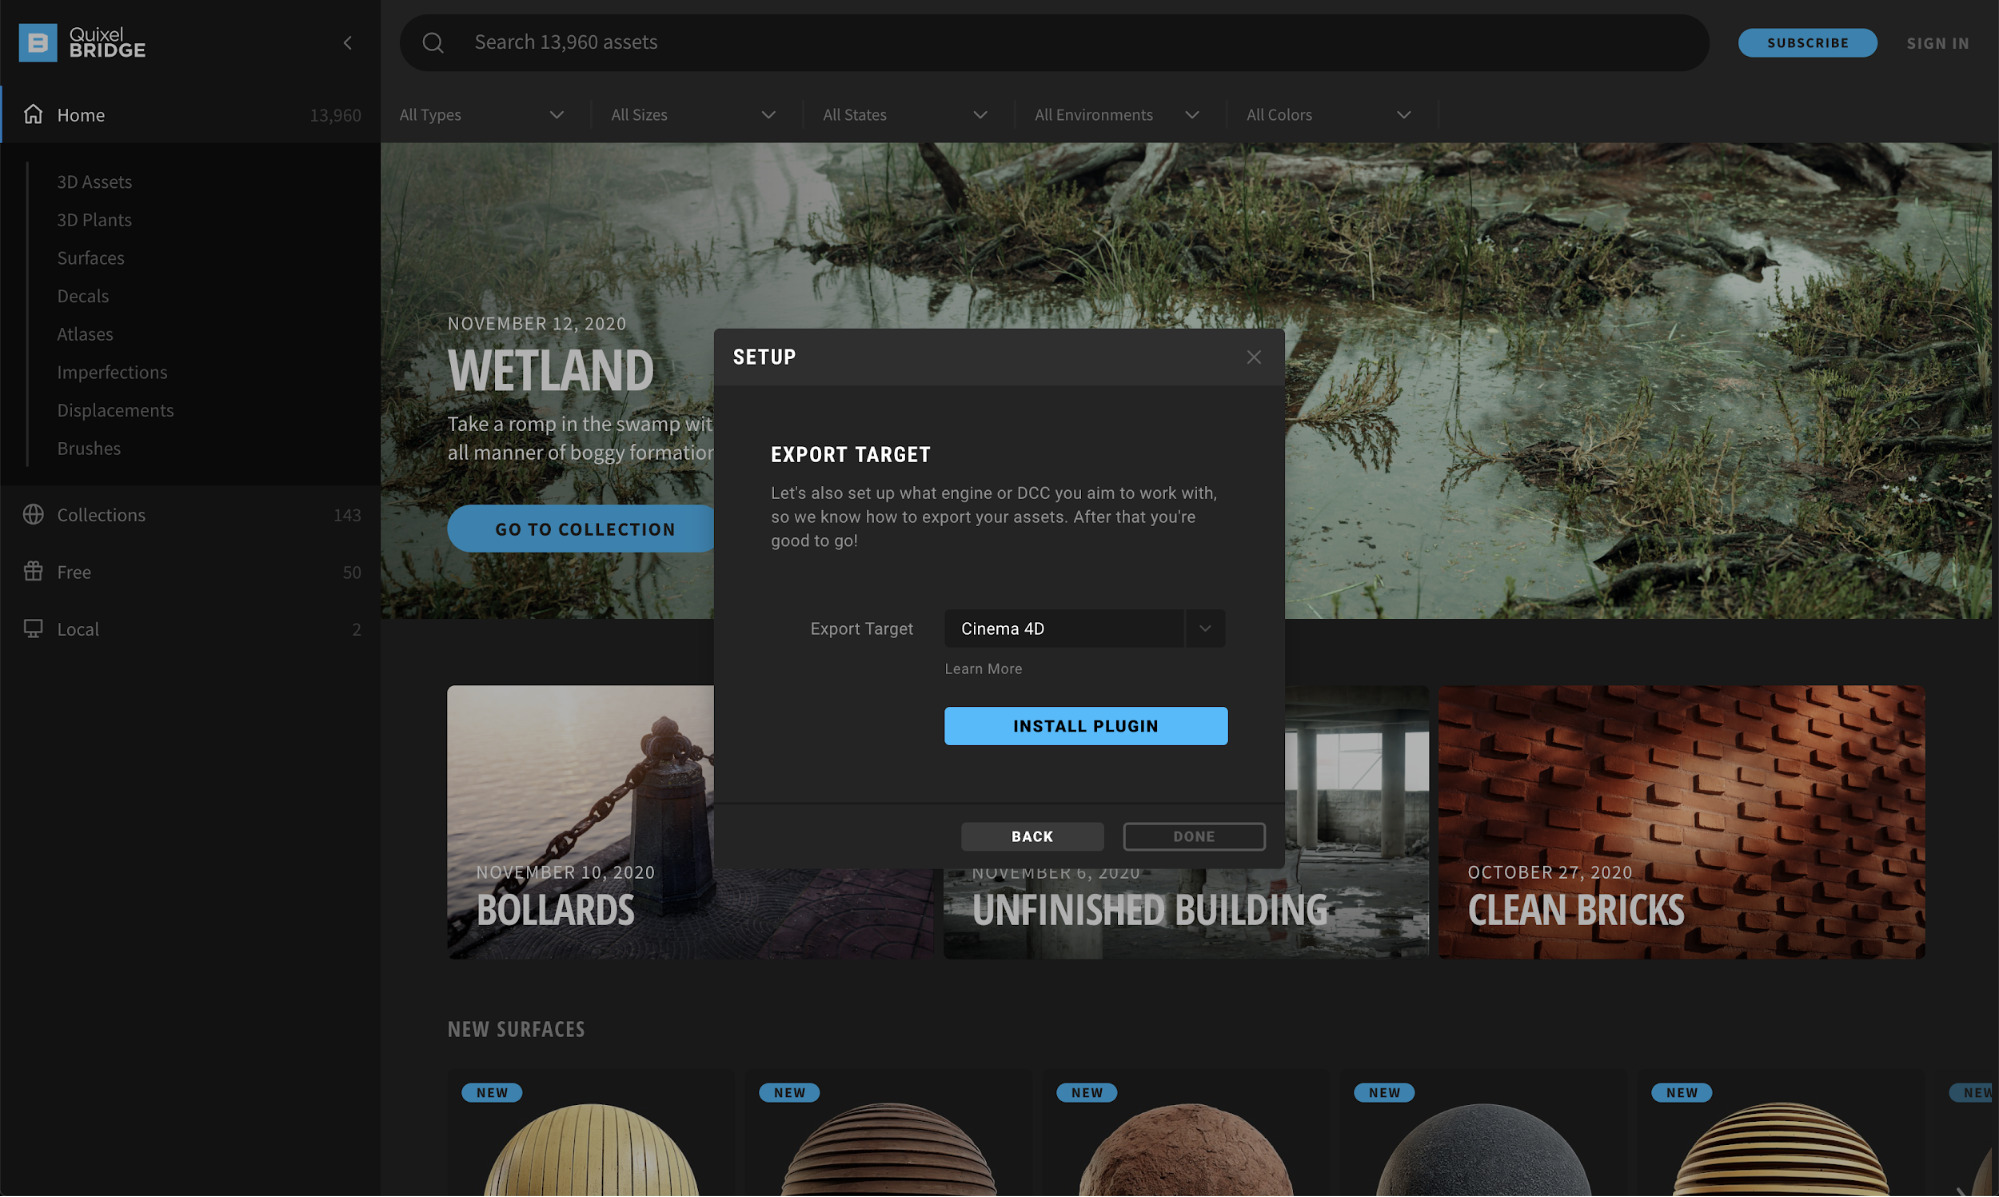
Step 4: To start downloading the plugin, click Download Plugin.
When the download is complete, Bridge will display a confirmation message.
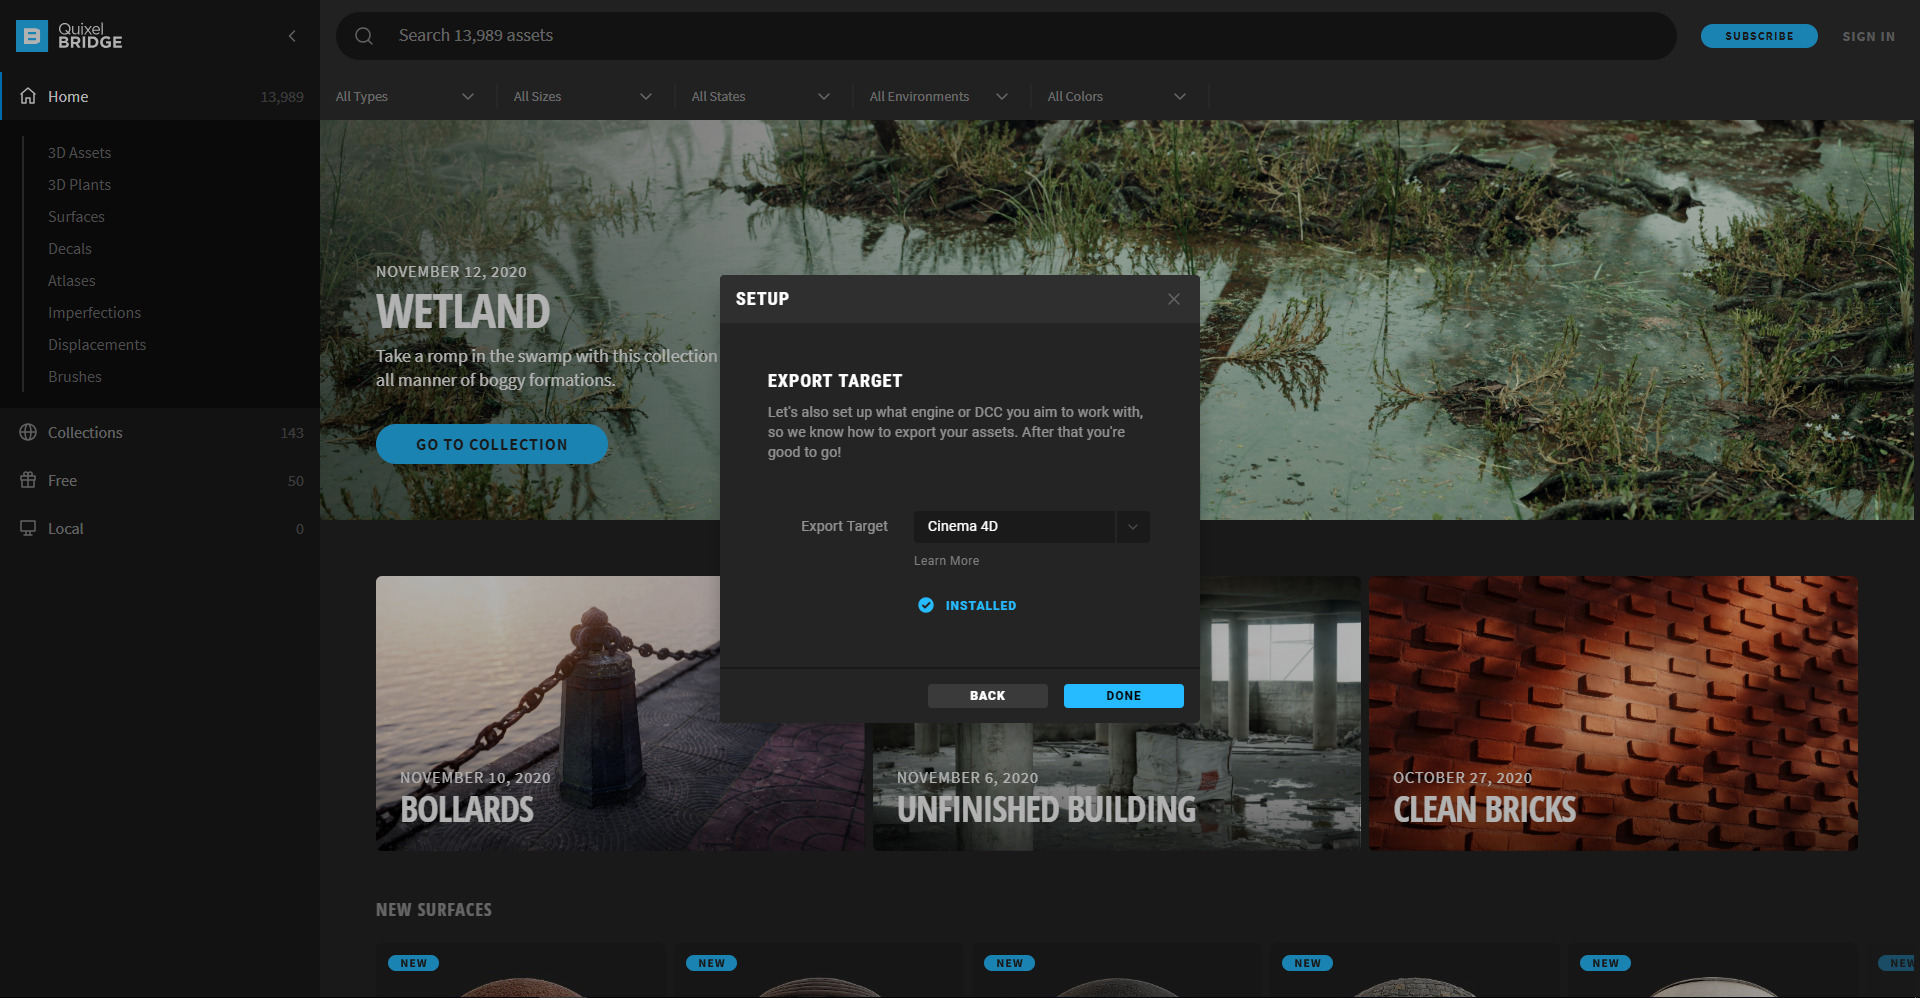
Step 5: To install the plugin in Cinema 4D, click Install Plugin.
Step 6: You should notice the Installed status on the pop-up once the plugin has been installed. To complete the setup, click Done.
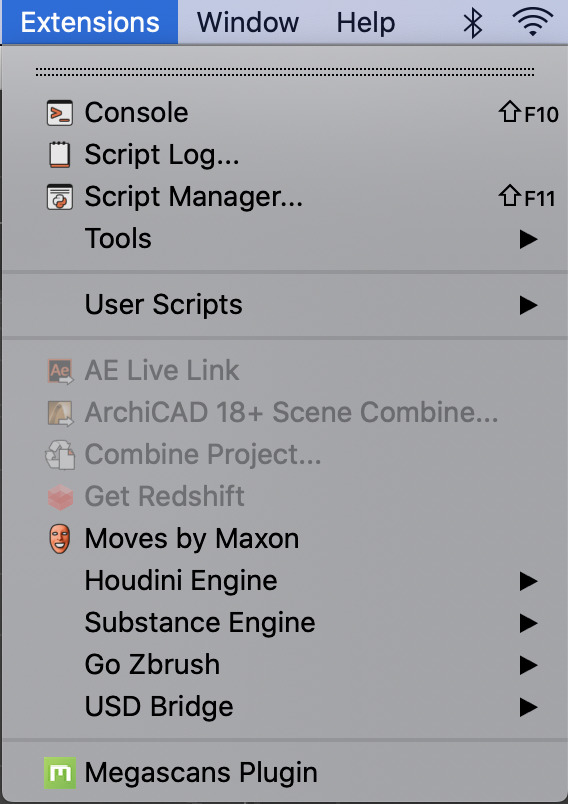
As soon as you launch Cinema 4D, the Extensions menu should now have a Megascans Plugin option.
2. Installation through Export Settings
Step 1: Click the gear icon on the bottom left corner of the asset’s right panel or go to Edit > Export Settings to access the settings
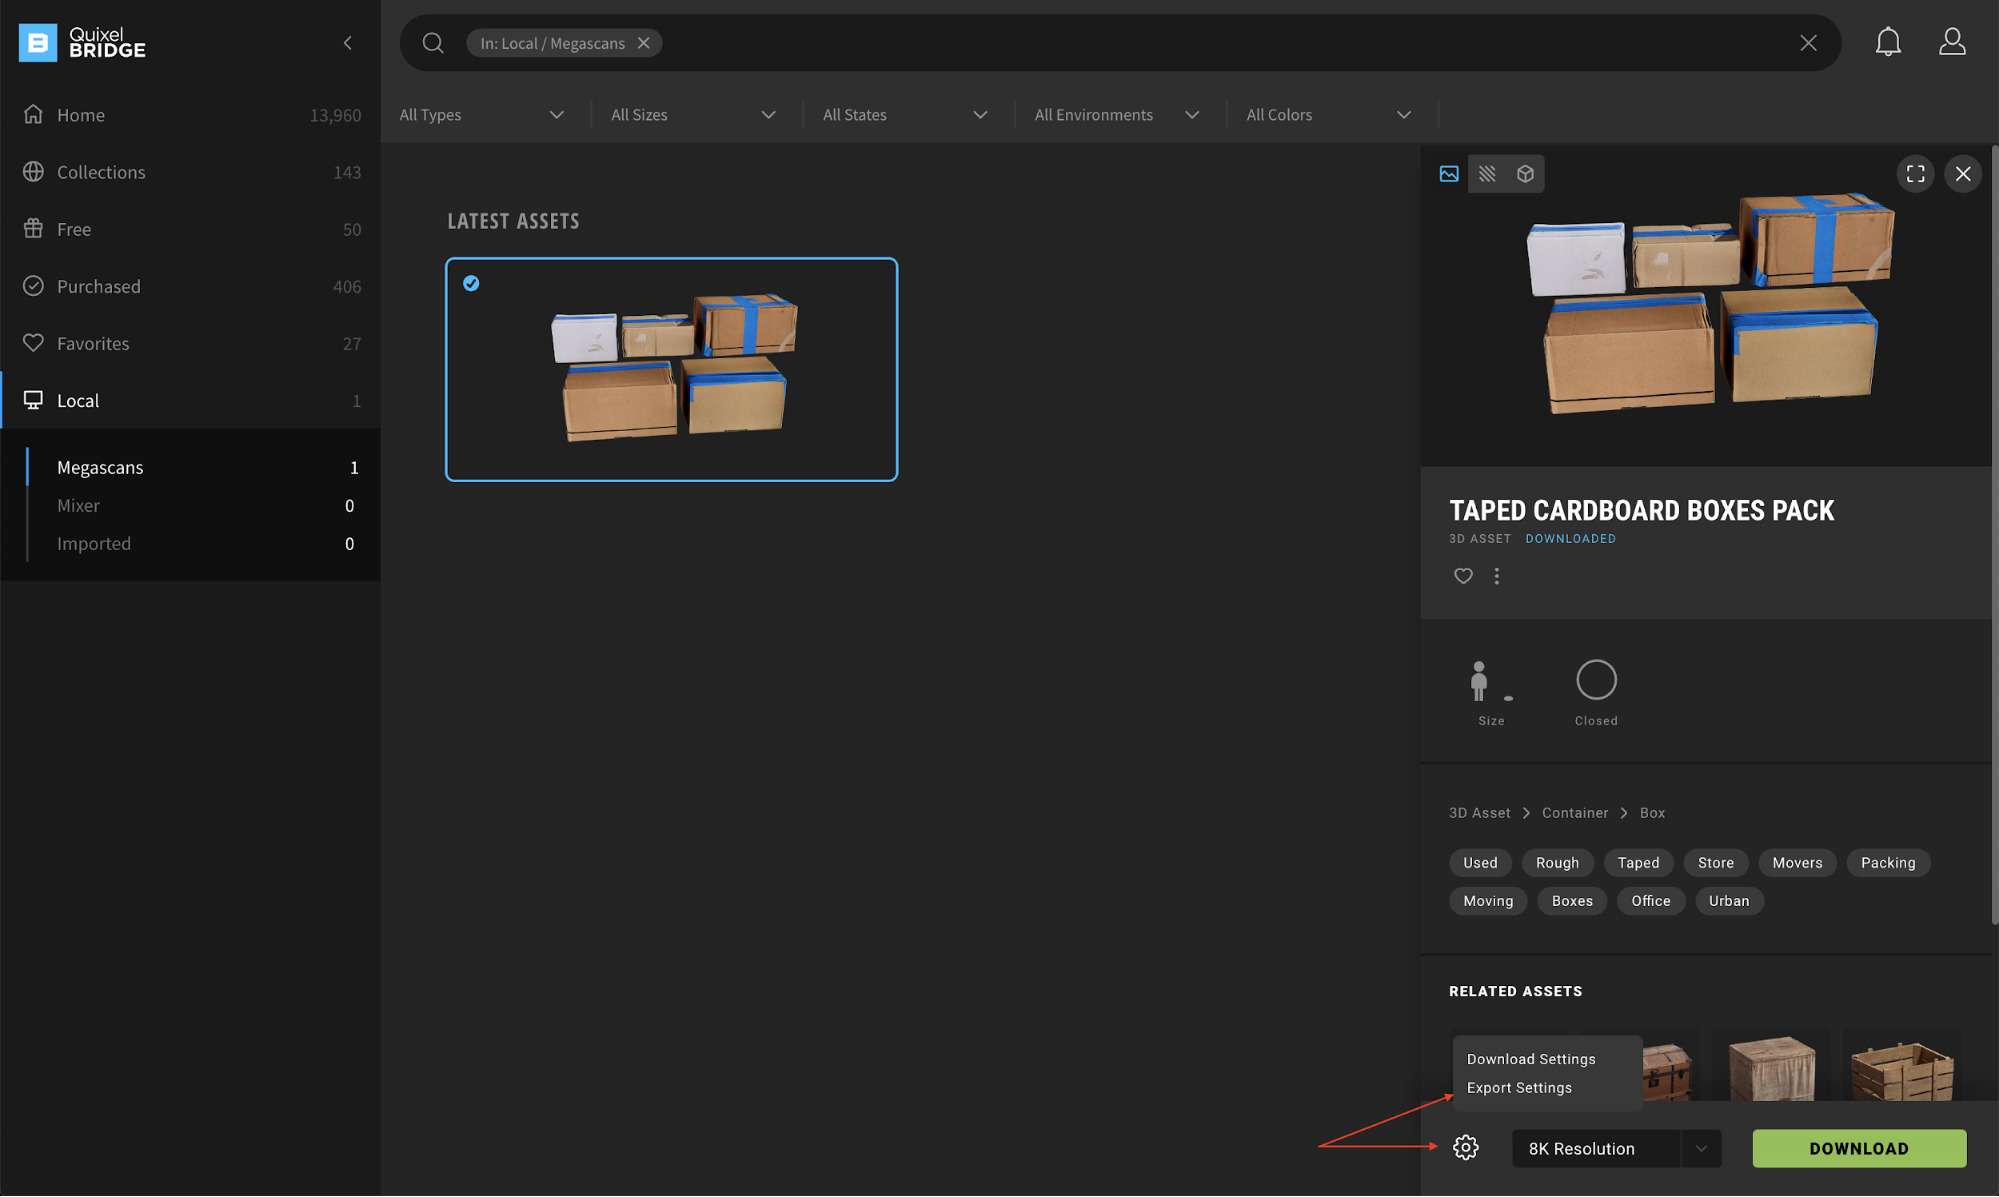
Step 2: To view all of the export options, select Export Settings from the pop-up menu. You may change your mesh format (FBX or OBJ), LODs, texture format, and other parameters.
Step 3: To export a downloaded object in Bridge, navigate to the Local filter on the left panel. Ensure that Cinema 4D is active.
Step 4: Click the Quick Export icon or hit the Export button

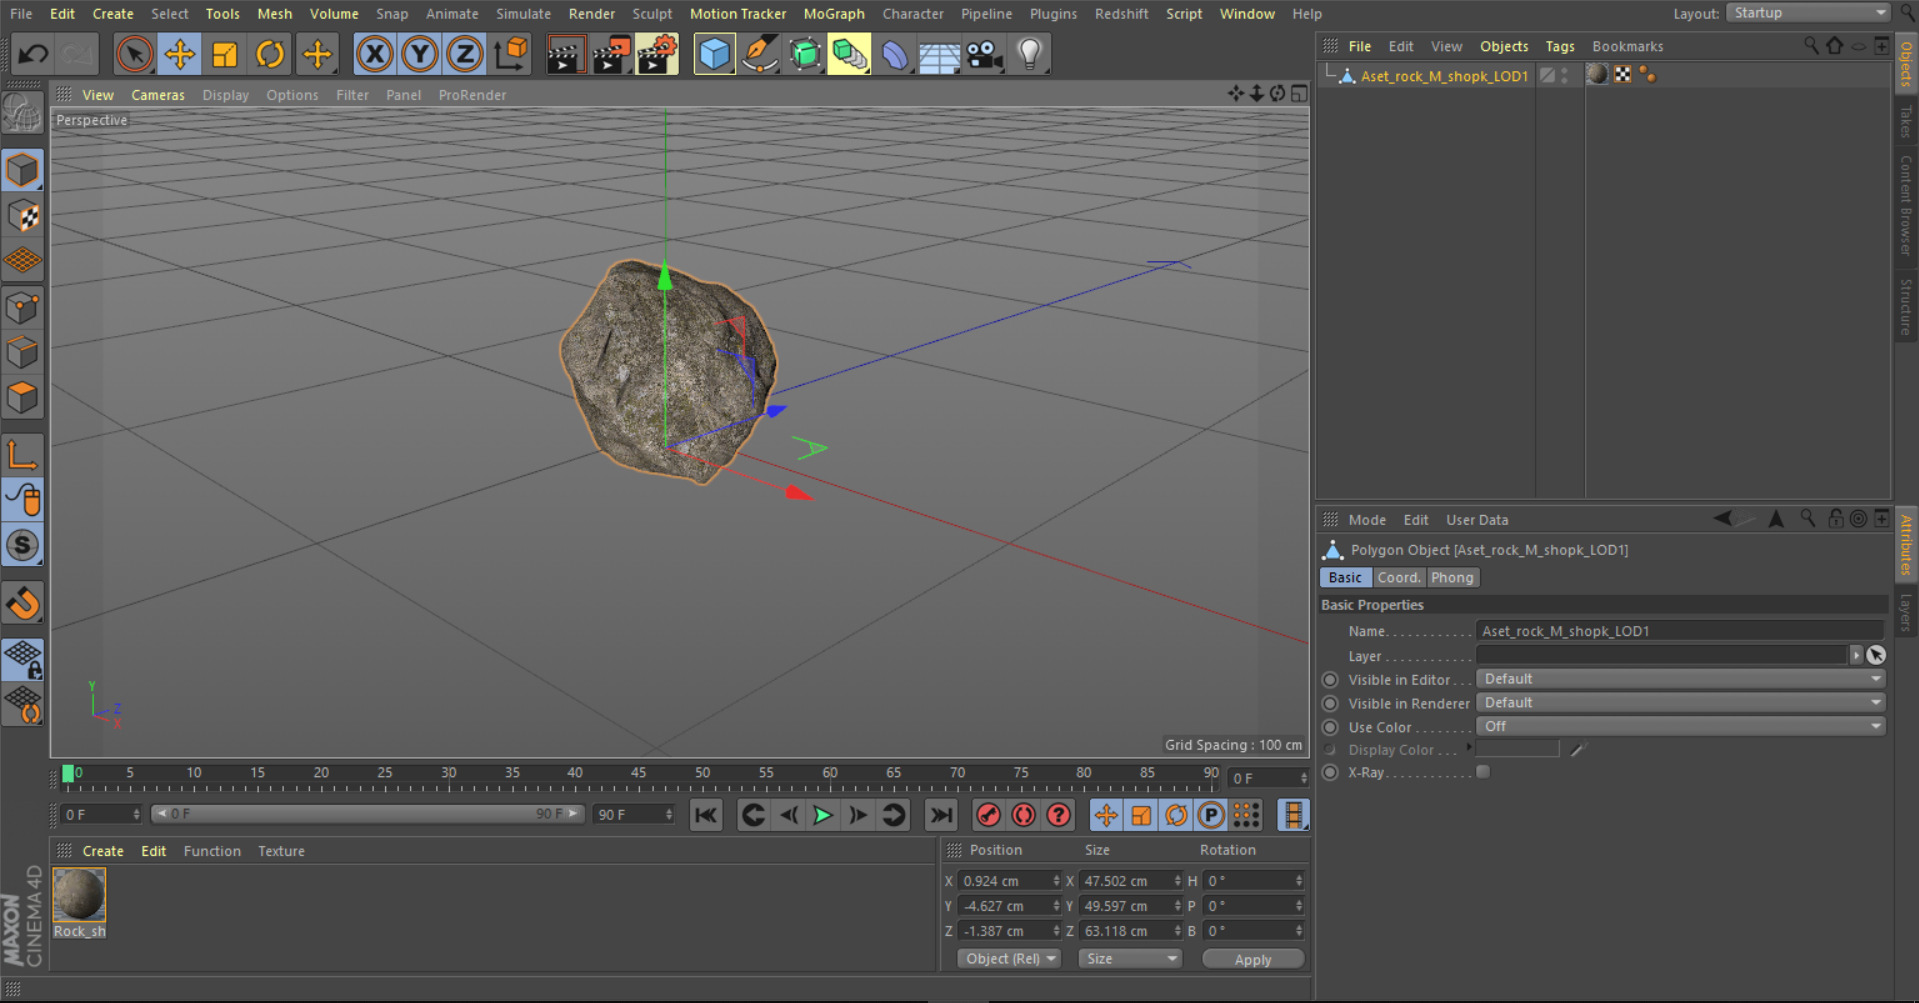
Your asset will appear in your Cinema 4D scene as soon as you click on the Export button in Bridge.
Why is iRender the best cloud rendering solution for render engines in Cinema 4D?
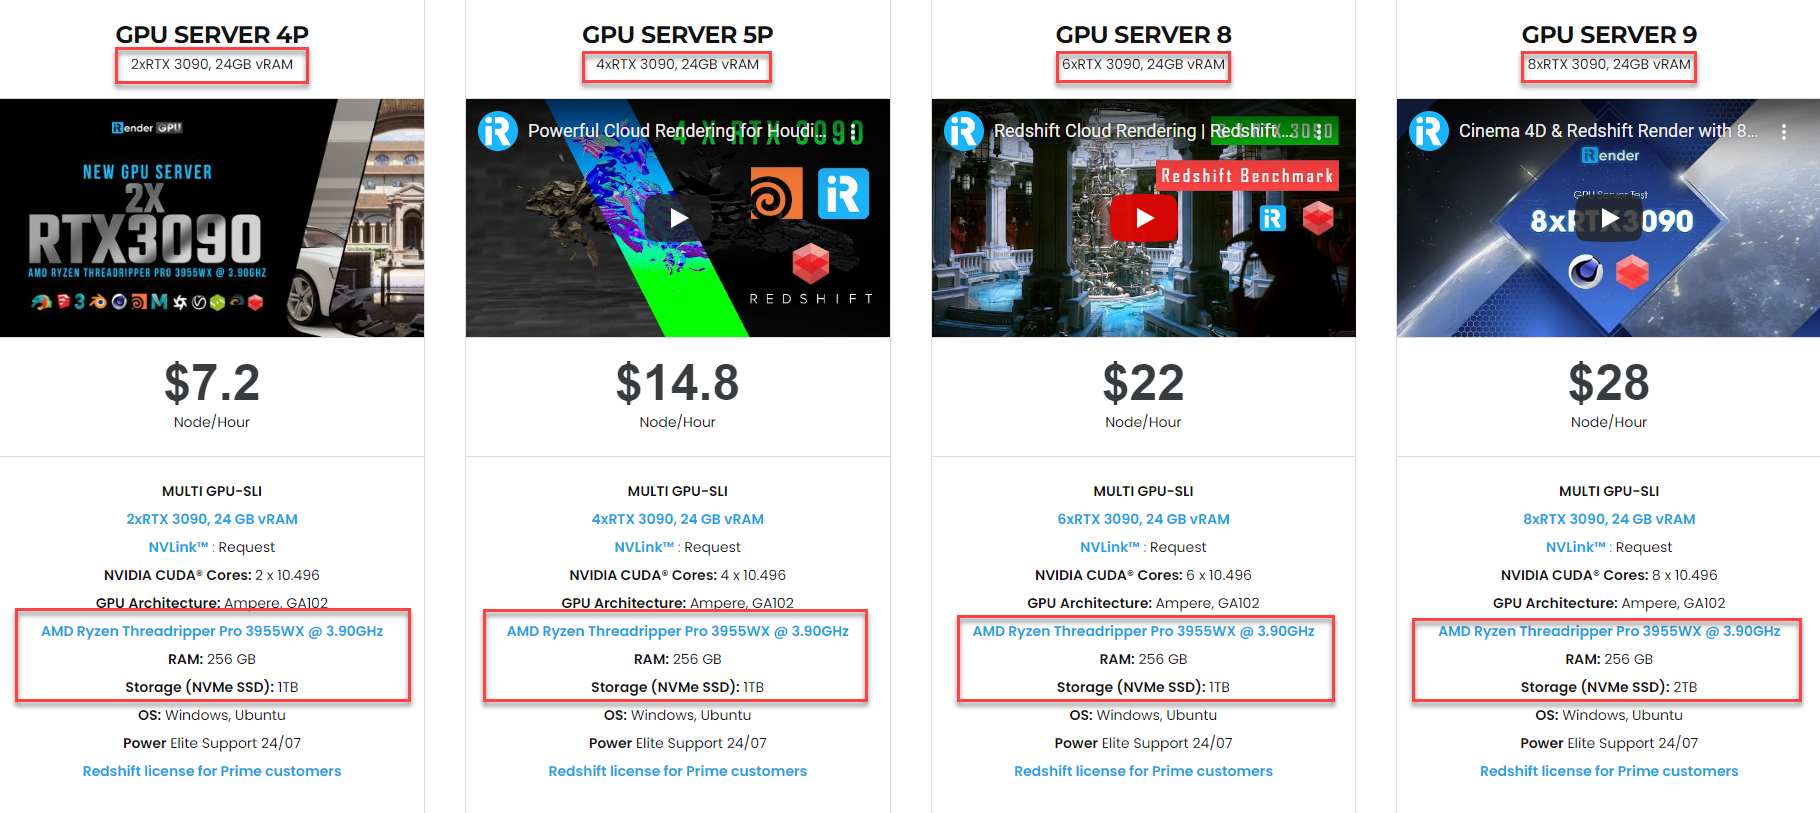
There is no doubt that Arnold, Octane, and Redshift are the big three render engines for Cinema 4D. These are GPU-based rendering engines. At iRender, we provide powerful servers with 2/4/6/8 RTX 3090, and most recently, we have launched servers with new powerful cards RTX 4090 which can dramatically speed up your rendering.
Not only have powerful GPUs and CPUs in all our servers, we also provide a lot of other features to make your rendering time easier and more efficient than ever. Above all, our server supports any applications; therefore, you may install the program you need only once, and everything will be kept for future use. If you’re concerned about security, be assured that the safety and security of your data is our first priority. No one, including iRender, will have access to any of your data. The privacy policy of iRender may be found here. To understand more about our server’s performance with Arnold, Octane, and Redshift, you can see the following video:

Besides, we are committed to providing you with a rendering experience unlike any other. iRender has appreciated in many global rankings (e.g: CGDirector, Lumion Official, Radarrender, InspirationTuts CAD, All3DP, VFXRendering). iRender, in particular, is running a fantastic deal for you: new clients will receive a 20% bonus on their first purchase within 24 hours of enrolling. To learn and enjoy more, please create an account HERE or contact me via [email protected]
iRender – Happy Rendering!
Source: Source: help.quixel.com
Related Posts
The latest creative news from Redshift Cloud Rendering, Cinema 4D Cloud Rendering , Octane Cloud rendering, Houdini Cloud rendering, 3D VFX Plugins & Cloud Rendering.