How to render an architectural scale model in V-Ray for SketchUp
With V-Ray SketchUp, it’s easy to match your designs to a background and create eye-catching realistic architectural renderings. According to many objective reviews, we can see that the scale model makes it easy to communicate an architectural concept. And here’s the trick: you can create a real-world physical model, a 3D drawing, or a combination of the two.
In Today’s Blog, we will show you how to use V-Ray for SketchUp to seamlessly integrate your SketchUp model with photos of a real-life web research model. The resulting images look lifelike, with the advantage that you can quickly tweak and re-render the image if you need to make changes. You can also use these techniques elsewhere. For example, to add a full-scale architectural model to an on-site shot, or to integrate an object with a real-world context.
Step 1: Take a backplate photo and match the camera
Take a picture of your handmade site study model. Make sure you note the color and direction of the on-site light source.
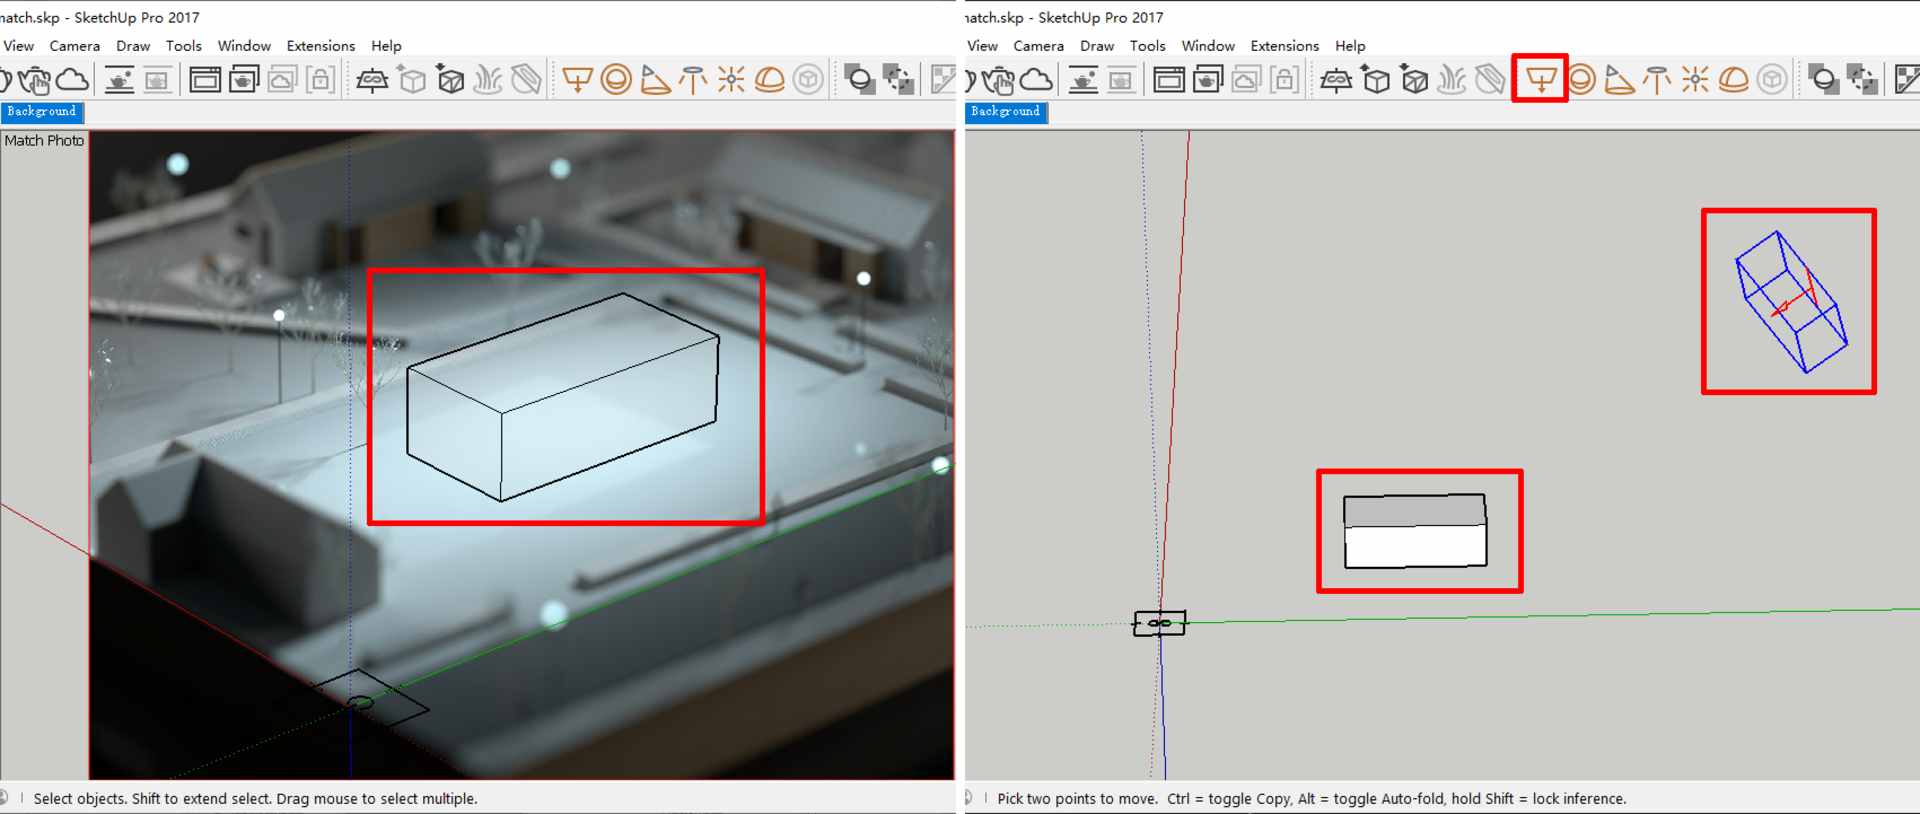
- Create a new file in SketchUp. In the Camera menu, choose “Match new photo…” then select the backplate photo.
- Drag the origin point (yellow square) to one corner of the site model. The red and green parallel lines control the direction of the perspective line. Just remember that the red, green, and blue axes are perpendicular to one other.
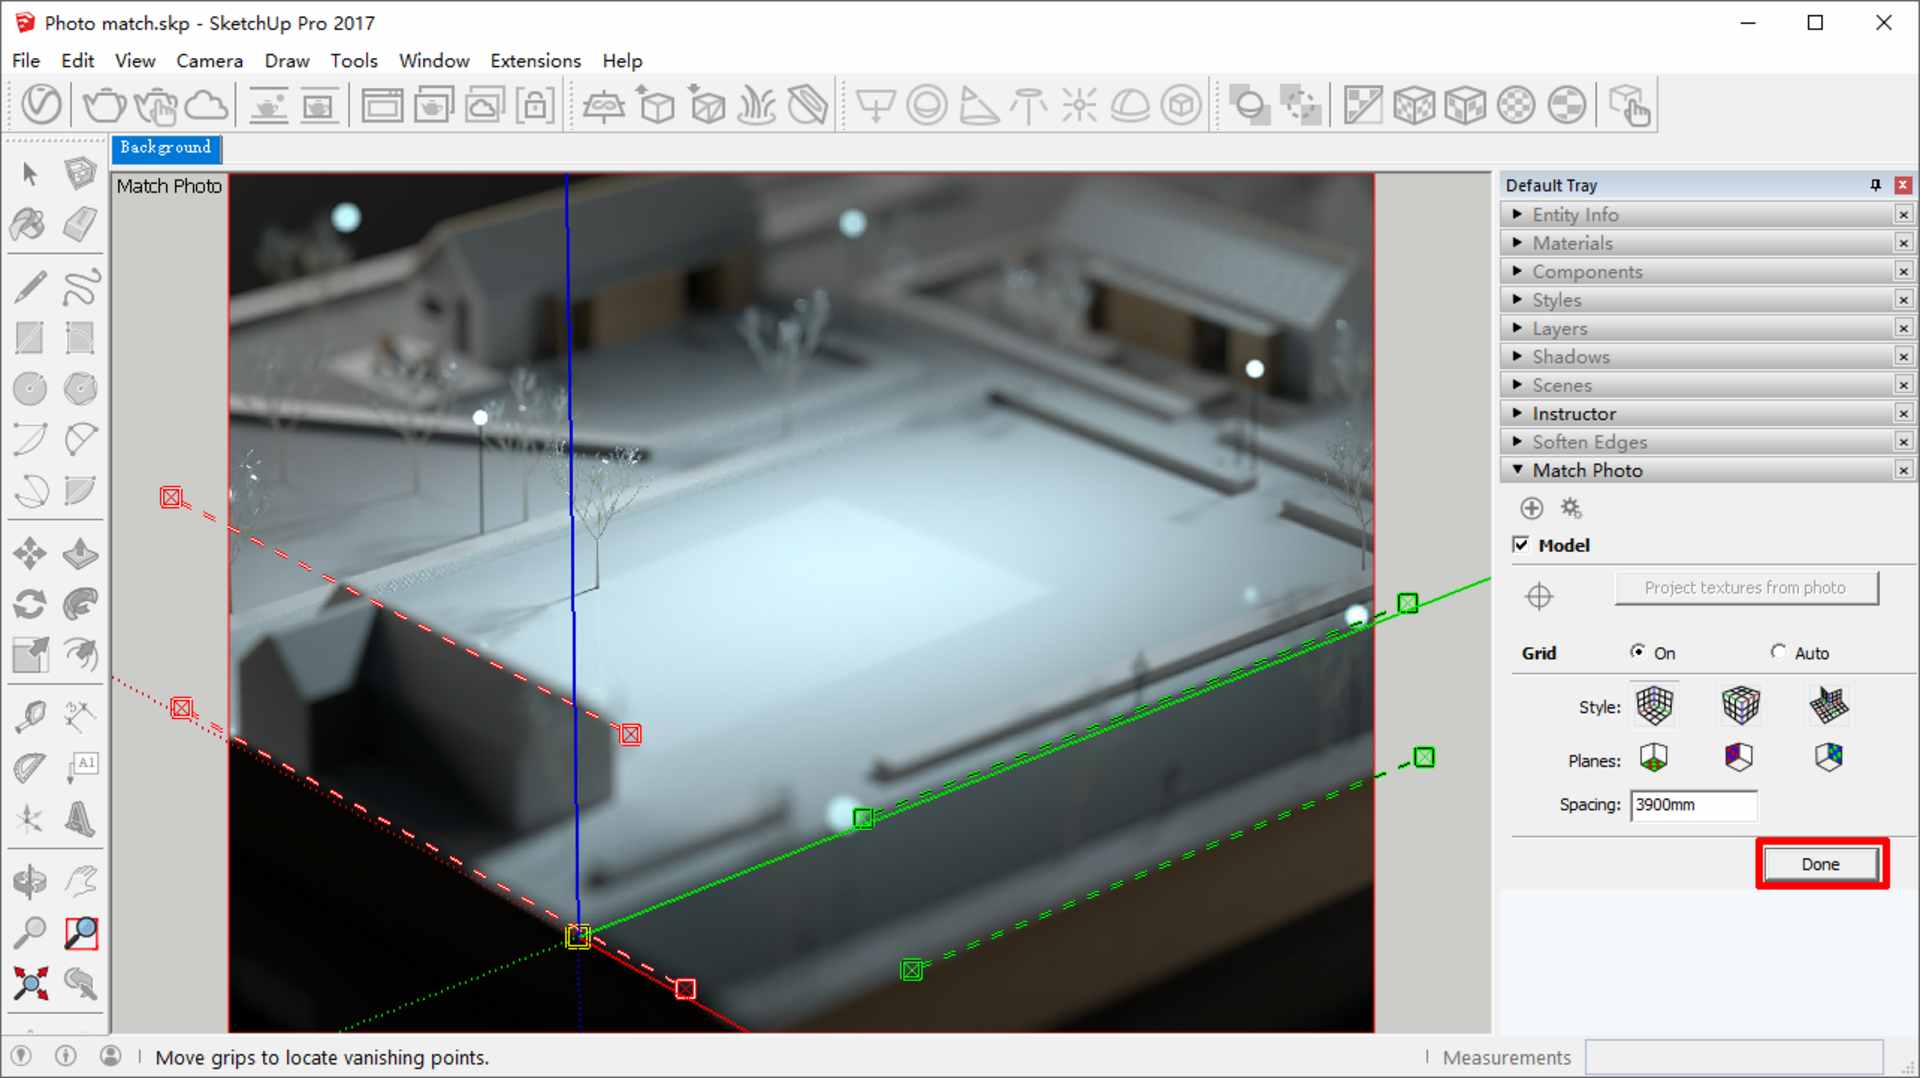
Click the “Done” button after photo matching.
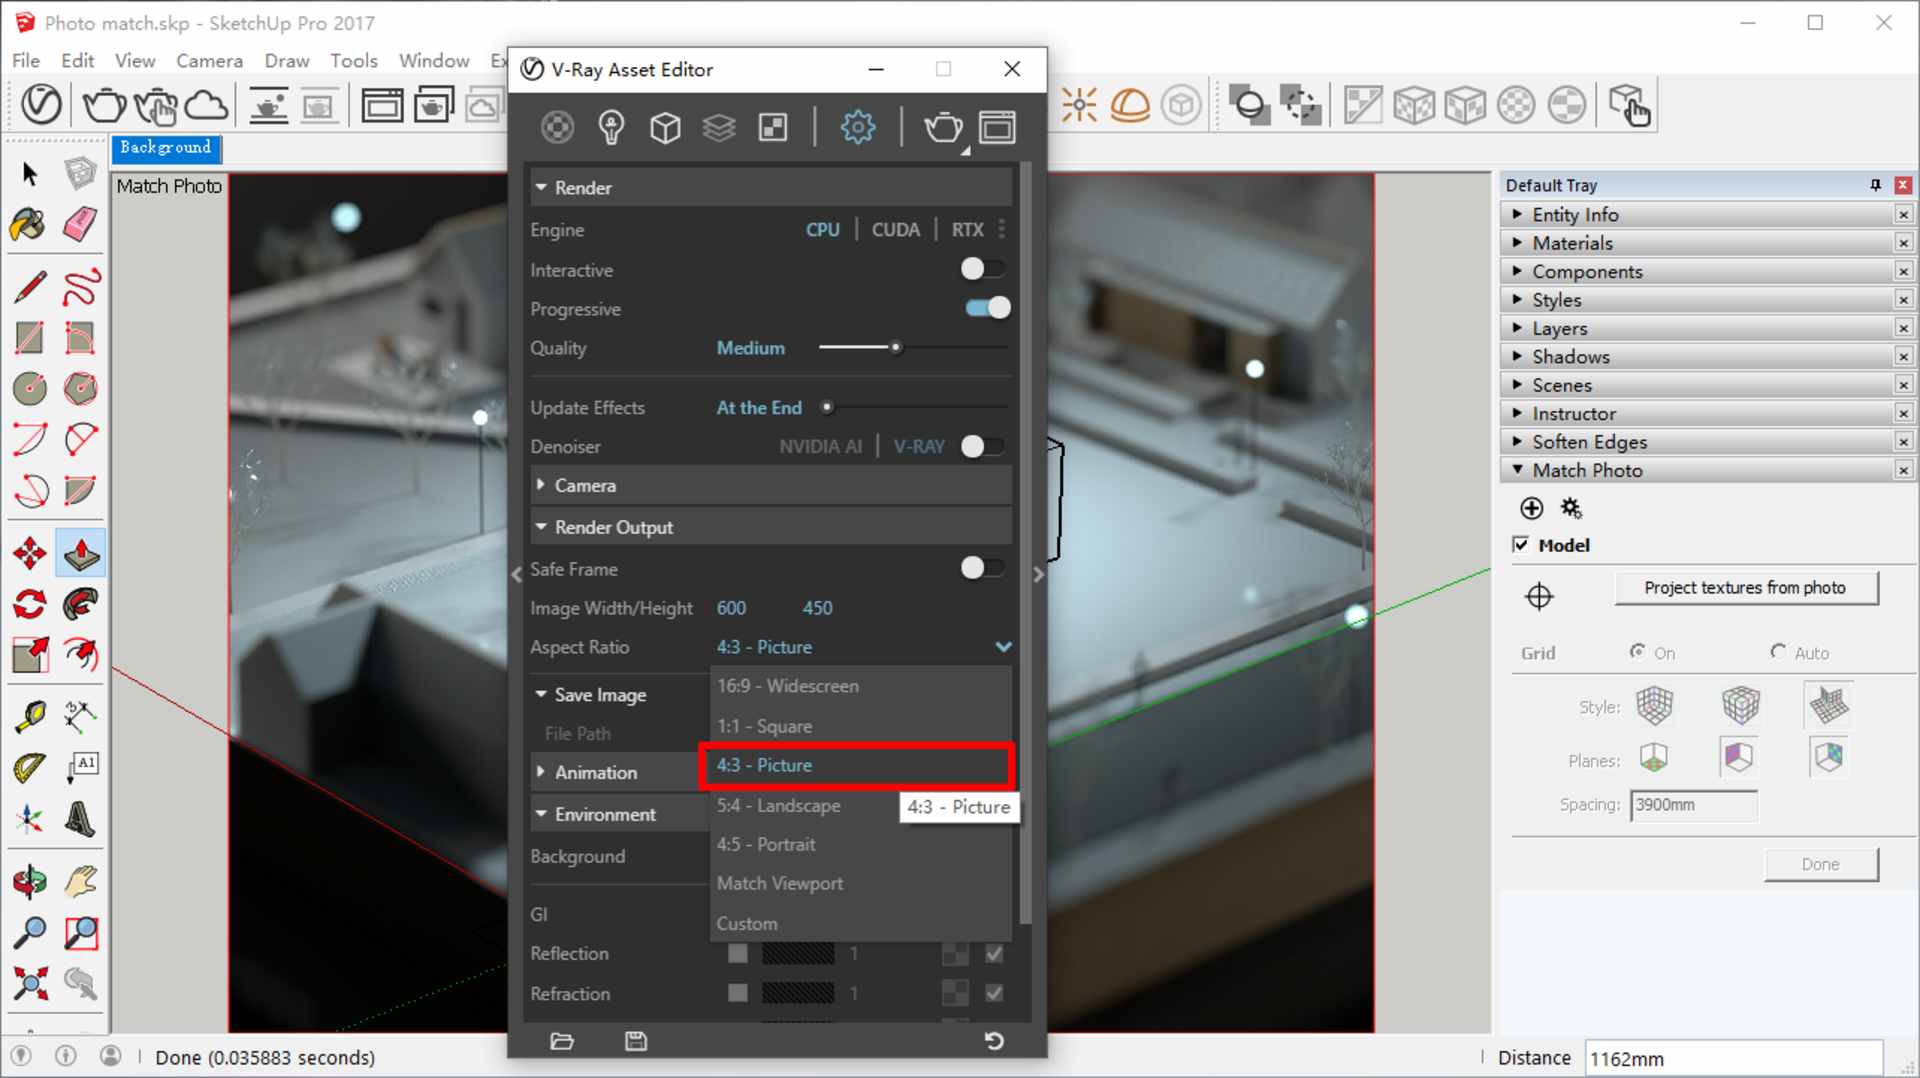
Do not forget to set the output aspect ratio to match the backplate photo (This example is 4:3):
Step 2: Match the light
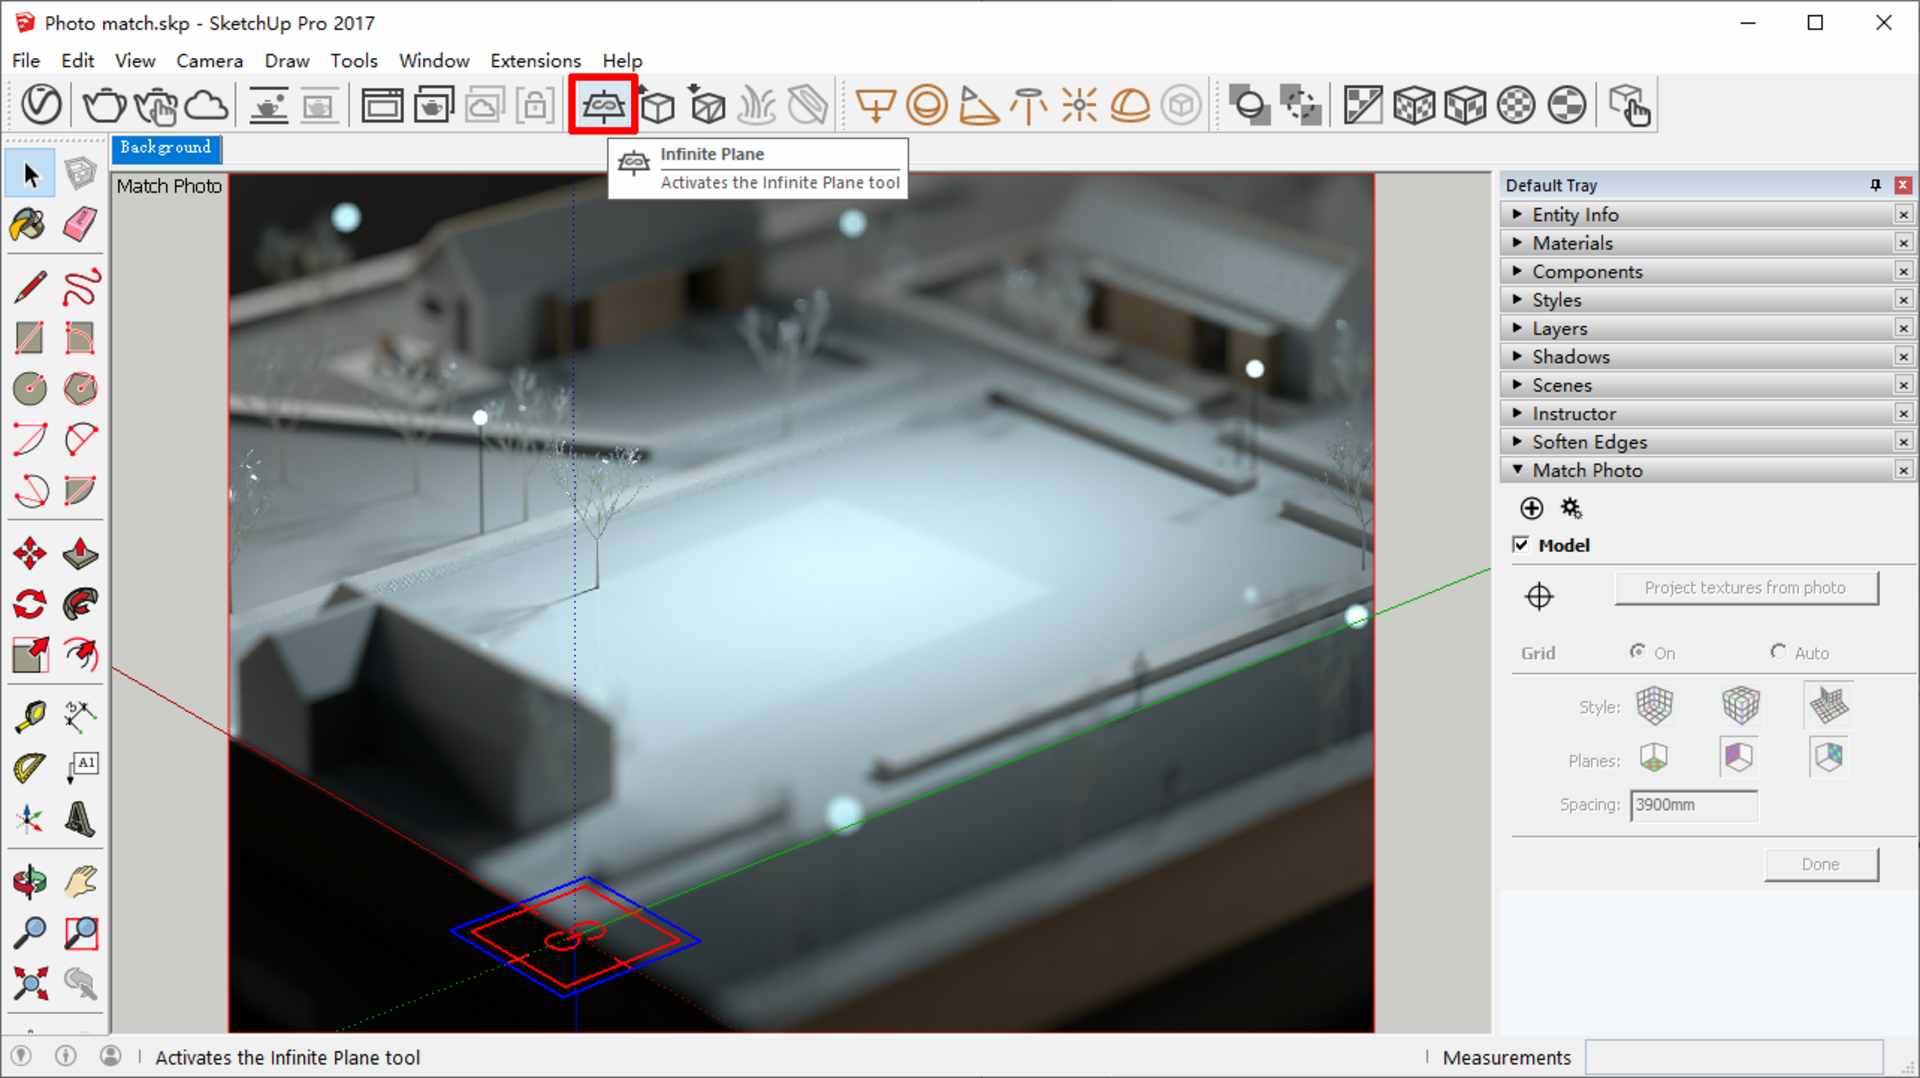
First, you need to draw a large plane surface to form the ground. To do this, you can simply put an infinite plane at the origin point of the scene. Make sure the normal direction of the infinite plane (the blue arrow) is facing upwards.
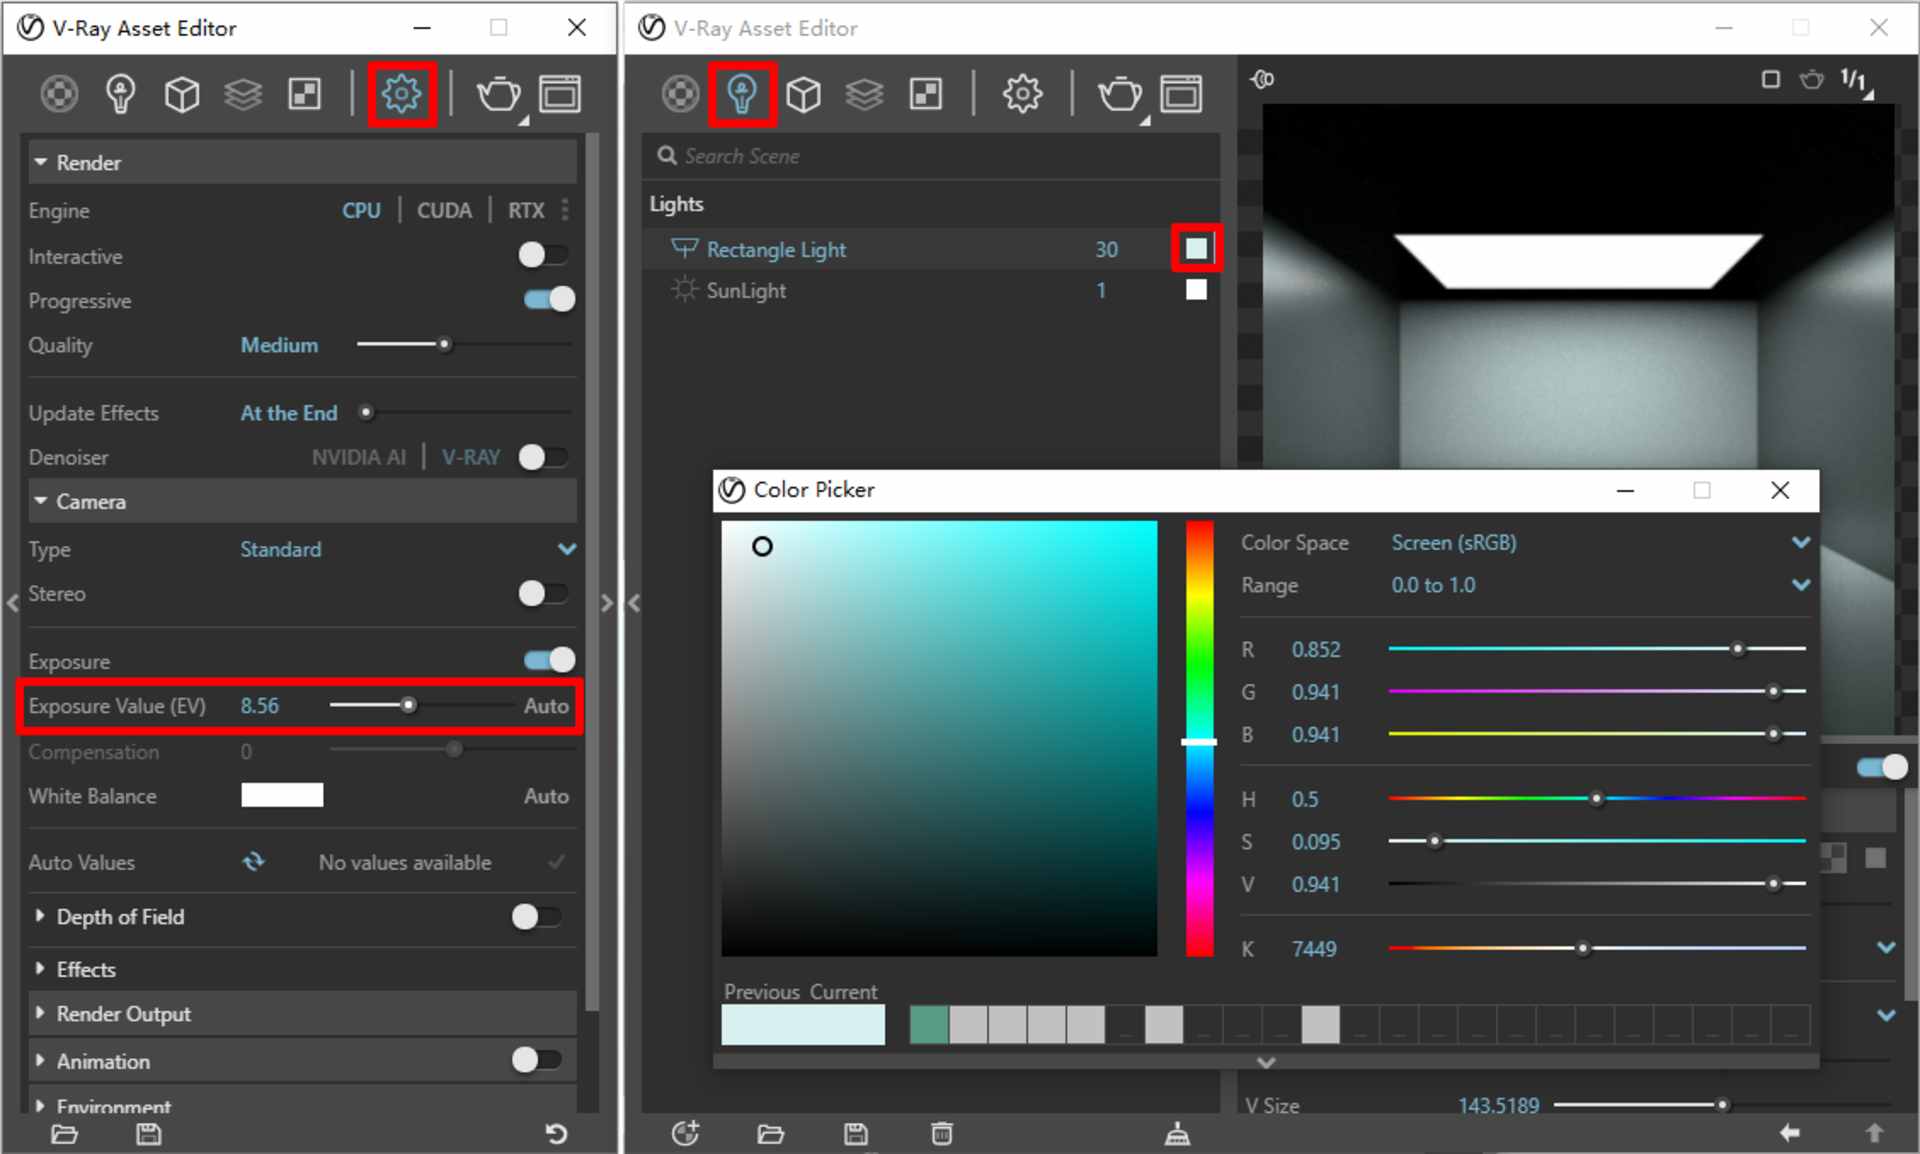
The next step is important. Try to recreate the digital light to match the direction, color and brightness of the real light source.
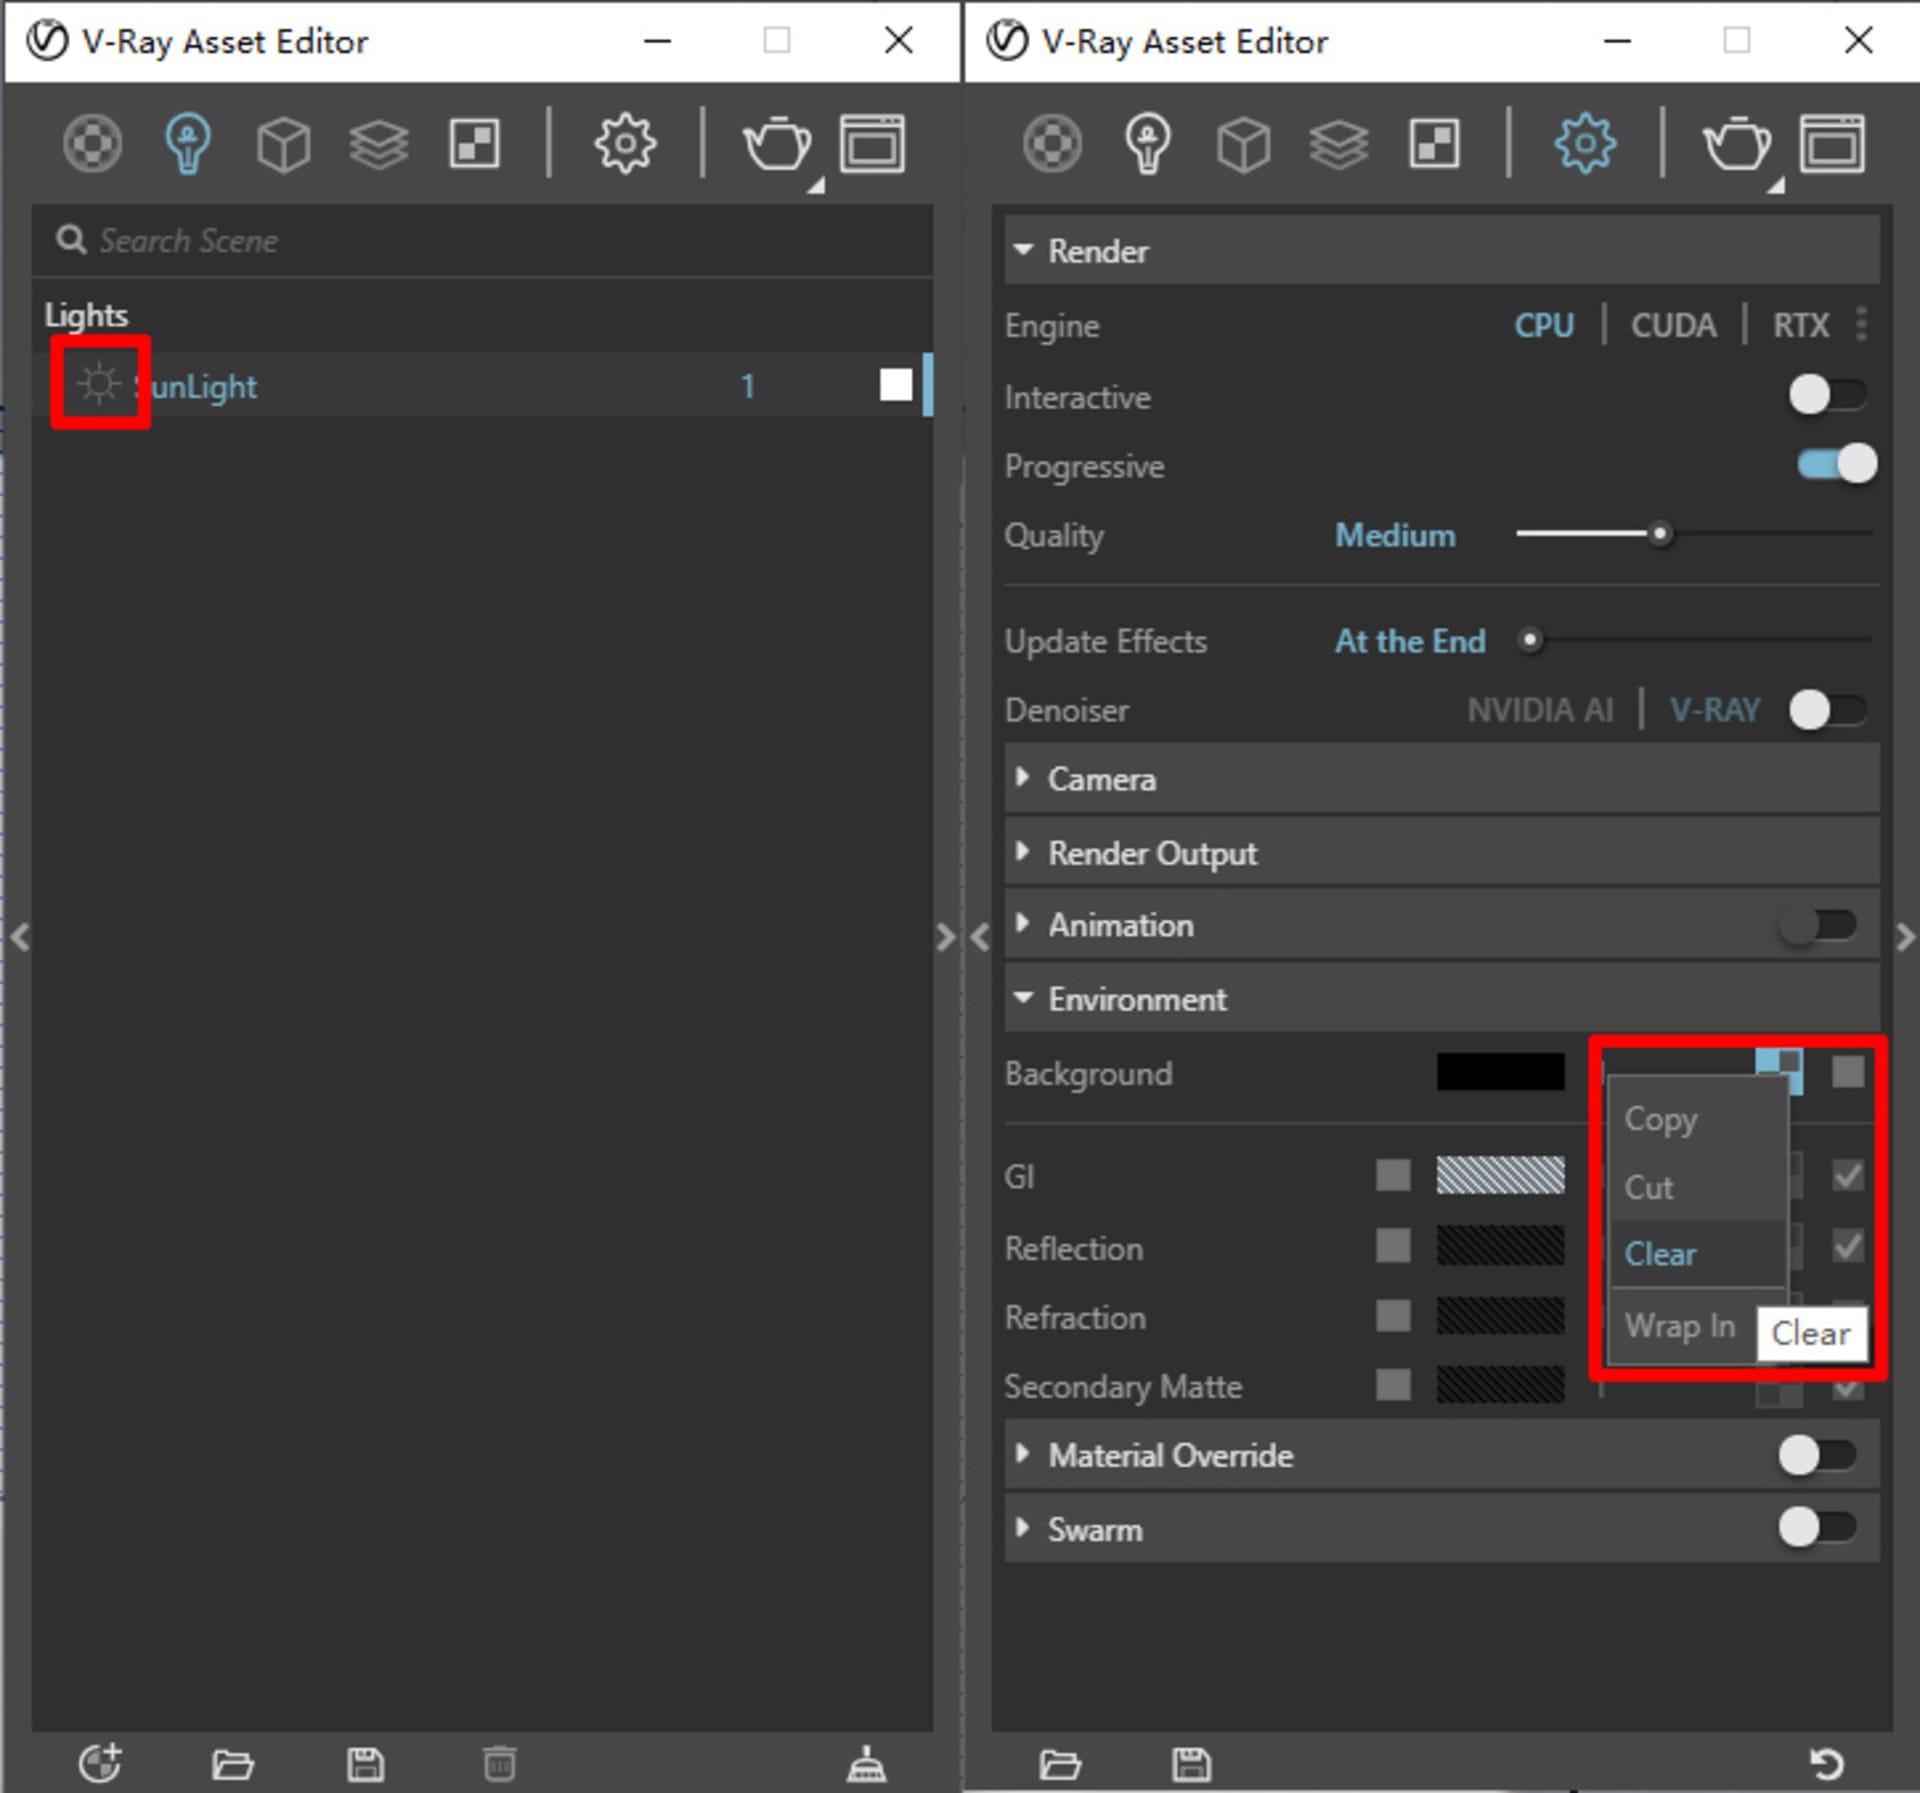
Don’t forget to turn off the default sunlight and the sky texture:
In this scene, the key light is obviously coming from the upper right corner, you can tell this by observing the shadow of the tree or the buildings around the site.
So just draw a block for reference, then put a V-Ray light on top right of the block.
Go back to the render camera and test. Adjust the Camera EV and light color:
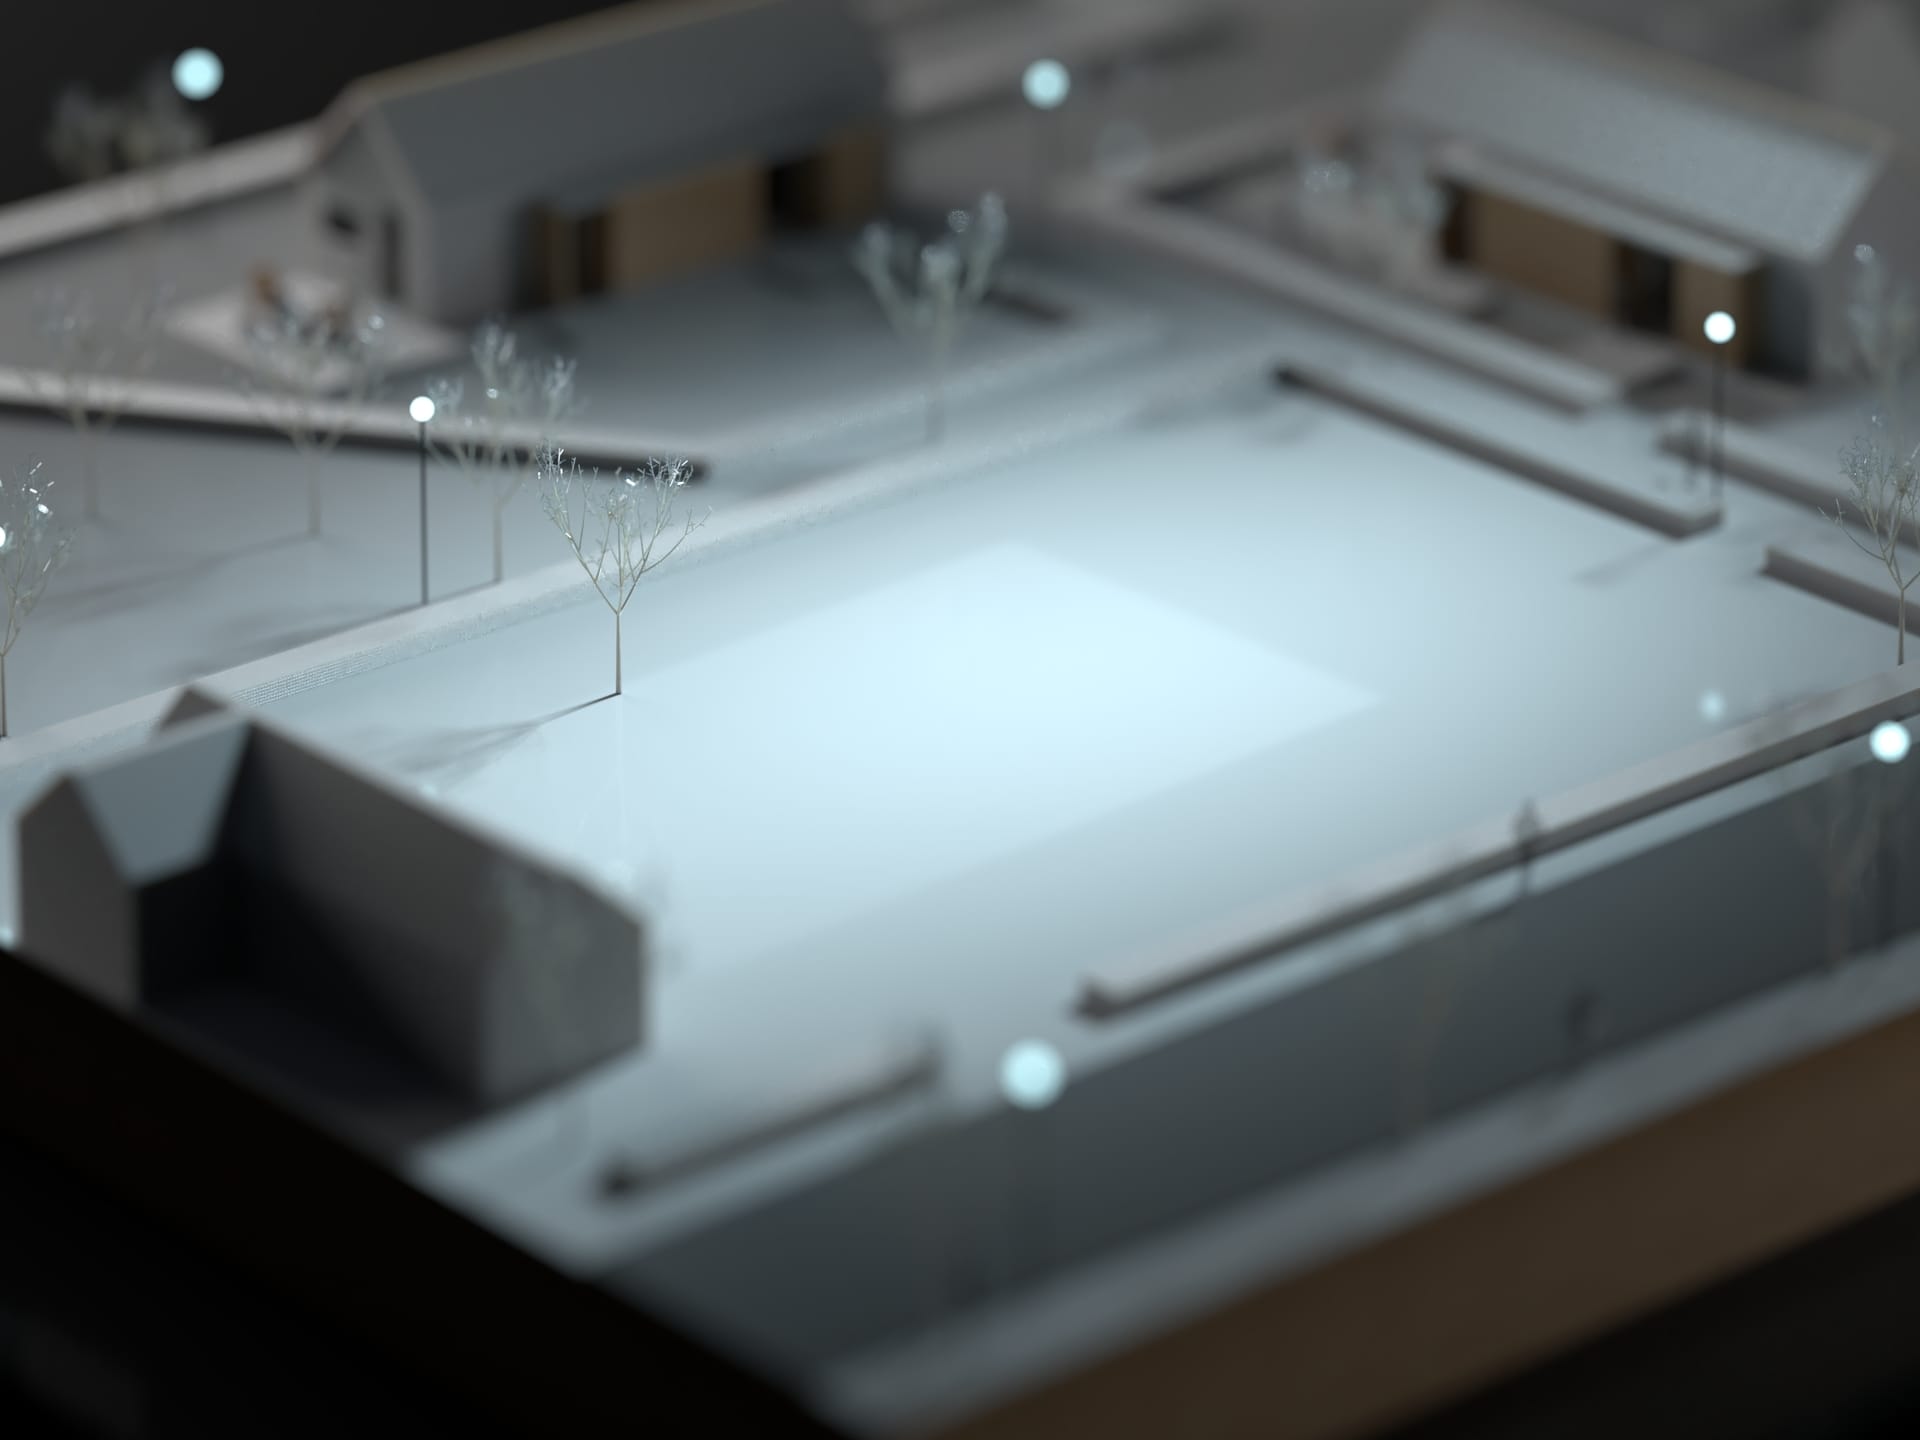
The result should look like the image below:

We can fine-tune the V-Ray light in the next step.
Step 3: Shadow catcher
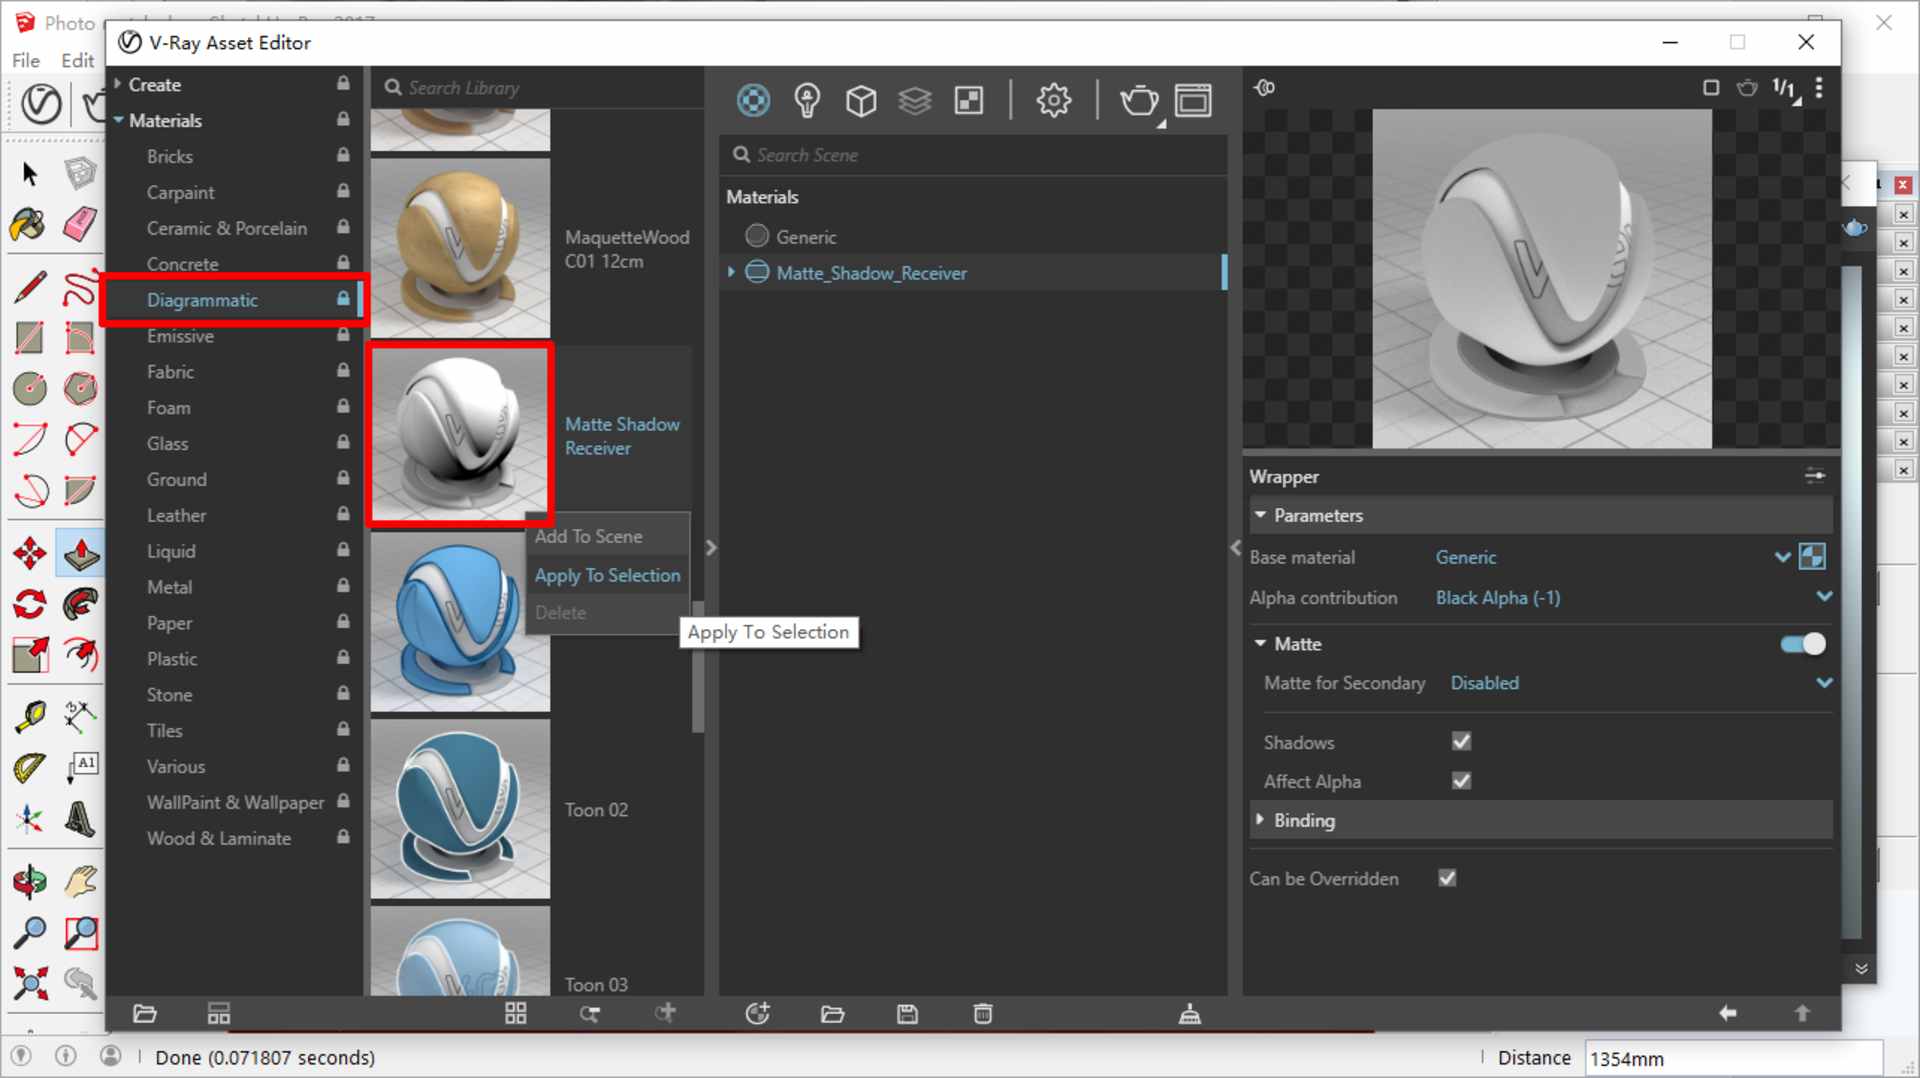
In the Material Library > Diagrammatic, we can find a “Matte Shadow Receiver”. Apply this material to the infinite plane.
In the V-Ray frame buffer, choose Color correction> Background, check “Background image” and load the backplate photo. Now you can see the final composition and fine-tune the light and exposure values. You can even add more fill lights to match the backplate, depending on your scene:
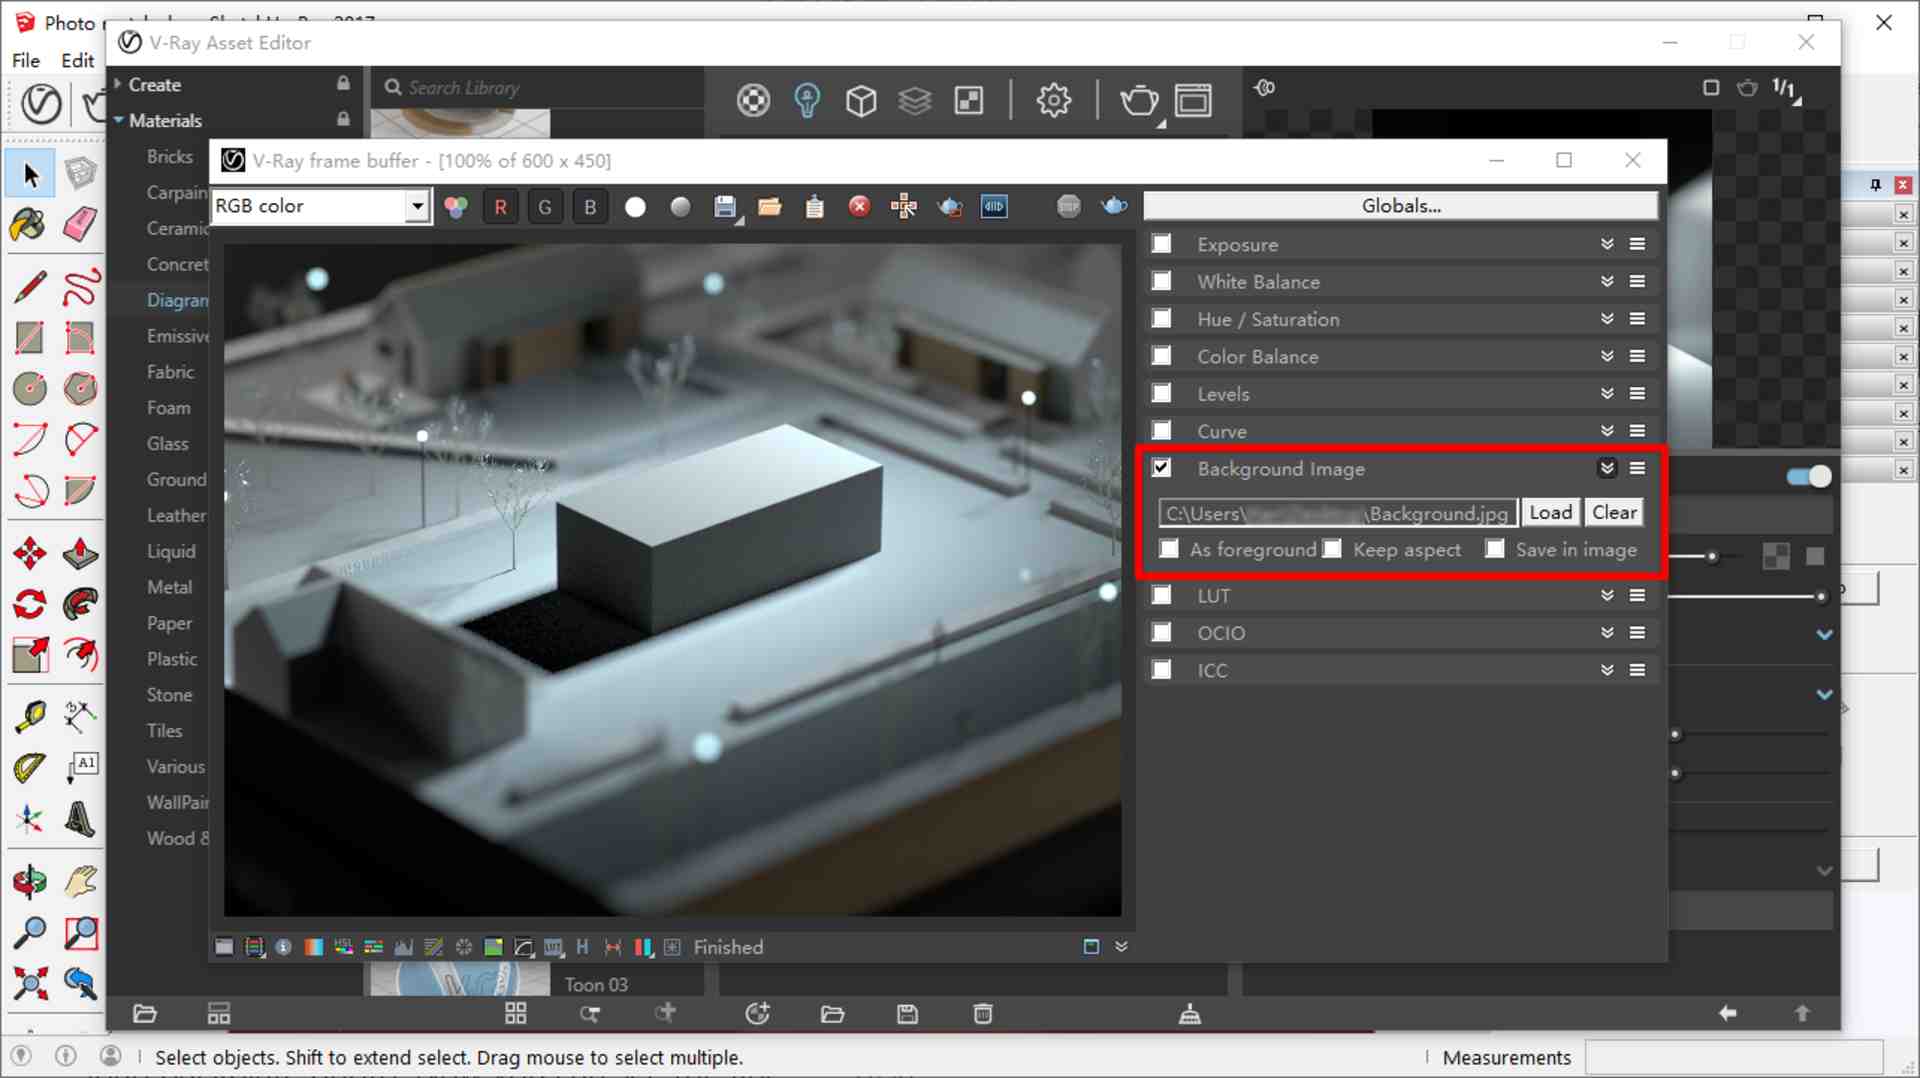
Note: If using the GPU engine, make sure the shadows are based on a Dome Light or other direct light sources instead of the Environment illumination.
Final Thought
We hope this overview will help you add source lights to your scene. As you may know, iRender provides a high performance and configurable server system for 3D rendering, AI Training, VR & AR, simulation, etc. With our server, you can install any software you need, add your license, and do whatever you like with your project. These tools above are no exception. Most tools for fluids are computationally expensive. Understanding that, we have different config and package compatible with them, from CPU to single GPU, dual and even multi-GPUs.
Let’s see rendering tests with Sketchup Vray on server 3 (1x RTX 3090) the latest NVIDIA CARD RTX 3090 with 24GB VRAM will help you reduce your render time very much at iRender:


Moreover, iRender has many more to offer.
- Free and convenient transfering tool: iRender offers a powerful and free file transfer tool: Gpuhub Sync. With fast file transfer speed, large data capacity, and completely free. You can transfer all the necessary data into our Gpuhub Sync tool at any time without connecting to the server. The data will be automatically synchronized in the Z drive inside the server, ready for you to use.
- Flexible price: You can always save from 10% to 40% with our Fixed Rental feature. For those who’s in need of server more than a day, or have extremely large project, we advise to choose daily/ weekly/monthly rental package. The discount is attractive (from 10 to 40% depends on your package), and you don’t have to worry about over-charging if you forget to shutdown the server. In this July, we offer a discounted price for GPU server 3 and other servers, users will take advantage of these to level up their renders.
- Real human 24/7 support service, helping you to handle the problem quickly, effectively, saving you both time and money.
In addition, we always have attractive promotions to thank our beloved customers. SPECIAL OFFER for this August: Get 20% BONUS for all newly registered users.
If you have any questions, please do not hesitate to reach us via Whatsapp: +(84) 916017116. Register an ACCOUNT today and get FREE COUPON to experience our service. Or contact us via WhatsApp: +(84) 916017116 for advice and support.
Thank you & Happy Rendering!
Source: chaosgroup.com
Related Posts
The latest creative news from V-Ray Cloud Rendering , Enscape Cloud rendering, Lumion Cloud rendering, SketchUp Cloud Rendering , Twinmotion Cloud Rendering , 3D VFX Plugins & Cloud Rendering.