
How to Simulate Cloth in Blender with iRender
Cloth simulation is one of the most difficult aspects of computer graphics. Cloth is often modeled as a 2D mesh to simulate real-world objects such as flags and banners. However, cloth can create 3D items such as teddy bears, pillows, balloons, and soccer balls. Cloth is affected by other moving objects, wind, and other drag factors, as well as the basic aerodynamic model, hence the representation is complex.
Let’s explore how to simulate cloth in Blender with iRender in today’s blog!
Introduction to Cloth Simulation in Blender
Cloth simulation in Blender allows you to create realistic fabric and clothing movement in your animations. By utilizing the cloth physics system in Blender, you can achieve lifelike drapery, flowing capes, and other cloth-related effects in your projects. To create a cloth simulation in Blender, you start by setting up a cloth object, applying cloth physics to it, adjusting various parameters such as quality, stiffness, and friction, and setting up collision objects to make the cloth interact with other elements in your scene.
Running the simulation allows you to see how the cloth behaves based on the physics settings you’ve defined. You can fine-tune the simulation, bake it to save the results, and further enhance your cloth object with materials and textures for rendering the final animation or image. Blender’s cloth simulation system offers a wide range of possibilities for creating dynamic and realistic cloth animations. Experimenting with different settings and techniques can help you achieve the desired visual effects in your projects.
How To Simulate Cloth in Blender
Step 1: Setting up the sphere
You can use a simple UV sphere by pressing Shift + A and going to Mesh > UV Sphere.
Add a Subdivision Modifier with the Ctrl + 2 shortcut, or add in the Subdivision Modifier from the Modifier Properties tab on the Editor.
Step 2: Setting up the plane
Next, we apply the cloth, which is the plane. Add a plane object to the scene by clicking Shift + A and selecting Mesh > Plane.
To double the scale of the plane, go to S > 2 > Enter. Press G > Z to move it up the Z axis, and then use the mouse to adjust the scale on top of the sphere.
To interact with the sphere, we need more topology, just as we do with the plane. Because a subdivision modifier changes the plane’s corners, we will instead change it in Edit Mode. Click on the plane to select Edit Mode from the top left navigation bar.
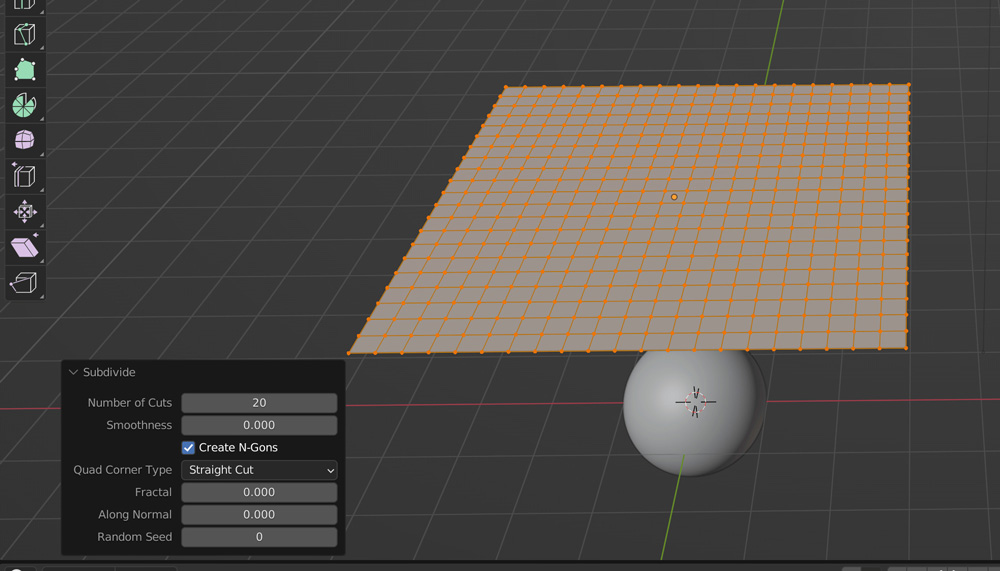
Adding subdivision in Edit Mode
Press 3 to enter face selection mode, then Right Click > Subdivide to add subdivisions to the plane. This will bring up a Subdivide menu on the bottom left of the screen, which you may expand and change the number of subdivisions to 8.
Step 3: Setting up the cloth
Finally, we can add some physics to the scene and run the simulation.
Select the cloth, then go to the Properties menu, then Physics Properties, and add the Cloth effect. It will show a list of many clothing properties that you can change to create the effect you want.
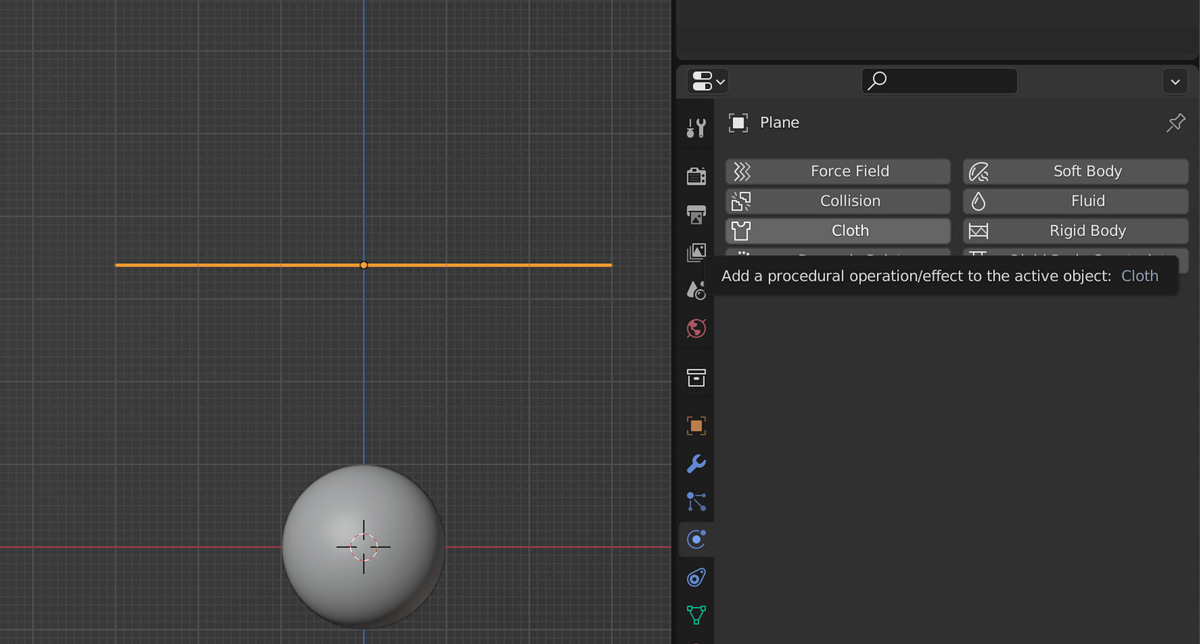
Adding the Cloth effect on Physics Properties
Step 4: Adding collision to the sphere
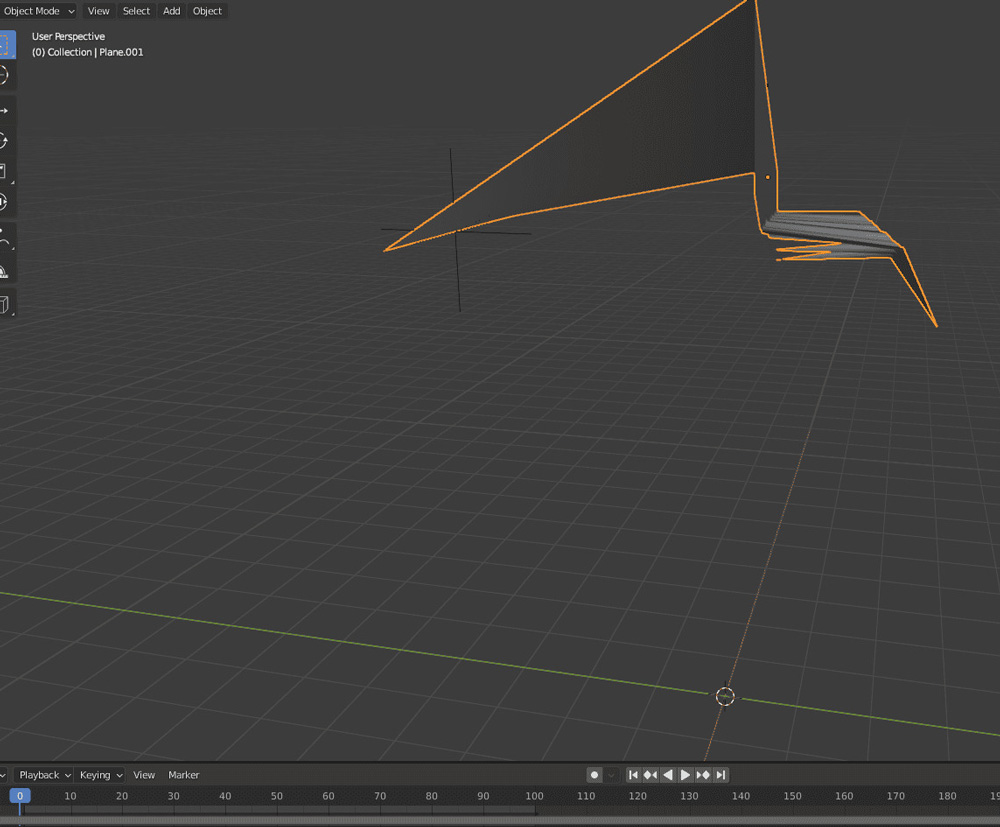
To make the cloth interact with the sphere, select the Collision Property in the Physics Properties, just like with the plane. Then, play the animation to see the cloth fall on top of the sphere. If the cloth isn’t smooth enough, add more subdivisions to the plane.
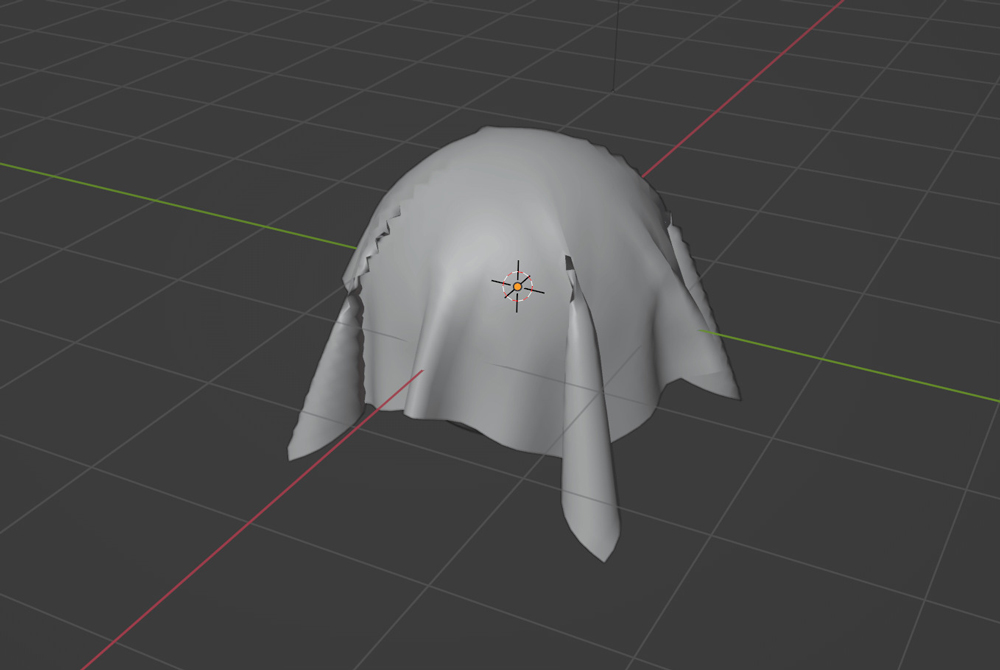
Playing the animation
How To Simulate Cloth in Blender
When you play the animation for the first time after making any changes, it automatically recalculates the entire simulation. So every time you make any changes, everything needs to be calculated again. But sometimes the simulation is very complex and it will take a long time to calculate. That is why Blender has a feature where you can store your cloth simulation, saving you from having to calculate it every time. This is done in the Storage section of the Physics Properties.
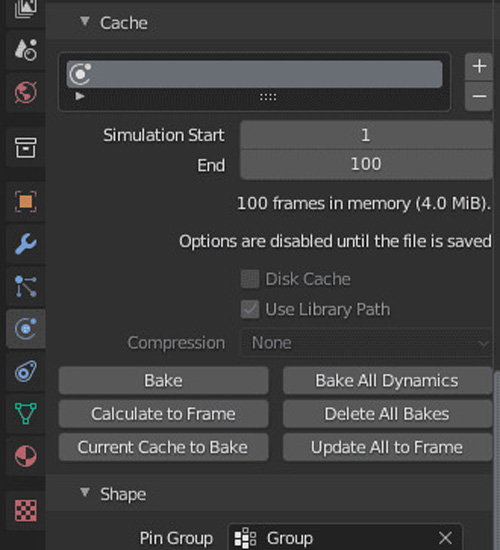
You just select the start and end frame of your simulation and then press the Bake button. Then the progress bar will appear at the bottom of the Blender interface.
When this is done, you will have your simulation Cached. This means that it would not be calculated anymore, no matter what you do.
However, as soon as the animation starts, it goes back to the state in which it was stored. In frame 2, you can see that it is a completely different position. The only method to change this simulation now is to delete the baked cache.
Conclusion
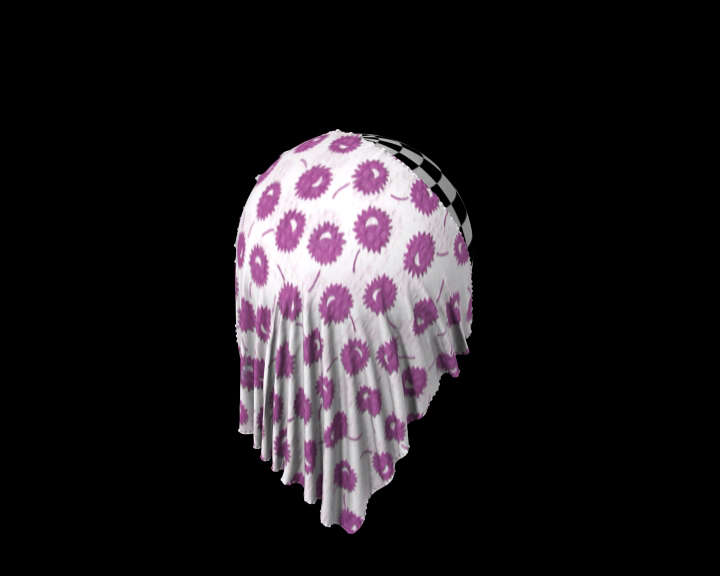
In conclusion, simulating cloth in Blender is a powerful feature that allows for the creation of realistic cloth and fabric effects within a 3D environment. Utilizing tools such as Cloth Simulation and Cloth Modifier, Blender offers the capability to generate natural-looking movements, shapes, and drapes for virtual fabrics. These simulations can greatly enhance the visual appeal and realism of 3D scenes, making them more engaging and immersive. Overall, simulating cloth in Blender provides artists and creators with the means to elevate the quality and authenticity of their digital creations.
iRender - The Best Render Farm Provides RTX 4090 for rendering Blender Projects
iRender is proud to be one of the best GPU service providers on the market. You can find a lot of options suitable for your Blender project. iRender offers from 1/2/4/6/8 RTX 4090s and 8 RTX 3090 servers. In addition to offering powerful configurations, all servers at iRender are also equipped with AMD Ryzen™ Threadripper™ PRO 3955WX @ 3.9 – 4.2GHz or AMD Ryzen™ Threadripper™ PRO 5975WX @ 3.6 – 4.5GHz, 256GB RAM, 2TB Storage NVMe SSD. The high-end configuration is extremely suitable for complex Blender projects. Right now, we have pre-installed Blender 4.1 option when you create a machine, it means you won’t take time to install software.
Let’s see how our RTX4090 performs when rendering with Blender scenes:


Besides, we also have flexible prices for all small to big projects. You can check out this video to estimate the cost with us:

Try our RTX 4090 machines and boost your rendering now! If you have any comments about our article, please do not hesitate to reach us at [email protected] or Whatsapp: +(84) 916017116.
iRender – Happy Rendering!
Reference source: Render Guide and Yarsalab Blog
Related Posts
The latest creative news from Blender Cloud Rendering, Redshift Cloud Rendering, Houdini Cloud Rendering , Octane Cloud Rendering, 3D VFX Plugins & Cloud Rendering.


