Overview of Shadows in Maya
In 3D graphics, shadows play an integral role in creating realistic environments and enhancing the overall aesthetic of a scene. Autodesk Maya, one of the leading software programs used in the industry, provides a comprehensive set of tools for effective shadow management. This blog will provide an overview of the shadows in Maya, allowing artists to take advantage of these tools for their projects.
Let’s get started with iRender!
Understanding Shadows in 3D
Shadows collaborate with lighting to enhance the realism of your scenes. They help define the relationship between objects, the light sources illuminating them, and the surfaces upon which they rest. In detail, they indicate the object’s position, whether they are on the ground or suspended in mid-air. Shadows can vary in appearance, being either soft-edged or hard-edged, and their inclusion or exclusion can contribute to the balance and contrast among the objects in your scene.
To generate a shadow, the scene must contain a shadow-casting light, a shadow-casting surface, and a shadow-catching surface. The lighting must illuminate both the shadow-casting surface and the shadow-catching surface.
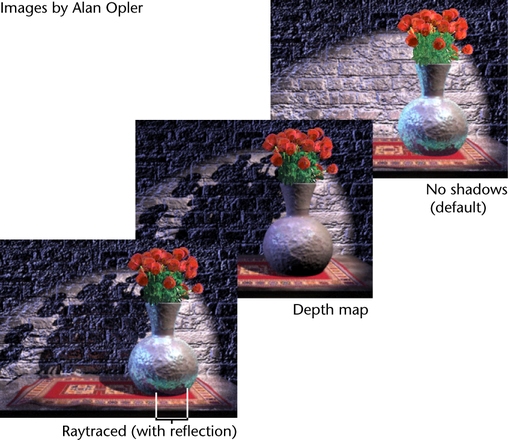
Image source: help.autodesk.com
In Maya, several types of shadows can be simulated, such as:
- Ray-Traced Shadows: These produce highly realistic shadows with soft edges. Ray tracing calculates the light paths, resulting in shadows that can simulate real-world behavior, including occlusion and transparency effects.
- Depth Map Shadows: These are generated by creating a shadow map based on the distance from the light source. While they can be faster to render, they may not deliver the same level of detail as ray-traced shadows and can produce harder edges.
- Shadow Mapping: This technique allows for dynamic shadows in real-time situations, making it useful for interactive applications and video games. It helps in optimizing performance while still providing a good quality of shadows.
Setting up Shadows in Maya
To create effective shadows in Maya, here are some essential steps to follow:
- Choose the Right Light Source: Different light types, such as directional, point, and spotlights, can impact shadows differently. For example, directional lights are often used to mimic sunlight, producing parallel shadows across a scene.
- Adjust Light Attributes: Once you have your light source set up, it’s vital to modify its attributes to achieve the desired shadow effect. You can adjust the shadow color, intensity, softness, and other parameters in the light’s attribute editor.
- Enable Shadows: In the light’s attributes, ensure that shadows are enabled. Depending on the type of shadow you want to create, you can choose between ray-traced or depth-map shadows.
- Fine-tune Shadow Quality: For more refined results, you can adjust shadow resolution, filter size, and other attributes that can affect the quality of shadows and their appearance.
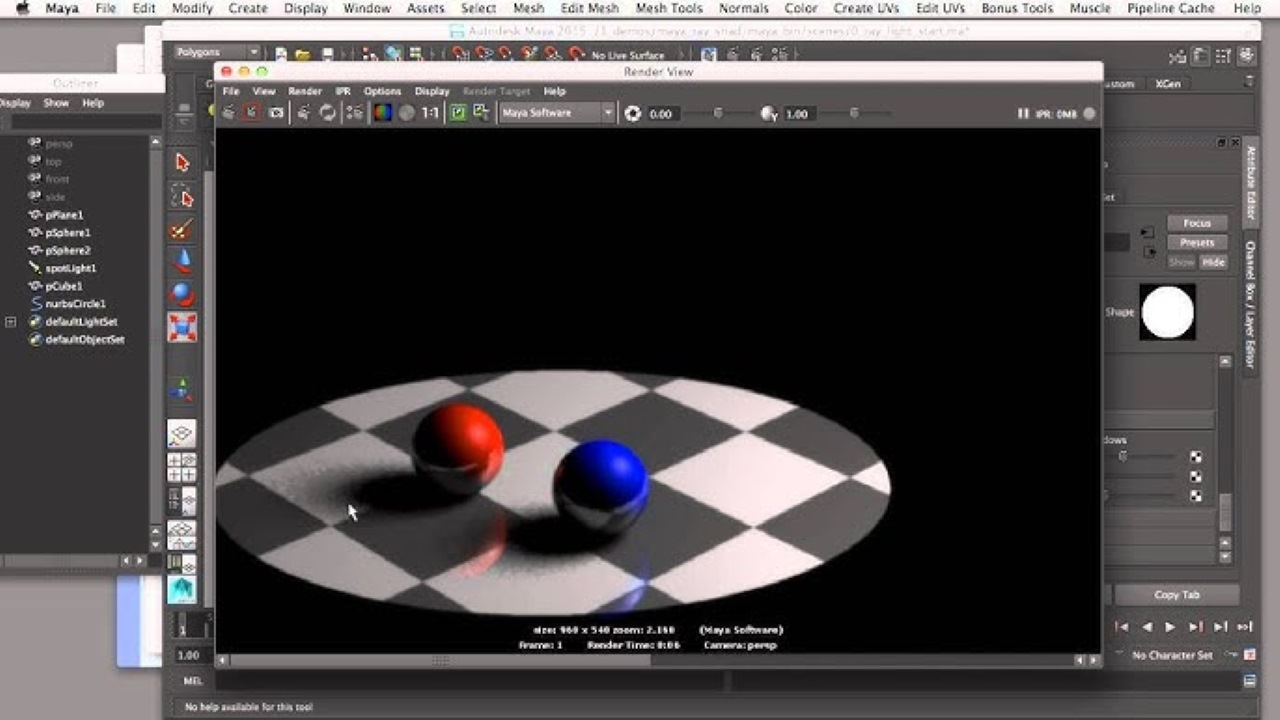
Image source: Mike Cushny
Rendering Shadows in Maya
Once your scene is set up with appropriate lighting and shadow options, rendering the shadows accurately is key. Maya’s rendering engines, such as Arnold and RenderMan, provide advanced capabilities for shadow rendering, offering various settings to optimize both quality and speed.
- Use Global Illumination: This technique can enhance the interaction of light and shadows in the scene. It simulates how light bounces off surfaces, contributing to more realistic lighting scenarios.
- Post-Processing Effects: After rendering, utilizing compositing software can help in further enhancing shadows by adding aspects like bloom and depth of field, contributing to the overall atmosphere of the scene.
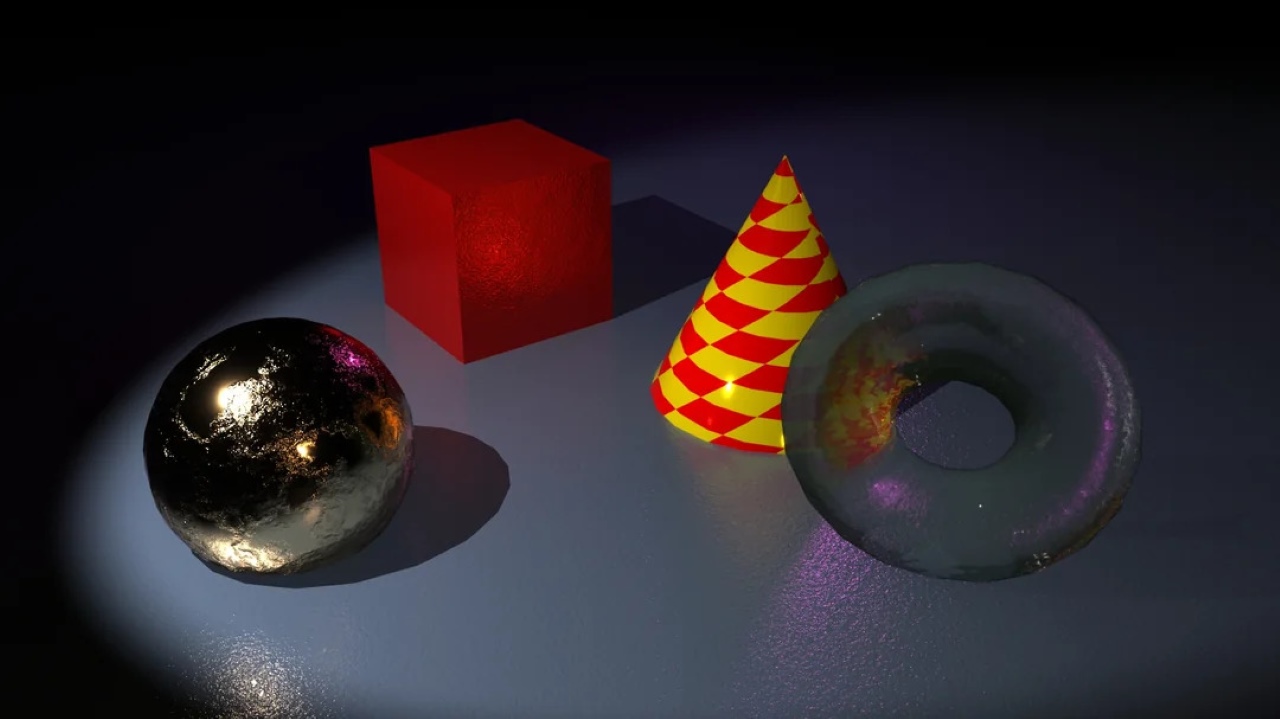
Image source: reddit.com
Below are basic instructions and some tips for rendering depth maps and raytraced shadows.
Rendering Depth Map Shadows
To create a depth map shadow, follow these steps:
- Select the light source for which you want to generate the shadow.
- In the Shadows section of the light’s Attribute Editor, enable the Use Depth Map Shadows option.
- Choose the surface where you want the shadow to be cast.
- In the Render Stats section of the surface’s Attribute Editor, enable the Casts Shadows option.
Tip: Adjust the light’s Resolution in the Depth Map Shadow Attributes to the lowest setting that still delivers acceptable shadow quality. A good starting point is to match the Dmap Resolution to the overall rendering resolution. If the Dmap Resolution is set too low, you may notice jagged shadow edges, while a setting that is too high can lead to longer rendering times.
When batch rendering from the command line, create shadow depth maps before rendering the entire scene by using the command Render -sp <sceneName>. This approach can accelerate rendering times, and you can reuse the depth maps for future renders.
Rendering Ray Traced Shadows
To create a ray-traced shadow, follow these steps:
- Select the light source for which you wish to generate the shadow.
- In the Raytrace Shadow Attributes section of the light’s Attribute Editor, enable the Use Ray Trace Shadows option.
- Choose the surface where you want the shadow to be cast.
- In the Render Stats section of the surface’s Attribute Editor, enable the Casts Shadows option.
- In the Raytracing Quality section of the Render Settings window (found under Windows > Rendering Editors > Render Settings), activate the Raytracing option.
- Proceed to render your scene.
Conclusion
Shadows are more than just dark areas in 3D space; they add depth, context, and realism to your projects. By understanding the different types of shadows available in Maya and knowing how to manipulate light sources and settings, artists can create compelling scenes that feel like the real world. Whether you’re working on animation, video games, or architectural visualizations, mastering Maya’s shading techniques will take your work to the next level.
iRender - Best cloud rendering service for Maya
We proudly support all 3D software including Maya with any version and render engine or plugins needed.
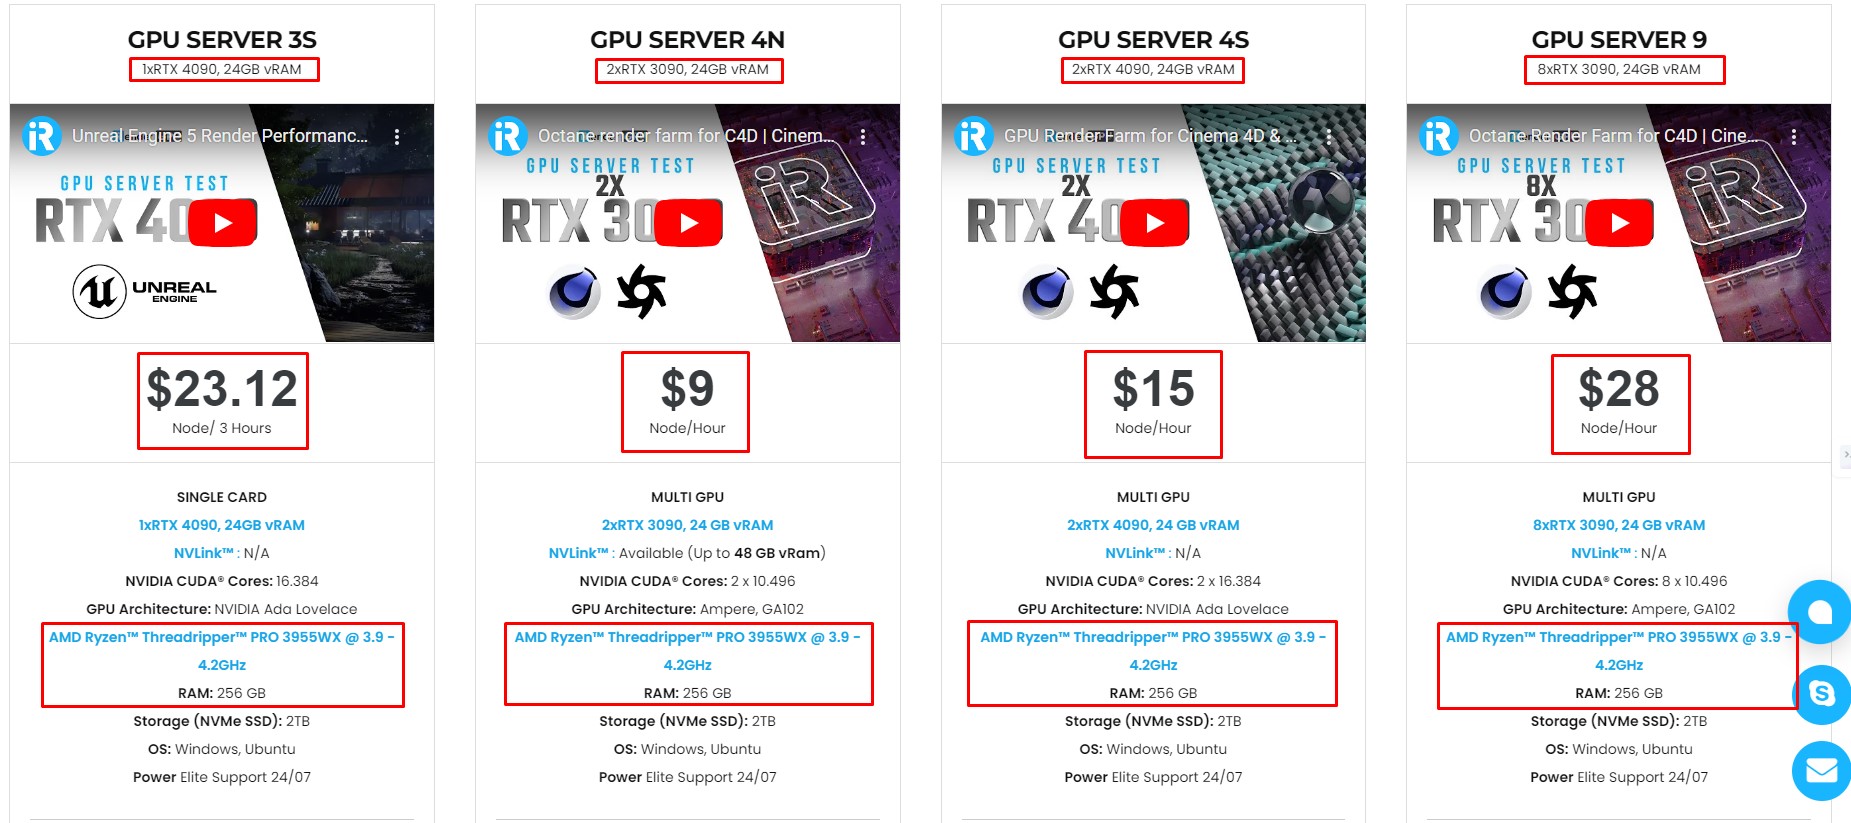
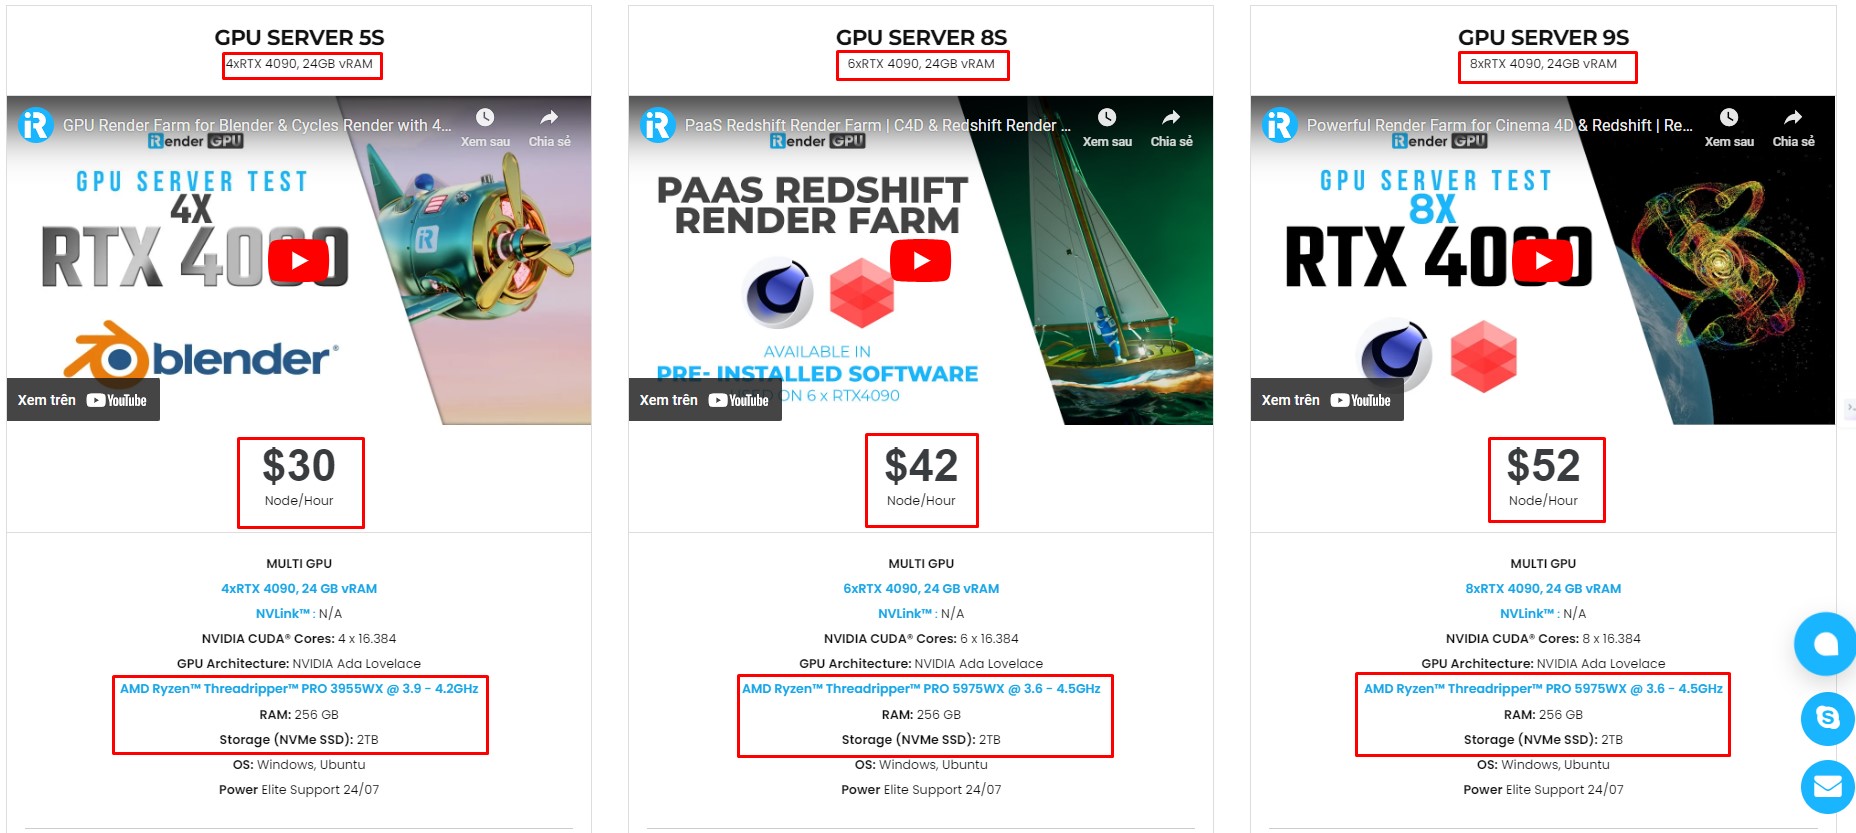
iRender provides high-configuration servers that increase CPU and GPU rendering speeds. We offer the most powerful RTX 4090 configuration packages on the market, all equipped with AMD RyzenTM ThreadripperTM PRO 3955WX @ 3.9 – 4.2GHz and AMD Ryzen™ Threadripper™ PRO 5975WX @ 3.6 – 4.5GHz processors, 256GB RAM and 2T NVMe SSD hard drive capacity. With a wide range of GPU servers (1/2/4/6/8x) – RTX 4090, you can choose the server that suits your needs to start the rendering process.
Simple Workflow
You just need to transfer your files, connect to the remote machine and install Maya with your license. Then you can render yourself there like the way you do on your local PC. Setting up ONCE and your working environment will be saved and ready to use at any time.

Why choose iRender?
Transferring data may cost time and money on the remote server. However at iRender, you can upload and download your files without booting the server, then you can save a lot of money.
We have an iRender GPU app for Windows PC which integrates all features and is easy to use, and an iRender Drive app for MacOS users to transfer data only. Moreover, there are many reasons why this is the best render farm for your project.
- 100% Software Support: We support all 3D software, their plugins, and render engines.
- Full Control: Our service will give you full control over the servers you rent. Therefore, you are free to create your own working environment.
- Go Green: We are committed to using 100% solar renewable energy towards environmental sustainability.
- Real-human 24/7 Support: Our professional support agents and technicians guarantee to bring you the best rendering experience.
Check out V-Ray and Maya rendering performance on our 9A (8xRTx 3090) server
If you still wonder if this is the right place for your project, REGISTER NOW to get a trial and receive a 100% bonus promotion for your first transaction within 24 hours of registration with us.

For more detailed information, please contact us via Live chat 24/7 or WhatsApp: +(84) 962868890 or Email: [email protected]
iRender – Happy Rendering!
References: help.autodesk.com
Related Posts
The latest creative news from Maya Cloud Rendering, 3ds Max Cloud Rendering , Redshift Cloud Rendering, Cinema 4D Cloud Rendering , 3D VFX Plugins & Cloud Rendering.