Quick Rendering Tricks for 3D Max and SketchUp
3ds Max and SketchUp are popular software used in 3D modeling and design. If you are a newbie and looking for some tips to speed up your rendering, this is the right place for you.
In this blog, iRender will discuss some quick rendering tricks for 3ds Max and SketchUp that can help you elevate your 3D projects to the next level.
Overview of 3ds Max and SketchUp
Developed by Autodesk, 3ds Max is a 3D modeling, animation, and rendering software widely used in the entertainment industry for creating visual effects, architectural visualizations, and video games. It offers many modeling, texturing, lighting, and animation tools, making it a good choice for artists and designers working on complex 3D projects.
SketchUp was created by Trimble Inc. and is known as a user-friendly 3D modeling software primarily used for architectural and interior design, urban planning, and landscape architecture. It is famous for its intuitive interface and ease of use, making it an ideal tool for beginners and professionals to create and visualize 3D models quickly. While it may not have the advanced features of other software like 3ds Max, SketchUp excels in its simplicity and accessibility for architectural and design purposes.
Image source: behance.net
Quick Rendering Tricks for 3D Max and SketchUp
Optimize Models
The first and most important rule for fast rendering is if you can’t see it, hide it. In a scene, if an object is invisible, you can delete it or turn off the object’s layers. This will make the rendering process faster. You can also optimize the model based on the distance to the camera and the level of detail needed. For example, if many cars are far away, you can optimize them using the optimization modifiers in 3ds Max and SketchUp or simply use simpler models. There are many models available on the asset libraries, you should refer to them.
Reduce Polycount
The more polygons in the scene, the longer it takes to render. Since models in 3ds Max and SketchUp have more polygons, they become heavier, slowing down the rendering speed and vice versa. Therefore, it is important to use models with fewer polygons, you can reduce the polygons through Skimp or Transmuter. You should use larger polygon models for objects close to the camera and smaller polygons for objects further away in the scene. In fact, reducing the polygon count of objects will increase efficiency and reduce rendering time by up to 5% for high polygon models.
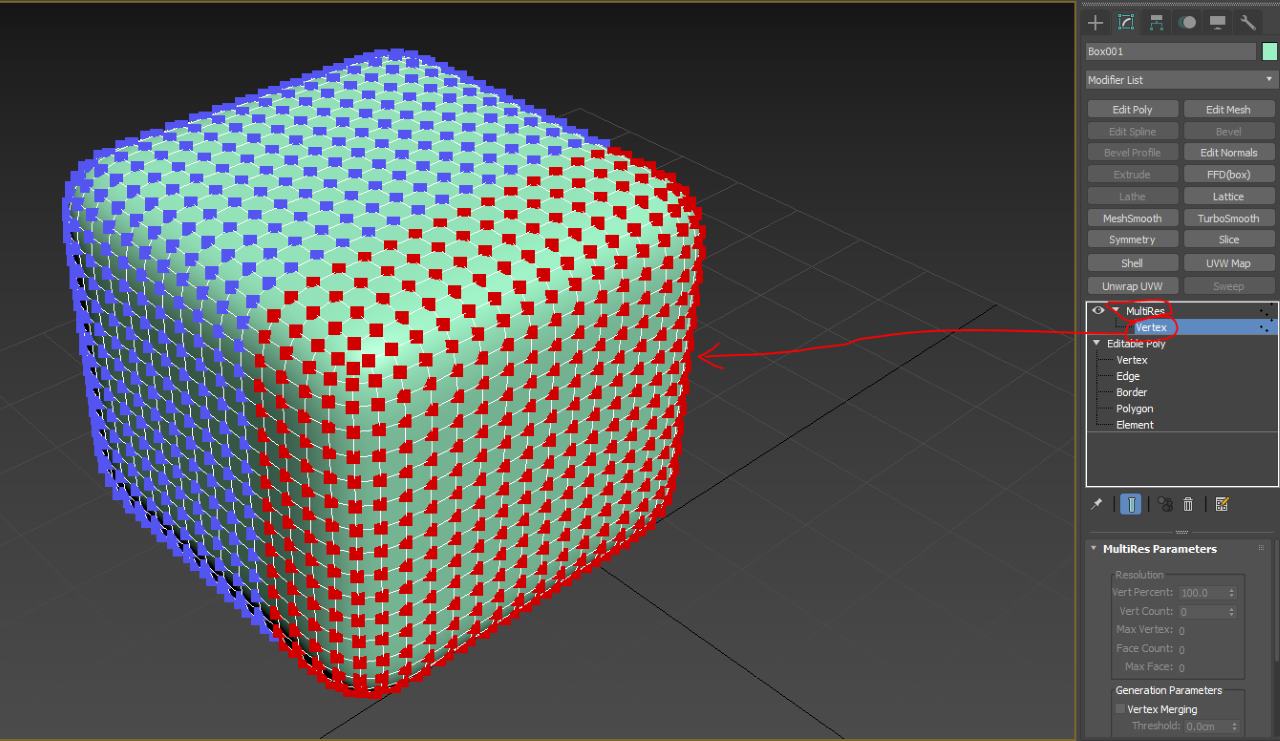
Image source: forums.autodesk.com
Use Proxies
If you can’t avoid having too many complex models in your render, you might consider using proxies. A proxy object is a simplified version of a more complex object that is used to represent it in the viewport. They allow you to work with high-polygon objects more efficiently by displaying a low-polygon version in the viewport.
With proxies, you can reduce the polygon count of your models, which makes rendering faster, especially in the V-Ray versions of both 3ds Max and SketchUp. Additionally, turning objects into proxies also reduces the file size of the models, which is much more efficient for large projects at the scale of neighborhoods or cities. You can use the Chaos Cosmo library to download proxy models for your renders. Just remember to delete the original objects after turning them into proxies.
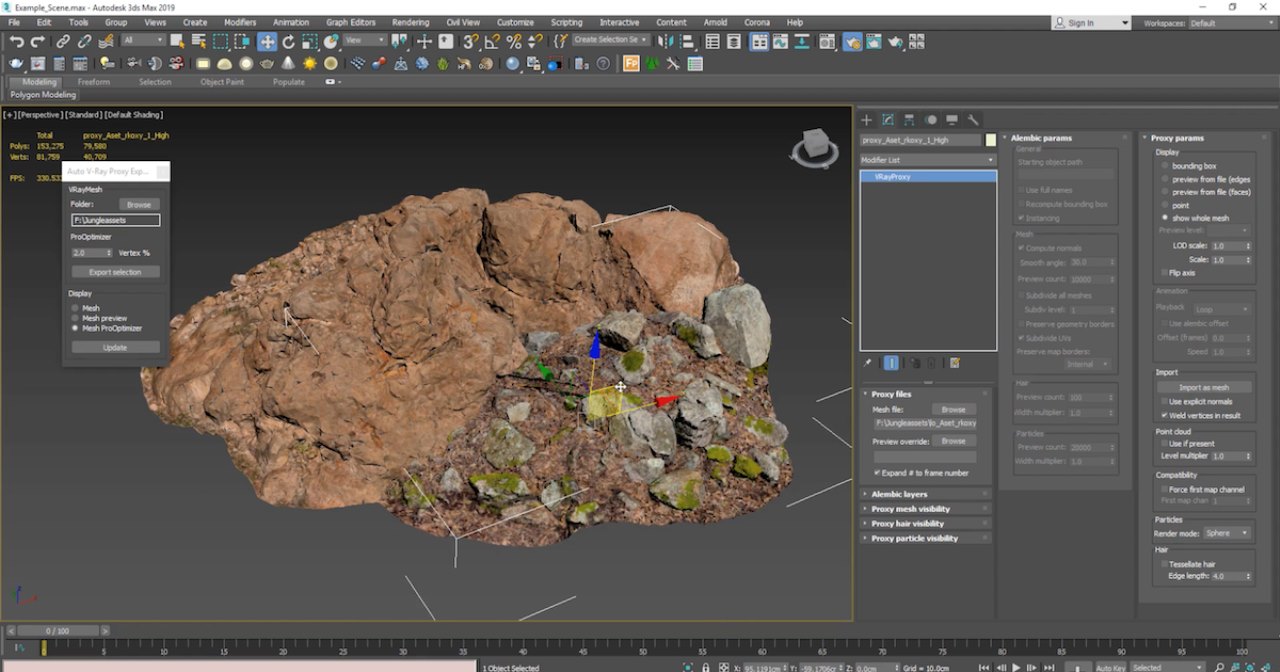
Image source: cdn.80.lv
Choose Proper Materials
Objects in the scene such as wooden floors, walls, and cabinets can reflect light. The scene will be more beautiful if you make the objects reflect each other. But when the objects have nothing to reflect, not only will it not bring about a visual effect but it will also slow down the rendering process because the reflection does not affect the final image. For example, using a white material in the rendering will increase the time because white is reflective, instead, you can choose an off-white material which will significantly reduce the rendering time while maintaining the same result.
Reduce Texture Resolution
In 3ds Max and SketchUp, when a model has fewer polygons, the rendering speed increases, and the resolution of the texture also increases. Resolution refers to the level of detail or quality of an image or a rendered output. It can be described in terms of the number of pixels in the image, often expressed as width x height (e.g., 1920 x 1080 pixels for a Full HD resolution). Obviously, resolution is a crucial aspect when working with 3D projects as it impacts the clarity and sharpness of the final render. Higher resolutions typically result in more detailed and crisp images but require more computational resources and longer rendering times. Conversely, lower resolutions may render faster but may appear pixelated or lacking in detail.
So you can use textures with resolutions ranging from 1k to 2k for models in the distance and 4k for objects close by. At first glance, the math of digital imaging may seem complicated, but it is very simple and logical.
The equation is simple: Raw image size = Horizontal resolution x Vertical resolution (in pixels) x Number of channels x Color depth (Number of bits per channel).
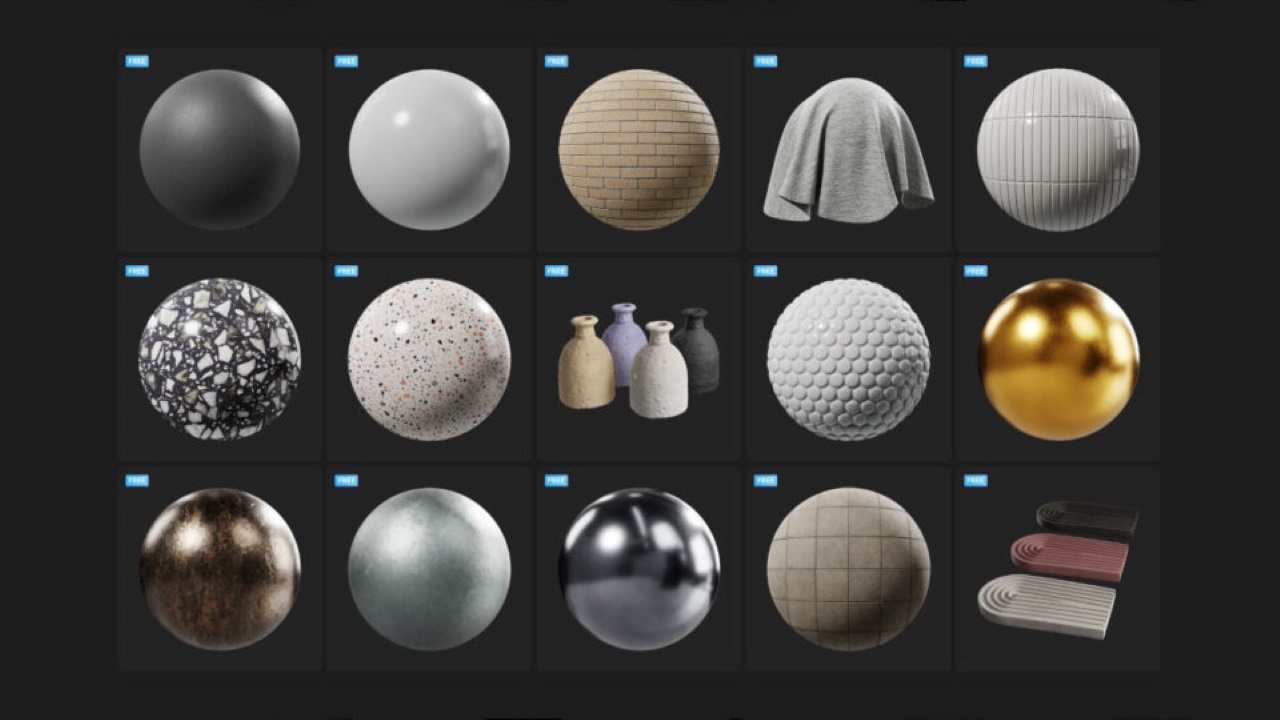
Image source: cgchannel.com
Minimize Displacement Maps
Using displacement maps in 3ds Max and SketchUp makes for smooth and beautiful rendering. A displacement map is a texture that is used to deform the surface of a 3D model at render time. Unlike a bump map, which simulates the appearance of surface detail without actually affecting the geometry, a displacement map physically alters the geometry of the object, creating actual ridges, indentations, or other changes in the surface. Therefore, you should not use displacement maps for all materials, as it slows down the rendering process. Consider using material maps when necessary. For example, you can use displacement maps for bricks, but for seamless materials like wood, you can use pump maps. This will effectively speed up rendering time while maintaining quality.
Optimize Lighting
Lighting is the most important part of rendering, but the trick is to know how to optimize the lighting of your scene to make your renders more efficient. A scene with a lot of light will make you wait longer for your render. Instead of waiting, render a darker image and use exposure to brighten the image, this will reduce the time and get the desired brightness. You should also minimize the light sources in your render and remove the ones that do not affect the image.
Adjust Render Settings
You should adjust your render settings to get the best balance between quality and speed. This includes downsampling materials, lighting, and general renderer settings, as well as adjusting the output resolution when running tests.
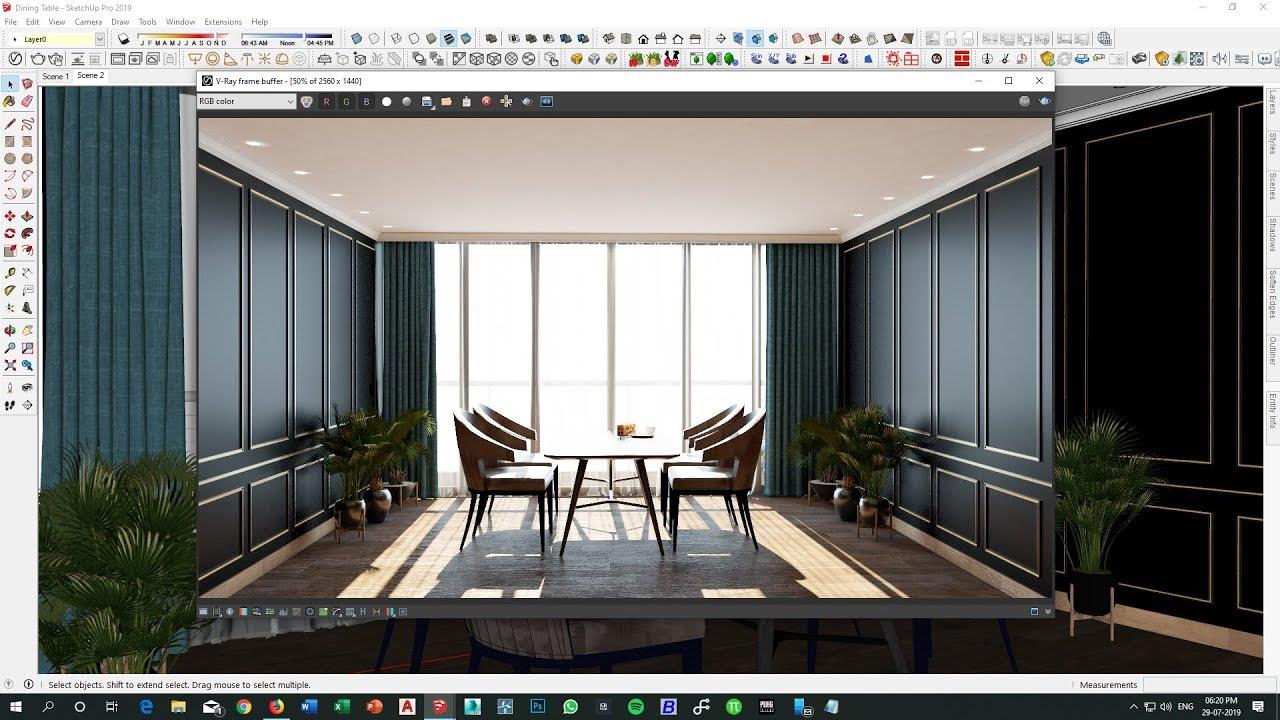
Image source: Arch Render Youtube
Here is a brief overview of each render setting:
3ds Max:
- Open the Render Setup window by pressing F10.
- Choose your desired rendering engine such as Arnold, V-Ray, or Mental Ray.
- Adjust settings such as resolution, quality settings, lighting, and global illumination based on your project requirements.
- Fine-tune parameters specific to the chosen rendering engine, such as V-Ray’s global illumination settings or Arnold’s sampling options.
- Prioritize and optimize settings based on the balance between render quality and rendering time.
SketchUp:
- In SketchUp, if you are using a rendering plugin like V-Ray or Enscape, access the render settings panel through the plugin interface.
- Adjust the resolution and quality settings to match your intended output.
- Set up lighting, materials, and environmental settings to achieve the desired look and feel.
- Explore the specific settings provided by the rendering plugin for further adjustments, such as V-Ray’s GI settings or Enscape’s real-time visualization options.
- Test render iterations to ensure the settings are achieving the desired results and make adjustments as needed.
Some Other Tips
- Use Chaos Cloud, a cloud rendering engine available for v ray in 3ds max and Sketchup, to get faster rendering.
- Don’t put objects in the scene, instead post-process the scene to reduce rendering time.
- Use 2D models for trees and other background objects in the scene to render more efficiently.
- Don’t use depth-of-field camera settings in the render. It’s best to use a z-depth render element.
- Use Draft Mode or Lower Resolution Rendering until you’re ready for your final render.
Boost up your 3ds Max and SketchUp rendering with iRender
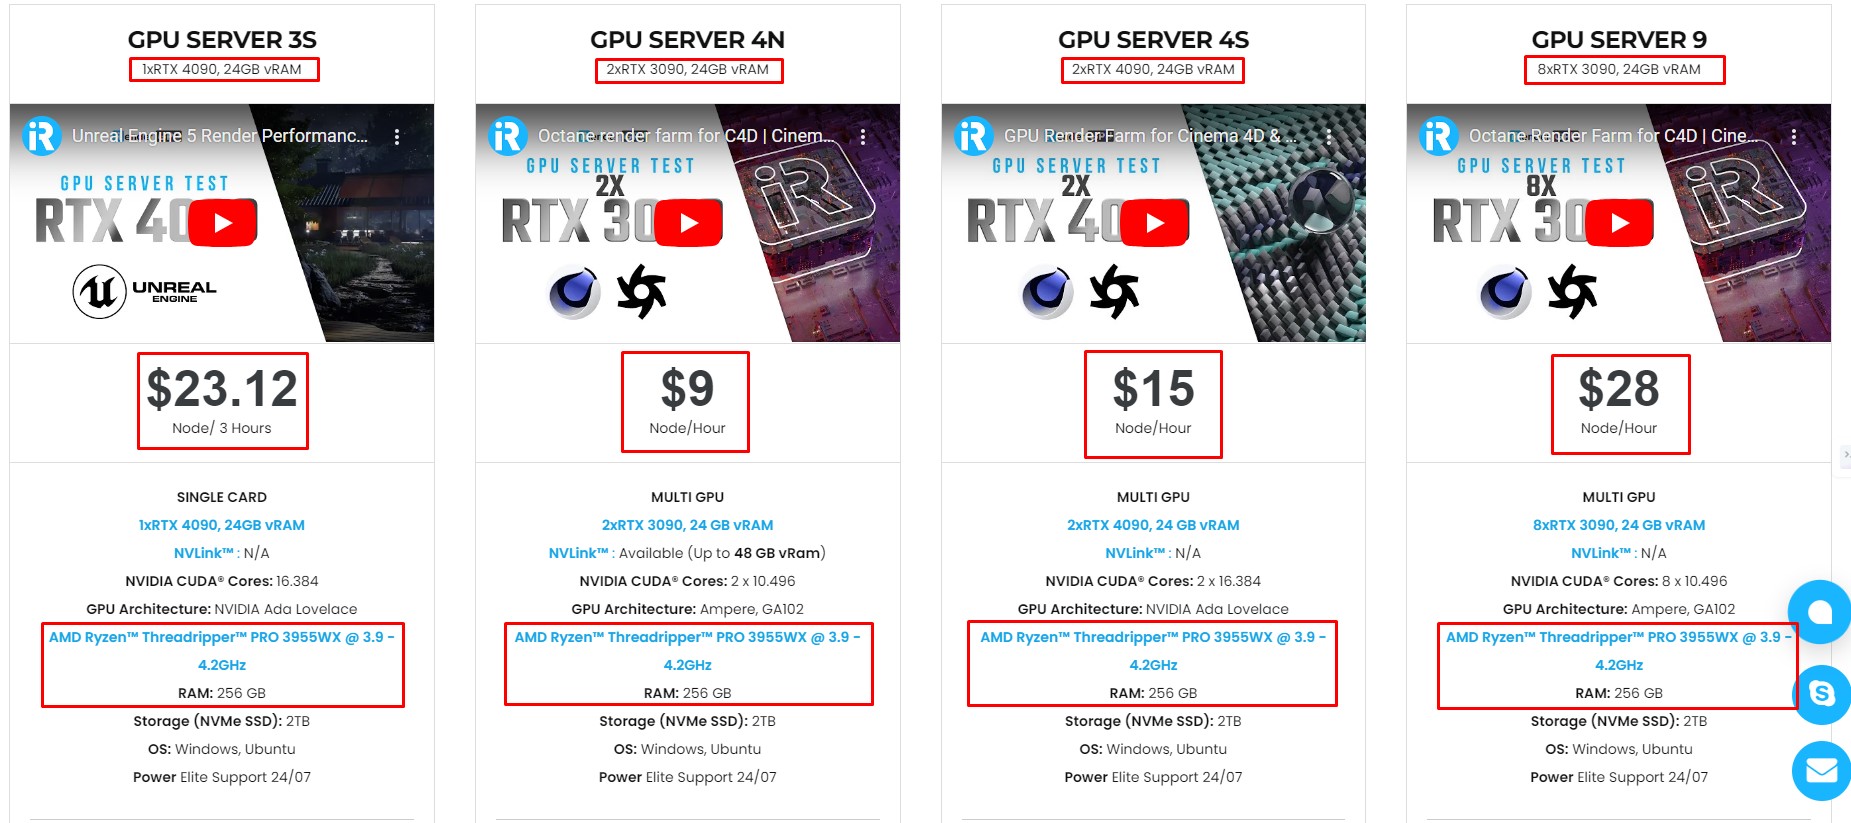
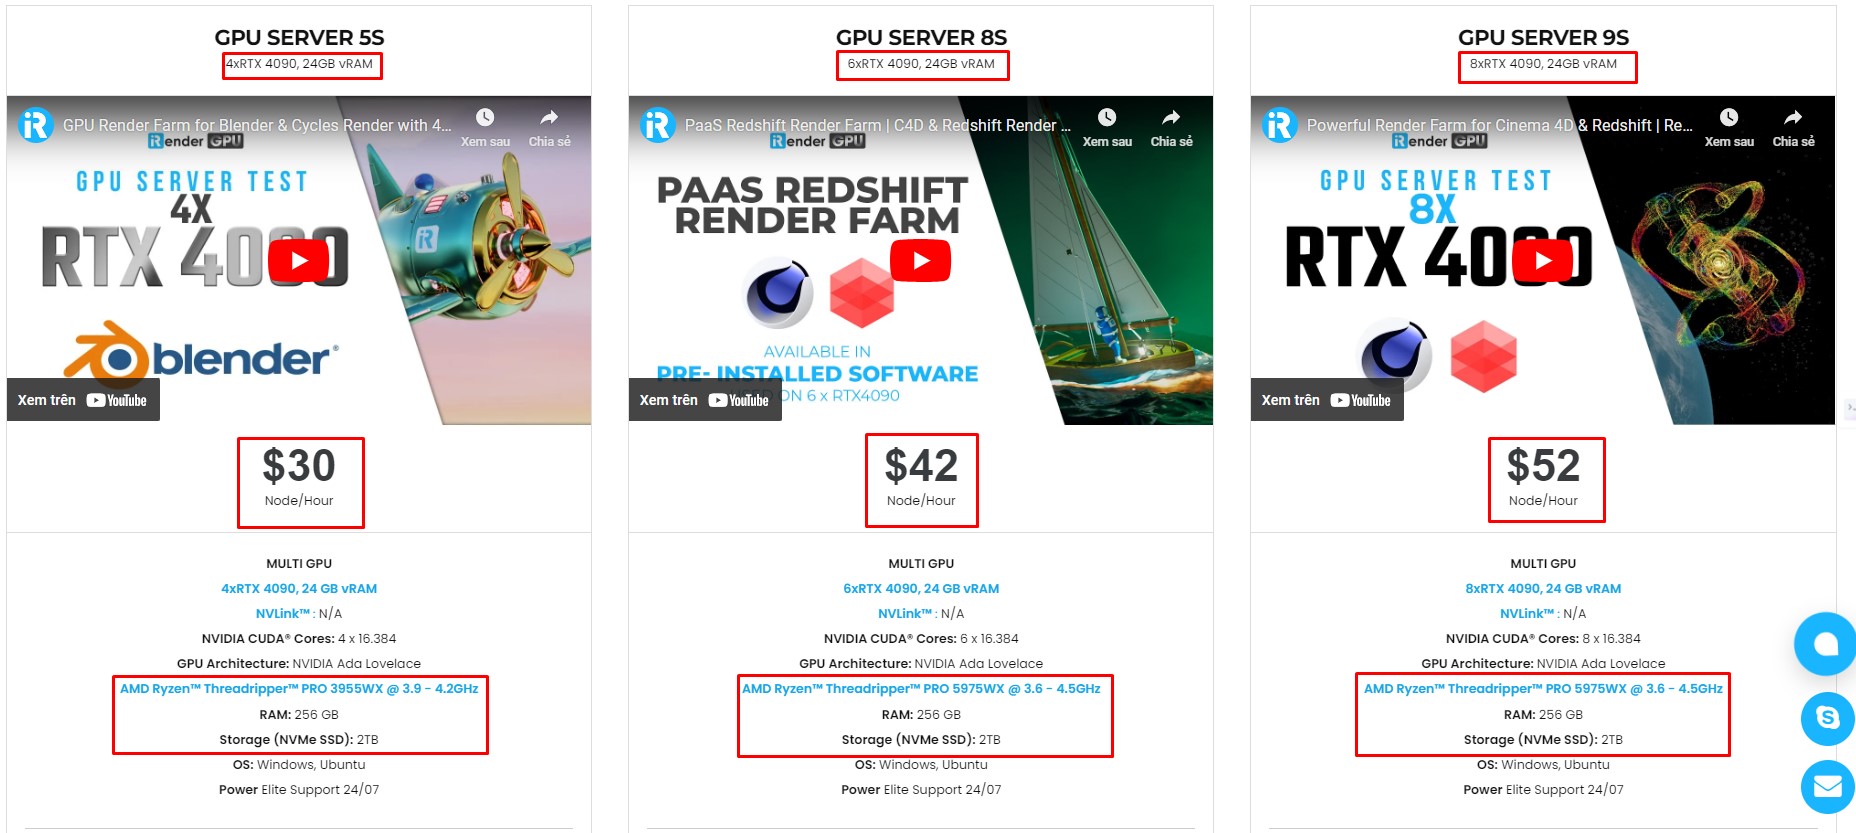
iRender – the best cloud rendering service, provides high-configuration servers that increase CPU and GPU rendering speeds. We offer the most powerful RTX 4090 configuration packages on the market, all equipped with AMD RyzenTM ThreadripperTM PRO 3955WX @ 3.9 – 4.2GHz and AMD Ryzen™ Threadripper™ PRO 5975WX @ 3.6 – 4.5GHz processors, 256GB RAM and 2T NVMe SSD hard drive capacity. With a wide range of GPU servers (1/2/4/6/8x) – RTX 4090, you can choose the server that suits your needs to start the rendering process.
You just need to transfer your files, connect to the remote machine, and install 3ds Max or SketchUp, as well as the necessary render engine and plugins. Then add your software license and render yourself there. Setting up ONCE and your working environment will be saved and ready to use at any time. Recently, we have newly released the most powerful ever server – 9S (8xRTX 4090) with CPU AMD Ryzen™ Threadripper™ PRO 5975WX @ 3.6 – 4.5GHz that will boost your rendering process to a new level.
Why choose iRender?
Transferring data may cost time and money on the remote server. However at iRender, you can upload and download your files without booting the server, then you can save a lot of money. We have an iRender GPU app for Windows PC which integrates all features and is easy to use, and an iRender Drive app for MacOS users to transfer data only. Moreover, there are many reasons why this is the best render farm for your 3ds Max and SketchUp project.
- 100% Software Support: We support all 3D software, their plugins, and render engines.
- Full Control: Our service will give you full control over the servers you rent. Therefore, you are free to create your own working environment.
- Go Green: We are committed to using 100% solar renewable energy towards environmental sustainability.
- Real-human 24/7 Support: Our professional support agents and technicians guarantee to bring you the best rendering experience.
Let’s see our easy and simple workflow below

Check out how to estimate rendering time and cost on our server

If you still wonder if this is the right place for your project, REGISTER NOW to get a trial and receive a 100% bonus promotion for your first transaction within 24 hours of registration with us.
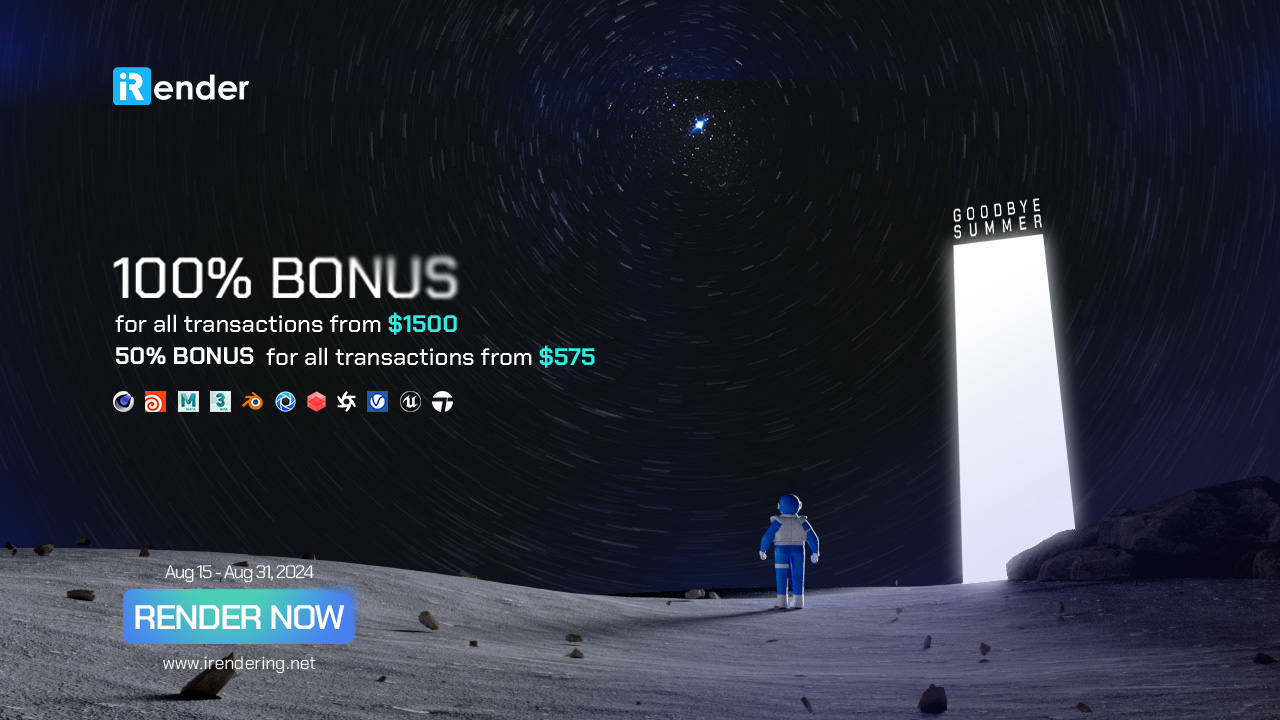
This August, we are excited to announce the biggest promotion to save big and boost your rendering power!
- 100% bonus promotion for all transactions from $1500
- 50% bonus promotion for all transactions from $575
For more detailed information, please contact us via Live chat 24/7 or WhatsApp: +(84) 962868890 or Email: [email protected]
iRender – Happy Rendering!
References: illustrarch.com
Related Posts
The latest creative news from Maya Cloud Rendering, 3ds Max Cloud Rendering , Redshift Cloud Rendering, Cinema 4D Cloud Rendering , 3D VFX Plugins & Cloud Rendering.