Reduce noise to optimize renders in Cycles for Blender (Part 1)
When performing a final render, it is vital to reduce noise as much as possible. In this article, we will go through some tricks that are particularly important to reduce noise when rendering animations within a reasonable time (although they seem to break the laws of physics). Let’s explore with iRender!
Some tricks to reduce noise for optimizing renders in Cycles
1. Path Tracing
Cycles uses path tracing with next event estimation, which is not ideal for rendering all sorts of light effects such as caustics. However, it has an advantage of being able to render more detailed and larger scenes than some other rendering algorithms. This is because we don’t need to store, for instance, a photon map in memory. We can maintain rays relatively coherent to utilize an on-demand image cache, compared to, for example, bidirectional path tracing.
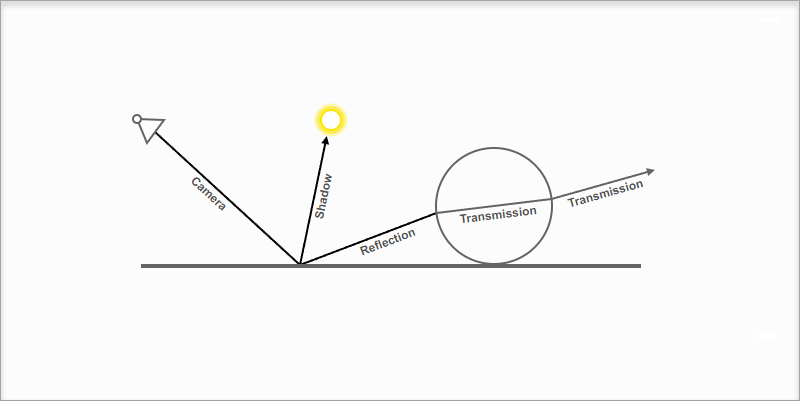
In reality, light rays go from the light sources into the scene and then into the camera. We do the exact opposite of what reality does. We trace light rays from the camera into the scene and onto lights. This has the advantage of not wasting light rays that will not end up in the camera. However, it also makes it difficult to find some light paths that may contribute significantly. Light rays will be sent either by the surface BRDF or by known light sources.
2. The Source of the Noise
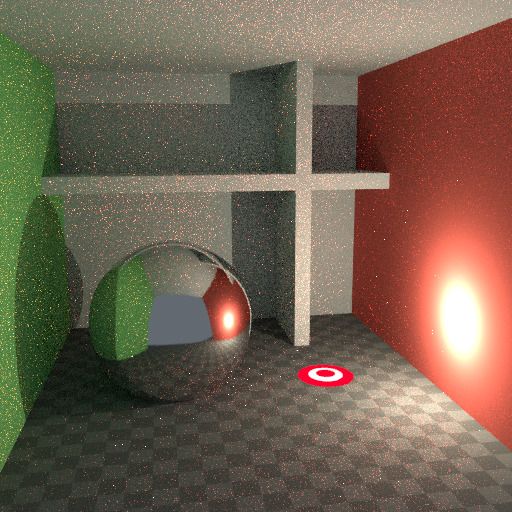
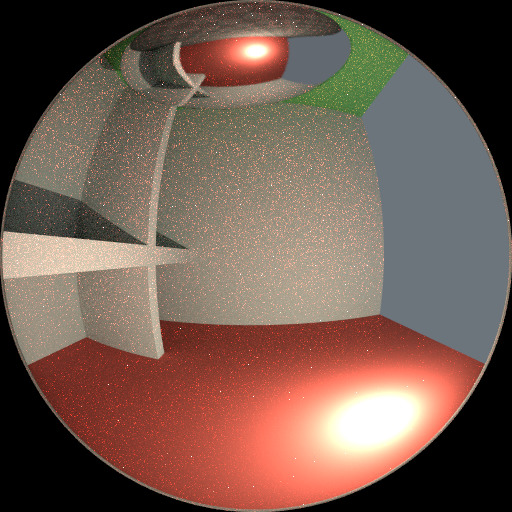
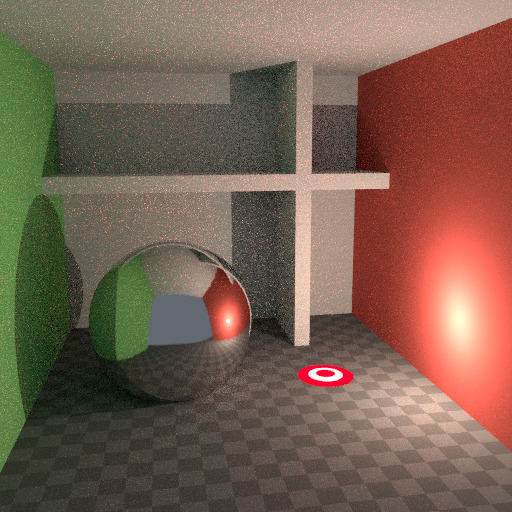
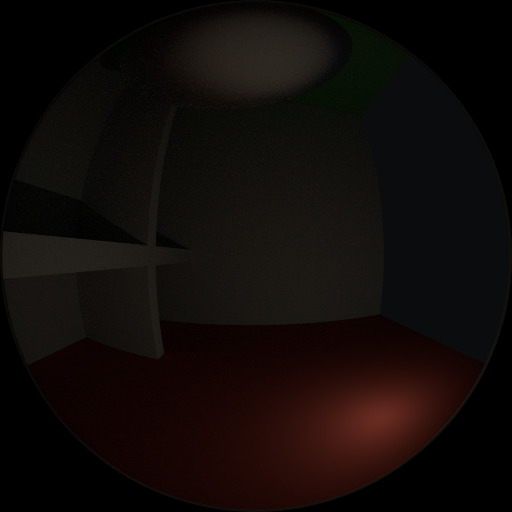
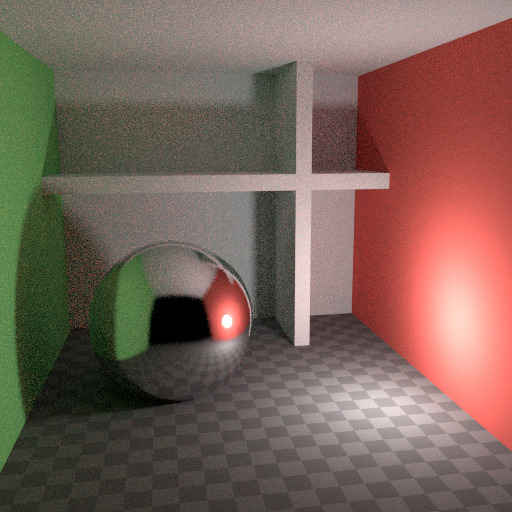
Take a look at the scene below to understand where noise can come from. When we trace a light ray into the location highlighted by the white circle on a red dot, the second image below shows what the diffuse shader “sees.” To find the light reflected from this surface, we need to calculate the average color of all these pixels. Take note of the glossy highlight on the sphere, as well as the bright spot that the light casts on the nearby wall. These hotspots are much brighter than the rest of the image. They will significantly contribute to the lighting of this pixel.
Source: Blender Documentation (docs.blender.org)
Since the light is a known light source, its location is already known. Yet, the glossy highlight(s) that it causes is a different matter. The most we can do with path tracing is to randomly distribute light rays around the hemisphere, expecting to find all of the significant bright spots. If we miss some bright spot for some pixels, though we do find it for another, the consequence is noise. The more samples we collect, the more likely we are to cover all of the important light sources.
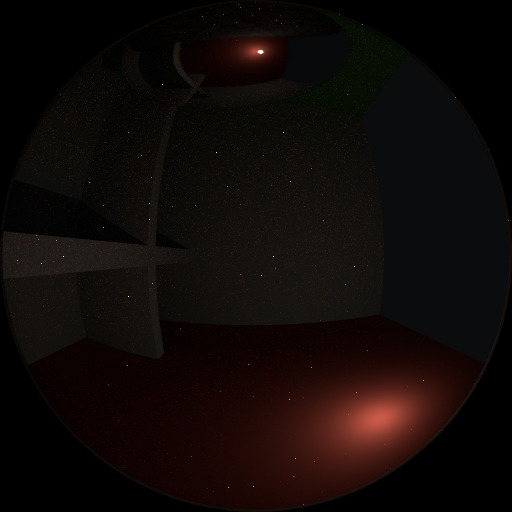
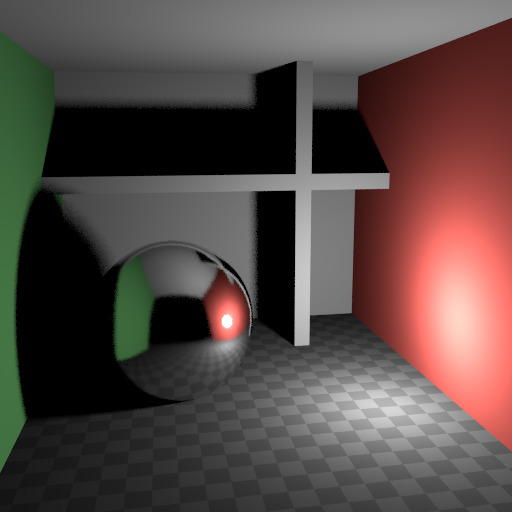
We can reduce this noise with a few tricks. When we blur the bright spots, they become larger and less intense, making them easier to find and less noisy. This does not always produce the same result. However, it is often close enough when viewed through a diffuse or soft glossy reflection. The example below shows how to use the Glossy Filter and Light Falloff.
Source: Blender Documentation (docs.blender.org)
3. Bounces
In reality, due to the rapid speed of light, light will bounce a large number of times. In practice, more bounces bring more noise. Thus something like the Limited Global Illumination preset in the Light Paths Section (which uses fewer bounces for different shader types) may be preferable. Diffuse surfaces may usually get away with fewer bounces. Whereas glossy surfaces require more, and transmission shaders like glass usually require the most.
Source: Blender Documentation (docs.blender.org)
It’s also important to use shader colors that don’t contain components with values of 1.0 or close to 1.0. Also, try to maintain the maximum value at 0.8 or less to make your lights brighter. In practice, surfaces rarely reflect all light perfectly, but there are exceptions. Generally, the glass will let most light through. Which is why we need more bounces there. High color component values are likely to introduce noise since light intensity does not decrease significantly as it bounces off each surface.
4. Caustics and Filter Glossy
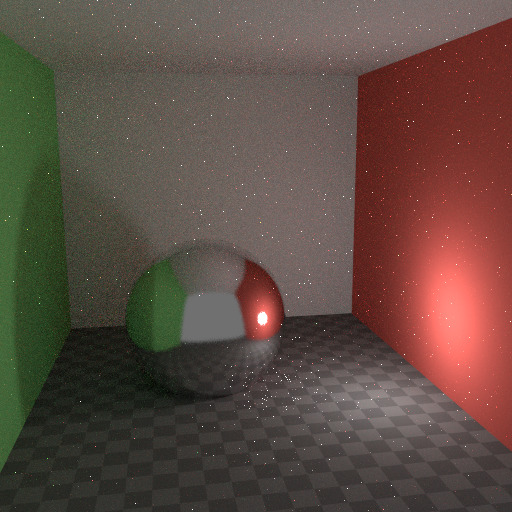
Caustics is a well-known source of noise that causes Fireflies. They occur when the renderer struggles to find specular highlights being viewed via a soft glossy or diffuse reflection. There is a No Caustics option to completely disable glossy behind a diffuse reflection. Many renderers will often disable caustics by default.
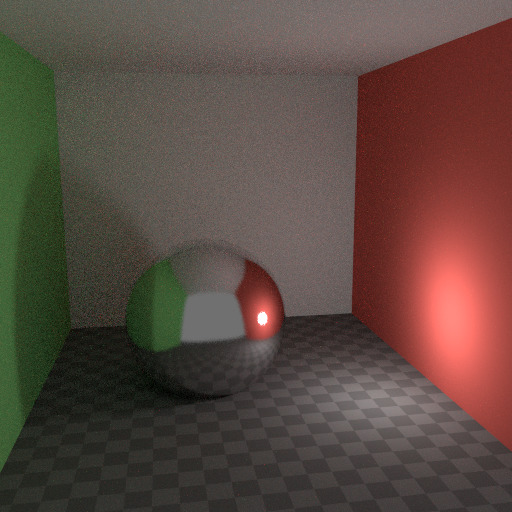
Using No Caustics, on the other hand, will result in missing light. It still doesn’t cover the circumstance where a sharp glossy reflection is viewed through a soft glossy reflection. There is a Filter Glossy option available to reduce noise in such circumstances at the expense of accuracy. By increasing the shader Roughness, this will blur the sharp glossy reflection and make it simpler to find.
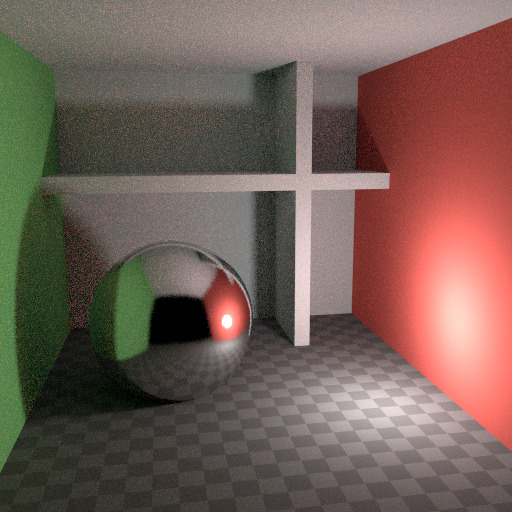
The following images show the default settings, no caustics, and the filter glossy set to 1.0.
Source: Blender Documentation (docs.blender.org)
Above are some important tricks for reducing noise when rendering animations in Cycles. Hope you find them useful to reduce noise for your final renders.
iRender - The Best Render Farm for Blender
iRender is proud to be a professional GPU Accelerated Cloud Rendering Service provider for 3D Render, CGI, and VFX tasks with more than 30,000 clients. We are appreciated in many global rankings (e.g. CGDirector, Lumion Official, Radarrender, InspirationTuts CAD, All3DP, BlenderBaseCamp, VFX Rendering.)
We are currently a Diamond Sponsor of Blender Foundation. Our long-term goal is to support the Foundation to partly contribute to the development of this awesome software. Let’s work together and support the future of Blender!
Our service for Blender
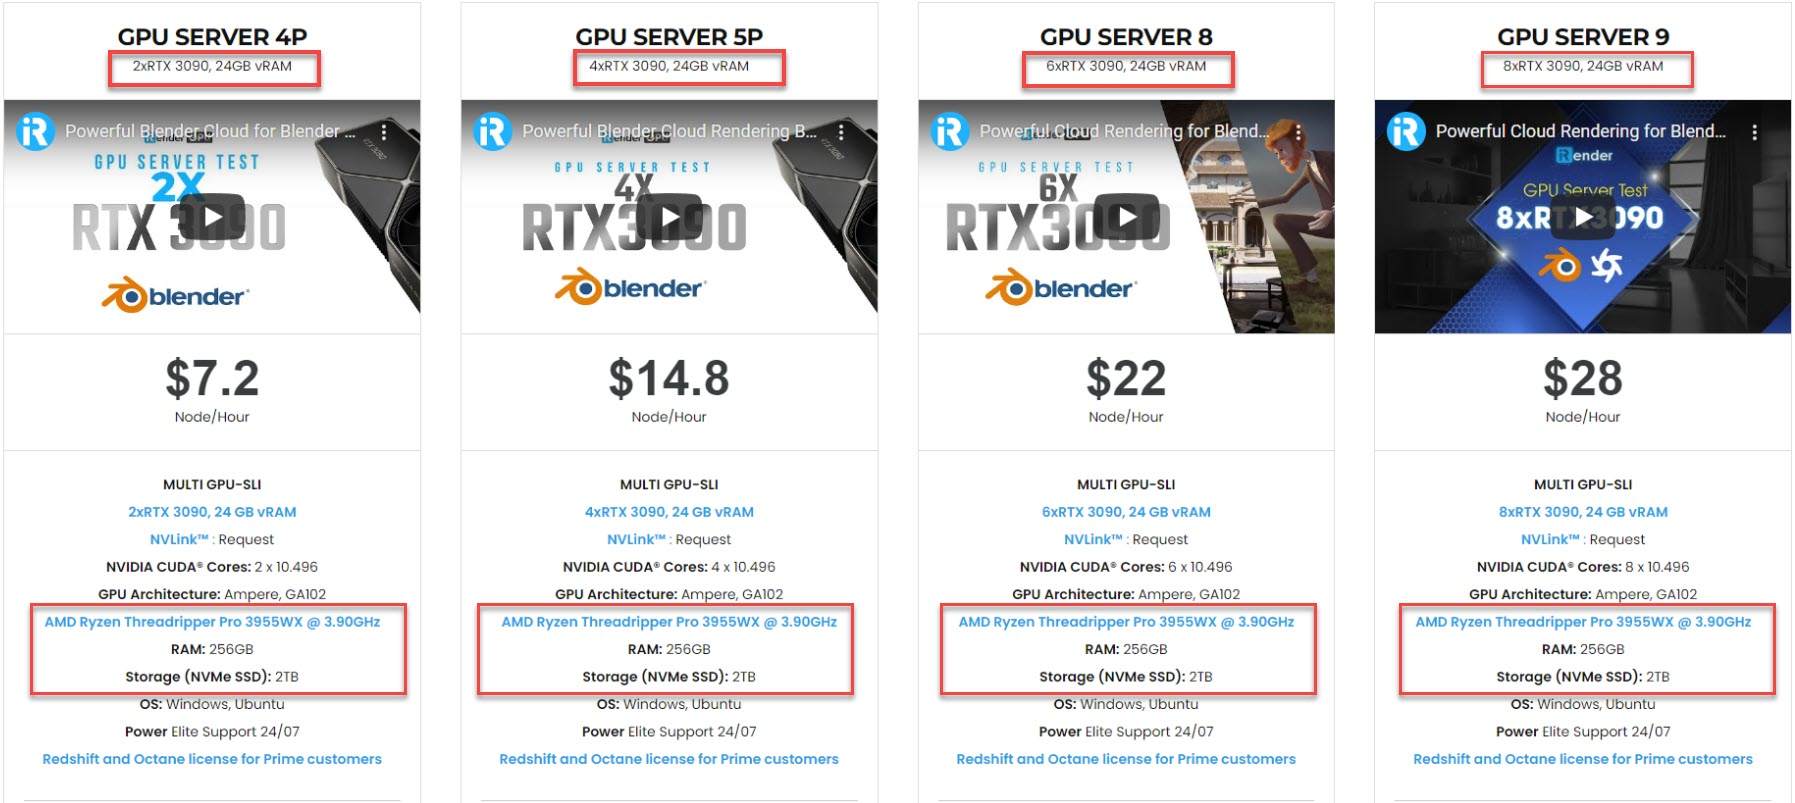
We provide high-configuration dedicated servers (machines) that are specifically configured and optimized for GPU rendering. Our GPU machines are built with 1/2/4/6/8x RTX 3090. Also, they all have a strong AMD Ryzen Threadripper Pro 3955WX processor, which provides increased performance together with GPU. Moreover, the workstations are ideal with 256GB RAM capacity (which is a great amount for most users, even high-end ones) and 2T NVMe SSD storage (that meets all your small to very large projects’ files). We highly recommend you try our highest configuration server, the 8x RTX 3090. This server will be a super-configured one that brings crazy speed to Blender. It is rated as one of the most worth-trying workstations so far for Blender.
We are the right place for your custom pipeline
If you use a custom pipeline with a lot of plugins, add-ons, or proprietary tools, we are the right place for you. Using our service, you have complete control over the server(s) you operate. Therefore, you can customize your creative working environment as you expect. You can even run multiple machines simultaneously to speed up the renders, thus no more worrying about any deadline.
All of our servers’ configurations are publicly posted on our website. Visit HERE for more details about the configuration and the cost.
Blender rendering speed on our RTX 3090 servers
Let’s check out the rendering performance of Blender and Cycles on our 2/4/6x RTX 3090 servers in the 03 following test videos.
This October, we are running a SPECIAL OFFER: 20% Additional Bonus for new clients who register an account and make a top-up within 24 hours of registration.
Let’s get started!
Get a FREE COUPON and totally control high-end computers to boost rendering for your Blender projects now! For further information, please do not hesitate to reach us at [email protected] or Whatsapp: +84915875500.
iRender – Happy Rendering!
Reference source: Blender Documentation
Related Posts
The latest creative news from Blender Cloud rendering.

