
Some Ways To Change Exposure In Blender
When rendering in Blender, exposure is also one of the important factors. There are many ways to adjust exposure to enhance the overall look of your render. If you know how to set the right exposure, you can get more realistic and attractive images. Besides, it can also help balance the overall brightness of the scene as well as make the scene more visually pleasing. Therefore, it will attract more viewers. In this Blog today, iRender will learn some ways to change exposure in Blender.
1. What is Exposure?
Just like in photography, the exposure will increase the amount of light that enters the camera, resulting in a brighter image. Blender has exposure controls for both Cycles and Eevee. You will find these in the Scene tab of your properties window.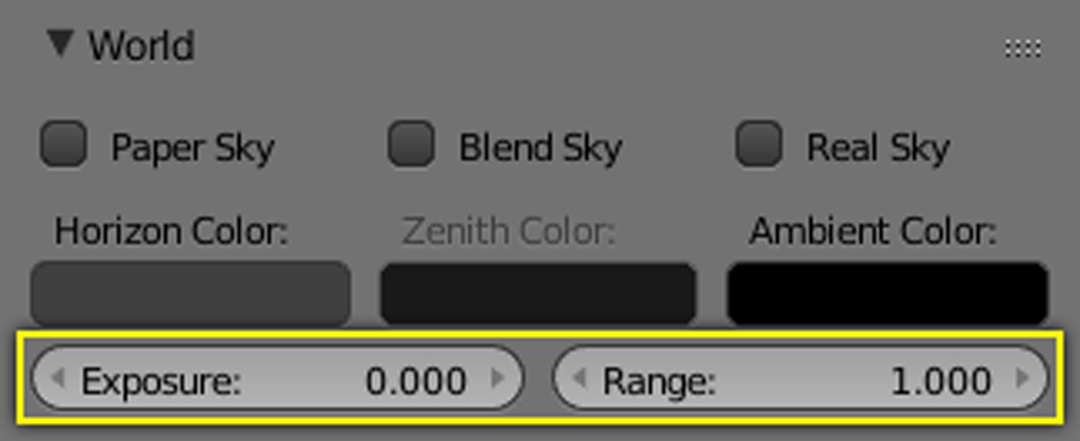
Image Source: Blender Document
In general, the right exposure will produce a well-lit image. It will accurately represent the scene as the human eye will perceive. An underexposed render will be too dark, while an overlight render will be too bright. Without the right exposure, the rendered result will not look good and attract the viewer.
An example of overexposure in our daily lives can be felt when you take pictures of the sky. The camera is often pointed towards the brightest area so it can be difficult to get the most accurate exposure. The sky is often much brighter than the foreground. And as a result, the camera will have trouble balancing the exposure between the two areas. Exposure brightens the darker pixels, so that the darker parts of the image will not be changed at all (Range : 2.0, Exposure : 0.3). You can refer some picture below:
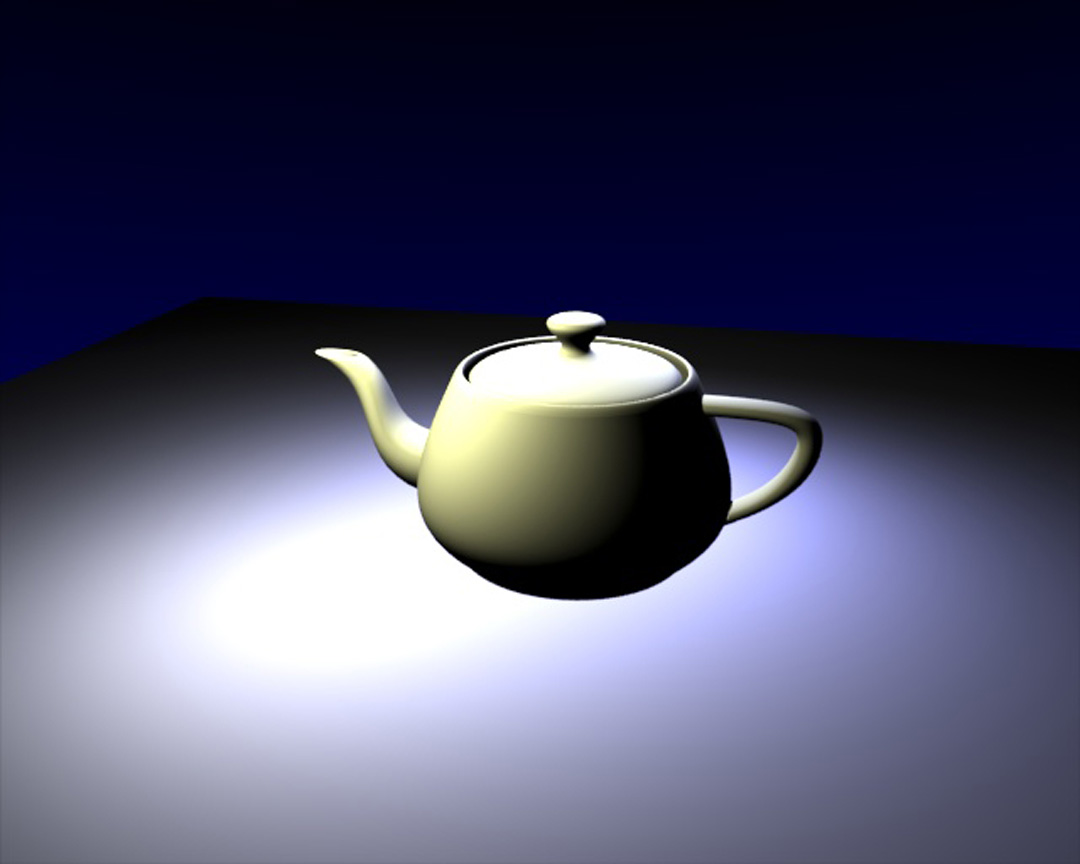
An overexposed teapot (Image Source: Blender Document)
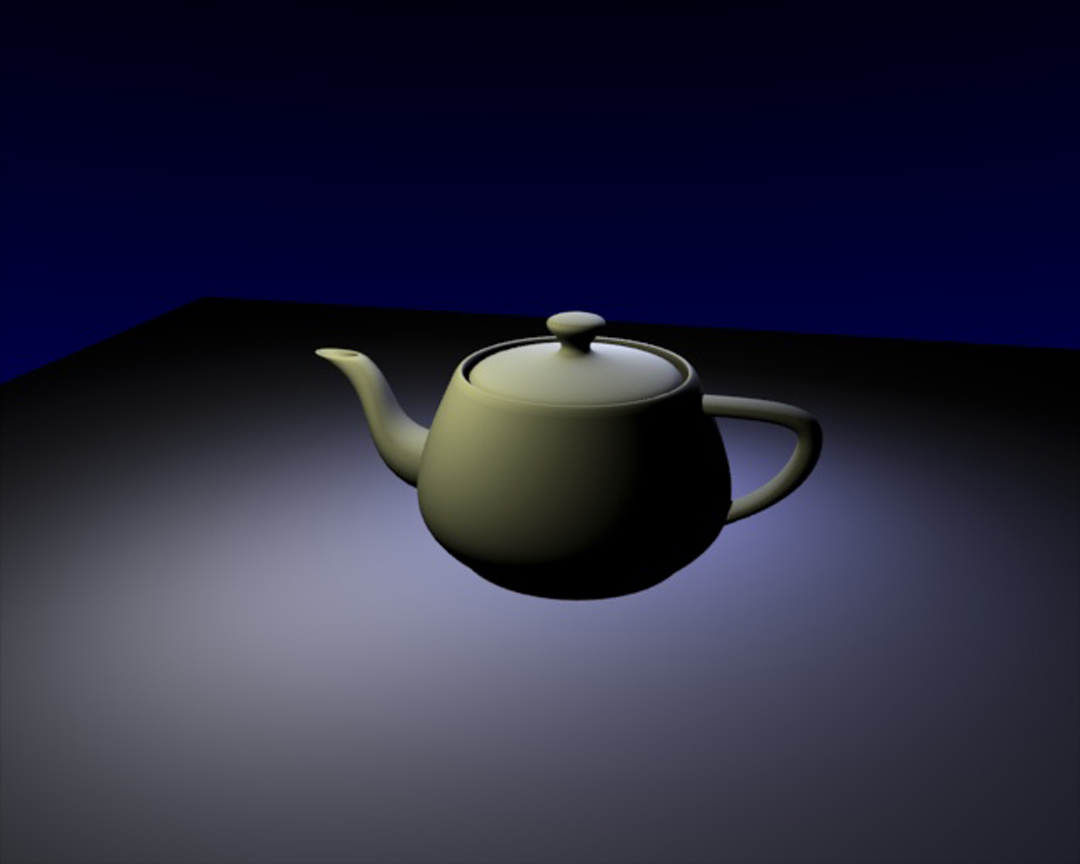
Range: 2.0 (Image Source: Blender Document)
2. Exposure in Film Section
The exposure setting in the film section is modified before starting the rendering process. This means that the information that you are seeing is adjusted.
If you want the final render to have a particular overall brightness while simulating the physical characteristics of a camera, you should utilize the exposure settings in the Film section. For example, you might utilize the exposure settings under the film section to match the camera’s aperture, shutter speed, and ISO if you wanted to duplicate the appearance of an image shot with a certain camera and film.
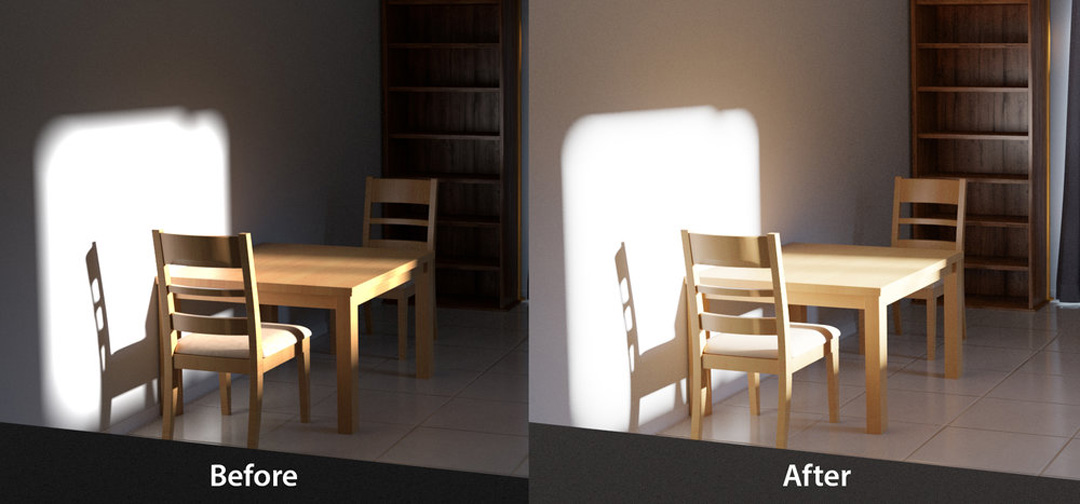
Image Source: Blender Guru
3. Exposure in Color Management Section
Color management is one of the most important tools that an artist can use. It allows an artist to ensure that an image remains the same from rendering, to saving, to post-processing. Moreover, Color management also helps an artist change exposure, gamma, or the overall color grade. Blender includes the OpenColorIO (OCIO) library to enable color management.
The final image’s colors and contrast should be adjusted using the exposure setting from the color management section. The exposure settings of the color management section can be used to adjust the overall brightness of the final rendered image. This can be useful for making final adjustments to the image.
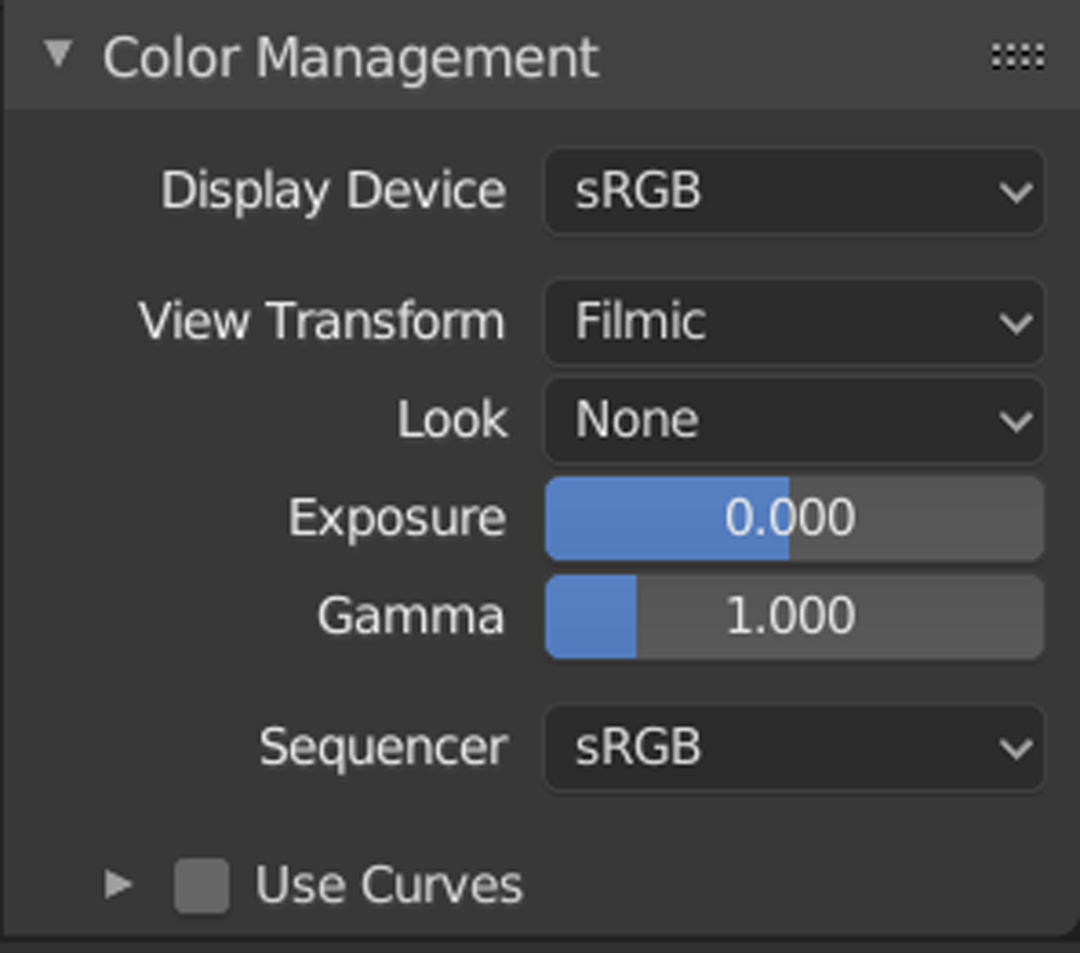
Image Source: Blender Document
Final Thoughts
In short, varying the exposure of your render can improve the sharpest and most realistic image. Especially, when you want to show viewers the beauty of nature and the sky. The color management settings in Blender mainly depend on your workflow. To get good quality photos, you need to balance the exposure properly.
iRender is The Best Solution for Blender Render Farm
To bring the best experience to our customers, iRender is always Constantly improving and updating every day with the newest technology. Recently, iRender launched a server 2 card 4090 – the new and hottest card. In the near future, we will also launch a server 1 card 4090. With Blender, you can run on multiple GPUs so you can choose any server.
We are currently a Diamond Sponsor of the Blender Foundation. Our long-term goal is to support the Foundation to partly contribute to the development of this awesome software. We have many high performance machines from 1 to 8 RTX 3090, 2-4 RTX 4090 which are highly recommended for Blender users. We are not only providing you the most powerful graphics card, but also the same level of hardware, such as AMD Ryzen Threadripper processor, 256 GB RAM, 2 TB of storage (NVMe SSD). A powerful processor is for low loading time, snappy viewport, 256GB of RAM is for huge projects, and 2TB of storage is for storing your renders.
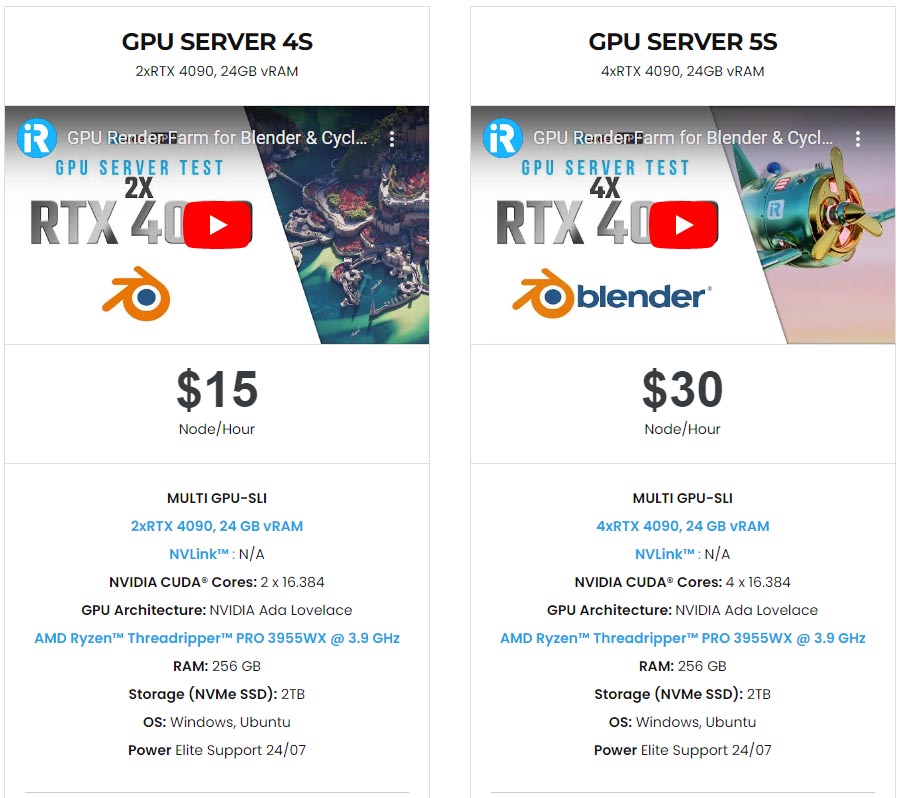
With one mouse click, now you can experience the newest card and enjoy working smoothly in a customized pipeline like you have always done with your own PC. Check out the rendering performance in Blender on RTX 3090 and RTX 4090 servers.


Not only providing those powerful configurations, you also have 24/7 support service via live chat with real humans who will support you whenever you encounter an issue.
Get the FREE COUPON to try our high-end computers for your Blender projects now! For further information, please do not hesitate to reach us at [email protected] or Whatsapp: +(84) 916017116.
iRender – Happy Rendering!
Related Posts
The latest creative news from Blender Cloud rendering.


