The Guide to Maya Animation Rendering 2024
Autodesk Maya is a powerful and versatile 3D animation, modeling, simulation, and rendering software widely used in the entertainment, film, television, video game development, and visual effects industries. Considered a standard in the 3D animation world, Maya offers a comprehensive suite of tools for artists, animators, and designers to create stunning and immersive 3D content.
In this article, join iRender to explore how to render animations in Maya and get useful advice on how to efficiently optimize your rendering process.
Why choose Maya for Render Animation?
Rendering in Maya involves the process of generating a 2D image or animation from a 3D model. Maya provides various tools and options to create visually stunning renders.
- Modeling Tools:
Maya provides a robust set of tools for creating and manipulating 3D models, whether for characters, environments, or props. Artists can utilize polygon modeling, NURBS (Non-Uniform Rational B-Splines), subdivision surface modeling, and more.
- Animation Capabilities:
With an extensive range of animation tools, Maya enables the creation of dynamic and lifelike character animations, including rigging, keyframe animation, motion capture editing, and tools for creating complex simulations and effects.
- Rendering Engine:
Maya’s integration with the Arnold renderer delivers high-quality, photorealistic renders, allowing artists to produce visually stunning imagery, animations, and visual effects with flexible and advanced rendering features.
- Dynamic Simulations:
Maya includes powerful dynamics and effects tools for simulating realistic phenomena such as cloth, hair, fluids, particles, and rigid and soft body dynamics, contributing to the realistic behavior of animated scenes.
- Scripting and Customization:
Maya supports scripting through Python and its own scripting language, MEL (Maya Embedded Language). This allows for extensive customization and automation of tasks to suit specific project requirements and workflows.
- Character Rigging and Tools:
Maya provides comprehensive features for character rigging, skinning, and deformations, empowering animators to create expressive and believable character performances.
- Motion Graphics and Visual Effects:
Maya offers tools for creating motion graphics and complex visual effects, enabling artists to craft dynamic and compelling animated content.
- Pipeline Integration:
Maya is designed to seamlessly integrate into production pipelines, with support for various file formats, interoperability with other Autodesk software (such as Autodesk 3ds Max and Autodesk MotionBuilder), and the ability to connect to third-party plugins and renderers.
How to Render Animation in Maya
Rendering animation in Maya involves several steps to ensure a high-quality, visually appealing result. Below is a comprehensive guide on how to render animation in Maya:
Step 1: Prepare Your Scene and Animation
– Set Up the Scene:
- Open your animation project in Maya and set up your 3D scene with models, materials, lighting, and cameras. Ensure that your animation is ready for rendering, and all assets are properly placed and configured.
– Set your frame range:
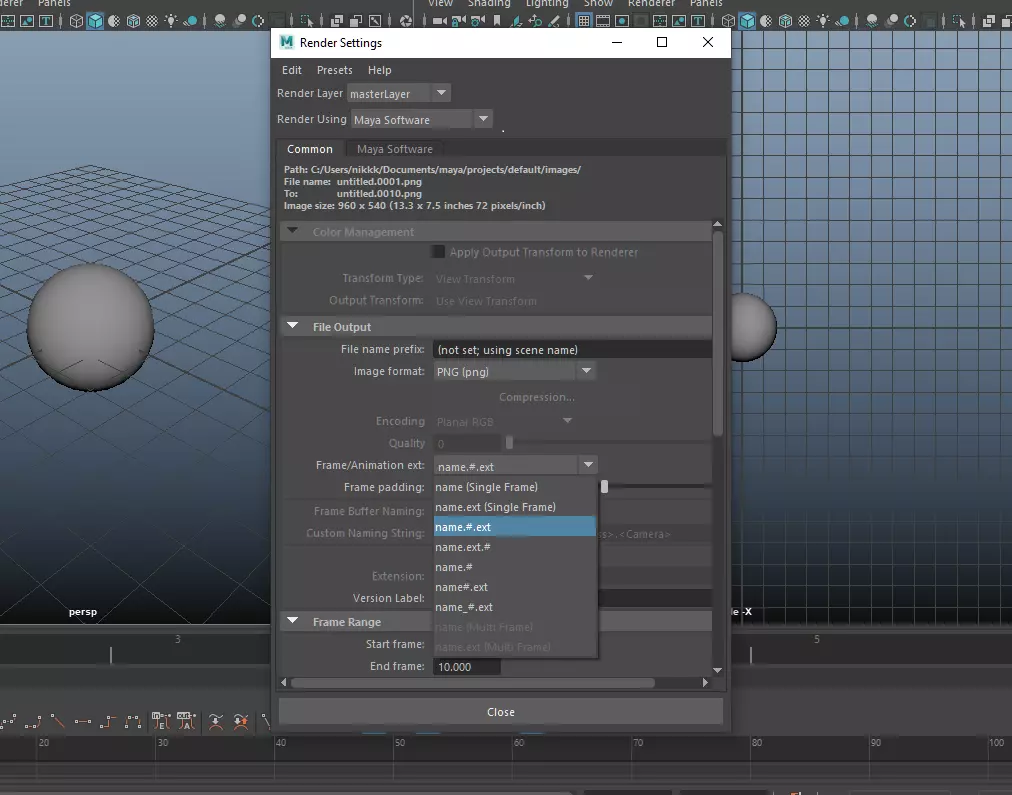
- Set the frames that you want to render in the Render Settings window > Common tab.
- From the Rendering menu set, select Render > Render Settings to open the Render Settings window.
- Under File Output > Metadata (name, type, value) > Frame/Animation ext, select any of the options with a #; for example: name.#.ext. This option determines the format of the rendered image file names, and activates the Frame Range > Start frame and End frame attributes in the section below.
Step 2: Choosing Render Settings in Maya
– Choose Render Sequence Option by:
- Select Render > Render Sequence > to open the Render Sequence options window.
- The title bar of the Render Sequence window indicates the frames that will be rendered, for example, Frame: 1-10.
- By default, images are saved to your project’s images folder. To add them to the Render View, enable Add to Render View.
Tip:
- You can also select Render > Render Sequence > from the Render View menu or from the Render View > Render marking menu.
- You can verify the path to which your rendered images are saved via the Render Settings window > Common tab.
Step 3: Rendering Your Animation
– Click Render Sequence to start rendering.
- Messages will appear in the Script Editor, indicating the progress of your render.
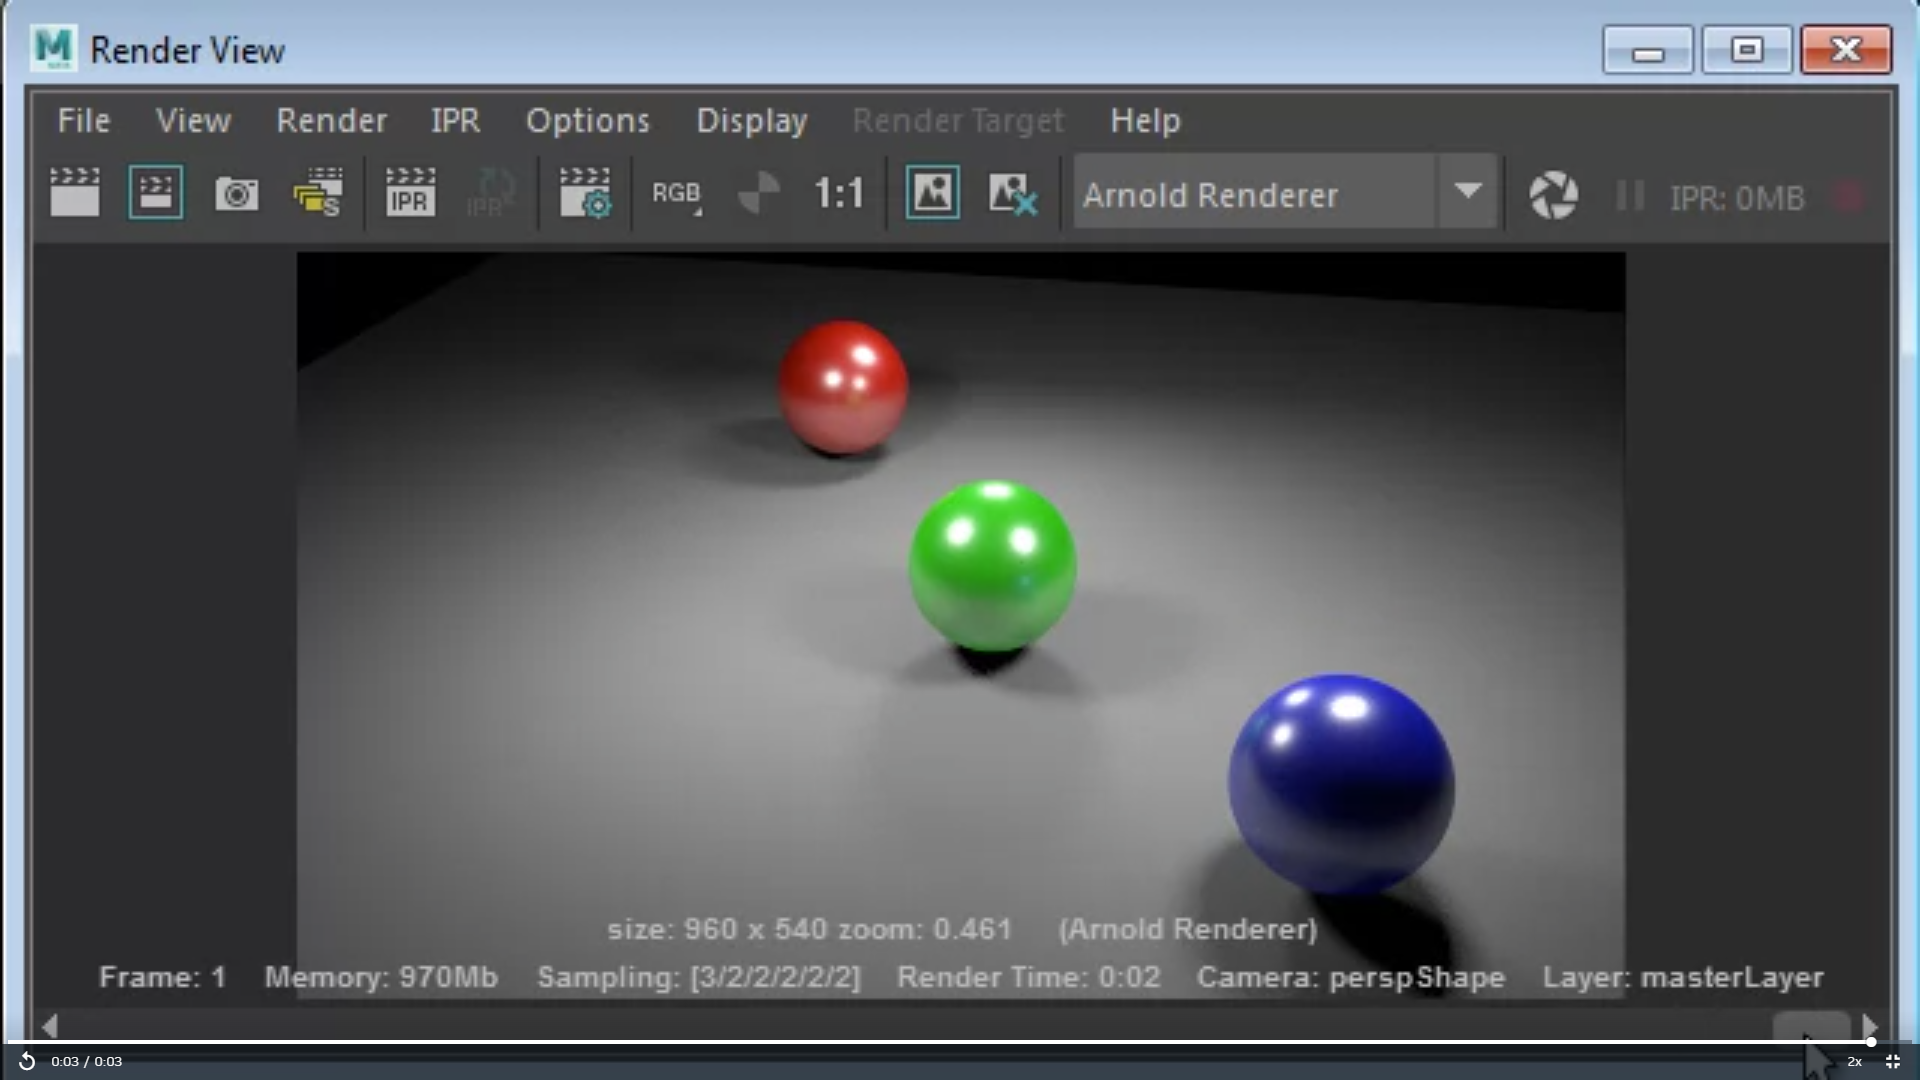
- If you have added images to the Render View, use the slider at the bottom of the Render View window to scroll through the rendered image sequence.
– Batch Render:
- Once all the settings are configured, go to the top menu bar and select “Rendering > Render Sequence”.
- This will initiate the batch rendering process for the specified frame range, rendering each frame of the animation sequence according to the defined settings.
– Monitor Rendering Progress:
- As the batch rendering progresses, you can monitor the status in the render view window, which provides real-time feedback on the rendering process. This allows you to ensure that each frame is being rendered correctly.
Step 4: Save or Export Rendered Sequence
Once you are satisfied with the rendered animation sequence, ensure that it is saved or exported in the desired format and resolution.
iRender - Best Cloud Rendering Service for Maya
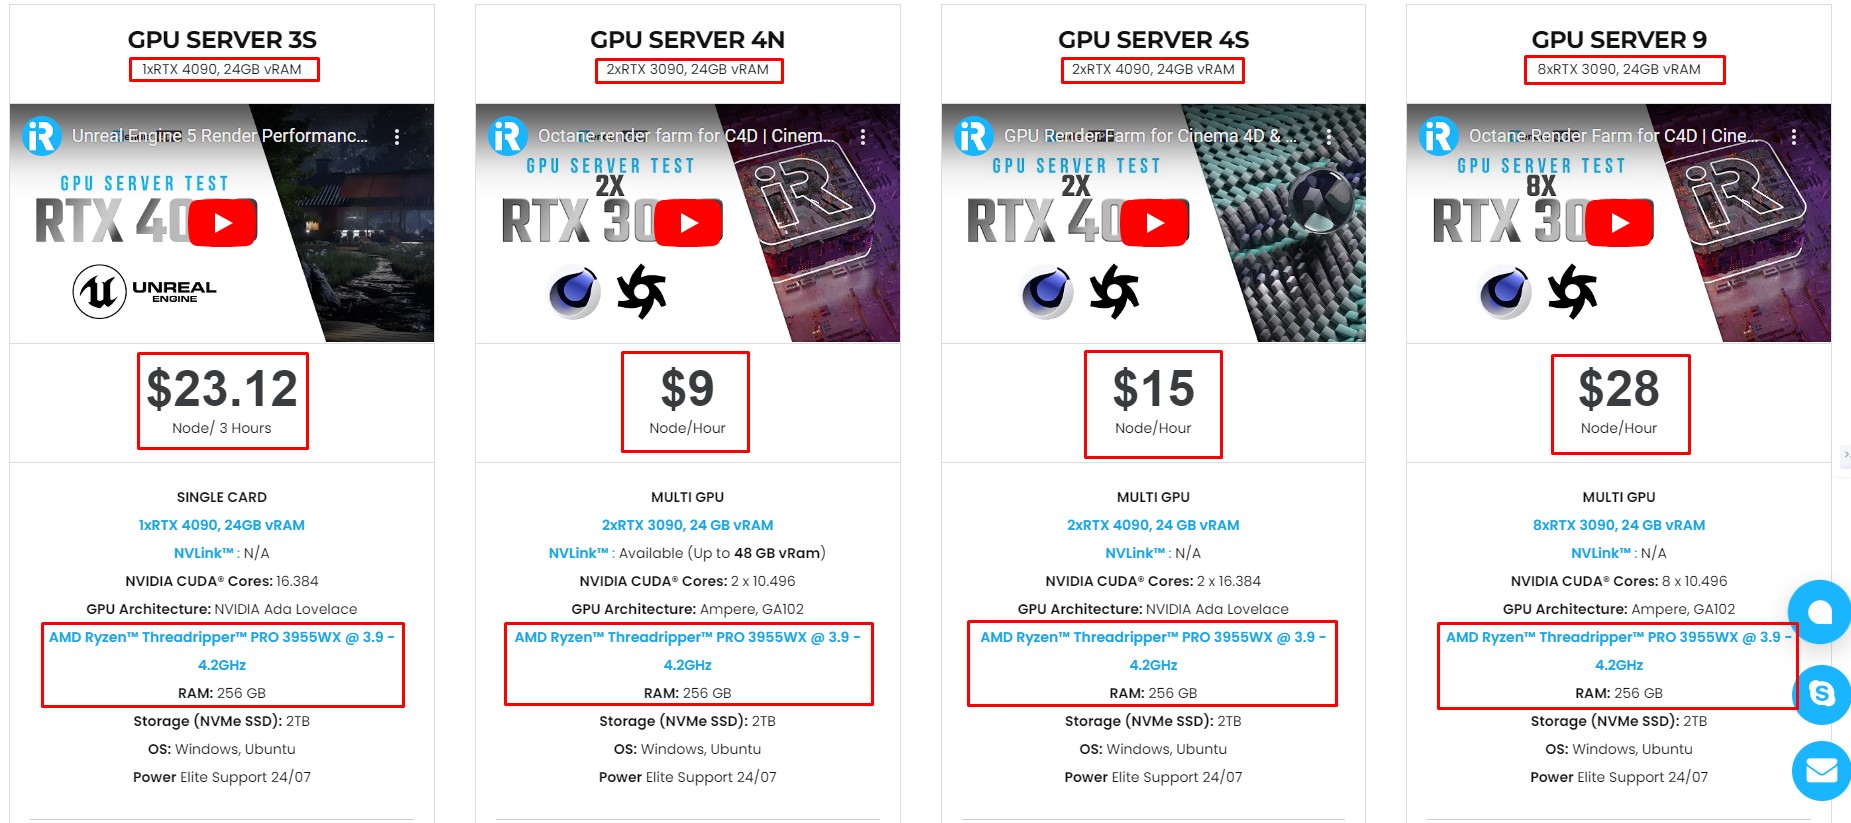
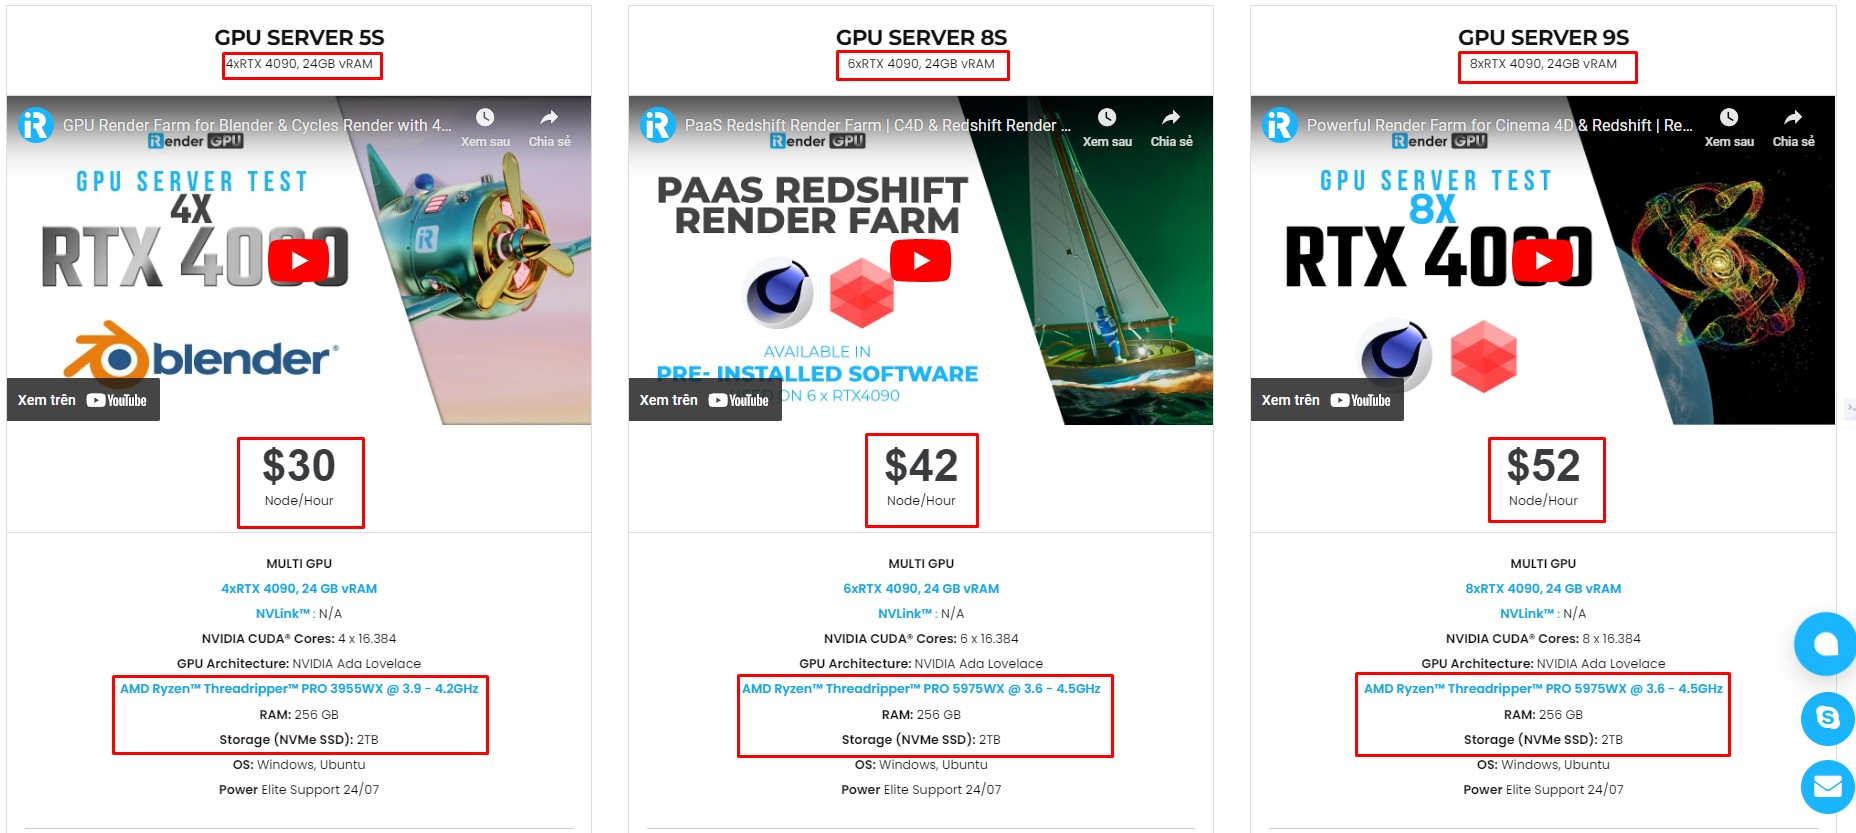
iRender provides high-configuration servers that increase CPU and GPU rendering speeds. We offer the most powerful RTX 4090 configuration packages on the market, all equipped with AMD RyzenTM ThreadripperTM PRO 3955WX @ 3.9 – 4.2GHz and AMD Ryzen™ Threadripper™ PRO 5975WX @ 3.6 – 4.5GHz processors, 256GB RAM and 2T NVMe SSD hard drive capacity. With a wide range of GPU servers (1/2/4/6/8x) – RTX 4090, you can choose the server that suits your needs to start the rendering process. You just need to transfer your files, connect to the remote machine, and install Maya, then add your software license and render yourself. Setting up ONCE will save your working environment and make it ready to use anytime.
In particular, if you use Maya with Redshift, you can connect to our remote server and use a free Redshift license. For Maya, install and use your license. Maya often uses third-party rendering engines such as Redshift, V-Ray, or the default Arnold renderer. Whether you use these render engines or not, you can still find a suitable rendering package at iRender. You can find a lot of server packages with extremely high-end configurations that are suitable for complex projects.
Below is information about iRender’s service packages:
Not only powerful configurations, iRender also provides you with many more services. Free and convenient transfer tool iRender drive for macOS and Linux users. For Windows users, we recommend the iRender GPU application, you will not need to access our website anymore. The price at iRender is also very flexible with hourly rental (pay as you use), and daily/weekly/monthly rental with a 10-20% discount.
We’re always happy to help you with any questions. If you have any problems or questions, don’t hesitate to contact our 24/7 support team. Or via WhatsApp: 0912 785 500 for free advice and support.
Right now iRender has a SPECIAL PROMOTION program with a 100% bonus for the first transaction within 24 hours of your registration. It means that you can get an extra 100% of the money you recharged the first time. And points never expire, so you can use them at any time.
Sign up for an account today to experience and enjoy our services.
Thank you & Happy Rendering!
Source and image:autodesk.com
Related Posts
The latest creative news from Maya Cloud Rendering

