Tips for Rendering an Animation as Video in Blender
Blender has established itself as a powerful and versatile tool for 3D modeling, animation, and rendering, making it a favorite among both amateur and professional artists. Rendering an animation from Blender is a critical step in the production pipeline. However, this process can be complex, often presenting challenges such as long render times, quality control issues, and technical glitches. To help you navigate this process and enhance your workflow, this blog will provide some tips for effectively rendering animations as video in Blender.
Let’s get started with iRender in the blog!
Prepare the scene for rendering
The first step in any rendering process is ensuring that your scene is fully prepared. This includes checking that the animation timeline is correctly set, with the appropriate start and end frames reflecting the total duration of your scene. Camera movements, object animations, physics simulations, and lighting should all be finalized. It’s also important to check playback in the viewport to ensure smooth motion and that no elements are missing or misaligned. By securing these foundational elements, you reduce the risk of errors or surprises in the final output.

Render as an image sequence
Rather than rendering directly to a video file, which can be risky if the software crashes or the render is interrupted, Blender users are encouraged to render animations as an image sequence. This means that each frame of the animation is saved as a separate image file, such as a .png or .exr. If rendering fails halfway through, you can resume from the last successfully rendered frame instead of restarting the entire process. This step is especially necessary for long animations or high-resolution renders that might take hours or even days to complete.
Choose render engine and optimizing settings
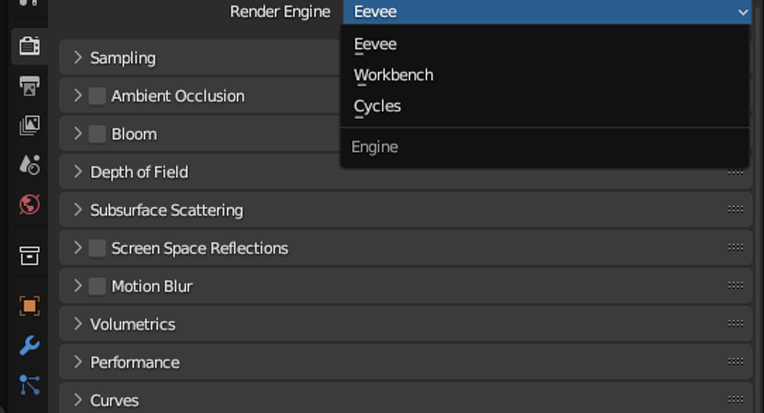
Next, it’s essential to choose the right render engine. Blender provides two main engines: Cycles, which is path-traced and ideal for photorealistic results, and Eevee, which is real-time and suitable for stylized or faster renders. Cycles is often the preferred choice for professional-quality animations, although it requires more computing power.
After selecting the engine, users must fine-tune rendering settings. This includes adjusting the number of samples (which impacts noise and render time), enabling denoising (using OpenImageDenoise or OptiX for NVIDIA RTX cards), and enabling motion blur for added realism in fast-moving scenes. For faster performance, Blender allows users to render using the GPU instead of the CPU. This setting can be adjusted in the user preferences under the “System” tab.
Set up the correct output settings
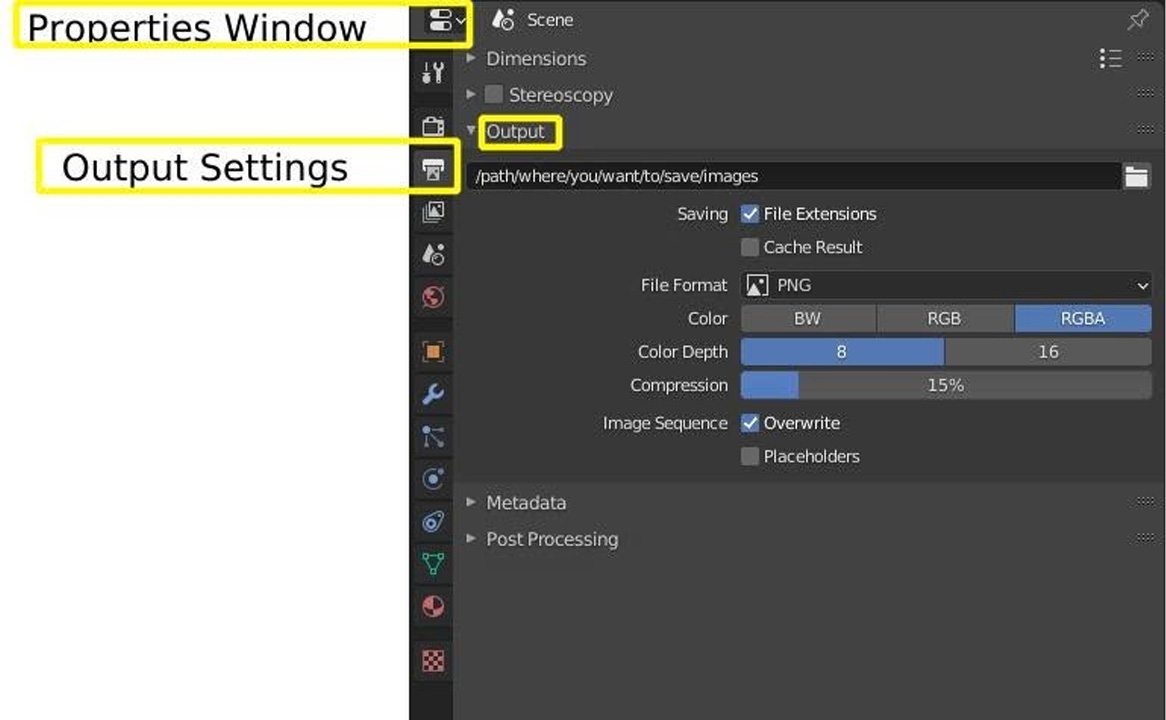
You have created an animation and want to make it into a final video format. Here are the steps:
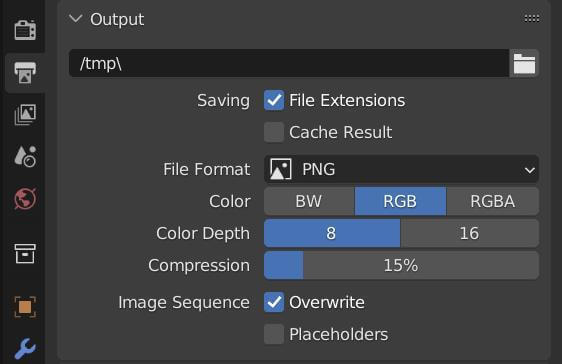
- Choose an output location for your animation under the Output Settings tab by clicking on “Output”.
- Set the Path to the folder where you want your output files to be saved, whether it is rendered as image files or a video file.
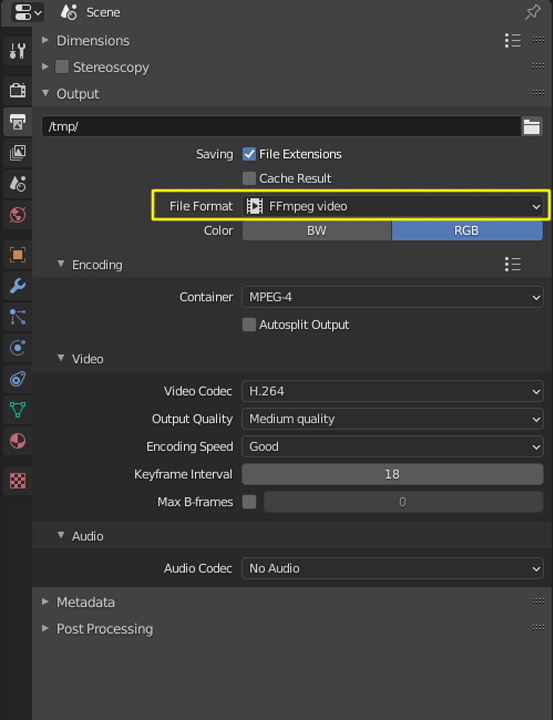
In the same Output Properties panel, under the File Format dropdown, you’ll find several image formats (like PNG, JPEG, OpenEXR) and one special option for video output: FFmpeg video. To render your animation directly as a video file, select: • File Format: FFmpeg video This unlocks a new section below called Encoding, which is where you’ll choose your actual video settings.
Final check before rendering
Before initiating the rendering process, it is crucial to perform a comprehensive final check to avoid errors, wasted time, or poor output quality. First, confirm that the frame range in the Output Properties panel is correctly set — the Start Frame and End Frame should match the duration of your animation timeline.
Next, ensure that your scene uses the intended active camera by selecting the correct camera view (Ctrl + Numpad 0) and verifying that it is locked and properly positioned. Then, double-check that your render engine is correctly chosen — Eevee for real-time performance or Cycles for high-quality ray-traced results.
If using Cycles, it is highly recommended to enable GPU Compute (in Preferences > System > CUDA or OptiX) to significantly speed up the rendering process. In the Render Properties tab, review your sampling settings — higher values yield better quality but longer render times — and enable denoising to reduce graininess. Additionally, review optional settings such as Ambient Occlusion, Bloom, or Screen Space Reflections (especially in Eevee) to enhance visual detail.
Finally, ensure your output file path is correctly set, and verify that the file format, encoding settings, and resolution are configured exactly as desired.
iRender - The Best Render Farm Provides RTX 4090 for rendering Blender Projects
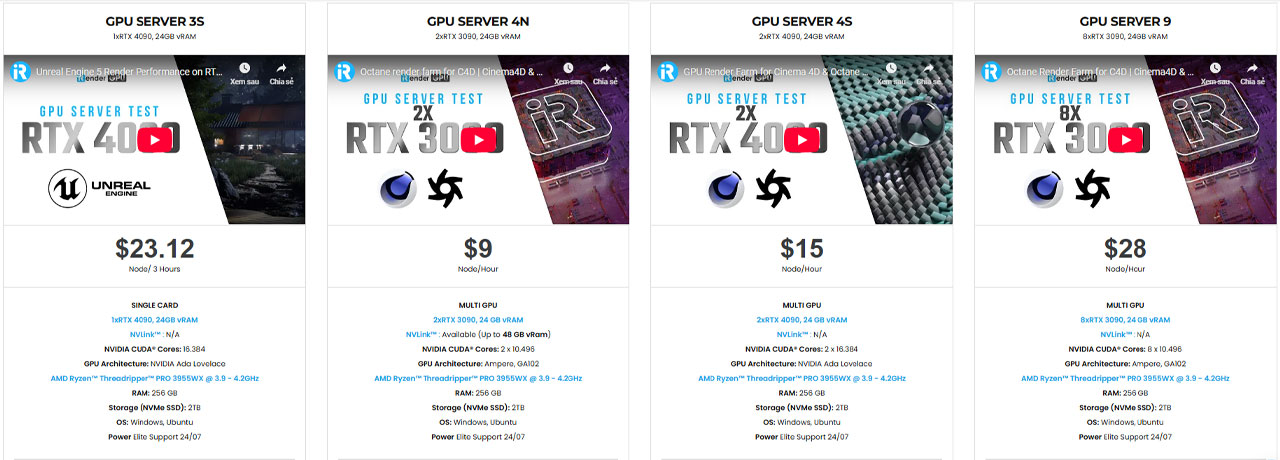
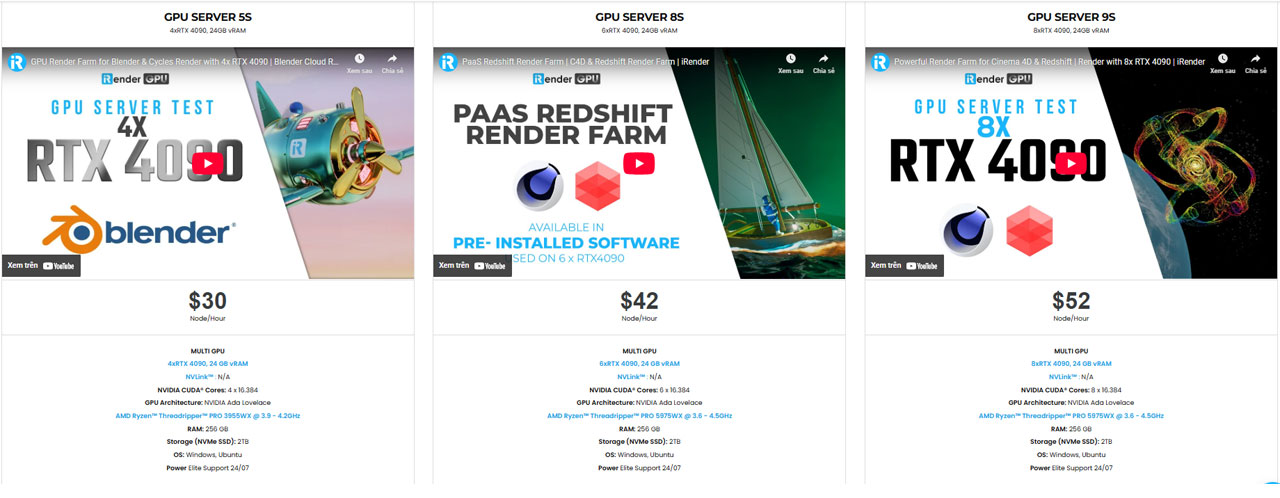
iRender is proud to be one of the best GPU service providers on the market. You can find a lot of options suitable for your Blender project. We are releasing new servers for iRender’s users, which have powerful processing capabilities of AMD Ryzen Threadripper Pro 3955WX @ 3.90GHz- 4.2GHz and AMD Ryzen™ Threadripper™ PRO 5975WX @ 3.6 – 4.5GHz. Besides, they have multi-GPUs: 2/ 4/ 6/ 8 RTX 4090 24GB VRAM to boost performance in the rendering process. The high-end configuration is extremely suitable for complex Blender projects. Right now, we have pre-installed Blender 4.4.1 option when you create a machine, so you won’t take time to install software.
Blender can use multi cards to render, you can refer any servers to speed up your rendering. Please have a look at all servers following:
Let’s see how our RTX4090 performs when rendering with Blender scenes:


Free and Convenient Transferring tools
iRender offers a powerful and free file transfer tool: iRender drive for macOS and Linux user. With fast file transfer speed, large data capacity, and completely free. You can transfer all the necessary data into our iRender drive tool at any time without connecting to the server. The data will be automatically synchronized in the Z drive inside the server, ready for you to use.
The tool is also integrated into iRender GPU app, an all in one application where you can free your workflow from accessing iRender website, and just have to work on the iRender GPU app.
Flexible Price
The price of server 3S is $8.2 per hour. However, the server is available for fixed rental when you boot (price at $23.124 for 3 hours rental, about 6% off compared to hourly basis). And you can even catch more attractive option for your big project when you rent it for daily/weekly/monthly basis, with discount from 10-20%.
In case you have any problems or questions, don’t hesitate to contact the 24/7 support team. We will be happy to help you with your questions and problems at all times.
We are running a SPECIAL OFFER: 100% Additional Bonus for new clients who register an account and make a top-up within 24 hours after their registration.
Register an account today to experience our service or contact us via the email [email protected] or WhatsApp: (+84) 912075500 for advice and support.
Happy Rendering!
Related Posts
The latest creative news from Blender Cloud rendering.