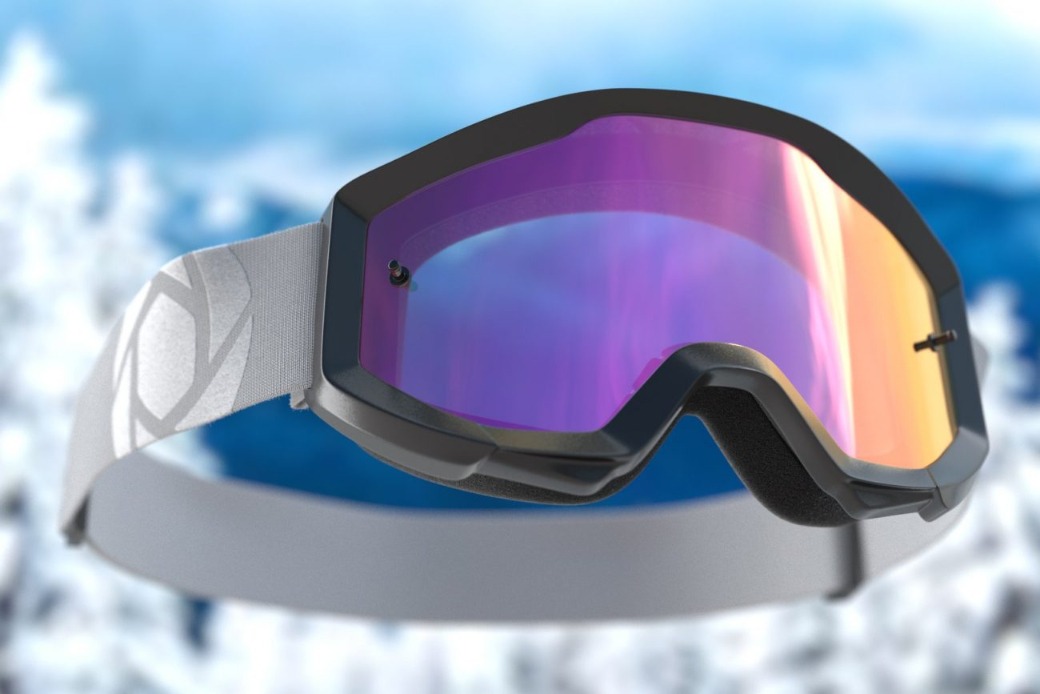
Utilizing Depth of Field in Keyshot
KeyShot includes all of the functionality you’d expect from a real-world camera for capturing your scene. It has the same capacity to give depth to a scene as Photoshop, and it’s a lot easier. The Depth of Field (DOF) camera settings in KeyShot is a simple but effective way to add realism to your product photographs. Let’s have a look at how to put it to work.
1. Get Your Camera in the Right Position
To begin, position your camera so that it frames your subject properly. This may be done with your mouse by rotating the Left Mouse Button and zooming in or out with the Scroll Wheel, or by adjusting the different sliders in the Position and Orientation area of the Camera tab.
2. Activate Depth of Field
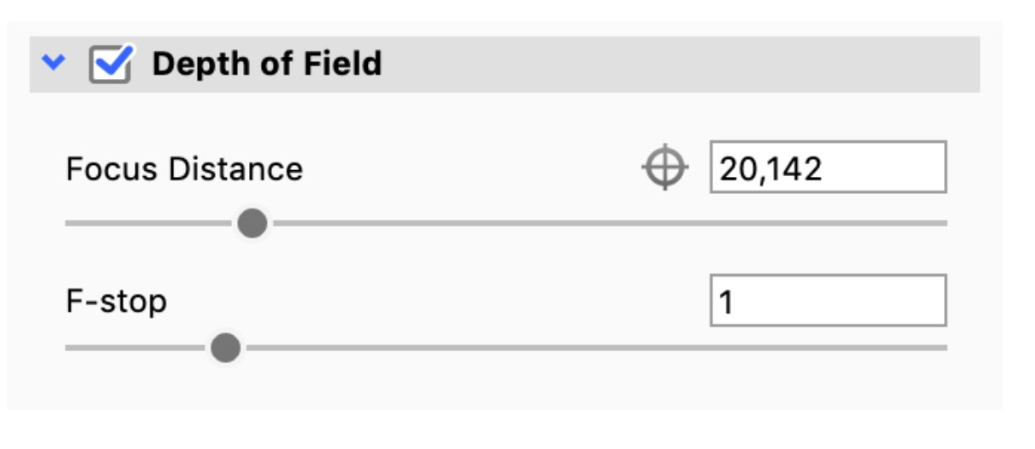
The depth of field settings in KeyShot are found in the Camera tab of the Project window. The Depth of Field choices are located just below the Lens Settings and Stereo options. When you tick the box to enable Depth of Field, you’ll see two options: Focal Distance and F-stop.
These two options should be quite familiar and natural to you if you are experienced with cameras and photography. Simply said, Focal Distance is the distance between the camera and the sharpest part of the image, whereas F-stop changes the camera’s virtual aperture to decide the size of the in-focus region.
Get Your Camera in the Right Position
To acquire a good DOF for your product photo, adjust the Focal Distance with the slider or by clicking the target icon, then choose the place on your model (or in your scene) you want to concentrate on. This instantly locks the camera’s focus.
Activate Depth of Field
Change the F-stop to a setting that gives you the required level of sharpness and focus. When your subject is closer, you’ll often select a lower F-stop value, but this also depends on whether you want a shallow or deep depth of field.
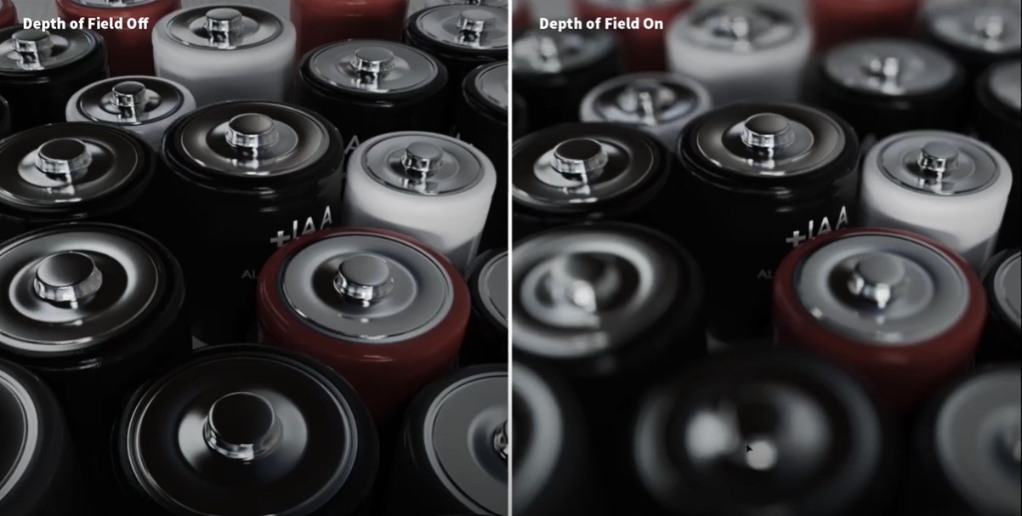
Using depth of field settings may help you attract attention to key characteristics or design aspects while also isolating your topic and establishing a center of interest. It may also help you create dramatic effects like Bokeh in your KeyShot sequences.
Using Depth of Field with The Professional Cloud Rendering Service iRender
iRender is a GPU-Accelerated Cloud Rendering Service with Powerful Render Nodes: 1/2/4/6/8x RTX 3090. On the basis of the IaaS paradigm, we deliver high computing performance (Infrastructure-as-a-Service). Keyshot Users can easily choose their machines configuration, ranging from recommended system requirements to high-end options, which suit all your project demands and will speed up your rendering process many times.
High-end hardware configuration:
- Single and Multi-GPU servers: 1/2/4/6/8x RTX 3090.
- 24 GB vRAM capacity, fitting to the heaviest images and scenes. NVLink/SLI requested for bigger vRAM.
- A RAM capacity of 128/256 GB.
- Storage (NVMe SSD): 512GB/1TB.
- Intel Xeon W-2245 or AMD Ryzen Threadripper Pro 3955WX CPU with a high clock speed of 3.90GHz.
Incredibly, iRender supports NVLink (Request) which helps you increase the amount of VRAM to 48GB. This is a technology co-developed by Nvidia and IBM with the aim of expanding the data bandwidth between the GPU and CPU 5 to 12 times faster than the PCI Express interface.
Let’s look at Keyshot rendering test on single and multi-GPU (NVLink) servers at iRender.

iRender – Happy Rendering!
The Reference: blog.keyshot.com
Related Posts
The latest creative news from KeyShot Cloud Rendering , Cinema 4D Cloud Rendering , 3D VFX Plugins & Cloud Rendering.