10 Expert Tips to Make Your Enscape Renders Stunning in 2025
Every 3D artist wants their renders to grab attention at first glance. However, in a world where everyone is using powerful tools like Enscape, standing out takes more than just pressing the render button. The difference often lies in how you control the mood, lighting, and perspective to tell a visual story instead of showing a flat image.
Many designers spend hours perfecting materials and settings, only to end up with renders that look decent but lack depth or atmosphere. That’s where expert knowledge makes all the difference.
In this article, you’ll discover 10 practical tips curated by professionals to help your Enscape renders feel more realistic, balanced, and emotionally engaging – the kind of visuals that make clients stop and say, “Wow.”
1. Shadows and Reflections
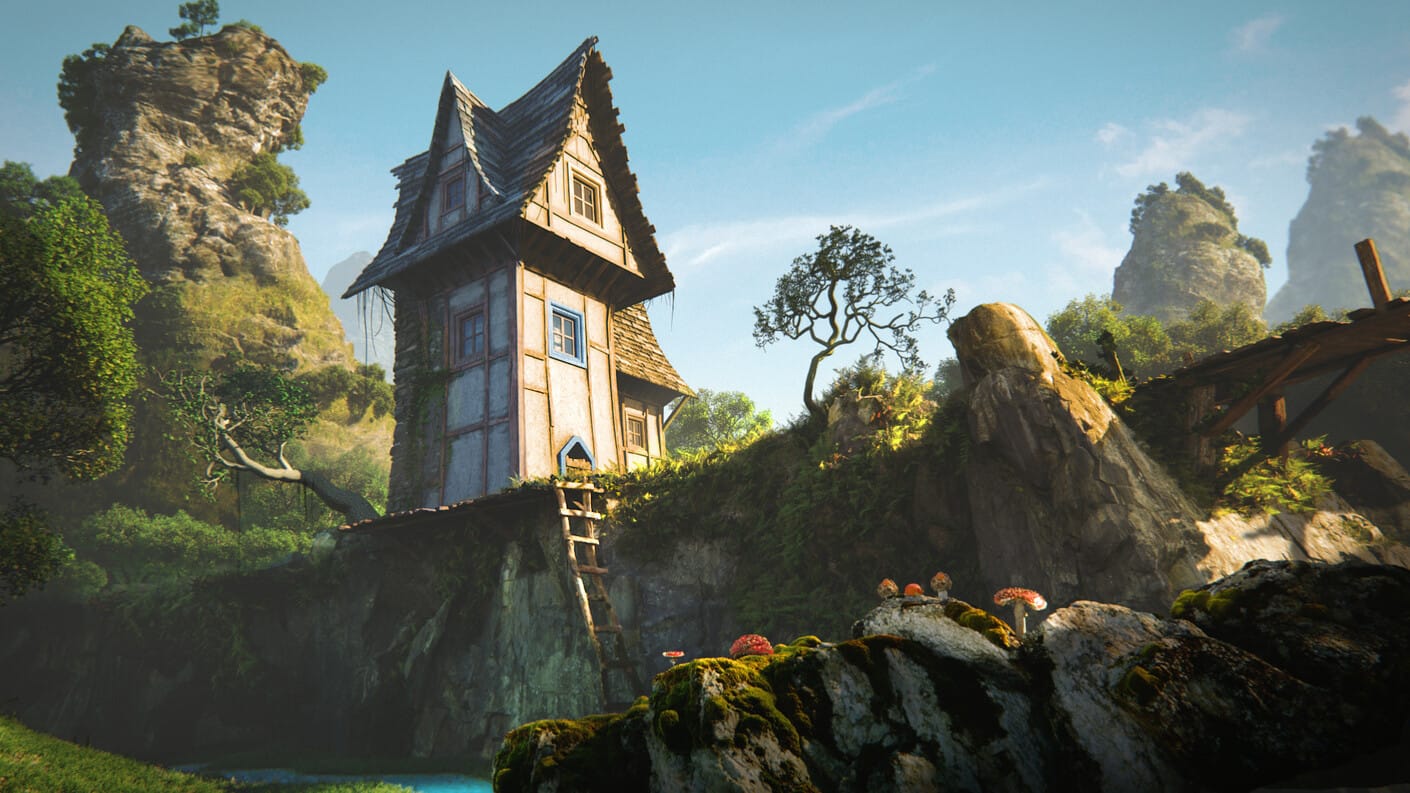
Shadows and reflections work hand in hand to add depth, realism, and atmosphere to your render. Shadows help define form and composition, while reflections make materials feel alive by reacting to the light and surrounding environment. Together, they shape how viewers emotionally connect with the scene.
- Place foreground objects such as trees, fences, or nearby structures just outside the camera’s view to introduce soft, natural shadows that subtly frame the scene and highlight your main subject
- Adjust the sun’s angle to fine-tune how shadows fall and how they interact with reflective materials like glass or polished metal for a more convincing look
- Use softer shadows in your lighting settings to mimic the way daylight naturally diffuses, avoiding sharp or unrealistic transitions on reflective surfaces and the ground
- Add small ground details such as scattered leaves or grass patches to break up flat areas, enriching both the shadow play and the overall realism of the render
2. Optimize Your Model
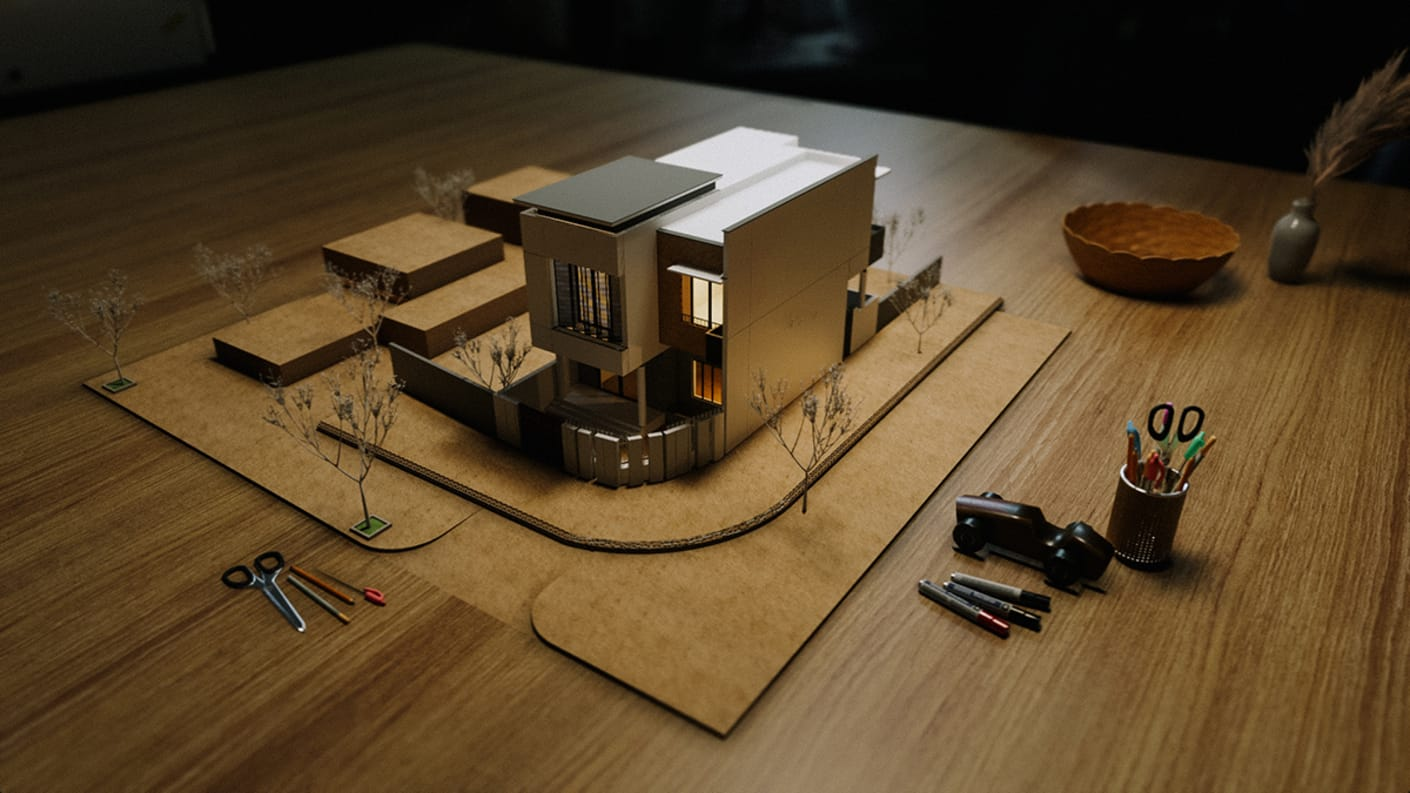
To achieve high performance in Enscape, it’s crucial to strike the right balance between efficiency and realism. In the early stages of design, working with low-poly assets keeps the scene light and responsive, allowing faster adjustments and smoother navigation. Later, as you prepare for the final render, swap these out for high-detail assets to ensure top-tier visual quality.
- Remove unnecessary geometry in tools like Revit or SketchUp to reduce file size and speed up loading times
- Limit texture sizes to 2K – 4K for an ideal balance between detail and performance
- Disable unused layers before rendering to free up memory and system resources
- Use proxy objects for complex models so your workflow stays efficient without losing visual fidelity
3. Composition
A strong render composition follows the same creative rules used in photography. To achieve balance and visual harmony in your renderings, apply techniques like the Rule of Thirds and the Golden Ratio to naturally guide the viewer’s attention through the scene.
- Apply the Rule of Thirds by dividing your frame into a grid and placing focal elements at the intersections to achieve a visually pleasing layout
- Use foreground objects such as trees, furniture, or architectural accents to create depth and context in your shot
- Incorporate leading lines like roads, paths, or edges of buildings to subtly direct the viewer’s gaze toward important areas
- Avoid showing everything in a single frame. Instead, let the viewer explore your space gradually, revealing details piece by piece for a more engaging visual story

4. Leverage High-Quality Materials for Realism
Achieving realism in Enscape starts with properly configured materials. Accurate material settings define how light interacts with surfaces, giving your render the depth and authenticity it needs. Here’s how to make the most out of your materials:
- Use PBR (Physically-Based Rendering) materials to achieve natural reflections and subtle imperfections that mimic real-world surfaces
- Add bump, normal, and displacement maps to introduce depth and dimension, ensuring that surface details reflect true material behavior
- Tweak roughness and metallic sliders to fine-tune how materials respond to lighting for more believable results
- Choose high-resolution, seamless textures from reliable sources like Poliigon, AmbientCG, and Textures.com, and always ensure proper scaling to match real-world proportions
- Refine materials with Enscape’s Material Editor, adjusting transparency and reflections, and ensure clean UV mapping to prevent visible seams or stretching.
5. Utilize the Enscape Asset Library and Custom Assets
The assets you choose can make or break the realism of your render. To keep your workflow smooth and stable, it’s essential to balance visual quality with performance. Take advantage of Enscape’s Asset Library, which includes pre-optimized trees, furniture, and people. Place high-quality assets in the foreground where they are more visible, and use lower-poly models for background elements to maintain efficiency.
- Differentiate between foreground and background elements to ensure your composition feels balanced and intentional
- Scale and position assets so they blend naturally into the real-world context of your scene
- Incorporate layered vegetation to add variation and prevent repetitive textures, distributing foliage assets efficiently for a more organic look
- For outdoor scenes, simple image planes can effectively serve as backdrops, filling in the horizon and enhancing realism without adding unnecessary load
6. Camera Settings
Camera settings play a key role in shaping the story and visual flow of your render. Fine-tuning parameters like the Field of View (FOV) helps you establish the correct perspective and balance within your frame. To achieve authentic results, understand real-world focal lengths such as 20mm, 30mm, and 50mm – each creating a distinct visual mood and sense of depth. Adding Depth of Field (DOF) can further enhance realism by introducing natural focal blur.
- Adjust exposure levels carefully to prevent overexposed highlights or overly dark shadows
- Use two-point perspective to keep vertical alignment in architectural frames
- Avoid capturing too much in one shot. Instead, let each render emphasize a single view or emotional focus for stronger storytelling impact
7. Fine-tune Interior Lighting for Realism
Lighting can completely transform how an interior render feels. In Enscape, achieving realism means layering different light types: ambient, task, and accent lighting to create depth, contrast, and atmosphere. Proper lighting not only enhances realism but also guides how viewers perceive space and materials.
- Use rectangular ceiling lights to replicate real-world fixtures and prevent interiors from appearing flat. You can also turn these into skylight portals through windows to introduce highlights and natural illumination
- Balance artificial and natural light by adjusting brightness values to achieve a comfortable, realistic glow
- Reduce sun brightness slightly and tweak exposure settings to soften contrasts between light and dark zones, making the scene feel more natural and visually pleasant
- Hide light sources behind walls or furniture to create indirect, diffused lighting that enhances realism without visible fixtures
- Experiment with different color temperatures (warm tones or cool tones) to influence the atmosphere of your scene

8. Use HDRI Skyboxes for True-to-Life Environment Lighting
The sky can completely change the mood and realism of your render. With custom HDRI Enscape skyboxes, you can simulate accurate environmental lighting that brings both exterior and interior scenes to life. Since HDRIs store real-world lighting data, they provide one of the most authentic methods to recreate how light behaves in natural conditions.
- Adjust sun rotation to match natural shadow directions for believable illumination
- Experiment with different HDRI maps to set the mood: try morning, sunset, or overcast lighting depending on your project’s atmosphere. For free, high-quality HDRIs, explore resources like PolyHaven, known for its realistic skyboxes
- Test HDRI reflections on glossy materials such as glass or marble to ensure the lighting complements your surfaces. Remember, not every render needs a bright, sunny day, overcast HDRIs often create softer, more balanced light for architectural visualization.
9. For Animations, Keep It Smooth
Video walkthroughs are one of the most engaging ways to showcase your design, but effectiveness lies in simplicity and flow. Instead of overcomplicating camera paths, focus on smooth, steady movements that allow viewers to appreciate your space naturally and comfortably.
- Start with linear camera motions like forward, backward, upward and downward motions to maintain clarity and prevent disorientation
- Keep your movements slow and stable to replicate the feel of real-world filming techniques and avoid shaky or unnatural motion
- Export animations at 60fps smoother playback
- Experiment with varied camera angles and heights: eye-level shots for realism, low-angle perspectives for drama, or top-down views for context
- Combine clips thoughtfully in editing software, keeping pacing smooth and transitions seamless to create a polished, professional presentation
10. Maximize Render Quality with Enscape’s Speed and AI Enhancements
One of Enscape’s strongest advantages lies in its exceptionally fast rendering performance, enabling users to push the boundaries of resolution without long waiting times. With this speed, you can render in 8K resolution and then downscale to 4K for sharper, more detailed result – a level of precision that’s hard to match in other rendering engines.
- Export stills in PNG or EXR formats to maintain lossless image quality, giving you maximum flexibility during post-processing
- Leverage the Chaos AI Enhancer to automatically refine your renders, enhancing clarity, lighting, and the realism of 3D people with minimal manual effort
By combining Enscape’s real-time speed with AI-driven post-processing, you can achieve professional-grade visuals faster and more efficiently than ever before – bringing both power and polish to every render.
Conclusion
Creating standout renders in Enscape comes down to precision, creativity, and smart workflow decisions. Every setting you fine-tune: from shadows, materials, and lighting to composition and animation, all contribute to how realistic and engaging your final scene will feel.
Enscape’s real-time rendering power allows you to explore ideas freely, make adjustments on the fly, and deliver professional results faster than traditional render engines. Combined with AI-driven tools and optimized assets, it turns visualization into a smoother, more intuitive process for architects and designers alike.
By applying these ten expert tips, you can unlock Enscape’s full potential – producing stunning, photorealistic visuals that not only impress clients but also bring your creative vision vividly to life.
iRender – Optimized Render Farm Solution for Enscape
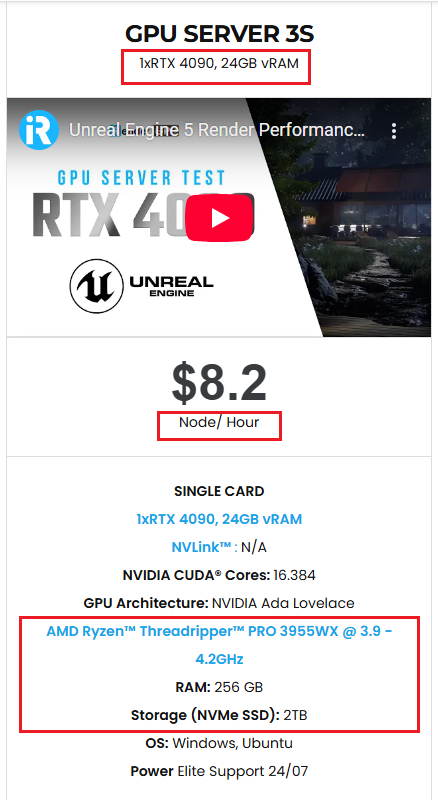
At iRender, you can install and run Enscape smoothly on our high-performance remote servers. Since Enscape relies on single-GPU rendering, our Server 3S with 1×RTX 4090 (24GB vRAM) is the perfect fit, delivering exceptional speed and stability for real-time workflows.
With this setup, you can:
- Render real-time scenes faster without being limited by local hardware
- Handle complex architectural projects seamlessly with stable interactivity
- Enjoy the freedom to install Enscape, add licenses, and work just like on your own workstation but faster, more reliable, and scalable
By combining Enscape’s real-time rendering capabilities with iRender’s optimized single-GPU server, you get a workflow that is efficient, cost-effective, and tailored specifically for architectural visualization.
Here is our Server 3S with detailed information:
Why choose iRender?
When projects become bigger and deadlines become tighter, finding a suitable and optimized renderer is no longer optional, it’s crucial. iRender’s mission is to help you make all your ideas become final products in a faster, stronger and more efficient way.
- Powerful performance: GPU RTX 4090 workstations, compatible with almost 3D/AI software. Moreover, iRender’s remote servers also provide CPU AMD Ryzen Threadripper Pro 3955WX @ 3.90GHz – 4.2GHz and AMD Ryzen™ Threadripper™ PRO 5975WX @ 3.6 – 4.5GHz, RAM 256GB and 2TB SSD NVMe Storage
- Flexible usage: Use the remote server anytime you want
- Secure & Privacy: Guarantee for your data safety and privacy
- Fast support: A customer support team ready to assist 24/7
- Cost-effective: Pay-as-you-go, pay for the time used
If you are still wondering, register now to get a free trial and receive a 100% iRender bonus points for your first transaction within 24 hours of registration.

For more detailed information, please contact us via Live chat 24/7 or WhatsApp: +(84) 962 868 890 or Email: [email protected].
iRender – Happy Rendering!
Image & Blogs Source: blog.chaos.com
Related Posts
The latest creative news from Enscape Cloud rendering, Lumion Cloud rendering, SketchUp Cloud Rendering , Twinmotion Cloud Rendering , 3D VFX Plugins & Cloud Rendering.