
An in-depth guide to preparing objects for 3D printing in Blender
It is really cool to materialize a digital 3D mesh into a tangible real-life object, isn’t it? However, we must carefully prepare a digital object to be suitable for 3D printing. Therefore, this article shines a light on preparing a mesh for 3D printing in Blender. Let’s dive into these exciting techniques with iRender!
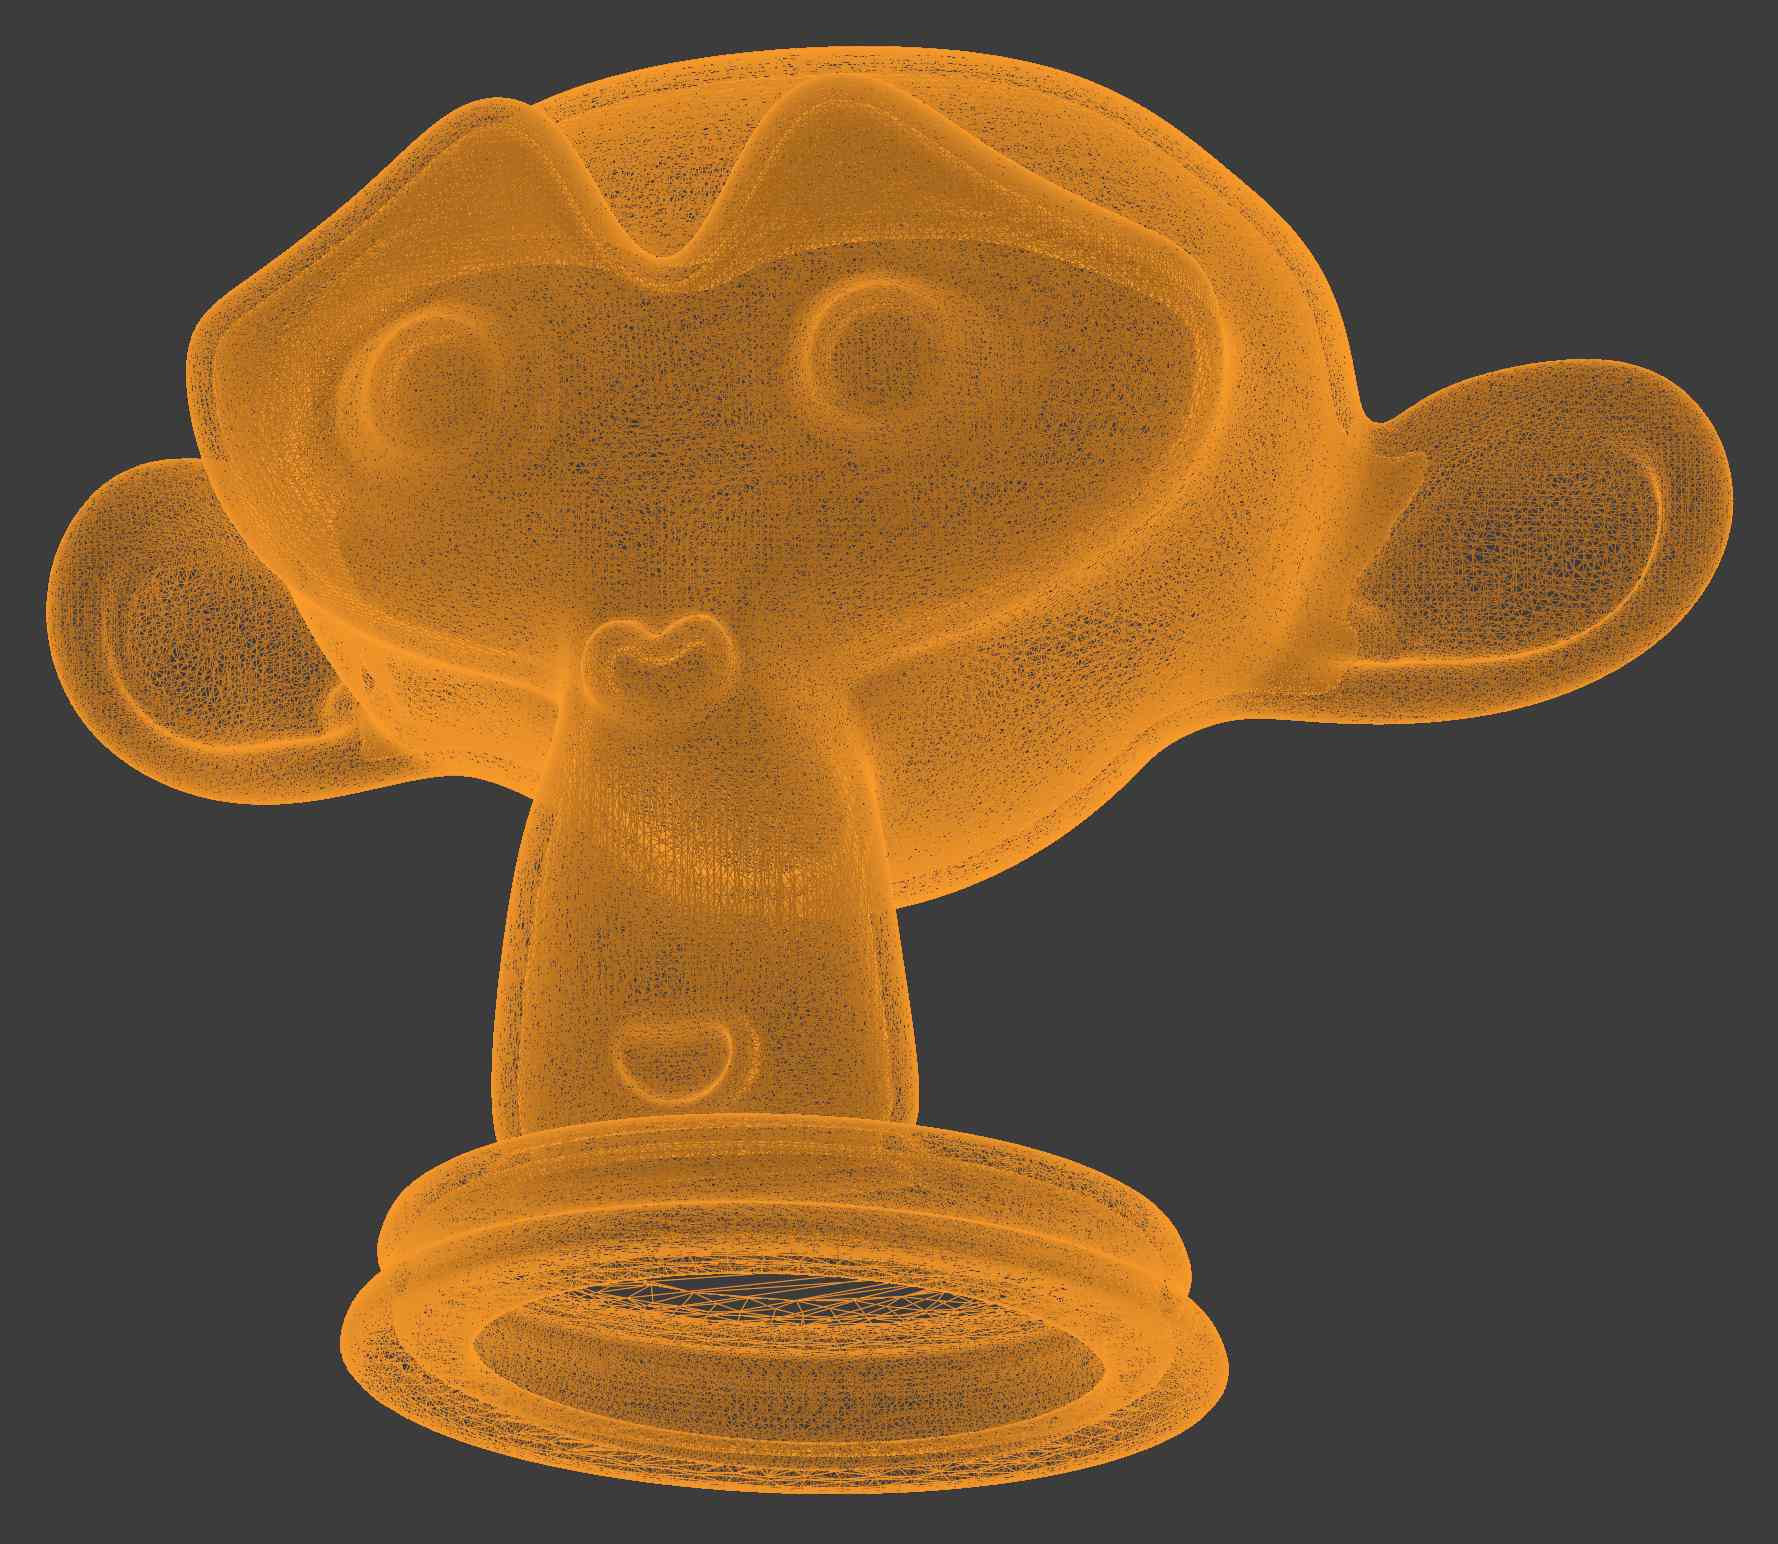
Note: Suzanne (Monkey) is used as an example throughout this article.
5 checks and options to prepare objects for 3D printing in Blender
1. The first check: Determine whether the Blender mesh has sufficient polygonal detail
The surface of a 3D object can appear smooth in renderings by employing a shader to hide low polygon detail in virtual 3D space. However, this effect cannot be translated into a 3D-printed object. Thus, unless you are going for a stylized execution, you must make sure that the object has enough polygon detail to prevent visible facets.
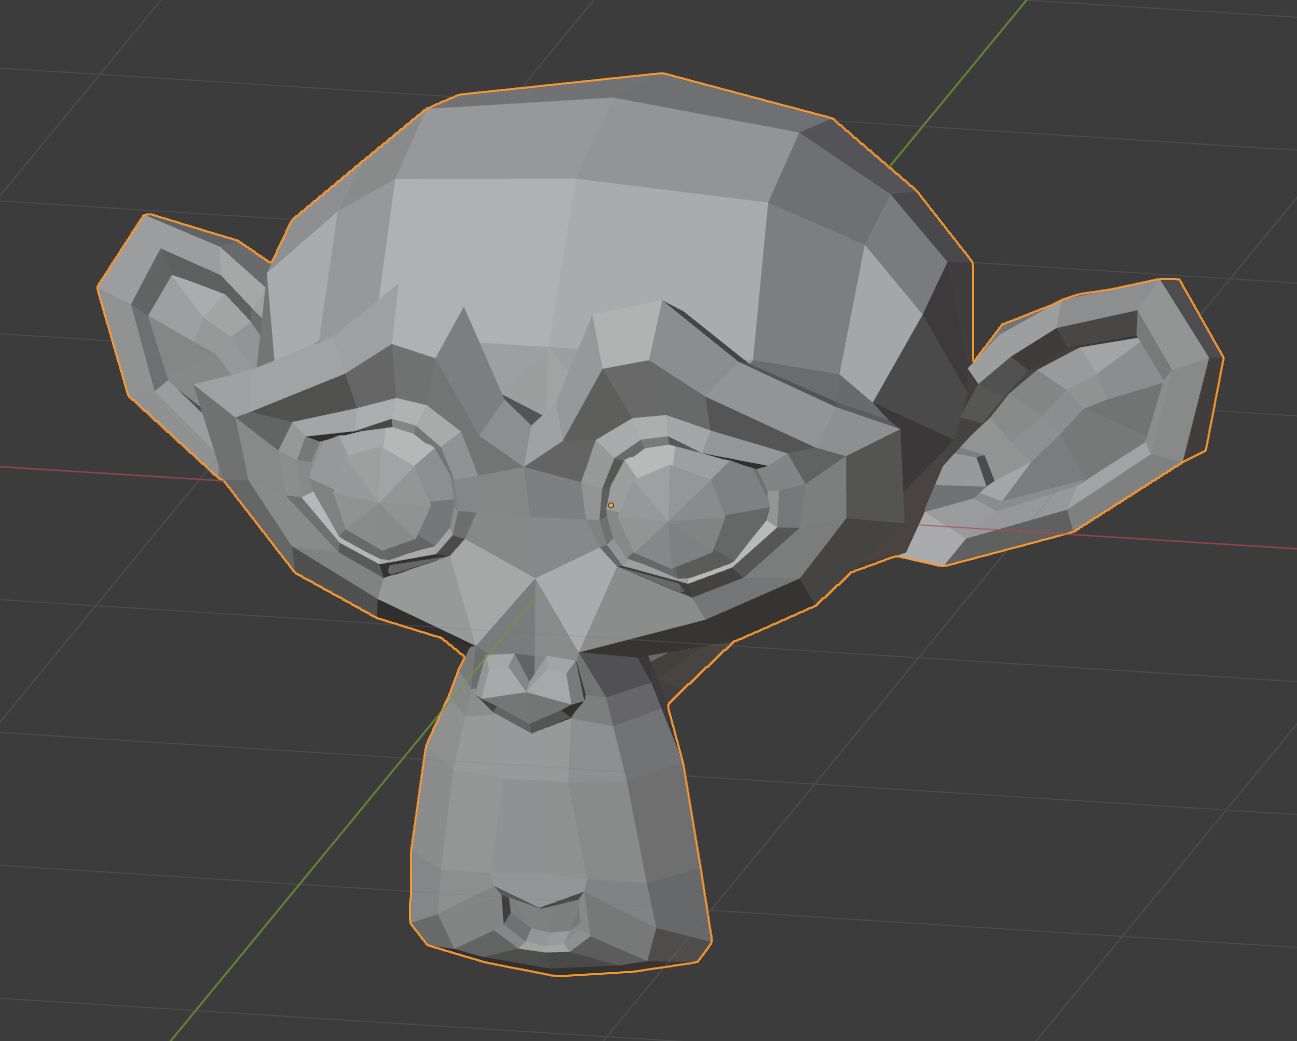
Let’s remove all default scene components, then add a Suzanne (Monkey) head to Blender. The monkey head has an extremely sparse number of polygons by default.
After selecting the head, press Control + 3 to add a Subdivision modifier (with three subdivision iterations.) This will even out Suzanne’s surface, giving us accurate polygon detail for 3D printing.
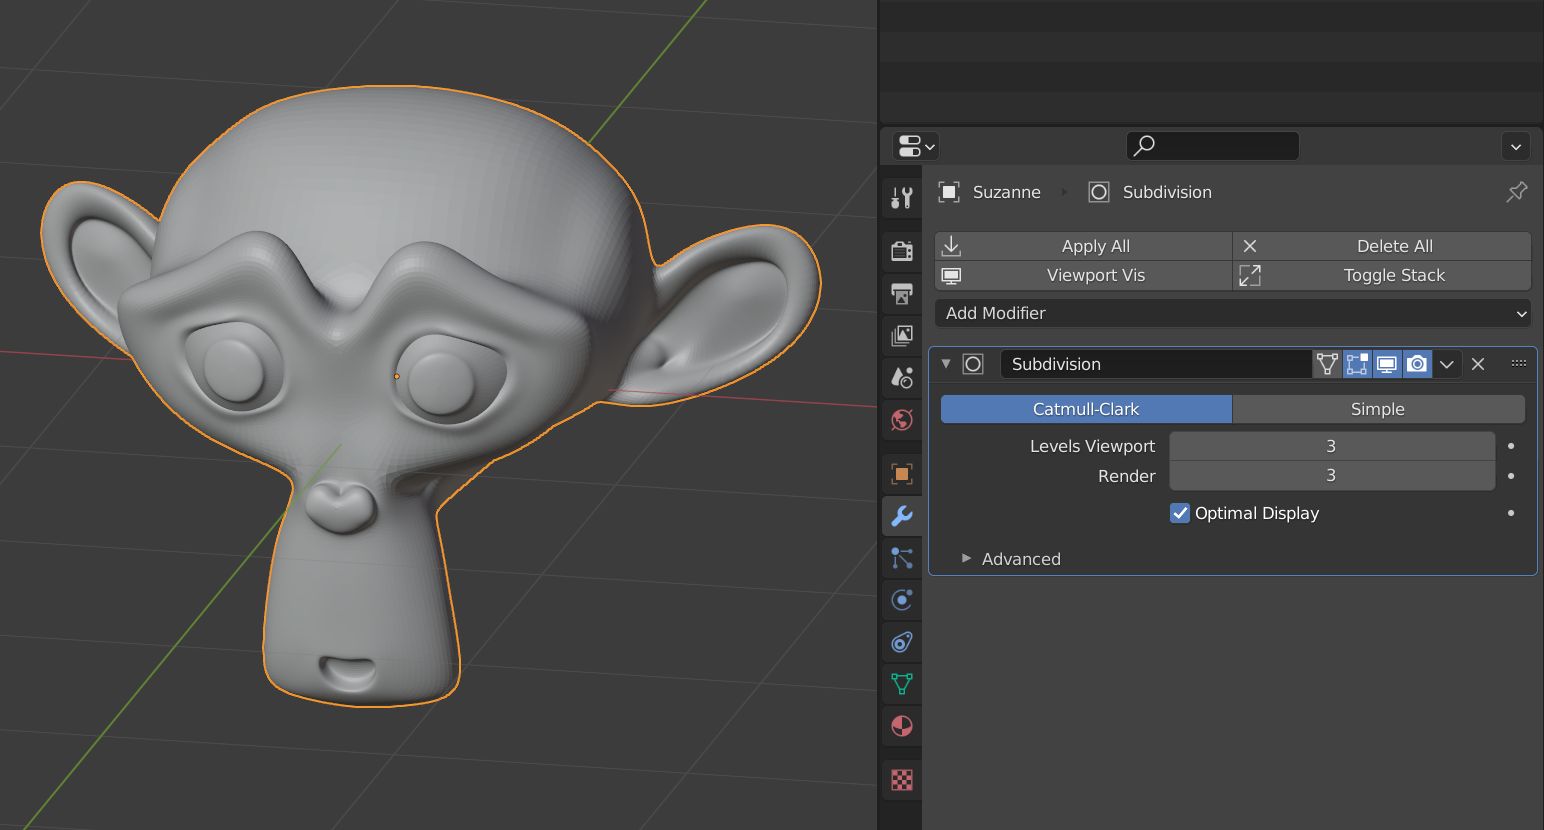
To apply subdivisions to the monkey head, move your mouse over the Subdivision modifier and then press Control + A.
2. The second check: Does the object require support?
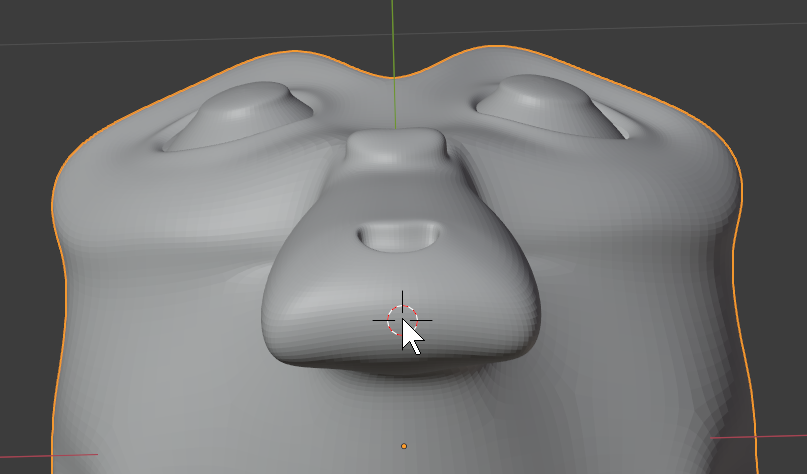
Everything floats by default in virtual 3D. A 3D-printed object, however, will fall over if the balance is insufficient. If Suzanne were placed on a table with her head tilted, it might still roll to the side. Therefore, let’s build support so that the head can maintain its 3D viewport orientation. To see Suzanne’s chin, rotate the viewer =>Then Shift + right-click on the bottom of her chin to bring up Blender’s 3D cursor.
To add a cylinder to the position of the 3D cursor, press Shift + A > Mesh > Cylinder. Edit Mode will allow you to move vertices, add edge loops, and extrude faces to the cylinder’s vertices as you wish. Let’s keep it straightforward and understated. To make the features a little bit sharper:
Added two subdivisions using the subdivision modifier > extruded a middle section > and added some edge loops (also inside the caps.)

Note: Take into account these two factors before you 3D print:
No.1. The balance: The huge head volume of Suzanne must be considered when creating support.
No.2. The robustness: If your mesh has thin or small elements, those parts could come loose during or after 3D printing. In Suzanne’s instance, be certain that the support and Suzanne’s chin are enough overlapping to hold the weight of the complete head.
3. The third check: Verify whether the Blender mesh is manifold
We can see something in Blender’s viewport that appears to be ready for 3D printing. However, there are still more works to be done. The head and two eyes are the three distinct sections of the monkey mesh in this instance. All of which have open edges.
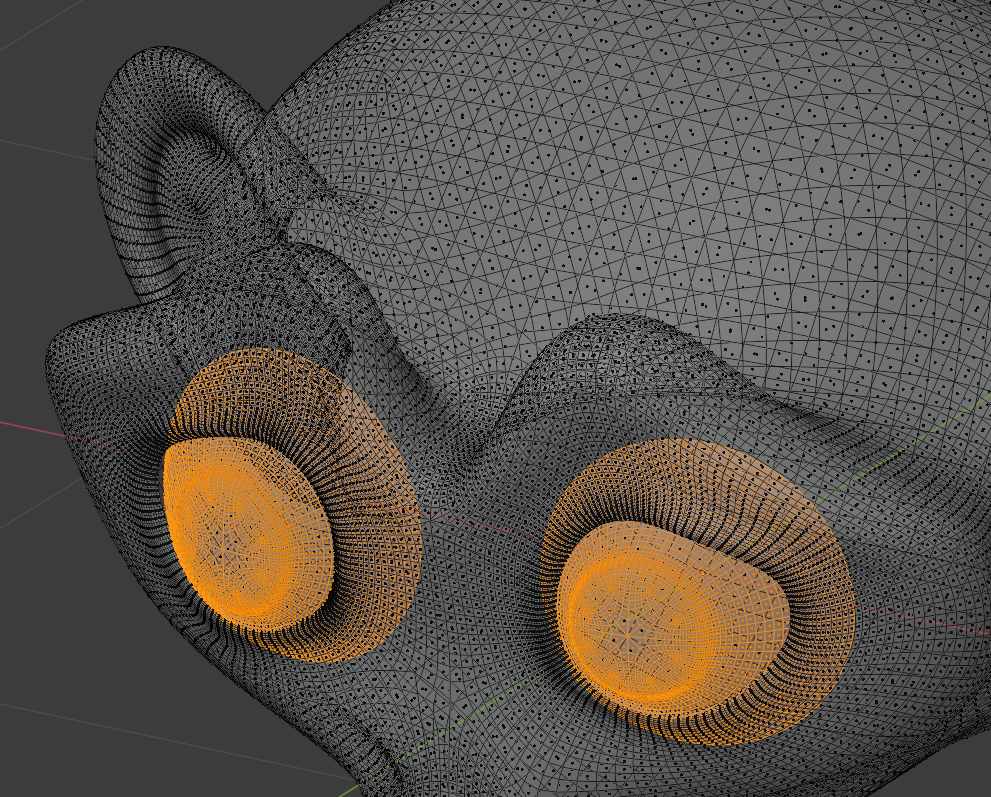
An object must be manifold, or “watertight,” in order to be ready for 3D printing. This requires that the object have a continuous surface free of flaws. The flaws are loose pieces, open edges, and other imperfections that might show up in a 3D virtual space.
Note: Making an object “watertight” in Blender for 3D printing with these 4 steps
Hover your pointer over the subdivision modifier, then hit Control + A to ensure it is applied.
-
-
-
- In Object Mode, select the head and the support. Then, press Control + J to combine the objects into a single mesh.
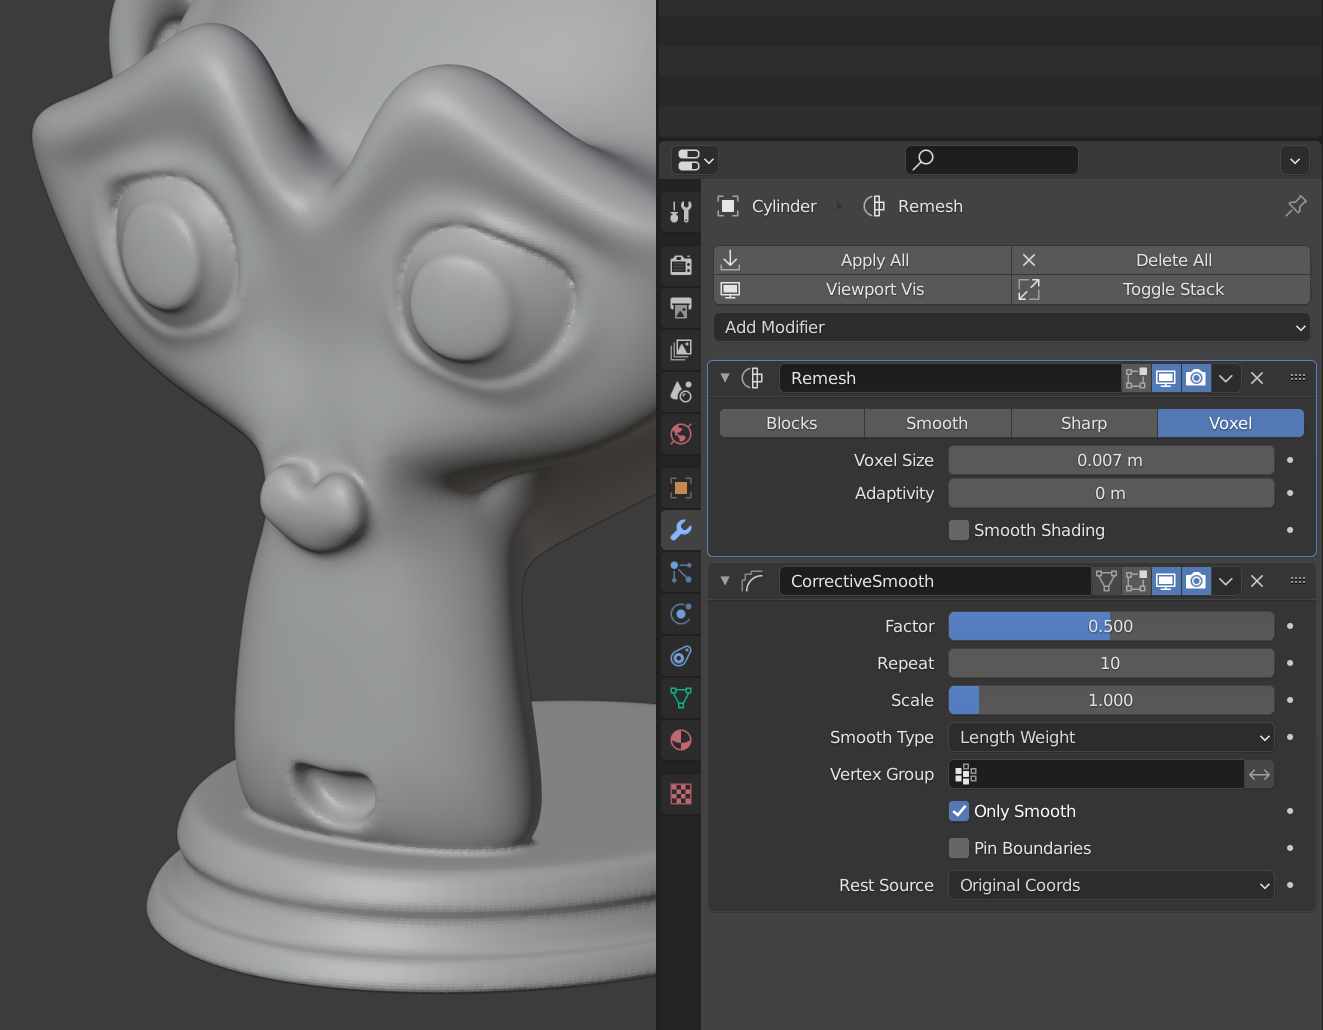
- Include a Remesh modifier, and confirm that the Voxel mode is on. Then, adjust the Voxel Size to the desired level of detail. (In the example, the Voxel Size was set to 0.007 while using the default Suzanne dimensions.)
- To reduce the voxel remeshing artifacts: Add a Smooth Corrective modifier > select Only Smooth > choose Length Weight for the Smooth Type > and change the Repeat value to your preference. (The Repeat value is set to 10 in the example.)
- Apply the Remesh modifier by moving your pointer over it and pressing Control + A. Repeat these steps for the remaining CorrectiveSmooth modifier.
-
-
The complete model and its supporting structure are now one seamless, manifold mesh. It is almost ready for 3D printing.
4. The fourth check: Are the object's dimensions accurate?
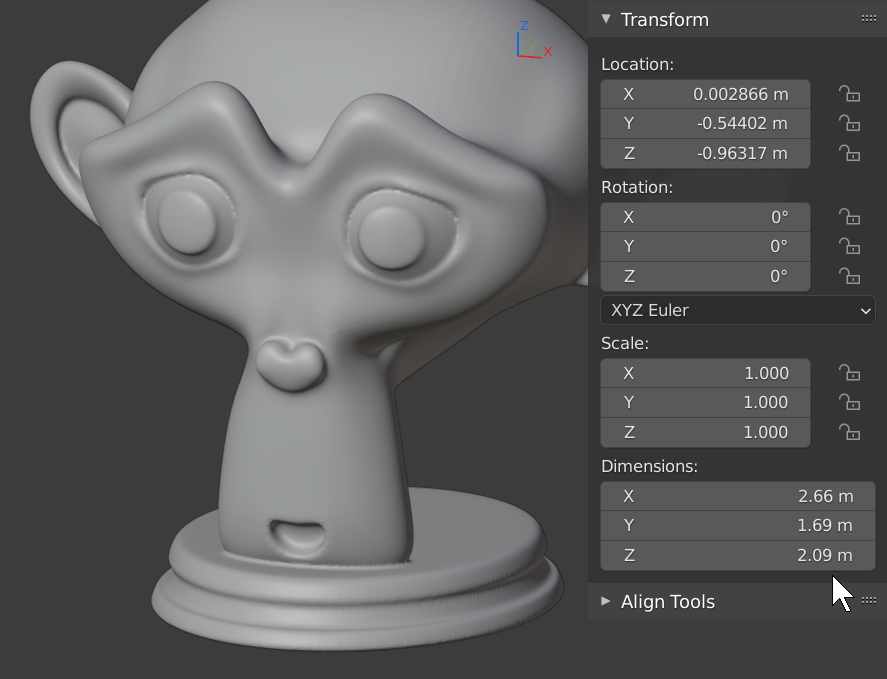
You can check the scale of your object in the N-key panel > Transform > Dimensions.
Ensure that Blender is set to use your local unit system
It would be convenient if you change your Blender units to metric, if necessary. To change, you may go to the Scene Properties tab > Unit System > Metric. Set the Unit Scale to 0.001 after changing the Unit System to Metric, which is a crucial setting. Since Blender’s 1.0 Unit Scale = 1 meter, doing this will bring Blender units into alignment with a millimeter scale. The majority of 3D file formats for printing use millimeters as the unit of measurement.

How to resize our Blender object to the proper scale?
-
-
-
- Choose the object, and make sure the Transform Dimensions values are shown in the N-key panel.
- Toggle on Scale mode by pressing S, then specify a scale factor to change the object’s dimensions to match the desired real-life size. (Suggestion: Scale the model down to about 0.1 meters, which is equal to 100 mm or 10 cm. Enter to confirm the updated size.)
- In the N-key panel’s Transform section, check the scale. It is recommended that the biggest dimension (X, Y, or Z) not be considerably larger than 0.1 m.
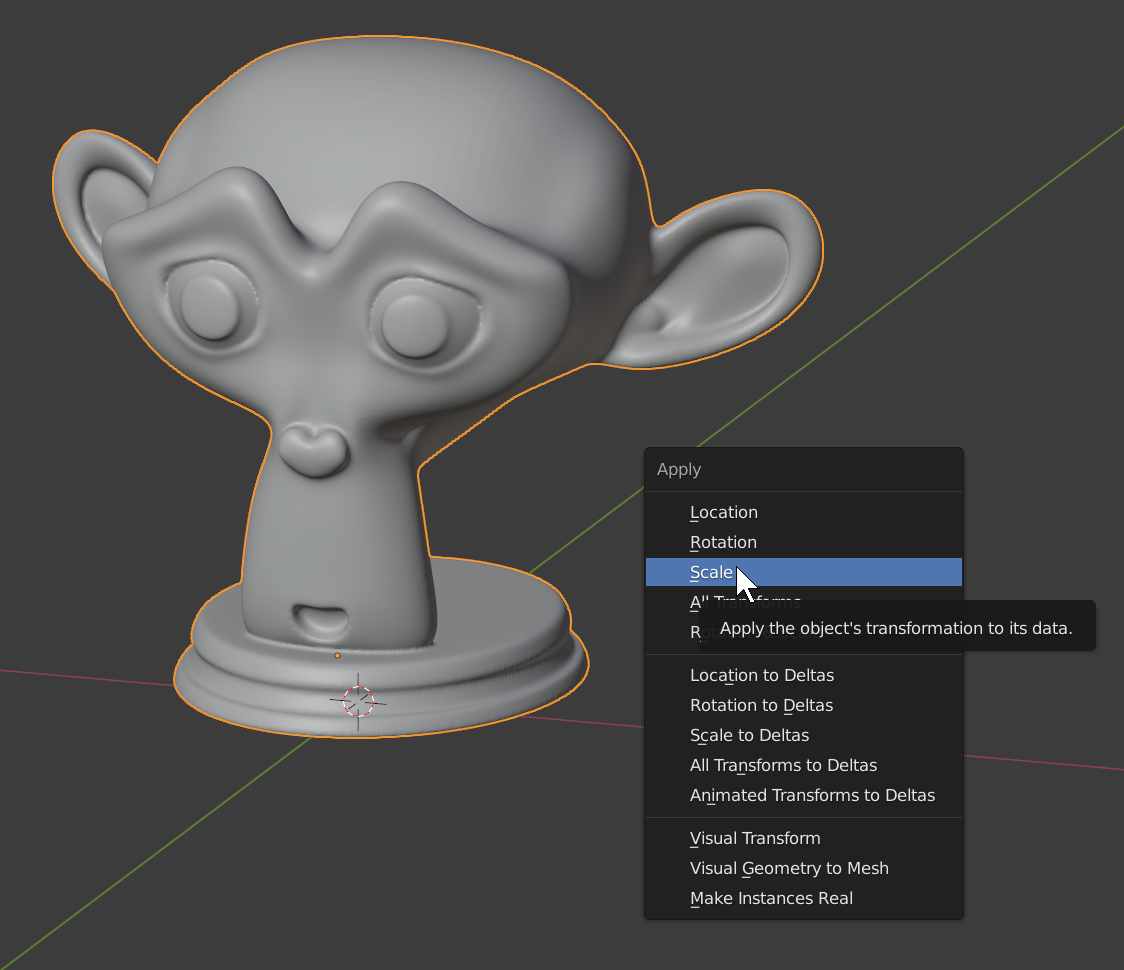
- If necessary, return the scaled object to the world’s center.
- This last step is very crucial. Press Control + A > Apply > Scale in order to hardwire the new scale into the mesh. The Scale values in the N-panel should now indicate 1.0.
-
-
You may now export your mesh to a 3D printer because it has the correct proportions. You may use either the software on your personal 3D printer or a service that prints 3D models online. However, you do still have a few choices to think about.
The first choice: Will you be painting your 3D model?
The model can be painted digitally or, after it has been printed, in real life. So, how do you paint your 3d printed model digitally?
Vertex painting is the greatest option for our model if you decide to go the digital path. Because we lost the UV coordinates during the mesh processing and the voxel remeshing gave the model high and consistent vertex detail, perfect for vertex painting. If you already painted the original model, you might try using the Data Transfer modifier to project the vertex colors from the painted model onto the model that was set up for 3D printing.
But first, you might consider the next choice before adding or reprojecting paint.
The second choice: Do you want the object you 3D printed to be hollow?
The 3D printer will currently treat the object as a solid volume. This is acceptable for tiny objects. However, when the object is 10 cubic centimeters or bigger, the amount of print material required for a solid volume might get expensive. It may drain your supply of print material. The object will also weigh more than if you made it hollow. So, a hollow object means a cheaper 3D print.
But the thing is hollowing out an item requires more work than simply copying the mesh and downsizing it slightly to produce an interior surface. (Unless it’s a fairly simple design.) In most cases, you will need to build a constant offset of the entire surface to guarantee a constant wall thickness across the model.
Guide to making an object hollow in Blender: (non-destructively, for any object’s complexity, without add-ons)
To establish a support material vent and identify the mesh as hollow, first, create an object to remove from the outcome that will be hollow. Typically, this can be a basic form like a box or cylinder. In this instance, a large cylinder has been inserted through the support’s bottom side to create a hole.
Next, select the 3D print model and apply the following modifiers and settings
-
-
-
- In the Solidify modifier, set Mode to Complex and the Thickness to your desired wall thickness. 0.002 equals 2 millimeters (Metric units)
- In the Boolean modifier, choose Difference, and set the vent object as the Boolean Object, to form the hole at the bottom. (Tip: If the Boolean operation fails, try moving the vent object slightly. Coinciding faces or edges could be the cause of the Boolean failure.)
- In the Remesh modifier, choose Voxel mode, and set the Voxel Size low enough to keep the small object’s details.
- In the SmoothCorrective modifier, enable Only Smooth, set Smooth Type to Length Weight, and adjust the Repeat value to your liking. This value is 5 in the instance.
- Optionally, in the Decimate modifier, choose Collapse mode, and set the Ratio to 0.5. Usually, this has no visible effect on the object but reduces the number of polygons by half.
-
-

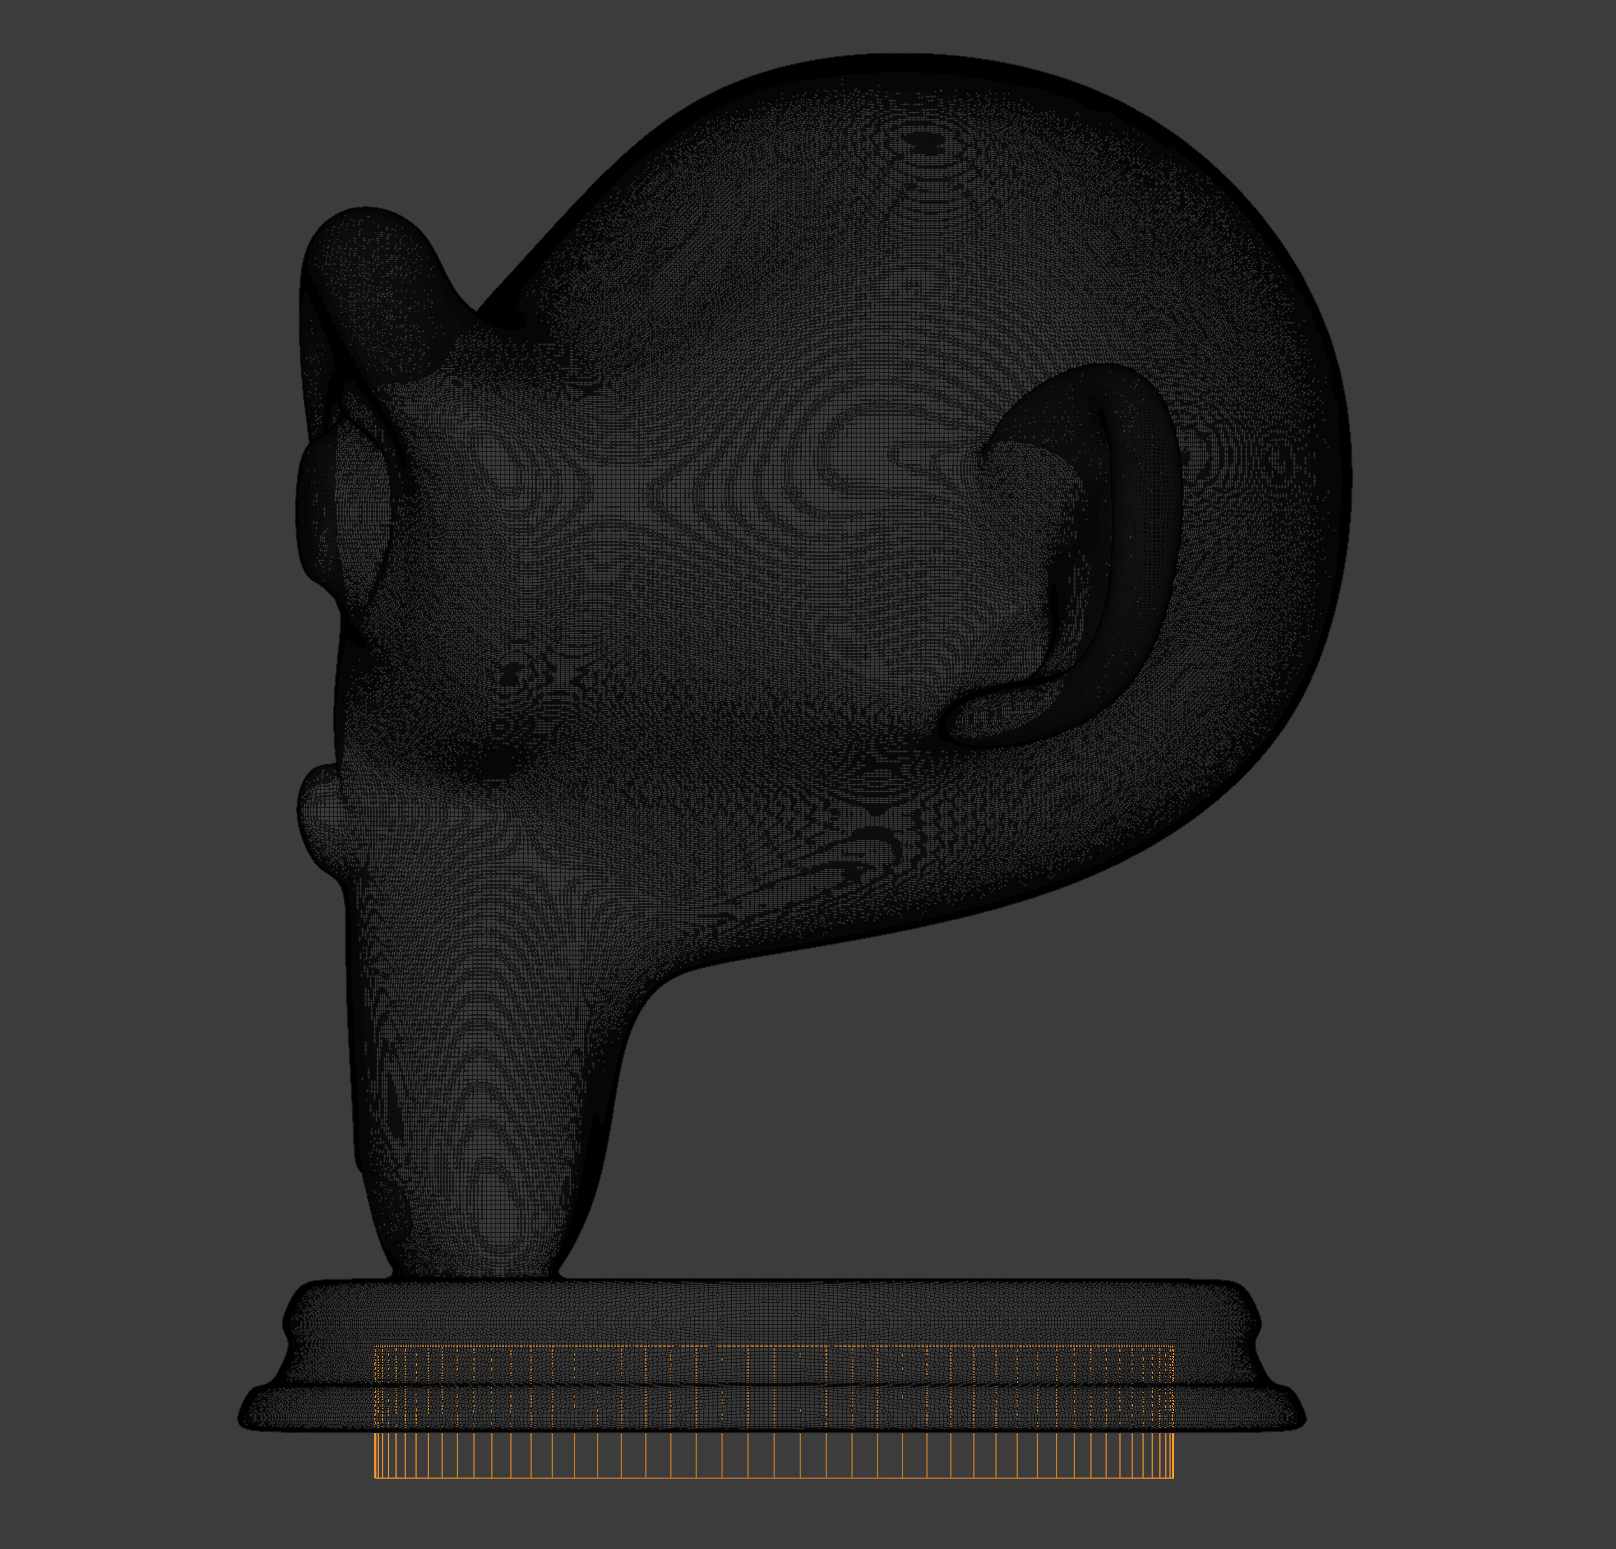
This method of hollowing based on modifiers is completely non-destructive
The model without a hollow inside is also unaltered. The below image is a wireframe view of the final hollow mesh, along with some decimation at the end. As you can see, the modifier stack automatically stops hollowing where parts, like the ears, would become too thin.
However, this is only applicable to non-colored 3D printed objects
One disadvantage of this modifier-based hollowing approach is that color information in the form of vertex colors or UV maps is lost. Thus, this hollowing method is only suitable for non-colored objects. For the time being, you could try using the Data Transfer modifier to reproject existing vertex color data, or you could paint the final, hollowed model. To paint on the resulting mesh, you have to apply all modifiers.
5. The final check/step is to export your model for 3D printing
Once your model is complete, it can be exported to a 3D file format supported by your 3D printer or 3D printing service.
-
-
-
- Check to see if the 3D file format supports color data. The STL format is widely used if the model does not include color.
- Check the Add-ons section of Blender’s Preferences if a required 3D file format is not available in the File Export menu. Certain file format export add-ons are not enabled by default.
- When exporting, make sure the scale in the file format options is set to 1.0 so that the dimensions of your object are correctly included in the 3D file.
-
-
Above are all the checks and options about preparing objects for 3D Printing in Blender we would like to share with you. We hope you enjoy the article and the 3D printing technique as well.
iRender - The Best Cloud Rendering Solution for Blender
iRender is proud to be a professional GPU Accelerated Cloud Rendering Service provider in HPC optimization for Render, CGI, and VFX tasks with more than 25,000 clients. We are appreciated in many global rankings (e.g. CGDirector, Lumion Official, Radarrender, InspirationTuts CAD, All3DP, BlenderBaseCamp, VFX Rendering.)
We are currently a Diamond Sponsor of Blender Foundation. Our long-term goal is to support the Foundation to partly contribute to the development of this awesome software. Let’s work together and support the future of Blender!
Our service:
We have developed multiple RTX 3090 server packages that are specifically configured and optimized for GPU rendering. With a range of GPU servers from a single RTX 3090 to multiple 2/4/6/8 x RTX 3090, you can choose a server that meets your needs and your software to start the rendering process. Visit the Server for more information about the configuration and the cost.
Let’s check out the rendering performance with Blender and Cycles renderer on our 2/4/6x RTX 3090 servers in the 03 following test videos.


In addition to the powerful high-configuration server, we also supply many other useful features such as daily/monthly rental with 10-20% discount, machine cloning, change package function, NVLink support, machine customizing, etc. You will receive dedicated support from our 24/7 technical support team when using our service. We are running a SPECIAL OFFER: 20% Additional Bonus for new clients who register an account and make a top-up within 24 hours after registration.
Let’s get started!
Get the FREE COUPON to try our server for your Blender projects. For more information, please do not hesitate to reach us at [email protected] or Whatsapp: +84915875500.
iRender – Happy Rendering!
Reference source: cgcookie.com
Related Posts
The latest creative news from Blender Cloud rendering.


