Blender 4.2 LTS: What’s new in this latest release?
Blender 4.2 LTS has just been released and it comes with a hugely anticipated change, some cool surprises, and a slew of top-notch improvements. In this article, let’s explore the new features in the latest release of Blender: Blender 4.2 LTS with iRender!
What is Blender LTS?
Blender LTS stands for Long Term Support. It’s a specific version of Blender that is supported with updates, bug fixes, and security updates for two years after its initial release. This helps mitigate compatibility issues with users working on long-term projects and ensures your workflow stays functional and secure.
As usual with LTS (long-term support) releases, Blender 4.2 LTS comes packed with features, improvements, and fixes ready to power your projects for the next two years.
The new features in Blender 4.2 LTS
Animation and Rigging
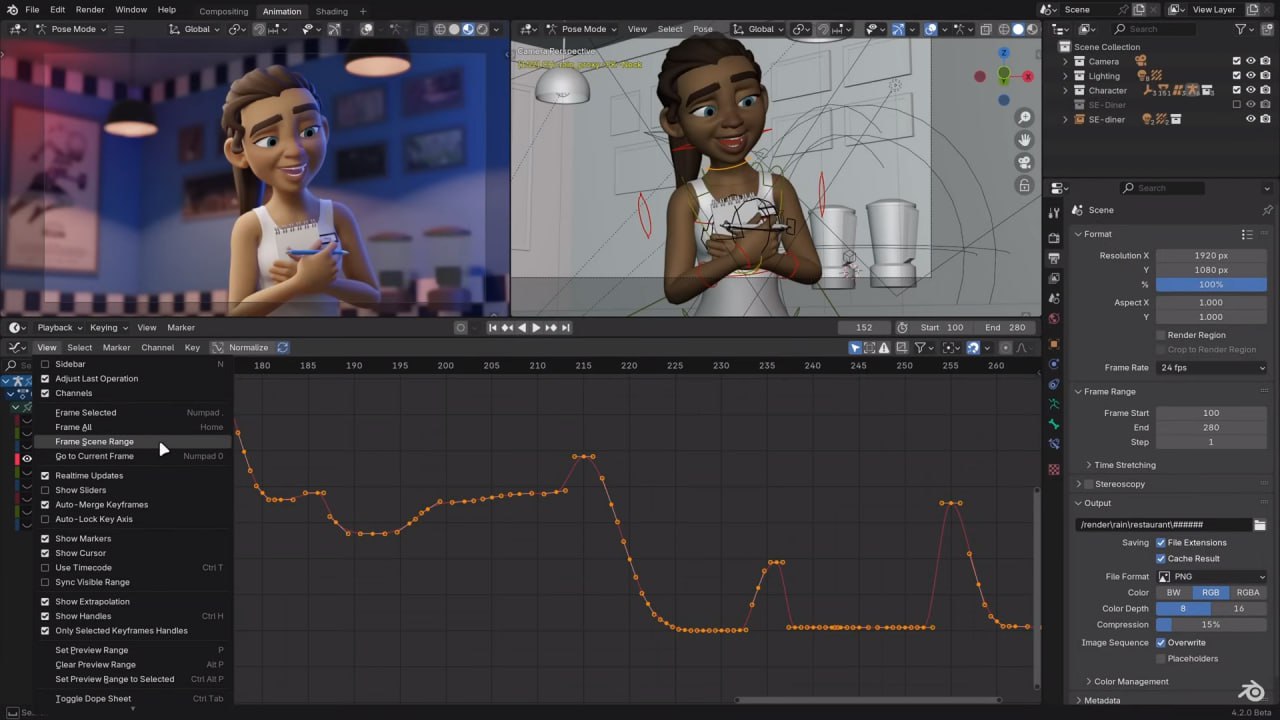
New operator in the View (regular + pie) menu: “Frame Scene Range”. This changes the horizontal view to match the scene range. If the preview range is active, the operator will be re-labeled as “Frame Preview Range” and zoom to that instead.
The dope sheet has a new keyframe type called “generated” which just indicates that the key was set automatically by an operator or an add-on rather than by hand. In the Shape Key Editor, non-relative shape keys are now visible and editable. Performance in the non-linear animation editor was also improved when zoomed in on a long action.
Subdividing Bones now correctly names the bones sequentially. The Armature Drawing Mode Stick can now use bone colors. You can now set the wire width for custom bone shapes per bone so that the most important controls can stand out. Bones can now be active, even if they are hidden, so you can select a bone in the outliner and edit its properties even if you can’t see it in the viewport.
The Copy Global Transforms add-on, which is one of the few that still ships with Blender, got two new features. One bakes the animation to the camera, so the motion matches up with it, if, for example, you’re animating on twos. The other allows you to copy and paste transforms relative to another object.
Modeling
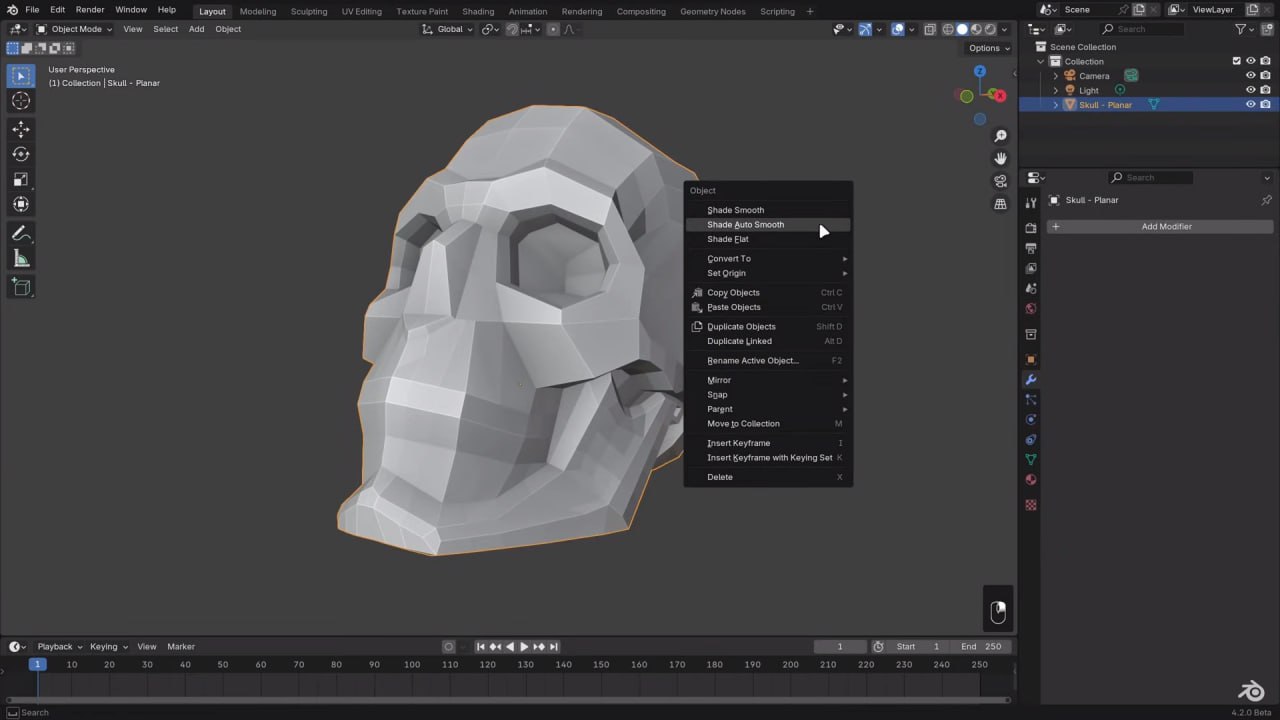
When you right-click in Object Mode, you can choose Shade AutoSmooth, which adds a smooth-by-angle modifier to the object. It’s also pinned to the bottom of the stack, which is another new feature.
You can now add clear and copy modifiers right in the 3D view using the Object menu. You can also add, remove, apply, and reorder modifiers on all selected objects by holding Alt.
The Add Images as Planes add-on is now built right into Blender. Just go to Shift + A, Image, and Mesh Plane, select your image, change any of the settings over in the sidebar, and click Import.
The Curve Edit mode for the new hair curves continues to mature and now includes converting hair types, an Add Menu, a new option for only drawing onto to selected objects, bezier handles, and new operators for setting the handle type, subdividing, switching direction, and toggling cyclic.
Extensions
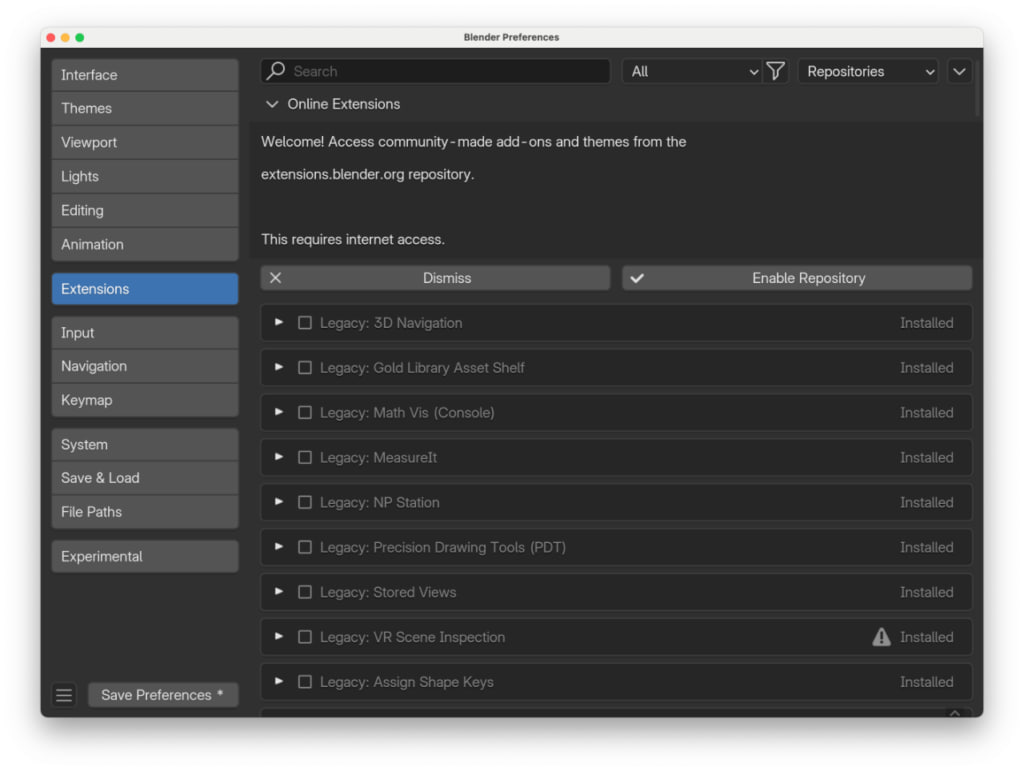
One of the most interesting updates in Blender 4.2 is the addition of extensions, which at the moment can be either a theme or an add-on, both of which were already available in Blender before. Still, now they can be downloaded and, more importantly, updated from within Blender itself.
Most of the add-ons Blender came with before are no longer pre-installed, making the download a bit smaller. But you can still get them directly in Blender by going to the Extensions tab of the Preferences Editor and installing them there, which will both download them from the internet and enable them.
Another cool outcome is that This change has prompted some of the key features of the most used add-ons to be built into Blender itself. Once installed, you can still move these add-ons with Blender onto a thumb drive or a server and use them without any internet connection just like before.
Rendering
- Eevee
Shadows are now rendered using Virtual Shadow Maps. This greatly increases the maximum resolution, reduces biases, and simplifies the setup.
Some other noticeable improvements include the fact that shadows are now sampled more accurately using virtual shadow maps, removing the need for contact shadows. To get softer shadows, increase the number of steps in the shadows panel and the number of samples. You can also jitter the shadows like in the old version if you need more accuracy when they’re soft. Just be sure to turn it on for both the light and the viewport if you want to see the effect in the viewport.
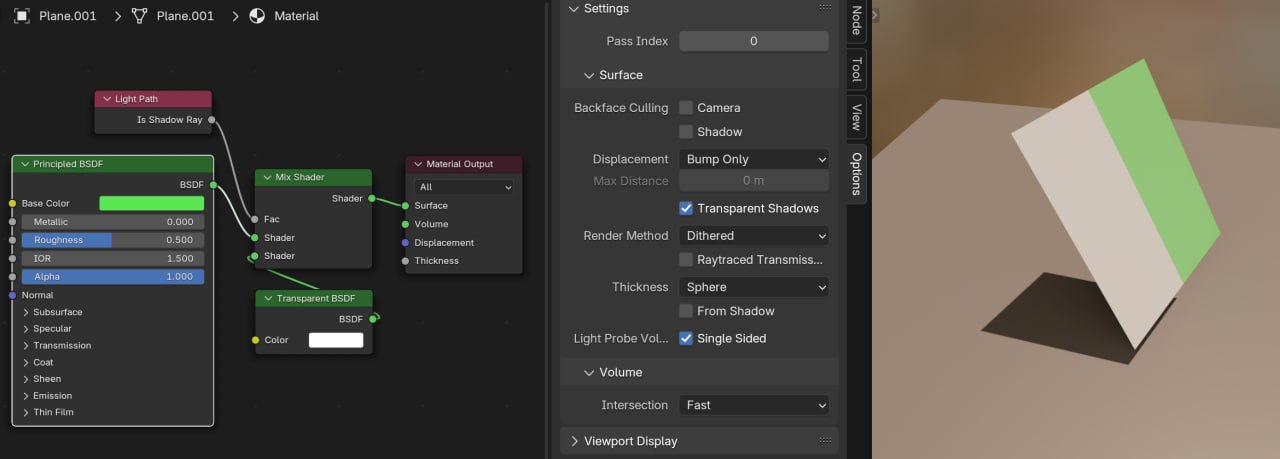
Also excitingly, volumes finally take the shape of the mesh, are more stable, and the resolution can go all the way down to 1 pixel. Refraction and subsurface scattering approximate the thickness of the mesh a bit better now, and you have fine-tuned control over that with the new thickness output and surface setting.
- Cycles
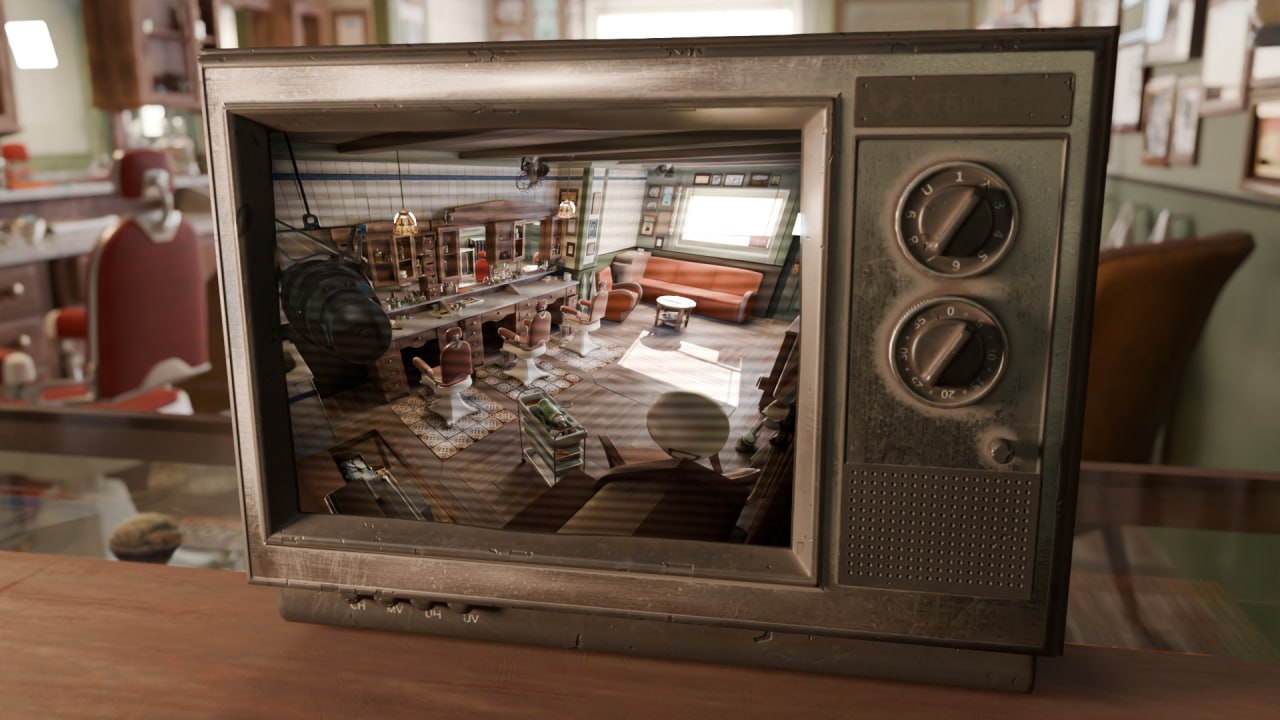
Regarding Cycles, there’s also an entirely new shader called the Ray Portal BSDF that lets you use vector math to warp the fabric of space-time itself. This has been used already to create everything from portal effects, of course, to live camera feeds and nice-looking sword trails.
The principal shader now supports thin film color effects like what you’d see on soap bubbles or a puddle of water mixed with gasoline, which is just gorgeous.
The Huang principal shader now has a new rounded model that it switches to when the hair covers more than a pixel on the screen, which drastically improves the quality of close-up shots without impacting performance when the hair is farther away.
In the View Layers tab, you can now render each layer with a different world using a new override. Cycles now use a blue noise sampling pattern by default, which produces a clearer image at lower sample counts that can be denoised more easily.
OpenImageDenoise is now GPU accelerated on AMD GPUs on Windows and Linux, and it can optionally use GPU denoising with CPU renders. It’s also been upgraded to version 2.3 which has improved quality. Rendering on Intel GPUs now uses their host memory fallback, which allows for rendering more textures than can fit on the GPU at once, which means you should be seeing those out-of-memory errors a whole lot less often.
Compositor
Final renders can now use the new GPU compositor, which is a massive speed boost. Switch it over in the compositor sidebar or the render performance panel, but even if you don’t choose to use it, the CPU compositor has been rewritten and is several times faster than before.
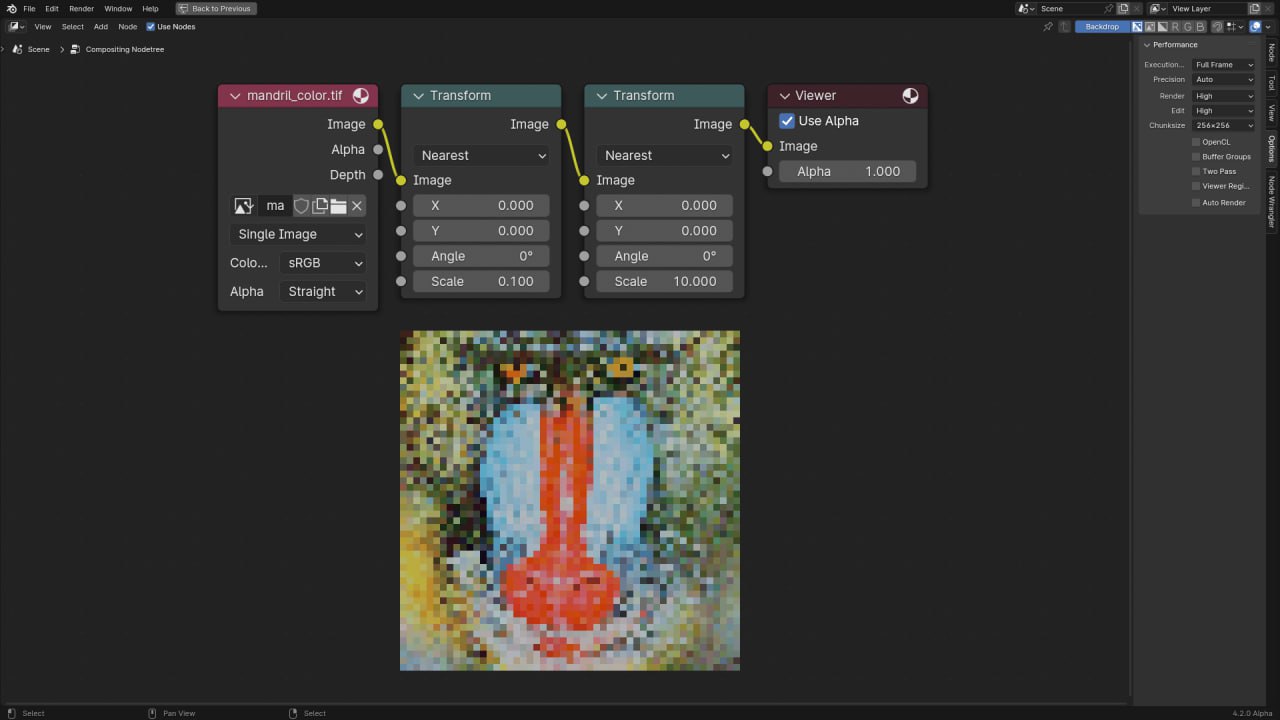
Some important effects of the change include the fact that the transforms are now immediately applied by the transform nodes, so scaling down an image destructively reduces its resolution. Also, the old compositor tried to infer an image size from upstream or output nodes while the new compositor evaluates the node tree from left to right without inferring image sizes.
The viewport compositor is now limited to the camera region when in camera view so that it better matches the final rendered result. In addition to that you can now see how long each node took to calculate, similar to geometry nodes, by enabling execution time in the overlays.
The fast Gaussian mode in the blur node, which has been fixed now to be the same size as the other modes, now also works in the viewport compositor, the translate node has new pixel interpolation options.
The hue-correct node now evaluates the saturation and value curves at the original hue, not the updated one, and the curve now wraps around. The vector blur node has been simplified and now uses the same motion blur algorithm as Eevee.
Geometry nodes
The Realize Instances node now supports partially realizing the geometry, which gives you much more control over what you’re realizing.
Next up, the rotation socket continues its campaign of world domination. The Curved to Points node now has one, and the Align Oiler to Vector node, many a geometry node as a first boss battle, has been depreciated, and replaced with the Align Rotation to Vector node. There’s a Rotation Input node and a new Axis to the rotation node. This allows you to take two vectors in this example, the tangent and the normal of a curve, and convert them into a rotation.
Next, the sample nearest surface node and the geometry proximity node now have group ID and sample group ID inputs, giving us much greater control over how we sample. The group ID separates the mesh into groups defined by what’s plugged into it.
RemoveNamed attribute now has a wildcard function, allowing you to remove attributes with the same painful prefix or suffix onward. The mesh boolean node now has a float option, like its boolean modifier and edit mode counterparts. The faceNeighbours node has been tweaked for accuracy.
Video Editing
The strips in the video sequence editor got a visual overhaul and now have rounded corners, no handles on the sides, thicker outlines, half-wave forms, and updated colors. Adjusting strip handles feels a bit nicer now with the new cursor change when hovering and the ability to tweak connected handles.
In the overlays, you can now turn on or off the cache line. This menu has also been reorganized. Text strips now have new options for outlines, shadow placement, and shadow blur. You can now drag and drop multiple files into the video sequence editor at the same time.
The AVI RAW and AVI JPEG file output types have been removed since the quality was the same as H .264 anyway, but with way larger file sizes and they took a lot to maintain, so they’re gone. But on the performance side of things, both rendering speeds and playback speeds have been slightly improved.
User Interface
A new version of Blender is now slightly faster thanks to improvements in font shader compiling, which was one of the slower parts.
Undo is now two to five times faster, which is a huge improvement for complex scenes, with the trade-off that autosave is now slightly slower. Properties dialogs, confirmation dialogs, tooltips, menu separators, square color pickers, overlay text, and the status bar have all gotten a bit of polish. More tool shortcuts are now displayed in the status bar rather than the header. The control shift hotkey to preview nodes in the node editor is now built into Blender and you can use it without enabling Node Wrangler.
The File Cleanup menu now has a Manage Unused Data option, which just pops up the Outliner in that view, and purging unused data blocks now lists exactly what will be deleted.
The Blender file view of the Outliner now shows user counts and lets you add or clear fake users. Ctrl +F now starts a search in the Outliner, like it does in the Properties and other data editors
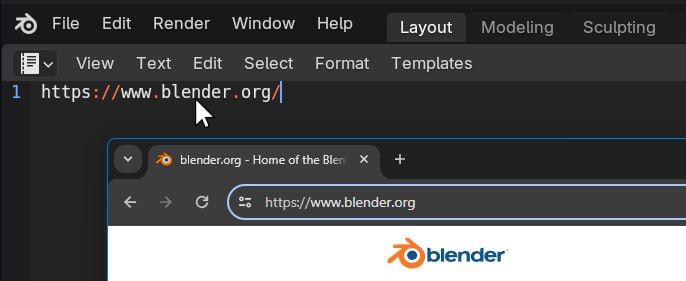
Composition guide visibility can now be toggled separately in the viewport overlays. There’s a new key map preference called region toggle that lets you toggle all editor regions with the hotkey. Text can now be dragged and dropped into the text editor and Python console. The text editor now supports GLSL syntax highlighting.
Import and Export
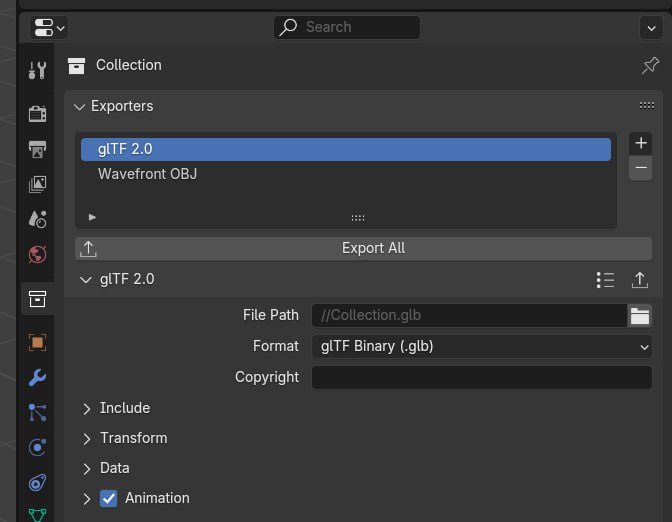
File format exporters can now be associated with Collections. One or more exporters can be added and configured in the Collection properties panel. Settings are stored in .blend files for easy sharing and persistence across Blender sessions. All collections in the scene can be exported with a single click through the File menu. Additionally, each collection can be exported to multiple file formats simultaneously.
The new Hair Curves Objects Types now fully work with USD. USD Importing now supports point clouds and there are new options for Unicode files, defined prims, dome lights, and mesh validation. USD Exporting has new options for filtering objects by type, dome lights, the up-axis of the stage, X4 operators, triangulation, down-sampling textures for USDZ, generating material X from Blender Shaders, and renaming UV maps to better follow conventions.
Alembic supports the new Hair Curves Objects type as well, it can import multiple files at once now, and there’s a big fix for animated curves not updating during rendering.
GLTF importing has new options for setting bone size and shape, and its exporting has received a ton of fixes, as well as new options for vertex colors, centering root objects and UDEMs.
Let’s explore the powerful performance with new features in Blender 4.2 on iRender servers
Our iRender GPU Render Farm offers from 1/2/4/6/8 RTX 4090s and 8 RTX 3090 servers. All servers at iRender are also equipped with AMD Ryzen™ Threadripper™ PRO 3955WX @ 3.9 – 4.2GHz or AMD Ryzen™ Threadripper™ PRO 5975WX @ 3.6 – 4.5GHz, 256GB RAM, 2TB Storage NVMe SSD. The high-end configuration is extremely suitable for complex Blender projects.
Our system has pre-installed Blender. You just need to transfer your files, connect to the remote servers and render yourself.
We just released a new server with 8 x RTX 4090 which will optimize your render with Blender, let’s check it now!
Currently, iRender offers a special promotion for new users, a 100% bonus program for the first deposit within 24 hours of registration, making it an attractive option for those looking to optimize their rendering budget. Just register and get our best deal!
For more detailed information, please contact us via Live chat 24/7 or WhatsApp: +(84)915875500 or Email: [email protected]
iRender – Happy Rendering!
References: developer.blender.org, Jonathan Lampel from @cg_cookie
Related Posts
The latest creative news from Blender Cloud Rendering

