Diffuse Material in Octane for Cinema 4D
In contrast to the OctaneRender specular material, the OctaneRender Diffuse material simulates the diffuse or dispersed reflection of light from a surface that is scattered at various angles. The distribution of the reflected photons is hemispherical over a flat surface. Photons are randomly dispersed when they come into contact with a rough surface. These surfaces appear almost the same no matter the angle of view since the photons do not change. Let’s learn more about the parameters to create Diffuse Material in Octane for Cinema 4D with iRender.

1. Diffuse
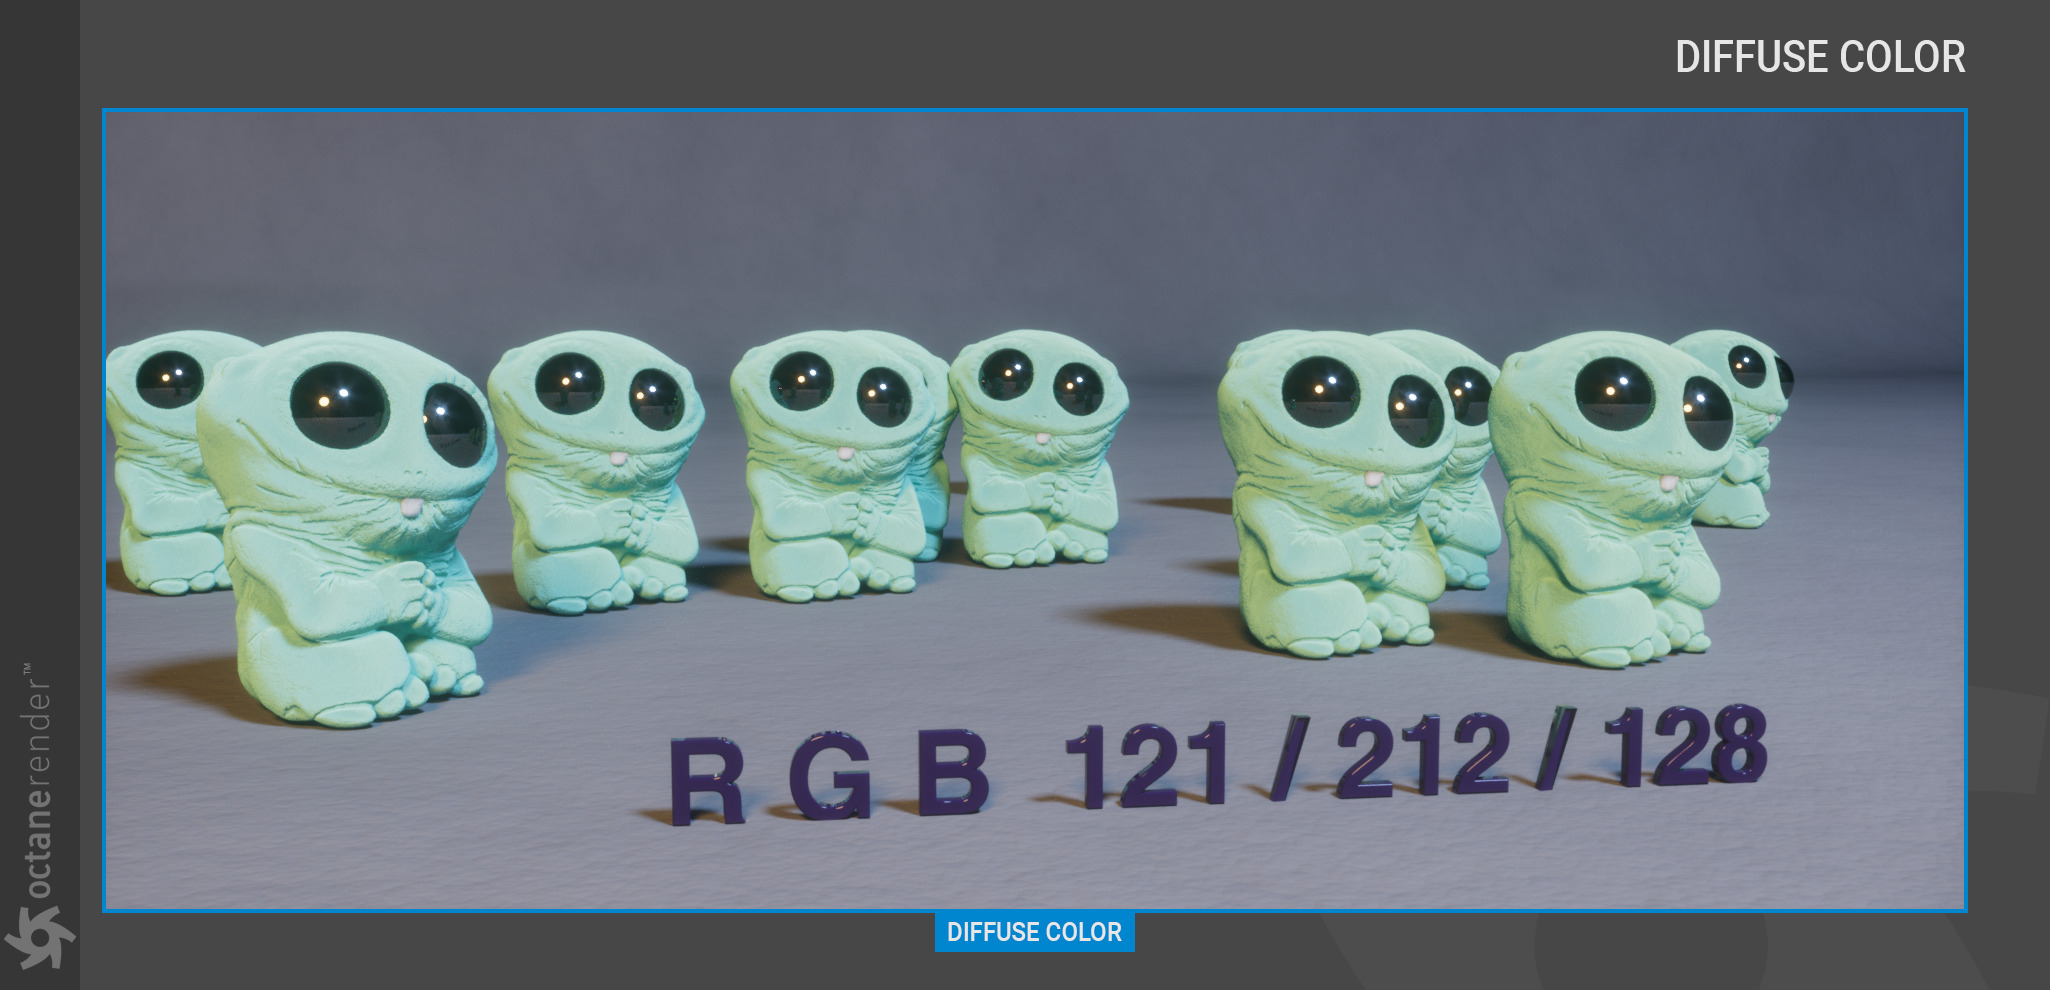
First, we jump up to the Diffuse Material in Octane: color. The material’s base color is determined by the Diffuse parameter. A generative or image-based texture, an RGBSpectrum or Gaussian node, or any of these can be used to set the diffuse color.
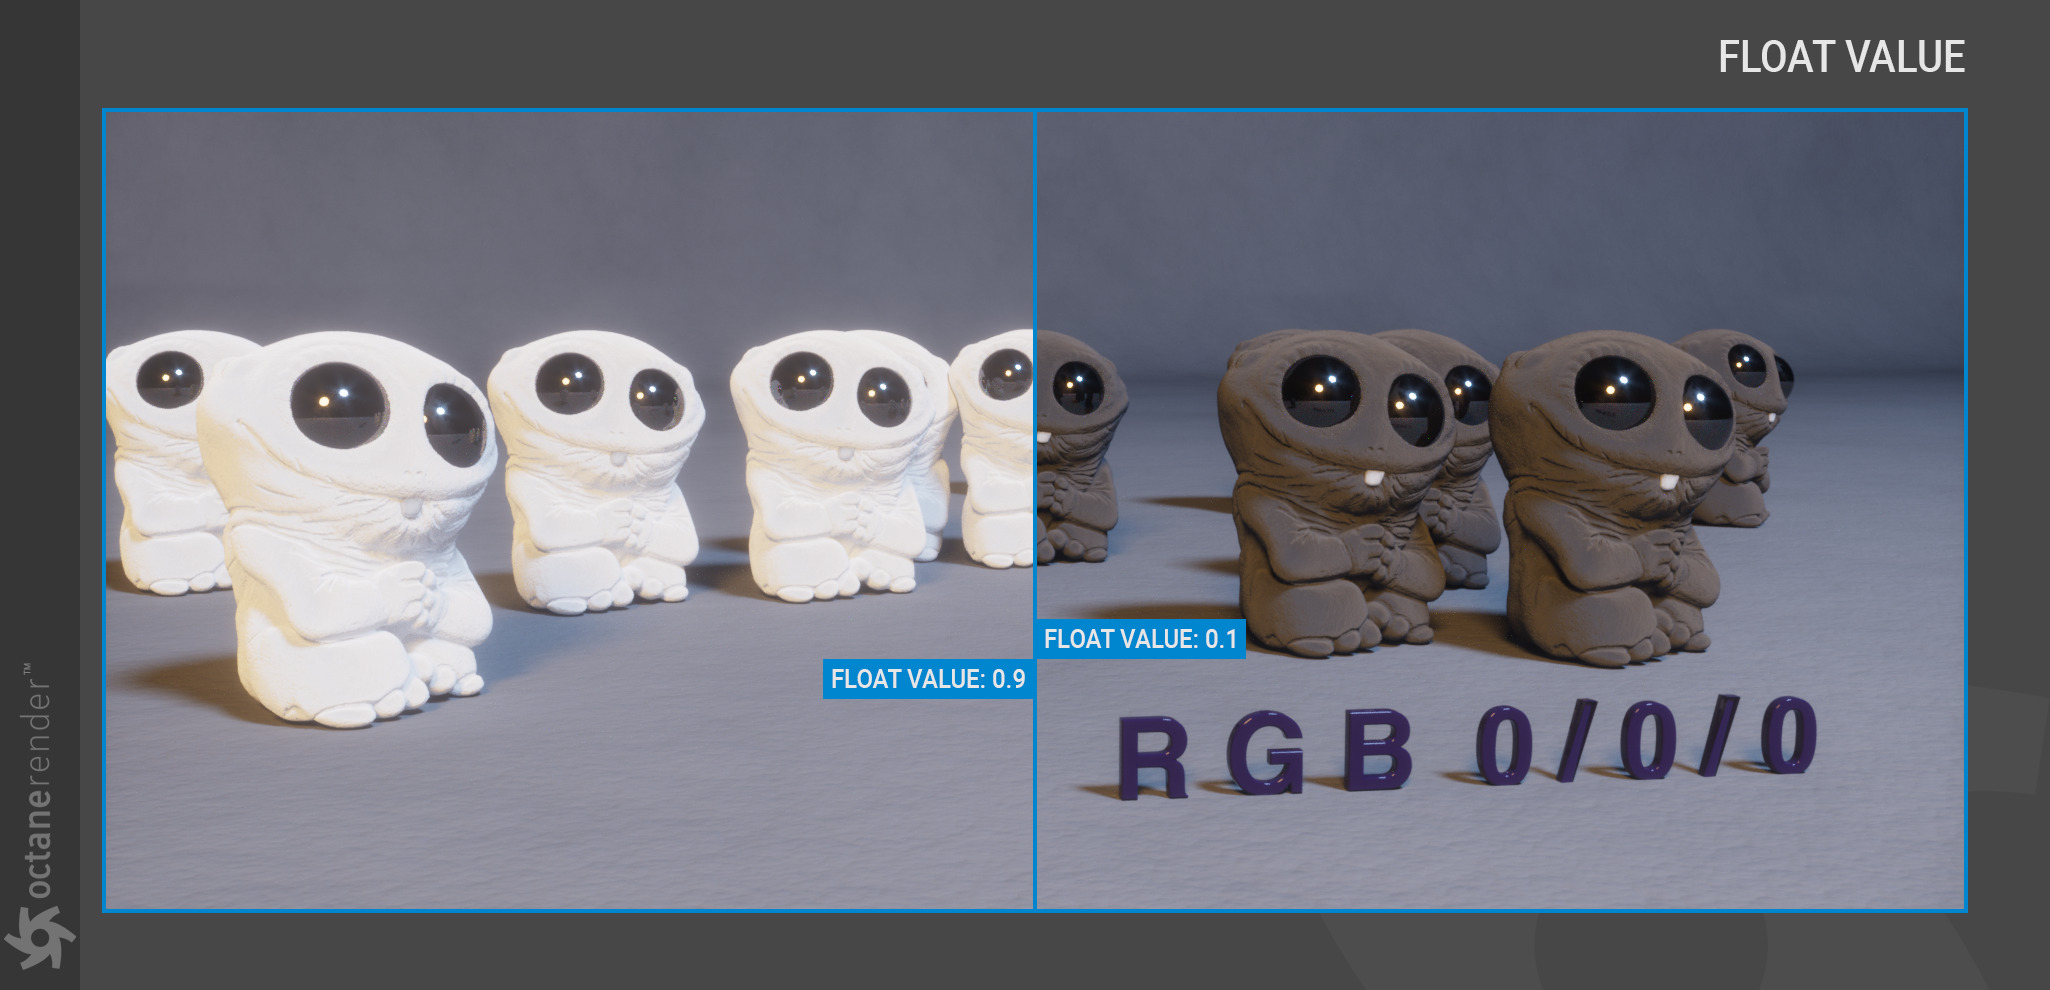
Color: The Diffuse/Albedo color. Use the Float option if you would like a grayscale value rather an RGB color value.
Float: This option generates a value in grayscale. This float value generates black for 0 and white for 1 if the RGB color is zero. The float in this case also functions the same in the channels for roughness, bump, normal, opacity, and transmission.
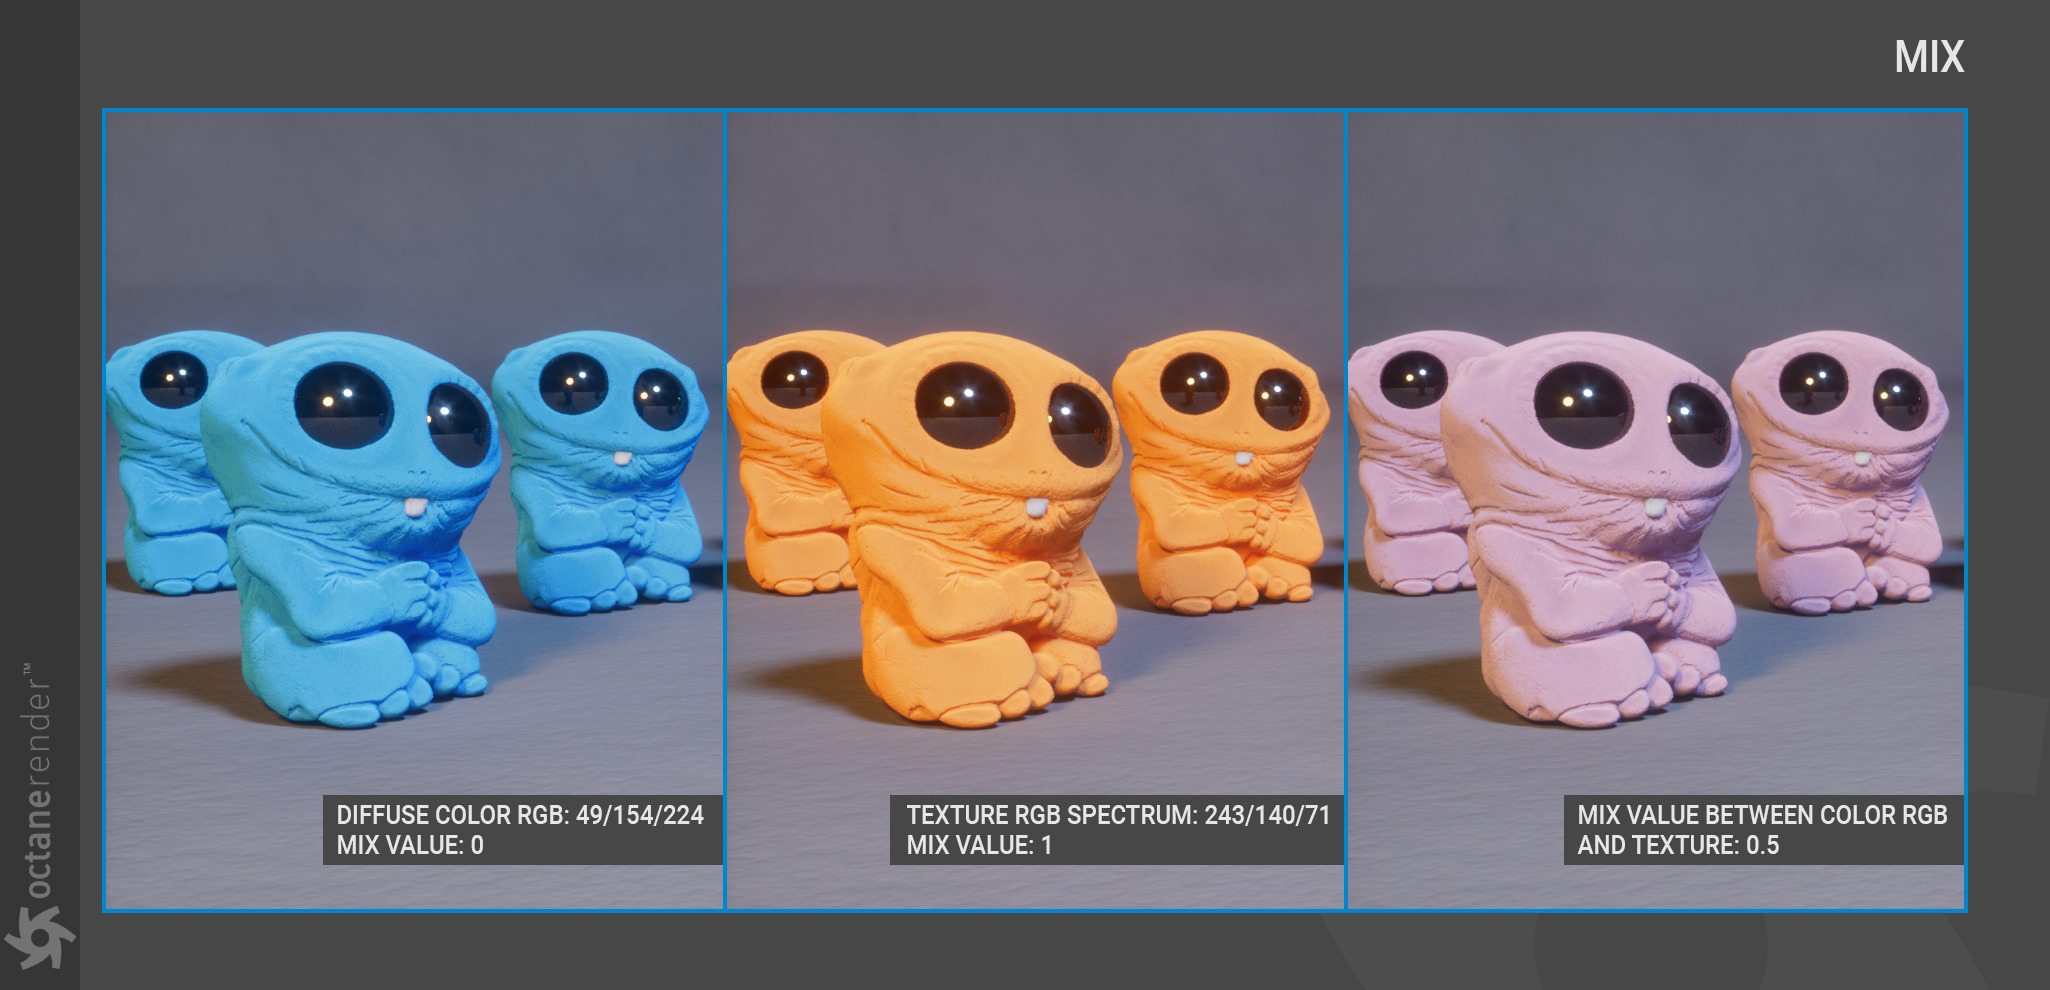
Texture: The diffuse channel’s texture will be defined by this option. These textures can be any of the image or procedural texture types. The RGB and Float values are disabled when textures are applied to this field. Use the mix option if a combination of texture and color is desired.

Mix: This option will blend the texture type and RGB color. Only the color given to the diffuse slot will be used if the slider is set to 0.0. Only the assigned texture will be used with a value of 1.0. As seen in the illustration below, any value in the middle will combine the two according to that value:
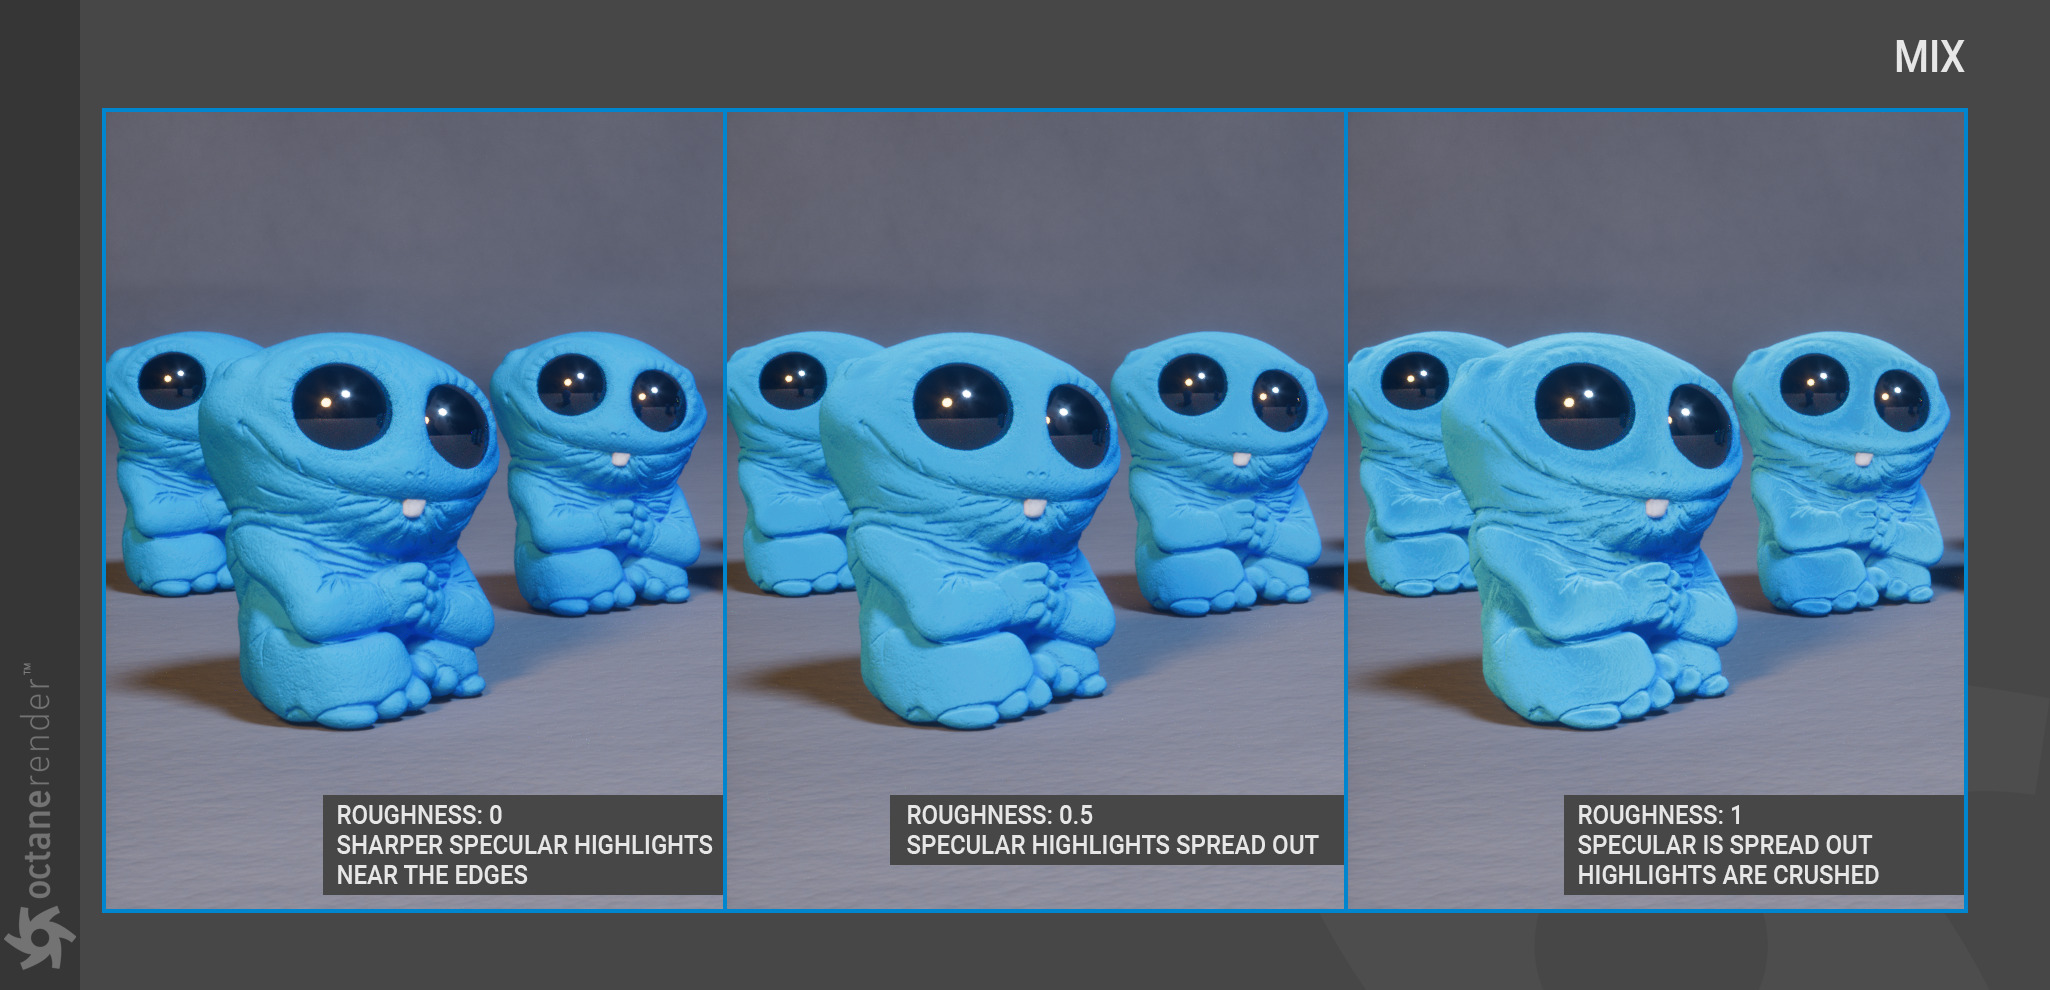
2. Roughness
The distribution of reflections (specular highlights) on the surface is controlled by the roughness parameter. Lower values are softer, whereas higher values generate sharper reflections. This option accepts float or grayscale values. Additionally, textures may be utilized to change the degree of roughness on an object’s surface.
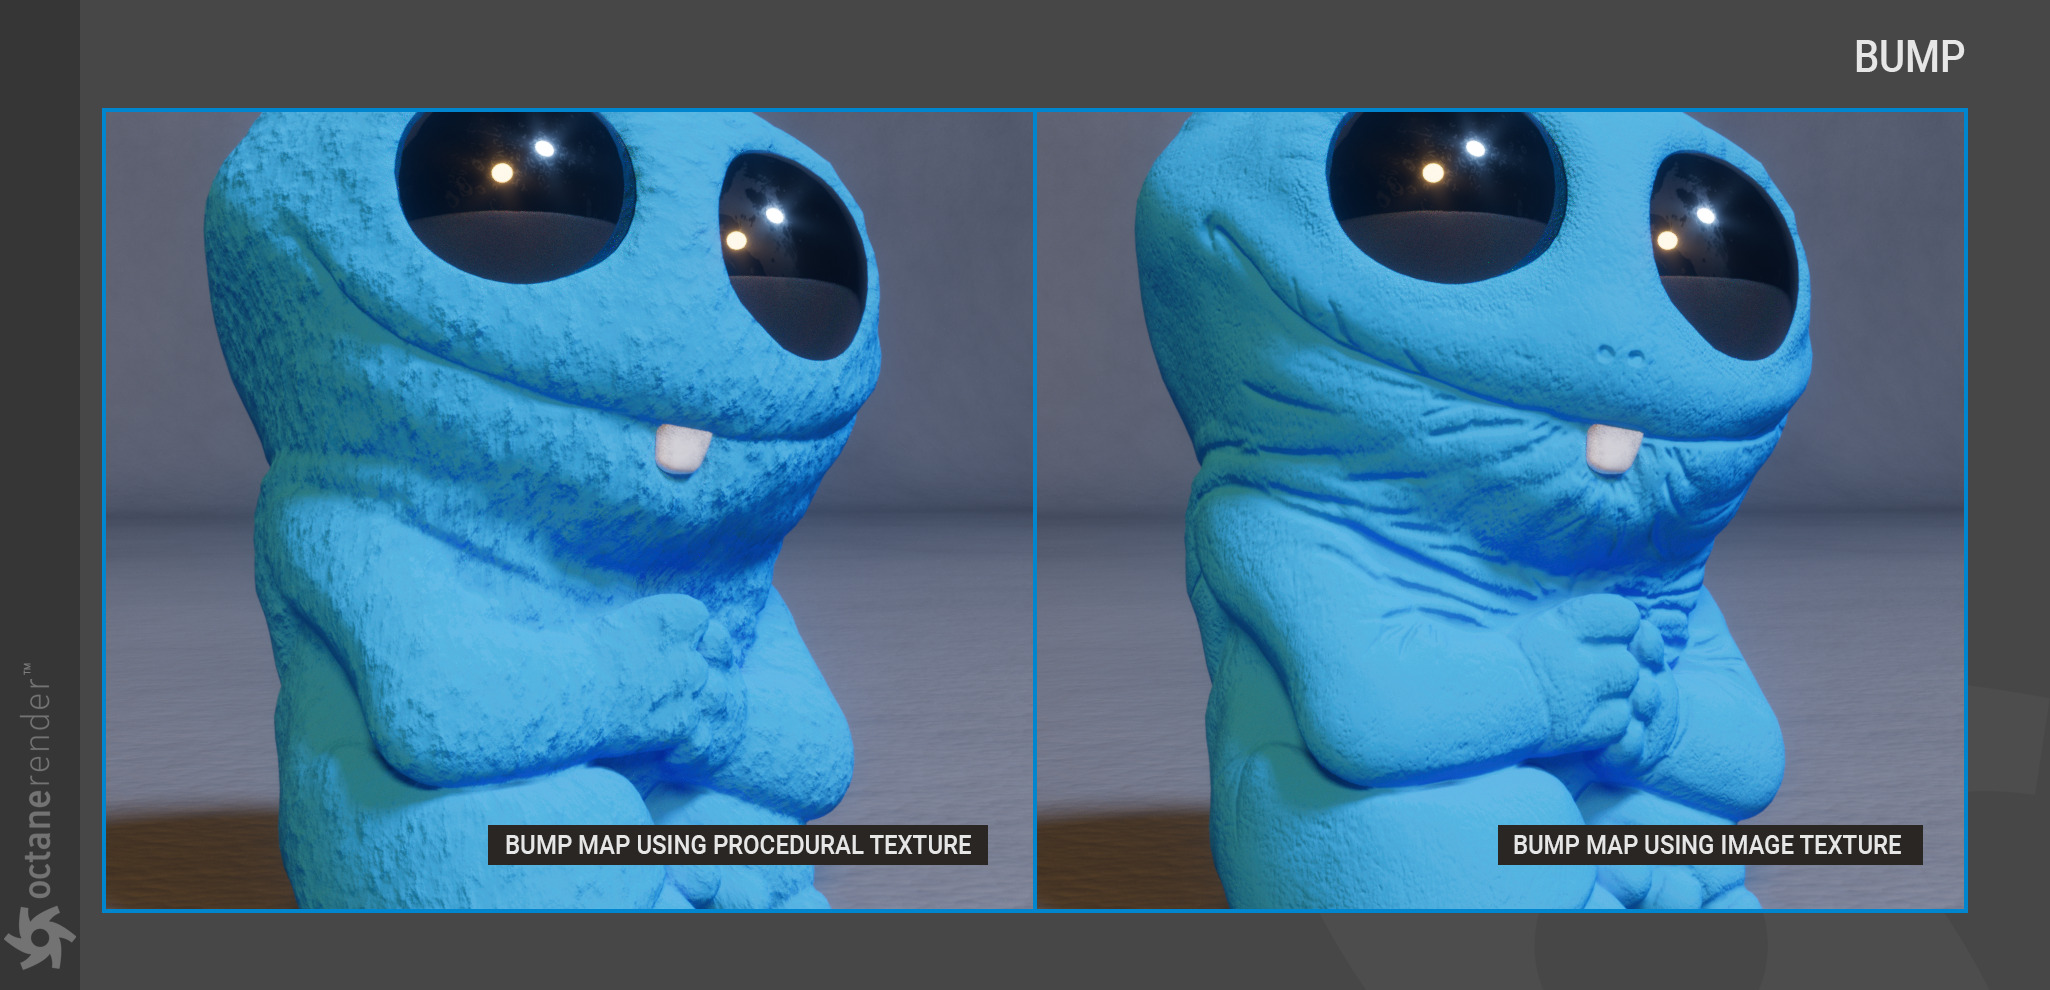
3. Bump
This parameter has the ability to produce fine-grained surface disturbances, such as chips, scratches, and so on. Use any generative texture or picture in grayscale (to save VRAM). Bump maps are basically a trick to make textured surfaces when shading, but they have no effect on the object’s silhouette. Use displacement for that.
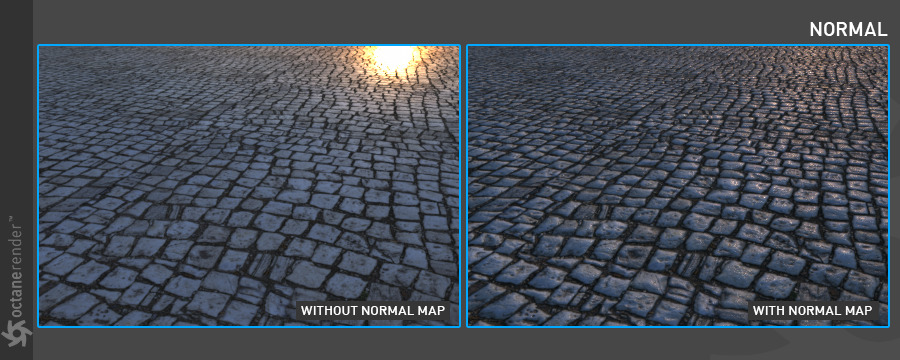
4. Normal
Bump maps are less sophisticated than normal maps, which will result in a more realistic effect. In order to produce fine surface indentations, normal maps store data in 32-bits per component via the red, green, and blue channels. You need to utilize tools like ZBrush, Mudbox, Bitmap2Material, or Xnormal to make a normal map. Normal maps, like bump maps, won’t alter the silhouette of the object; displacement will. It is good to utilize normal maps as much as possible and use displacement maps as a backup as they are highly effective and more efficient than displacements. Regardless of the gamma setting, Octane will treat the gamma of Normal maps as 1.0.
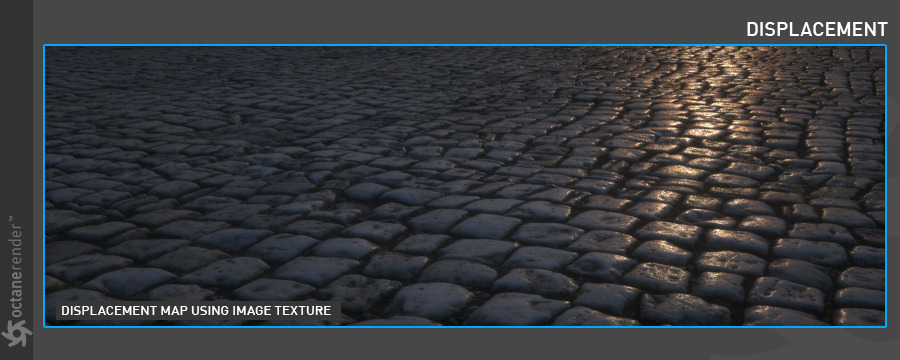
5. Displacement
At render time, displacements produce new polygons based on the used grayscale displacement map. A UV map must be applied to the object using a Displacement node in order to use displacement maps. Additionally, it is crucial that your object has enough polygons and vertices. The Octane Object tag may break the object into smaller pieces and offer greater resolution, and the displacement node’s own displacement value can accomplish the same thing.
The most realistic results will come from displacements since the new polygons will conform and alter the object’s silhouette. The surface will appear detailed from any viewpoint. Displacement has a wide range of applications and may make larger indentations as well. Use displacement carefully because it uses a lot of processing and VRAM. Vertex and Texture displacement types are supported by Octane.
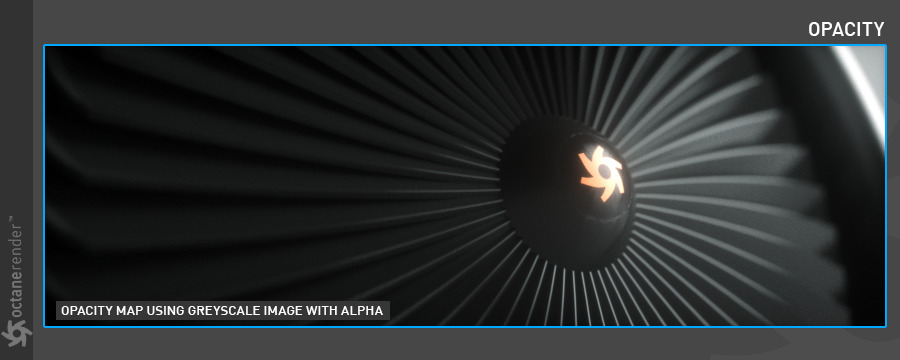
6. Opacity
The only values needed for this option, which controls object transparency, are grayscale values (Floats). White makes an object opaque whereas black makes it transparent.
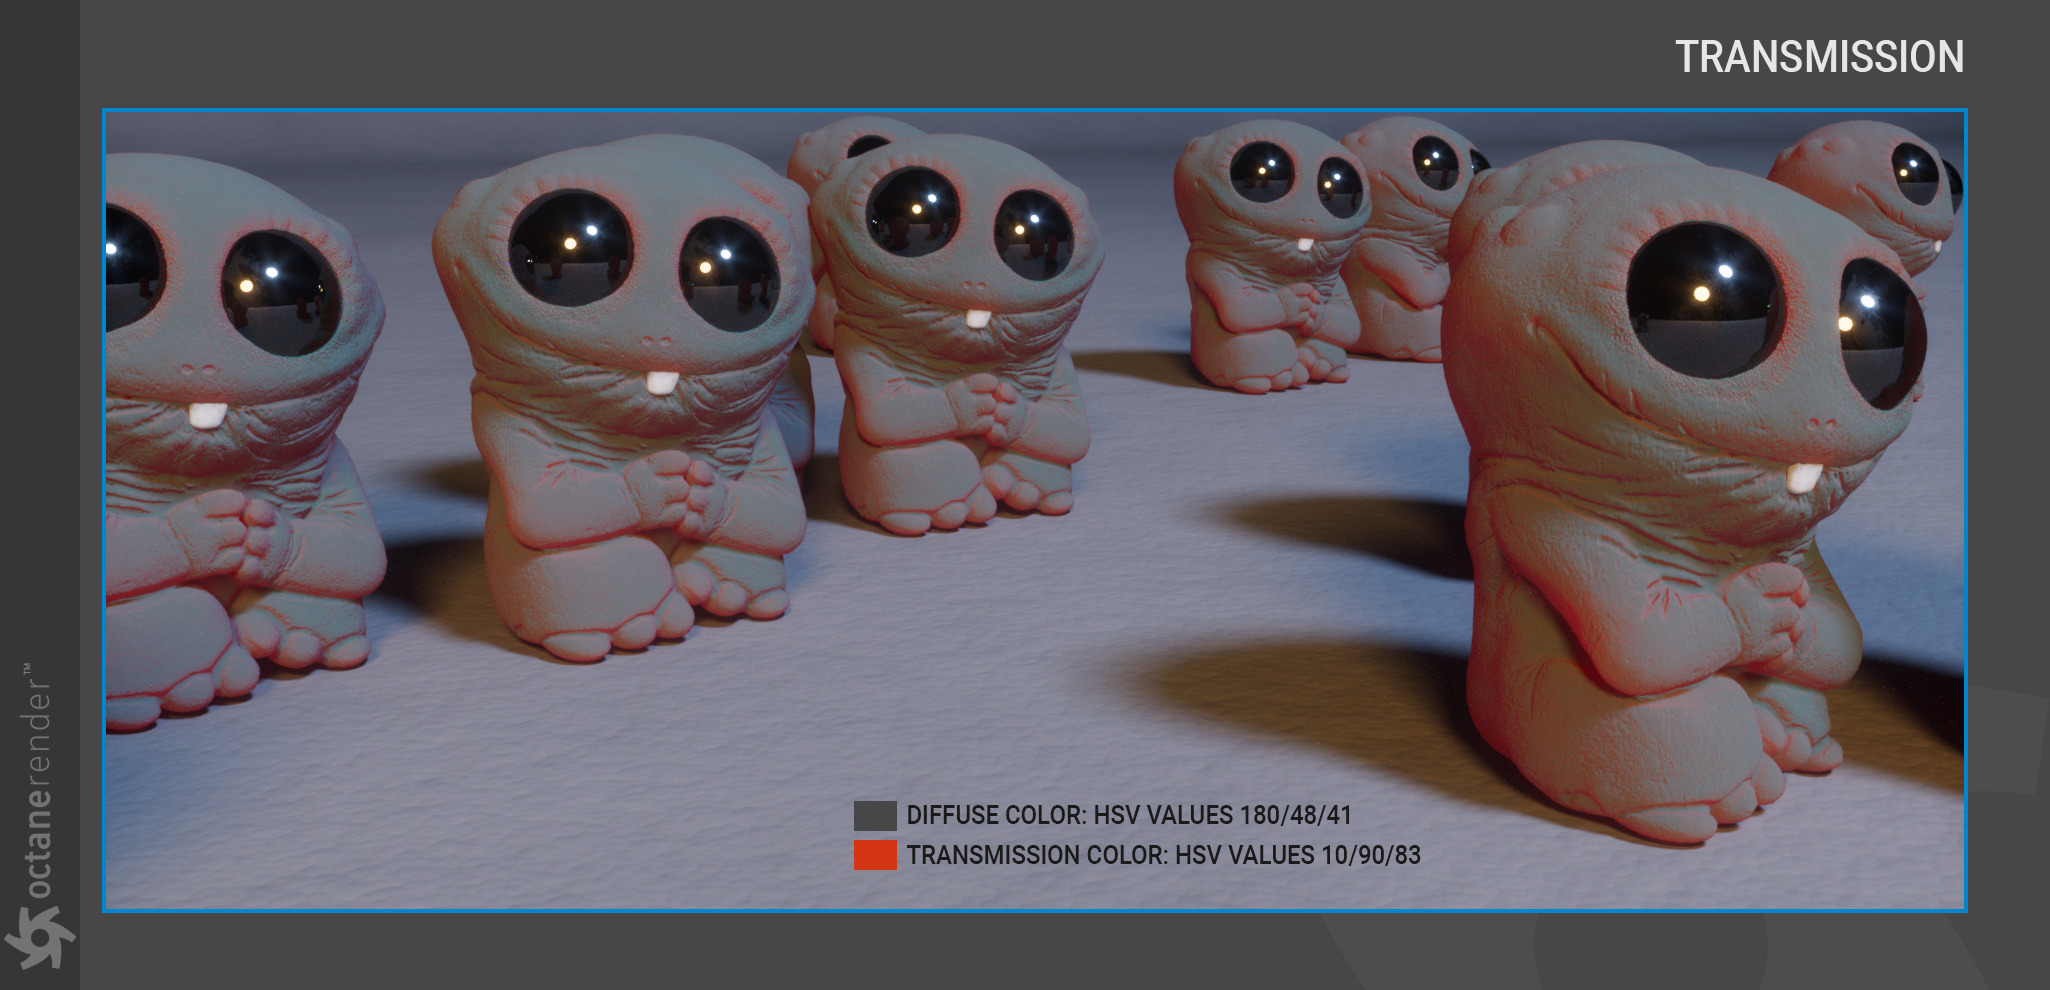
7. Tranmission
Transmission will let light pass from the object, providing the illusion of interior lighting. If you want to avoid sub-surface scattering, use a medium node instead of this effect, which is best suited for single-sided objects. According to the indirect light striking the surface, the Diffuse RGB and Transmission RGB are blended in this parameter.
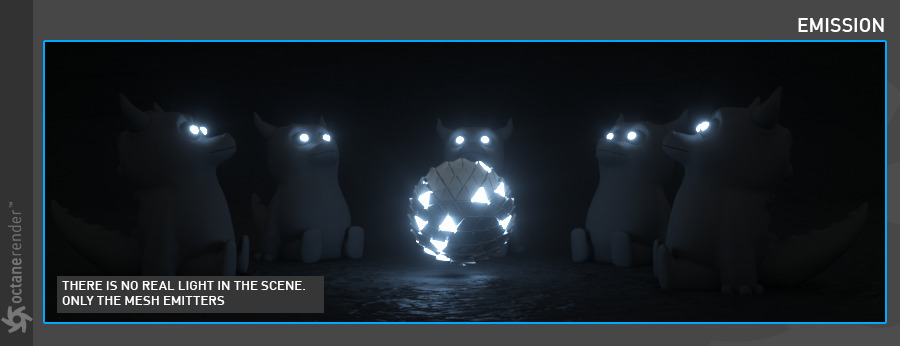
8. Emission
Any item or component of an object can be made into a light source or a mesh emitter using this parameter.
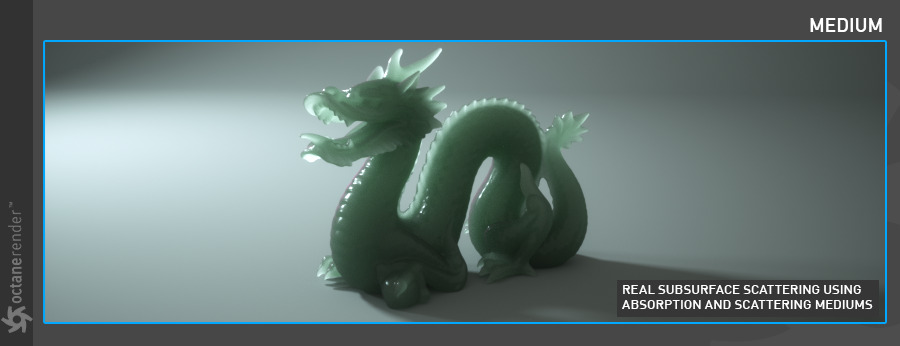
9. Medium
Complex transparent materials like wax, leather, skin, milk, or leaves are produced using this parameter.
10. Material Layer
By adding up to eight material layers to an existing material, the Material Layer may be utilized to create a unique material (defaults to OFF). These layers are derived from the elements found in typical Octane materials. Instead of manually combining components, complex materials may be generated using a physical approach. A Material Layer tab will be added to the tab row when the Basic tab’s checkbox is activated. The Add button in the Material Layer tab will show the available material nodes:
-
-
-
-
-
- Diffuse Layer — Used for dull, non-reflective materials.
- Layer Group — Adds multiple material layers to existing materials.
- Metallic Layer — Used for highly reflective materials.
- Sheen Layer — Simulates the grazing coloration in fabrics.
- Specular Layer — Used for shiny materials like plastic, or clear materials like glass.
-
-
-
-
11. Round Edges
Instead of adding more geometry, the Round Edges option will round off the edges by employing a shading effect (defaults to OFF). As bigger sizes would expose the trick, this option is best utilized for rounded edges that will seem small in the final image. A Rounded Edges tab will be added to the tab row when the Basic tab is activated.
12. Common
This section covers several options:
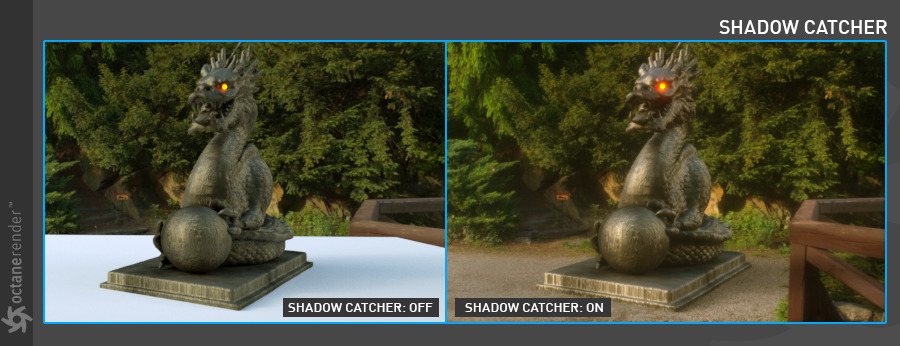
Shadow Catcher: This option will transform any item into a specific “Shadow Catcher” object in the scene, which is helpful to “ground” a rendered object into a real-world photo for compositing.
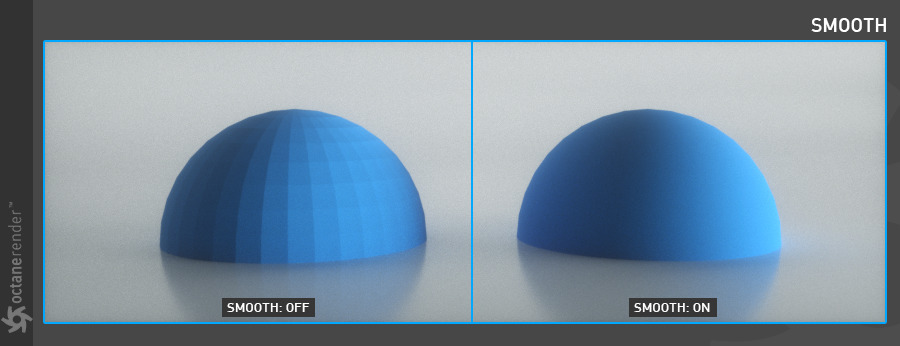
Smooth: a switch to make the change between surface normals more seamless. If this option is deactivated, the surface’s polygonal edges will be sharp, giving it a faceted appearance.
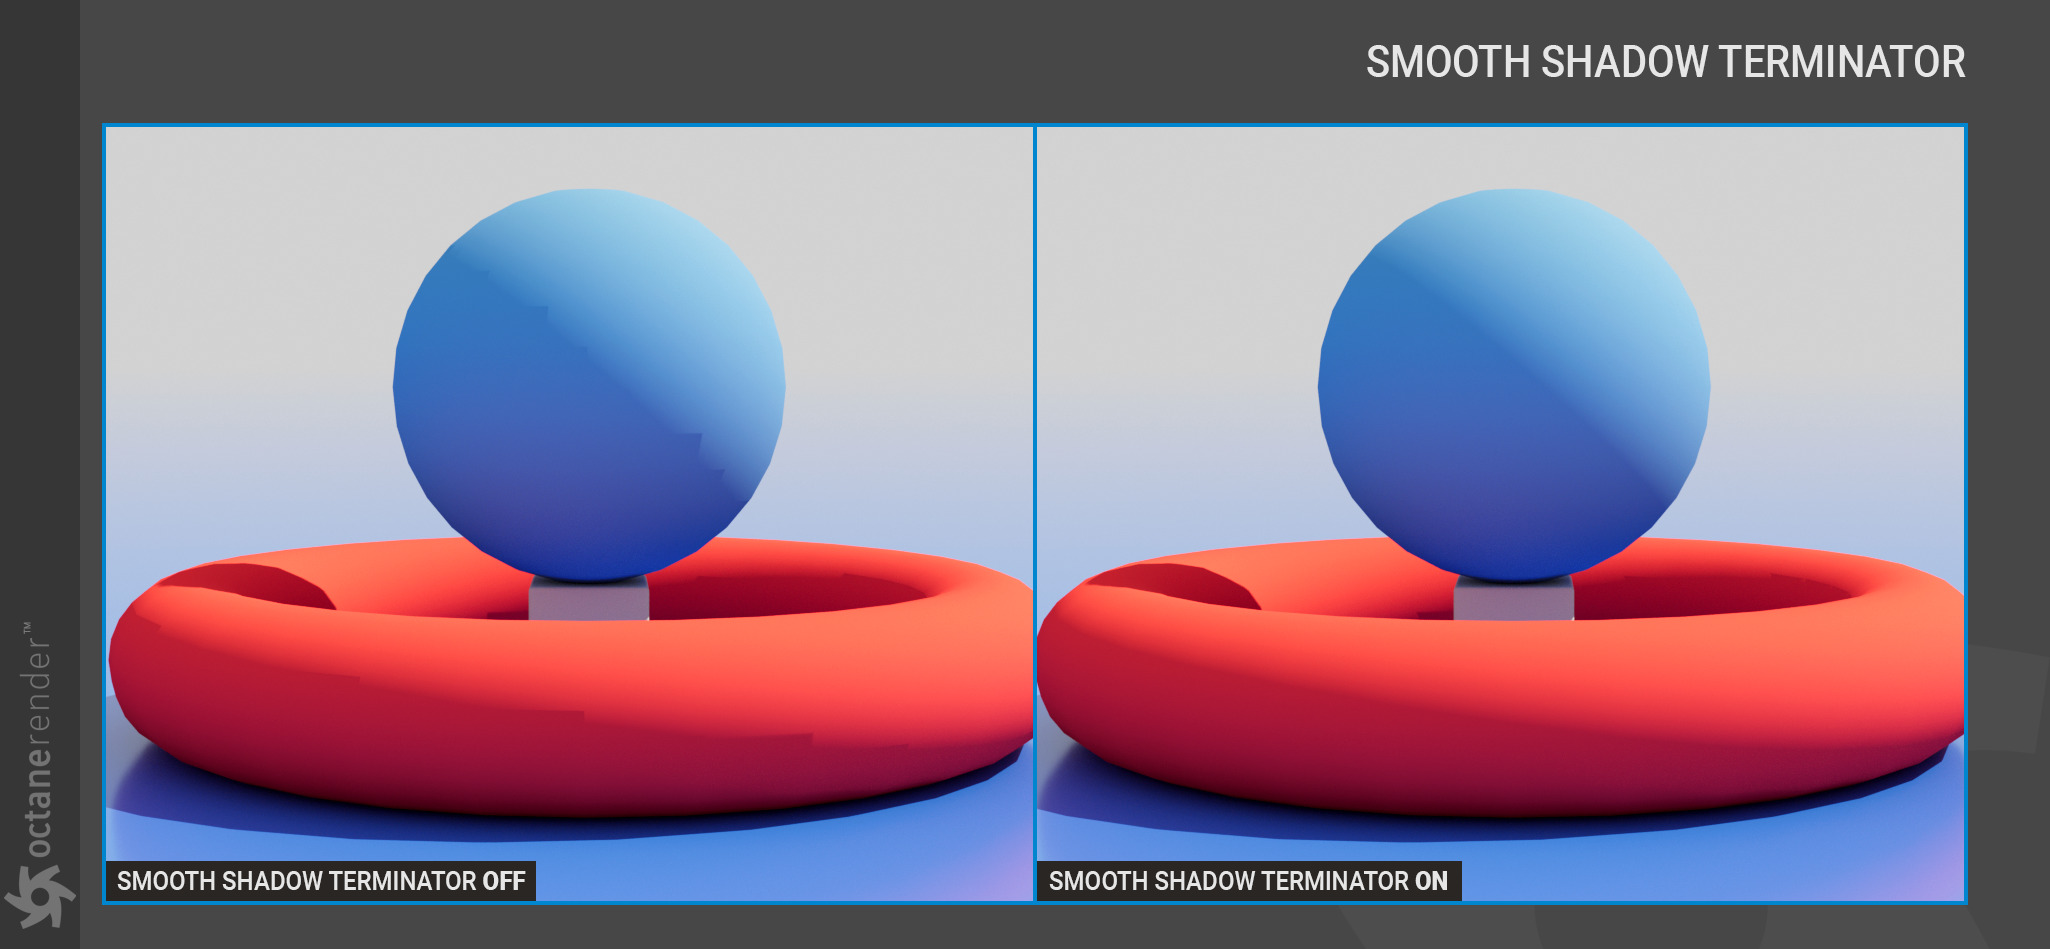
Smooth Shadow Terminator: The Smooth Shadow Terminator changes the ray offset locally to prevent terminator artifacts brought on by imprecise geometry. There is a little performance hit, and the projected shadow may occasionally move when employed.
Affect Alpha: When used with the Specular material, this option will render the material’s refractions in the alpha channel for accurate compositing. The “Alpha Channel” option in the Kernel settings must be turned on in order to use this parameter.
Priority: When Nested Dielectrics is enabled, this value defines the precedence of transparent surfaces (valid range is -100 to 100)
C4D Shaders: The Cinema 4D shader quality is determined by this setting.
Vertex Map Resolution: This variable operates internally. The default setting is advised.
13. Custom AOV
The material can produce a customized AOV thanks to this portion. Custom AOVs are just RGB containers that may be utilized in various ways to capture certain elements of your picture. Specific object layer or material masks may be written into client AOVs, and you can decide whether to write the mask into all channels or only the red, green, or blue channels.
14. Editor
The following opinions are available in this section:
-
-
-
-
-
- Animate Preview: The display of animated textures or material properties in the user interface will be enabled by this option.
-
-
-
-
-
-
-
-
-
- Texture Preview Size: The size of the OpenGL texture preview for the 3D viewport windows is determined by this parameter.
- Editor Display: Which property of the material is utilized for viewport display will depend on this option. Combination is the default, and all channels are displayed. Since the individual channels in the list only apply to materials for Cinema 4D, use this option for Octane resources.
-
-
-
-
iRender - The Best GPU Render Farm Service for Octane
If you’re a fan of Octane who wants to learn and use the latest features, but your computer configuration is still limited, don’t worry; iRender will provide you with a solution that will completely address your problem. In other words, our company offers a choice of server with 2/4/6/8 RTX 3090 allowing you to pick the best server package for Octane. Recently, we have released server 4S with 2 RTX 4090 which is one of the latest of Nvidia.
As a result, the powerful machines make rendering enjoyable and quick. In addition, a unique feature is that you will connect to the iRender server and utilize it as your own computer, with total control over setup and capacity. Above all, our server supports any applications; therefore, you may install the program you need only once, and everything will be kept for future use. If you’re concerned about security, be assured that the safety and security of your data is our first priority. No one, including iRender, will have access to any of your data. The privacy policy of iRender may be found here. To understand more about our server’s performance with Octane, you can see the following video:

Through this article, iRender hopes you can create Diffuse Material in Octane for Cinema 4D. Besides, we are committed to providing you with a rendering experience unlike any other. iRender has appreciated in many global rankings (e.g: CGDirector, Lumion Official, Radarrender, InspirationTuts CAD, All3DP, VFXRendering). iRender, in particular, is running a fantastic deal for you: new clients will receive a 20% bonus on their first purchase within 24 hours of enrolling. To learn and enjoy more, please create an account here.
iRender – Happy Rendering!
Source: Source: docs.otoy.com
Related Posts
The latest creative news from Redshift Cloud Rendering, V-Ray Cloud Rendering , Octane Cloud rendering, Houdini Cloud rendering, 3D VFX Plugins & Cloud Rendering.