Everything You Need to Know about Daz Studio Face Transfer
This article will discuss about Face Transfer of Daz Studio. There is a free version that comes with Daz Studio, and frankly, this plug-in is an absolute delight to play around with.
As technology improves and 3D techniques continue to develop, big-brand studios have done an amazing job exploring face transfer and deepfake technology. Personal tastes aside, most Star Wars fans can probably agree that, overall, the post-production team at Disney did an excellent job with several characters over the past few years. But these deepfakes aren’t perfect yet. Most viewers will probably spot a few telling details that alert them to the fact that they aren’t looking at a real actor, or at least, not the true face of the actor.
That said, when Daz Studio released Face Transfer and we actually can have a test on this plug-in at no cost, these are some important tips to make sure that your custom characters look their best!
Please Note: Face Transfer is Windows 64-bit only. It will not work on Windows 32-bit or Macs.
Getting Face Transfer Ready
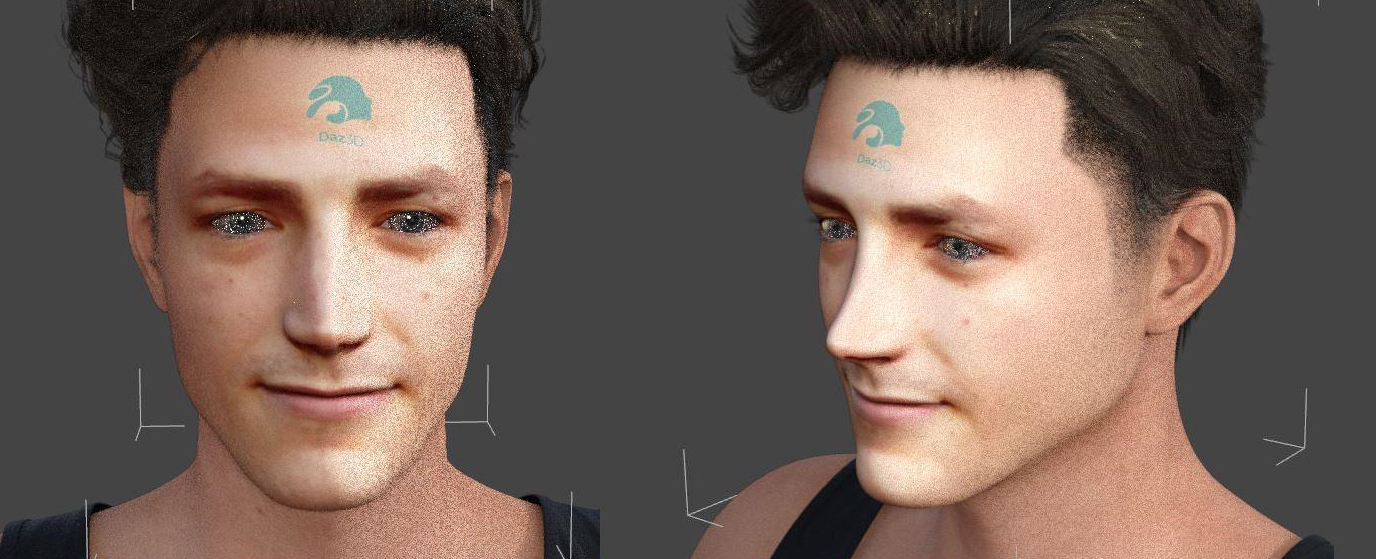
You may have noticed that there is a product in the asset store called Face Transfer Unlimited. Even said before that it’s free. However, it is important to note that the free version has limitations. Think of it as a free trial. The free version can generate an unlimited number of face transfers, although they will be branded unashamedly with the Daz Studio logo on their forehead. That said, you will get three free renders that won’t have the logo applied.
If you aren’t sure if you want the full plug-in yet, that is okay. Open up Daz Studio and test out the free version first! You don’t have to do anything special to set it up. If you did purchase it, download and install it from Daz Central like you would any of your other assets.
For the sake of the test, go ahead and open a blank project and don’t load any characters at this time. In order for this to work right, you will need a good photo to work from. If you already have one, go ahead and skip to the end. But before you get too excited, check out my helpful tips below so you can make sure your 3D character looks its absolute best.
Getting The Most Out Of Your Base Photo
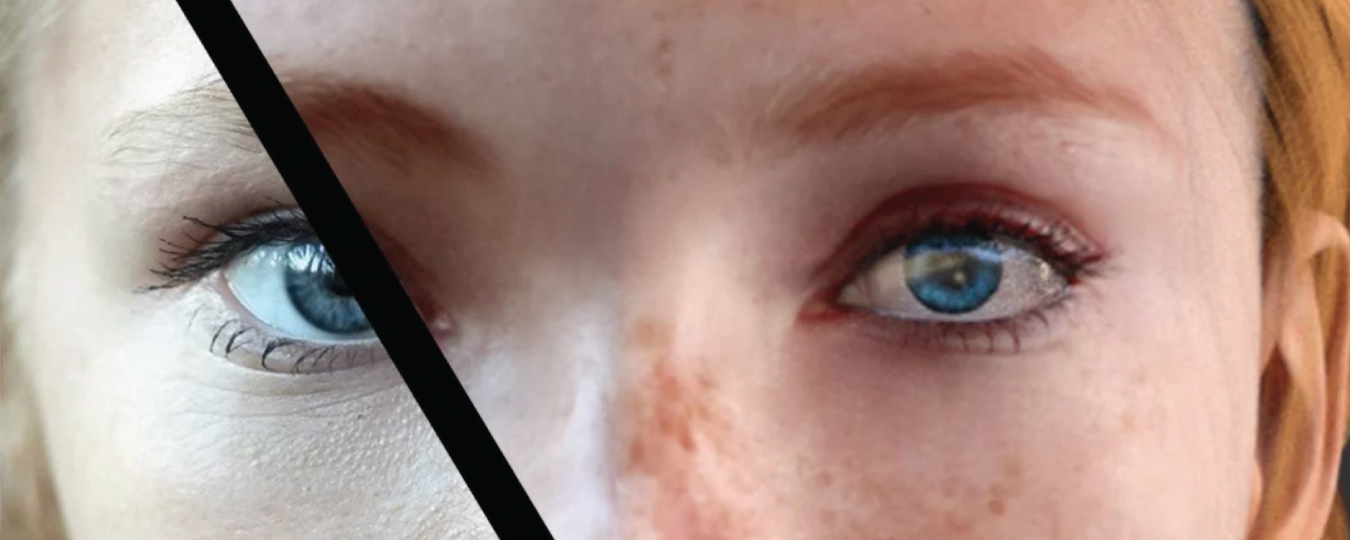
All you need for the Daz Studio Face Transfer to work is your face. It is important to understand exactly what Daz Studio is going to try to do with that image in order to generate your character. Essentially, it is going to identify your face and the specific elements of the face. With that information, it is going to transpose your face onto a Genesis 8 Male or Female (whichever you choose).
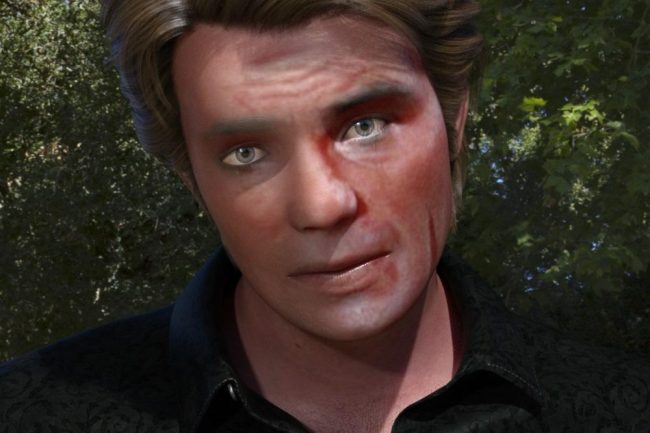
The software is honestly pretty good at what it does. In the end though, the software is vastly hindered by poorer quality photographs. In the end, Daz is taking your face and generating new texture maps to replace the face of the base character. Understand that if you have, say a mole, on your right upper lip, Daz is going to transfer that onto the skin, but it won’t have actual 3D dimensions. The same goes for facial hair. Of course, Daz will generate textures of your facial hair, but it won’t actually generate individual hairs. Have no fear, you can easily resolve this by adding a separate facial hair asset to your character after it’s been generated.
If you have long hair or bangs, make sure you pull your hair back completely. You don’t want anything in front of your face, as Daz will read that information and include it on the 3D character’s textures. A wayward strand of hair for example will render as a streak across your face and may cause unwanted blurriness and artifacting. There is the off-chance that this streak looks like an awesome battle scar, in which case, maybe you will want it included after all.
Daz Studio Face Transfer Checklist
Before you continue, here are a few checklist items to keep in mind as you prepare or select your photo for the Daz Studio Face Transfer.
- Make sure to take the picture pointing straight at your face and that you don’t clip off part of your head. Keep yourself centered.
- Comb back that hair, as I explained why earlier!
- Don’t smile! Don’t show any emotion at all. Remember, if you smile, Daz is going to pull that information and use it to create the new face’s textures. Wrinkles from your smile or frown will forever be ingrained in your character, regardless of their actual expression!
- You may have issues with your eyes “painting” onto the texture of the character’s eyelids or even nose. This won’t happen for everyone, though it seems to just depend on the actual shape of your face and how it compares to the Genesis Base models. If you have this problem, try squinting slightly more than you normally would when wearing a straight face.
- Make sure to close your lips. If you show your teeth, they will most likely appear in the texture of your character’s lips. Trust me from experience. It looks silly!
- Take the photo in soft, natural light. Just like any photograph, avoid harsh direct light, or overly shadowed light as well. The ideal photo is one that has soft, flat light that evenly lights up your entire face.
- Make sure the photo is as high of a resolution as possible. This one is so important. Daz can’t accurately portray your face with hyperrealism if you don’t use a hyper-detailed photograph! If you have the opportunity, try to use a photo that was taken by a professional-grade camera or newer smartphone for the best results.
- Save the file as a JPEG or PNG.
If your photo checks off all these items, then you should be ready to go!
Execute The Face Transfer And Enjoy The Results!
Now that you have the perfect base photo ready to go, hop back into Daz Studio and navigate to Window > Panes > Face Transfer. This is the same way you will access the plug-in whether you are using the paid version or the free one.
The Face Transfer tab is fairly straightforward. Under Browse, you can search your computer for the photo you want to use and load it. Don’t worry if the orientation appears off inside the editor, Daz knows how to sort out these issues automatically during the transfer process.
Under the uploaded photograph, let Daz Studio know whether you want to use the Genesis 8 Male or Genesis 8 Female by clicking on the desired option. Finally, hit Generate. It shouldn’t take more than a minute or so, and Daz Studio will generate your character using your face. If you are happy with the results, you can even save the character so that you can quickly load them in the future.
Final Thoughts On Daz Studio Face Transfer
Remember, characters generated with Face Transfer are still totally morphable, and you will probably have to do some morphing to get your character to look like you or the person you are trying to imitate in 3D.
Whatever your reason for using the Daz Studio Face Transfer plug-in, the added flexibility it gives you as a creator is amazing. You don’t have to be a talented 3D modeler to get professional results. With a little effort preparing the right photo, you can generate amazing, unique characters. You can then morph them and use other Daz content to customize the character even further. The flexibility and customization inside Daz Studio empower creators to make high-quality renders that look as unique as the imagination that guided their creation.
The professional cloud rendering service for Daz 3D
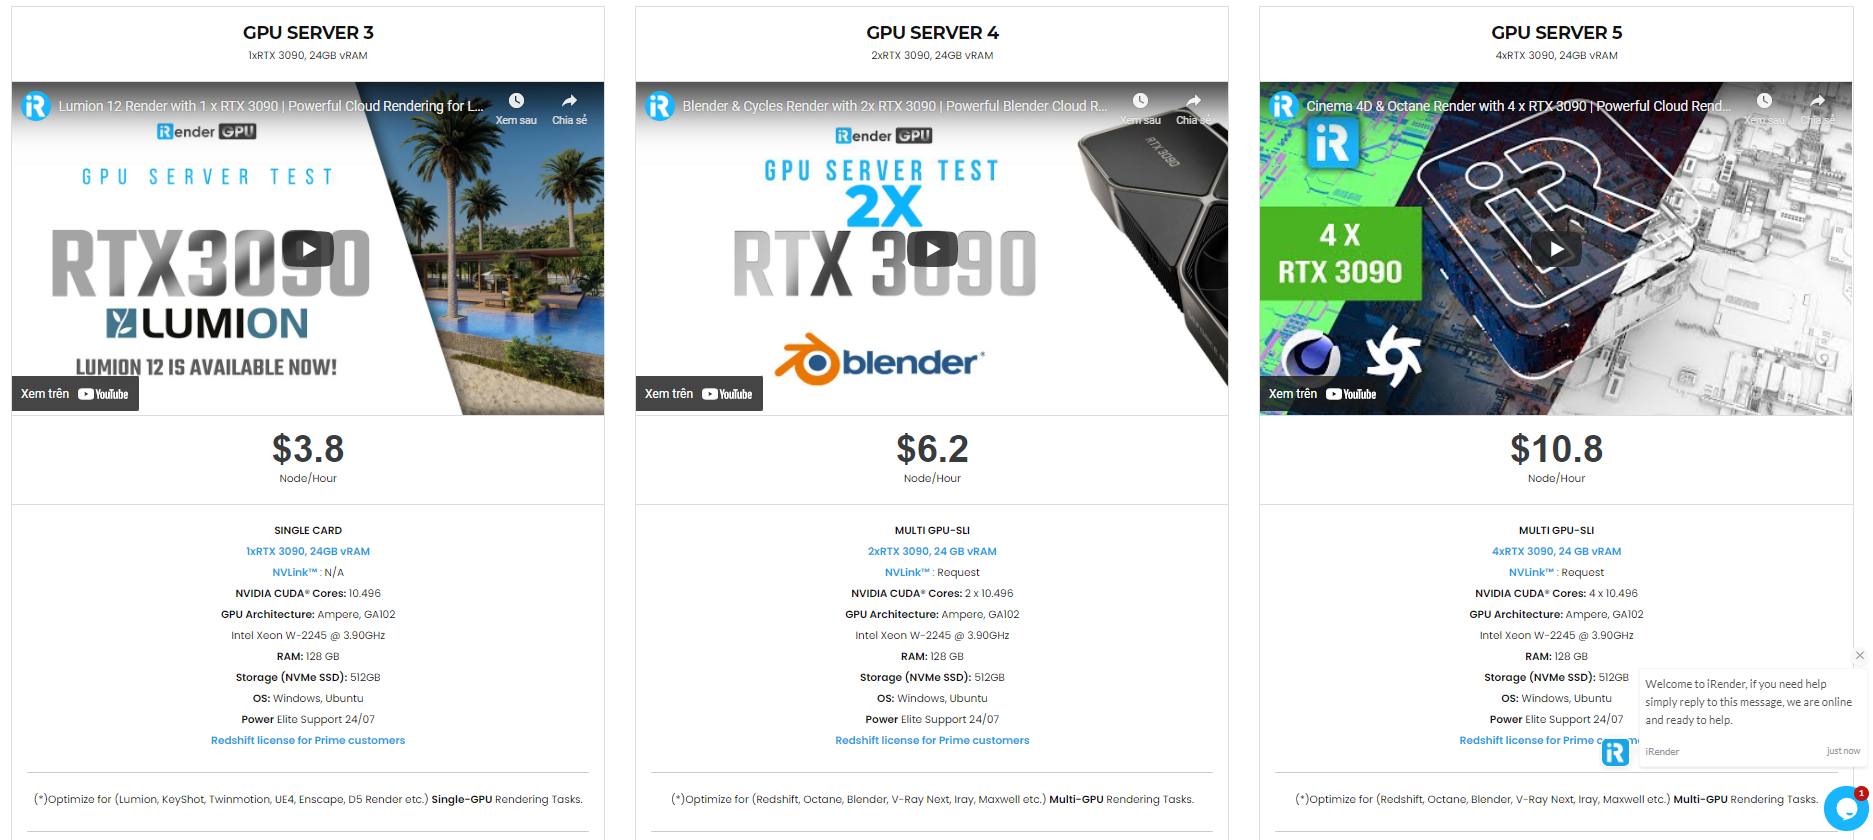
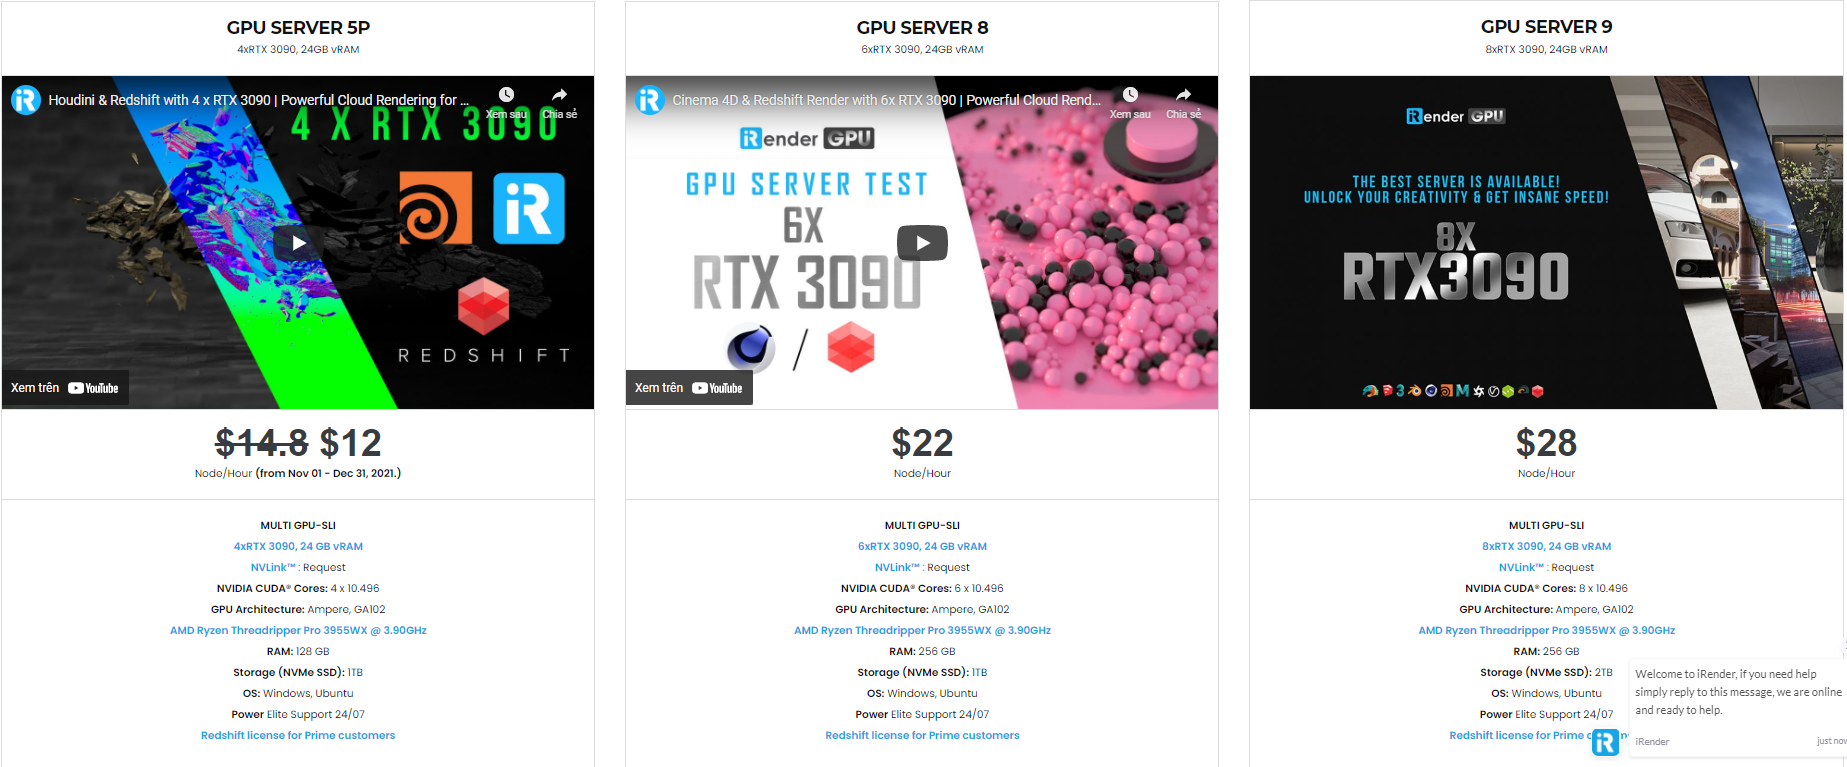
iRender is a GPU-Acceleration Cloud Rendering Service for Multi-GPU Rendering with Powerful Render Nodes: 2/4/6/8x RTX 3090/3080/2080Ti. iRender provides High-performance machines for GPU-based & CPU-based rendering on the Cloud. For Daz 3D users can leverage the power of single GPU, multi GPUs to speed up your render time. Users can easily choose their machine configuration from recommended system requirements to high-end options.

Why iRender?
Reasonable price (lots of bonus)
You will be charged on a per-minute basis. However, you can always save up to 30% with our Fixed Rental feature. For those who are in need of the server for more than a day, or have extremely large projects, we advise choosing daily/weekly/monthly or even yearly rental packages. The discount is attractive (10% for daily packages, 20% for weekly and monthly packages)
Real human 24/7 support
Our support is always online 24/7, helping you to handle the problem quickly, effectively, saving you both time and money.
Conclusion
If you have any questions, please do not hesitate to reach us via Whatsapp: +(84) 972755742. Register an ACCOUNT today and get FREE COUPON to experience our service. Or contact us via WhatsApp: +(84) 972755742 for advice and support.
iRender – Happy rendering
Source & pictures: Daz3D blog
Related Posts
The latest creative news from Daz3d Cloud Rendering, Redshift Cloud Rendering, Nvidia Iray Cloud Rendering , Octane Cloud Rendering, 3D VFX Plugins & Cloud Rendering.