How to Fix Grainy Renders in Blender?
You’ve spent hours creating the most amazing modeling and shading, then pressed F12 to see the final render. But unfortunately, the result is not as clean as you want; it is noisy and grainy. In fact, noise is a common phenomenon, especially in Cycles. It usually occurs when Blender does not have enough data to calculate the lighting accurately. So, how do we remove grainy renders in Blender? That is the purpose of this article, where we will learn why your render is grainy and how to fix it effectively without overloading your system.
What Causes Grainy Renders in Blender?
Cycles uses path tracing with next event estimation, which isn’t great for rendering all kinds of lighting effects, like caustics. But it’s good for rendering larger, more detailed scenes than some other rendering algorithms. That means Cycles simulates light from sources and predicts how it will bounce off objects and materials in the environment through path tracing. Of course, not all light sources are the same, so Cycles can’t always predict their paths accurately, which can lead to noise and graininess.
You may need more light paths in your scene, for example, by using specific materials like glass. The materials and lights you choose for your scene can also greatly impact the final render. You should pay more attention to your lighting setup and material complexity when rendering in Blender. Also, light portals are important, especially for interior scenes. Indoor light coming in through windows or small openings makes it difficult for Cycles to direct light rays when sampling. Then, Light Portals help Blender understand where the main light source is for more efficient sampling.

Source: Deepal Graphics
The next reason makes your image might appear grainy could be a low sample count or a high noise threshold. Another thing you might think of is that your computer is lower-end. This makes it difficult to render complex images with many details and polygons, resulting in long render times and noisy rendering. You can refer to the article Blender Cycles Optimization Tips for Low-end PC (2025) for some useful tips!
How to Fix Grainy Renders in Blender?
So, when using Cycles, there may be times when the render doesn’t look the way you expect. Sometimes, you will see a grainy mess with tons of noise on your render, instead of a nice-looking image. Let’s see what we can do to remove grainy renders in Blender!
Increase Sample Count
As mentioned above, Cycle focuses on path tracing to create and calculate the lighting of the scene. To get the most accurate results, Blender needs to perform the calculations as many times as possible to accurately map all the objects in the scene. This process is called sampling, meaning that the more samples Blender uses, the more accurate the results will be.
Of course, the number of samples needed for a scene depends on the scene’s structure. The more complex the scene, the higher the number of samples needed, for example, a forest scene or a city with many buildings. Therefore, a low sample count means more grain, noise, and ‘fireflies’ (white pixels that occasionally appear in the scene). In this case, we need to estimate the minimum sample count and try increasing the sample count until we get the desired result.
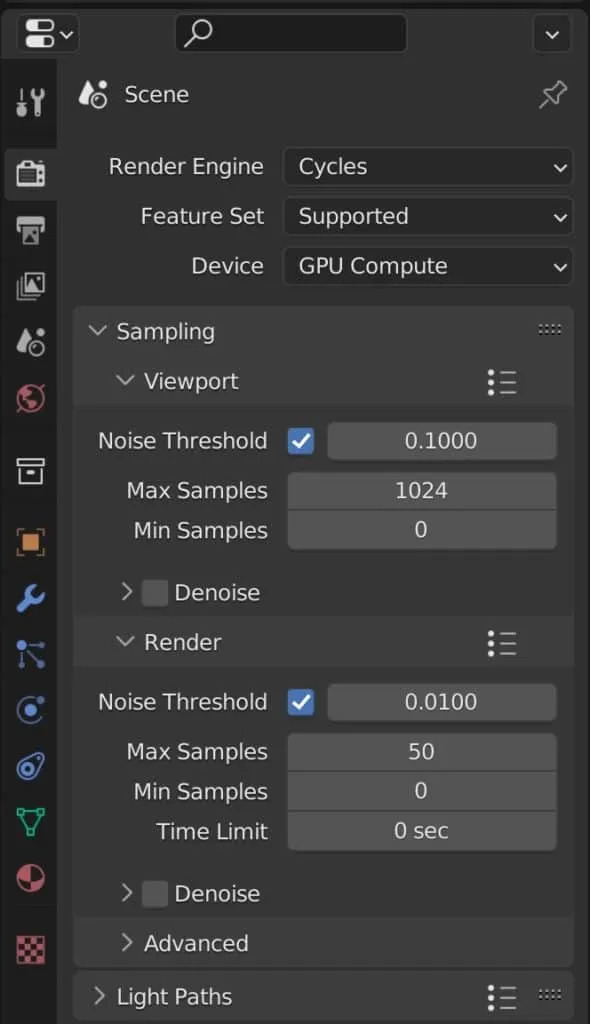
Sample settings for render (Source: blenderbasecamp.com)
You can increase the sample count in Render Properties > Sampling. Note that higher sample counts will increase the render time. This is the simplest solution, and in 99% of the cases, it works; if not, then refer to the solutions below.
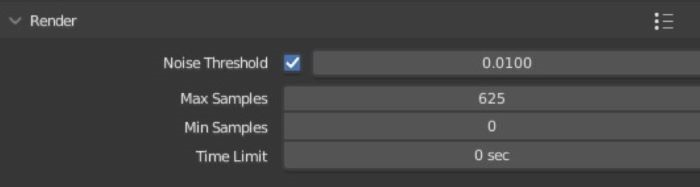
Lower Noise Threshold
Another option to improve rendering in Blender Cycles is to lower the noise threshold. This imposes a per-pixel limit on the number of samples that can be used to remove noise. It also acts as an efficiency estimator, preventing Blender from using too many samples in areas of the image that are already at their best. The lower the noise threshold, the longer it takes to remove noisy pixels in the image, and the higher the value, the faster the sample will move to subsequent sections.
Use Denoising
You can also use Denoise to remove grainy renders in Blender. With the denoising function, Blender can clean up your image after calculating the samples. The biggest advantage of denoising images is that it can clean up images even when they have a low sample count. So, if used properly, the denoiser can still significantly reduce the render time while still maintaining a clean result.
However, this function also has a drawback, which is more obvious when using a low sample count. The denoiser takes the image it receives after the samples are calculated, then it uses whatever data is there to clean up the image. This means that too few samples will significantly limit the quality of the details that can be seen in the image. Therefore, we should still use a moderate sample count and a suitable noise threshold for the denoiser to work properly without losing details.
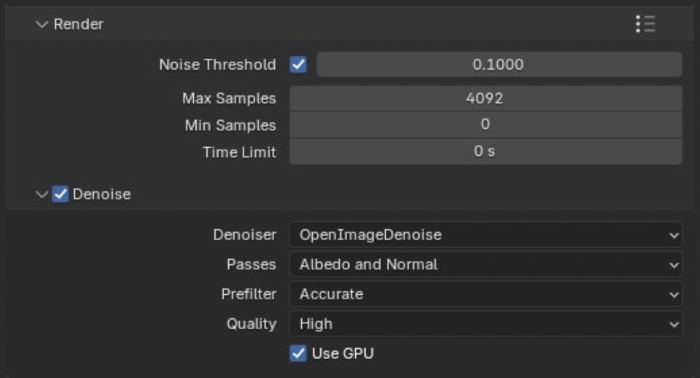
To enable the Denoiser, go to the Render Properties panel > Render > Denoise. Image denoising is enabled by default with your 3D viewpoint. But it is disabled for rendering, so we need to tick it on. Then, click the arrow next to the checkbox, and it will open a small menu with a few settings for denoising.
The Noise option is the most important. The noise options can vary depending on your hardware. Sometimes, one method can give cleaner results or preserve finer detail. The Passes option will determine what kind of information the denoiser calculates. By default, it is set to Albedo and Normal, so we should leave it that way. Finally, if you have the image denoiser open, you will have an additional Prefilter option. If you have albedo and normal passes enabled, you can choose how the prefilter works to prioritize speed (faster denoising) or accuracy (cleaner denoising, better detail retention).
While the denoising setting will take some time, it is not a significant amount of time in terms of overall render time. You should adjust this setting carefully and appropriately.
Removing Fireflier in The Render
Consider fireflies, those isolated white spots that appear when rendering glossy or transparent materials. We often see this phenomenon in interior scenes, when the light source is shining in from outside through a gap like a window. The firefly effect is harder to remove than regular noise or pixels because it comes from the calculation of real light. Sometimes, increasing the number of samples to a very high level still doesn’t get rid of these spots. Using denoise can sometimes help, but it can also cause problems such as distortion or loss of detail. So we need to address the root of the problem.
Source: digitalarthub.net
First, try increasing the number of light paths in the scene. This will increase the accuracy of the path tracing, thereby reducing the appearance of fireflies to some extent. Next, you can use portals. Portals will change the way light enters the scene and significantly reduce the number of fireflies generated.
Enable Multiple Importance Sampling
Next up is Multiple Importance Sampling, a feature that is enabled by default in Blender. This helps calculate light paths more efficiently, which reduces noise and fireflies in the render. But it doesn’t completely clean up noise or grain. Since Multiple Importance Sampling works by treating lights and objects differently depending on the context, one object might have no fireflies, but another object in the same scene might still have them. Of course, this technique analyzes each element of the scene more deeply, so it will render more slowly. Still, if the above methods don’t work, this is something to try.


Before and After using Multiple Importance Sampling (Source: blender.org)
Consider Using Eeeve
We come to the final option, using Eevee as an alternative to Cycles. You might consider Eevee because it computes the scene using a different method than Cycles, which is rasterization. While Cycles uses path tracing to calculate the effect of each ray of light as it bounces off the surface of an object, Eevee estimates how light interacts with surfaces and materials.
Since Cycles’ method is more intensive, it can introduce noise or pixelation in the render, but Eevee doesn’t. You won’t have to worry about noise in your renders with Eevee. However, Eevee also comes with the disadvantage of not being very realistic. So if you want to create realistic images, this disadvantage is hard to ignore.
Wrap Up
Grainy renders in Blender are annoying, but they can be fixed. With some fine-tuning of the sample count or denoise settings, you can clean things up pretty well. The key is knowing where the noise is coming from and choosing the fix that works for your scene. If you’re having trouble with noisy, grainy, or blurry renders in Blender, give these a try!
Optimize Blender Rendering with iRender’s Powerful Servers
If your current setup struggles with heavy scenes in Blender, resulting in noisy renders, one of the smartest tips is to offload your renders to a cloud-based solution like iRender. We give you access to high-performance GPUs, so you can render faster and more efficiently, no need to upgrade your own hardware. We are proud to support all popular 3D software, including Blender Cycles, with all versions.
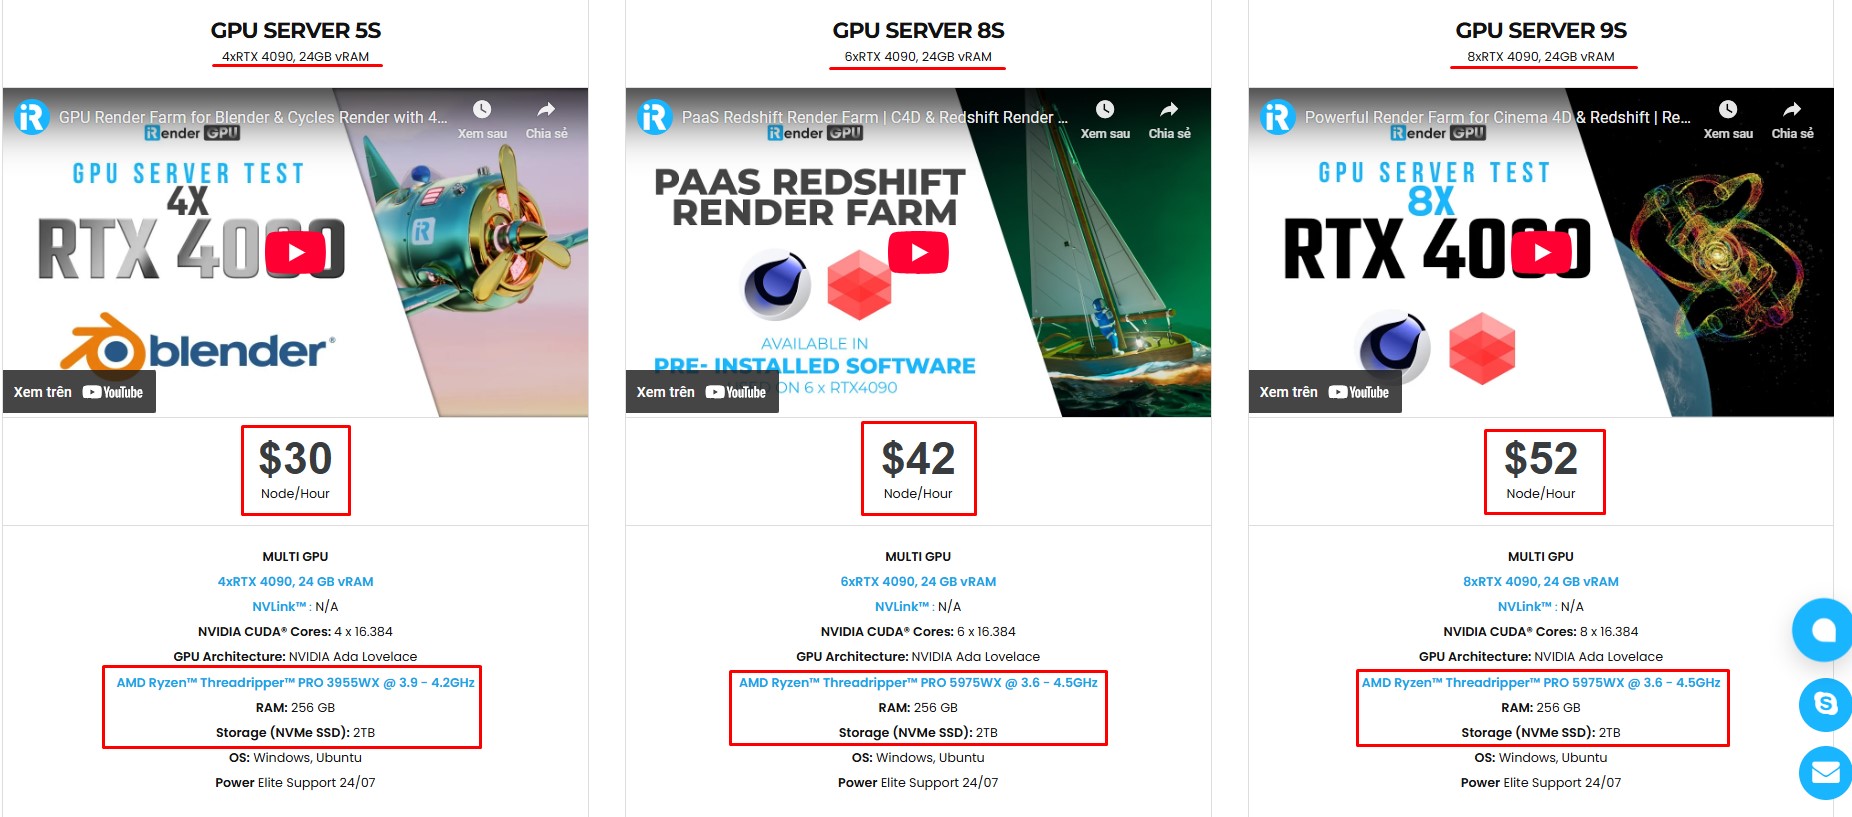
iRender offer the most powerful RTX 4090 configuration packages on the market, all equipped with AMD RyzenTM ThreadripperTM PRO 3955WX @ 3.9 – 4.2GHz and AMD Ryzen™ Threadripper™ PRO 5975WX @ 3.6 – 4.5GHz processors, 256GB RAM and 2T NVMe SSD hard drive capacity. With a wide range of GPU servers (1/2/4/6/8x) – RTX 3090/4090, you can choose the server that suits your needs to start the rendering process.
Simple Your Workflow with Blender Preinstalled
Our servers have Blender 4.4.1 preinstalled. You just need to transfer your files, connect to the remote machine. Then you can render yourself like the way you do on your local PC. Setting up ONCE and your working environment will be saved and ready to use at any time.

Why choose iRender?
Unlike other services, iRender lets you upload and download files without starting the server, saving you both time and money. We offer a Desktop app for Windows with a full feature set and a simple Drive app for macOS for easy file transfers. Here’s why iRender is a top choice for your rendering needs:
- 100% Software Support: We support all 3D software, their plugins, and render engines.
- Full Control: Our service will give you full control over the servers you rent. Therefore, you are free to create your own working environment.
- Go Green: We are committed to using 100% solar renewable energy towards environmental sustainability.
- Real-human 24/7 Support: Our professional support agents and technicians guarantee to bring you the best rendering experience.
Let’s see our latest performance test for Blender Cycles on our servers; you’ll definitely see the difference!

If you still wonder if this is the right place for your project, REGISTER NOW to get a trial and receive a 100% bonus promotion for your first transaction within 24 hours of registration with us.
This June, let’s celebrate our 6th anniversary with the biggest offer ever!

For more detailed information, please contact us via Live chat 24/7 or WhatsApp: +(+84) 912-785-500 or Email: [email protected]
iRender – Happy Rendering!
References: blenderbasecamp.com, digitalarthub.net
Related Posts
The latest creative news from Blender Cloud Rendering.