How to set up Blender UDIM UV?
Blender is a powerful 3D software widely used by artists and designers to create stunning visual effects, animations, and models. One of the key features that many professionals rely on is the UDIM UV mapping, which allows for seamless texturing of high-resolution models. In this article, iRender will guide you through how to set up Blender UDIM UV mapping.
What is Blender UDIM UV?
Blender UDIM is a feature that allows artists to work with UV maps in a way that supports texturing high-resolution assets. UDIM stands for “U-Dimensional Images,” and it’s a way of organizing multiple texture tiles into a single UV space. This enables artists to work with higher-resolution textures by assigning each tile a unique identifier, making it easier to texture complex models without running into texture resolution limitations.
Besides, UV refers to “UV mapping,” which is applying a 2D texture to a 3D model. UV mapping involves unwrapping the 3D model into a 2D space, allowing texture artists to paint or project textures onto the model. The term “UV” comes from the 2D coordinates (U and V) used to describe the 2D texture space of the 3D model.
When these two features are used together in Blender, artists can take advantage of the enhanced texturing capabilities provided by UDIM while precisely mapping those textures onto their 3D models using UV mapping techniques. This combination allows for more detailed and refined texturing of models, especially when working with high-resolution assets.
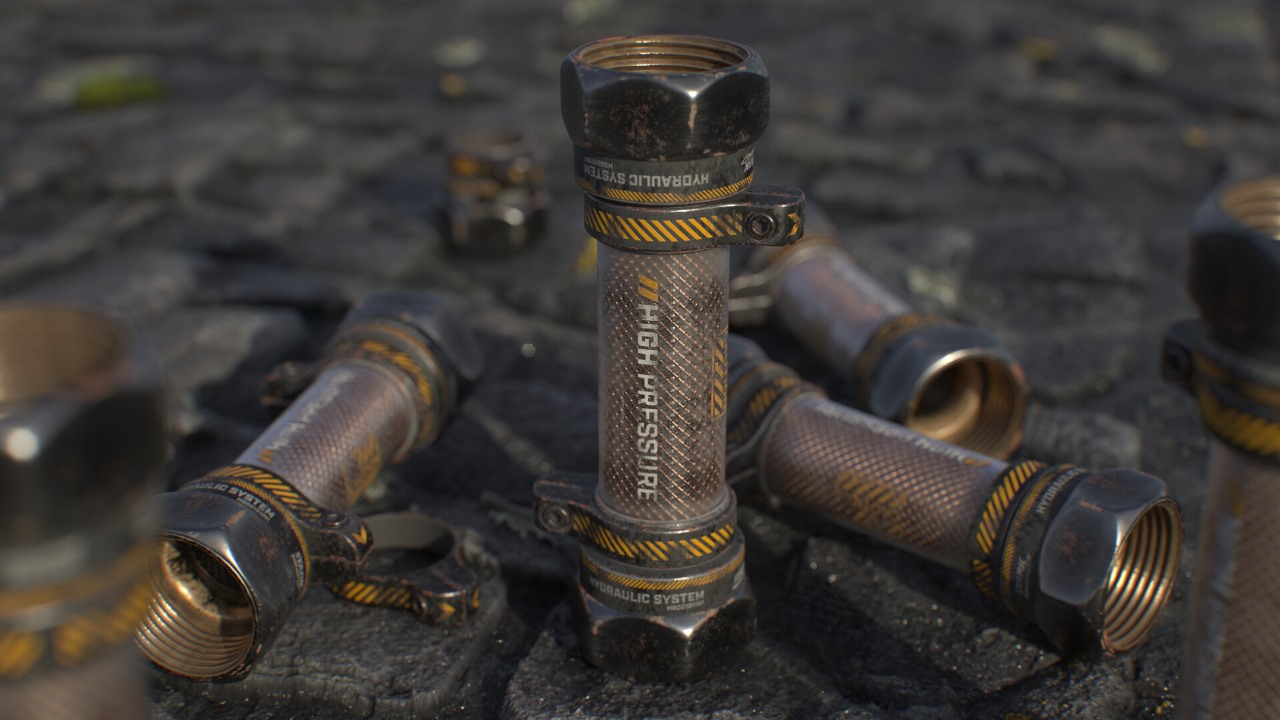
Image source: vfxonfire.artstation.com
Advantages of using UDIM UV Mapping
- Higher Texture Resolution: UDIM UV mapping allows artists to work with higher texture resolutions, providing more detail and realism to their models.
- Efficient Workflow: Texturing assets with UDIMs streamlines the workflow by organizing textures across multiple tiles, making it easier to manage and edit textures.
- Flexibility in Texture Placement: UDIM UVs offer flexibility in placing textures across multiple tiles, providing more control over how textures are applied to different parts of a model. This allows for better utilization of available texture space and contributes to more detailed and visually compelling results.
- Compatibility: UDIM UVs are widely supported in various 3D software and game engines, ensuring compatibility and seamless integration with different pipelines.
- Compatible with Substance Painter and Other Texturing Software: UDIM UVs are supported by industry-standard texturing software such as Substance Painter, enabling artists to seamlessly transfer their models for further texture refinement and painting in these applications.
How to set up Blender UDIM UV?
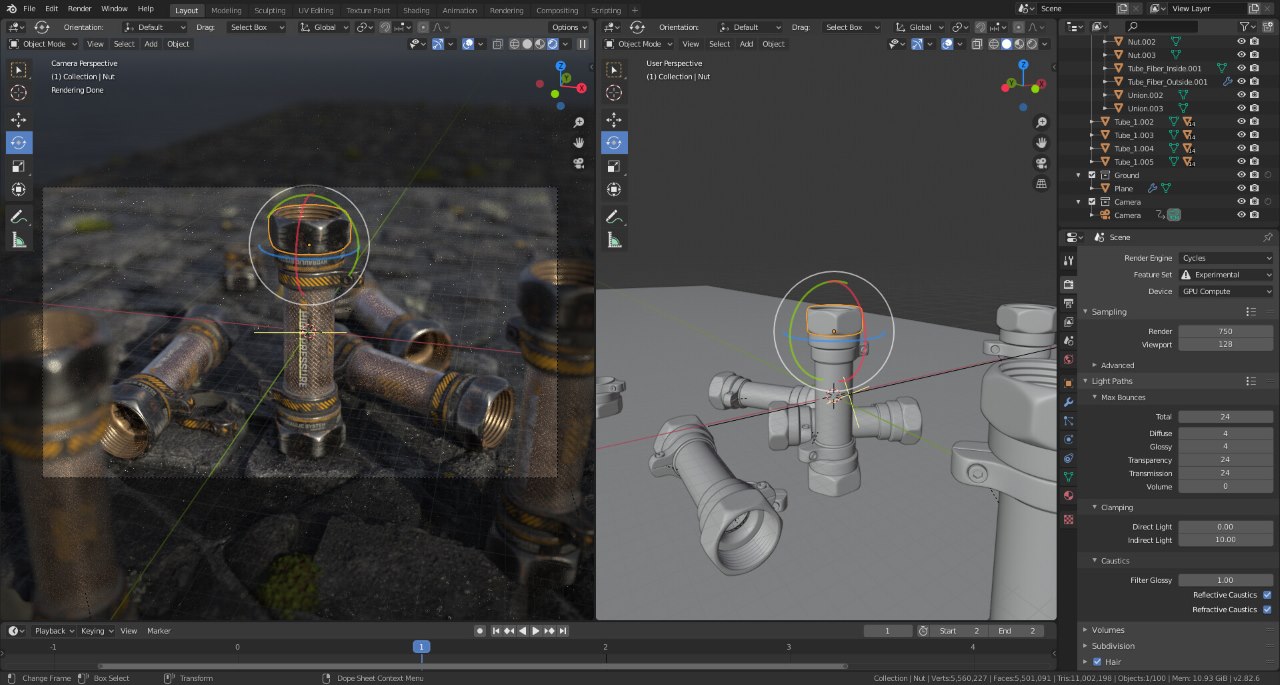
Image source: vfxonfire.artstation.com
Step 1: Model Preparation and UV Unwrapping
Before diving into UDIM UV mapping, ensure that your 3D model is properly prepared and unwrapped for texturing. Use Blender’s UV editing tools to unwrap the model’s geometry, creating a UV map that can be utilized for texturing.
Step 2: Enable UDIM Support
In Blender, go to the Preferences window by clicking on “Edit” > “Preferences.“ In the Preferences window, navigate to the “Add-ons” tab and search for “Node Wrangler.” Enable the Node Wrangler add-on, as it provides additional options for working with textures.
Step 3: UDIM Grid Setup
- In the UV Editing workspace, select your model’s UV map.
- Navigate to the “UV” menu and choose “UV Grid” and then “Add” to create a new UDIM tile in the UV editor.
- You can add multiple UDIM tiles to accommodate the resolution and detail required for your textures.
Step 4: Texture Painting in UDIM
- Switch to Texture Paint mode in Blender.
- Utilize the various painting tools to apply textures onto the model’s UV map, taking advantage of the UDIM tiles to paint across multiple texture spaces.
- Use the “Page Up” and “Page Down” keyboard shortcuts or the Node Wrangler add-on to switch between different UDIM tiles for painting.
Step 5: Texture Export
Once you’re done texturing your model using UDIM UV mapping, you can export the textures for use in other programs or game engines. In the Shader Editor, create a setup to combine all the UDIM tiles into a single texture file using the File Output node.
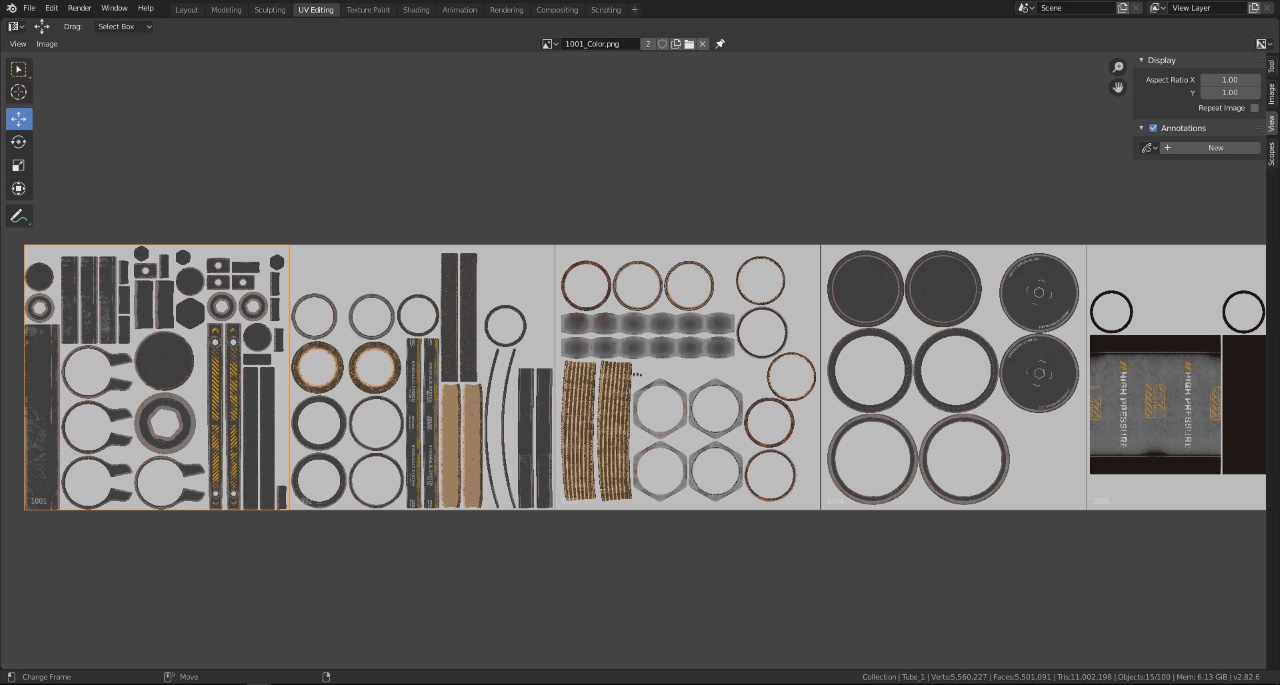
Image source: vfxonfire.artstation.com
Additional Tips
- Creating texture sets for specific components of your model, such as body, head, armor, etc. This can help you manage and organize your textures more efficiently, especially when working with complex models that require multiple UDIM tiles.
- Utilize the Node Wrangler add-on to assist with the management and visualization of UDIM textures in the Shader Editor.
- While UDIM UVs allow for high-resolution texturing, it’s important to balance texture resolution with performance considerations. Assess the optimal resolution for each UDIM tile based on the detailed areas of your model, ensuring that textures are detailed where needed without unnecessarily high resolution in areas that don’t require it.
- When exporting, ensure that your textures are properly organized and labeled according to their respective UDIM tiles for ease of use in external software or game engines.
Conclusion
In conclusion, mastering Blender UDIM UV mapping can elevate your 3D projects to the next level by enabling you to create detailed and realistic textures efficiently. By following the steps outlined in this blog, you can harness the power of UDIMs to enhance the quality of your creations and streamline your texturing workflow in Blender.
Get the best out of Blender UDIM UV rendering with iRender
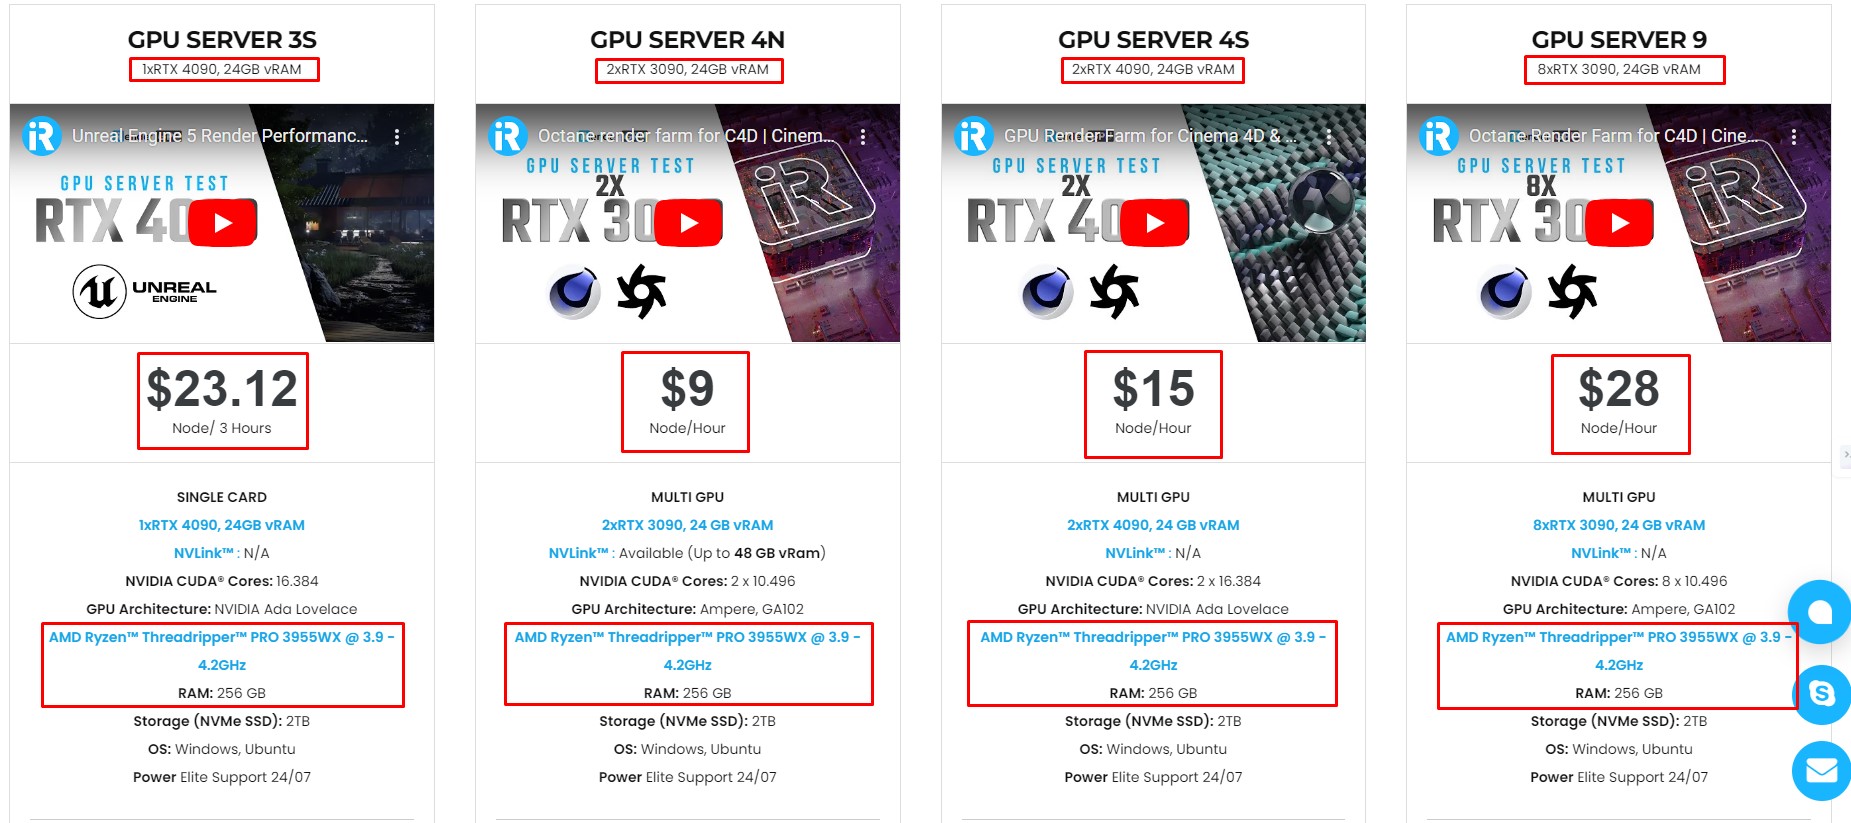
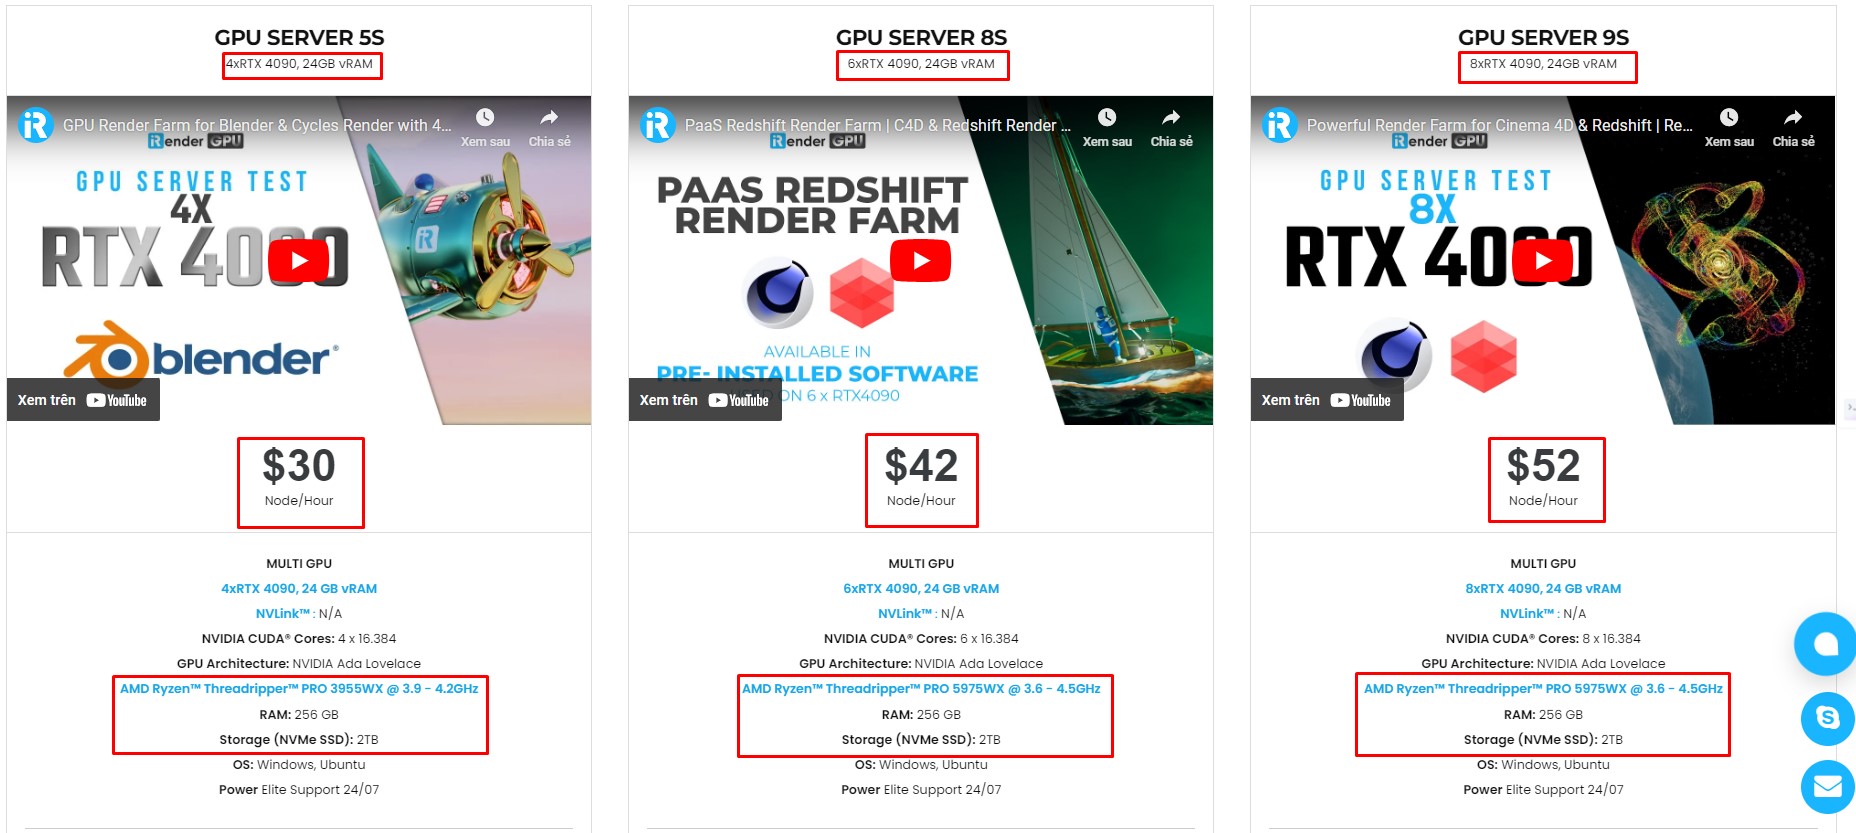
iRender – the best cloud rendering service, provides high-configuration servers that increase CPU and GPU rendering speeds. We offer the most powerful RTX 4090 configuration packages on the market, all equipped with AMD RyzenTM ThreadripperTM PRO 3955WX @ 3.9 – 4.2GHz and AMD Ryzen™ Threadripper™ PRO 5975WX @ 3.6 – 4.5GHz processors, 256GB RAM and 2T NVMe SSD hard drive capacity. With a wide range of GPU servers (1/2/4/6/8x) – RTX 4090, you can choose the server that suits your needs to start the rendering process.
Blender preinstalled
Our servers have Blender 4.2 LTS preinstalled. You just need to transfer your files, connect to the remote machine, and install the necessary render engine and plugins. Then you can render yourself the way you do on your local PC. Setting up ONCE and your working environment will be saved and ready to use at any time.
Why choose iRender?
Transferring data may cost time and money on the remote server. However at iRender, you can upload and download your files without booting the server, then you can save a lot of money. We have an iRender GPU app for Windows PC which integrates all features and is easy to use, and an iRender Drive app for MacOS users to transfer data only. Moreover, there are many reasons why this is the best render farm for your project.
- 100% Software Support: We support all 3D software, their plugins, and render engines.
- Full Control: Our service will give you full control over the servers you rent. Therefore, you are free to create your own working environment.
- Go Green: We are committed to using 100% solar renewable energy towards environmental sustainability.
- Real-human 24/7 Support: Our professional support agents and technicians guarantee to bring you the best rendering experience.
Recently, we have newly released the most powerful ever server – 9S (8xRTX 4090) with CPU AMD Ryzen™ Threadripper™ PRO 5975WX @ 3.6 – 4.5GHz that will boost your rendering process to a new level. Let’s see Blender performance on our powerful servers:


Check out how to estimate rendering time and cost on our server

If you still wonder if this is the right place for your project, REGISTER NOW to get a trial and receive a 100% bonus promotion for your first transaction within 24 hours of registration with us.
This August, we are excited to announce the biggest promotion to save big and boost your rendering power!
- 100% bonus promotion for all transactions from $1500
- 50% bonus promotion for all transactions from $575
For more detailed information, please contact us via Live chat 24/7 or WhatsApp: +(84) 962868890 or Email: [email protected]
iRender – Happy Rendering!
References: docs.blender.org, artisticrender.com
Related Posts
The latest creative news from Blender Cloud Rendering.