How to set up HDRI lighting in Cinema 4D
For several decades now, Cinema 4D has been considered the gold standard for 3D products. It is a user-friendly software that lets customers get in and start. Cinema 4D is a professional 3D software solution that is a fast, powerful, flexible, and stable toolset. It makes 3D workflows more accessible and efficient for all types of visualization professionals. And as we know, creating 3D lighting is a difficult but extremely important thing. The purpose of this article is to look at all the different types of lighting from a high level, explaining when and how to use them, as well as a bit about how to set up HDRI lighting. Let’s get started with iRender.
What is HDRI Lighting?
HDRI stands for High Dynamic Range Imaging, a technique used in computer graphics to create more realistic lighting effects. It is a spherical image that captures the visible environment, including the light source, and allows for more customizable lighting in simulations and animations. The HDRI is a 360-degree image that can create accurate reflections, shadows, and indirect lighting.
HDRI Lighting is technically called ‘image-based lighting. Image-based lighting works by applying a high dynamic range image map (HDRI map) onto an environment light in 3D software. The environment light surrounds the 3D scene and provides HDR illumination, HDR reflections, and an HDRI background for the render.
What is HDRI lighting used for?
Easy Photo-realism
With the help of HDRI mapping, which provides photo-like illumination and reflections that interact with computer-generated objects in a 3D environment, 3D artists may create incredibly realistic 3D representations. Using an HDRI map to create an environment light is an easy approach to add realism to your renderings without much effort.
CG Integration
A key application for image-based lighting is integrating 3D-rendered elements into a photographic background image or movie. This is accomplished by creating a photographic HDRI map at the shooting site, starting from the point where the computer-generated image (CG) item will be inserted into the scene.
Studio Lighting
In 3D software, spherical cameras are used to build a lot of Studio HDRI maps. This uses the 3D scene to create an HDRI map. Photo editing software is used to paint or draw certain studio HDRI maps. That’s not ideal because this isn’t how photo editing software is meant to work.
Set up HDRI lighting in Cinema 4D
Beginning
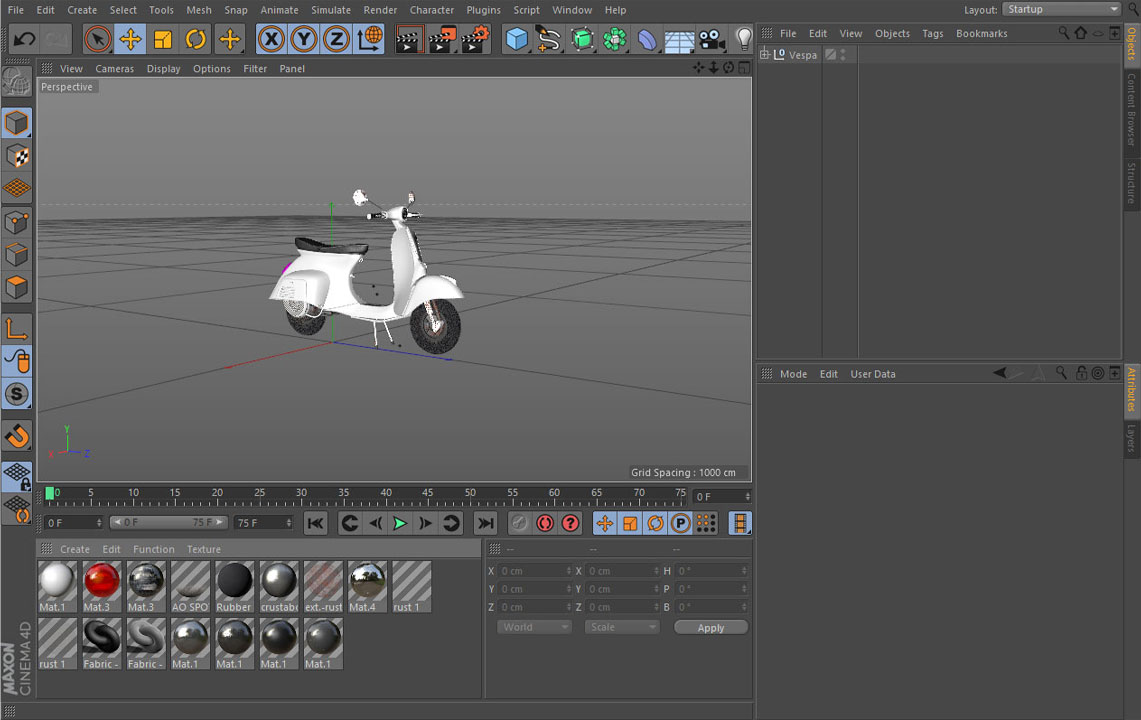
Add a model to the scene or open your project where you want to set up HDRI lighting. To be sure that you can see any changes it is recommended to turn off any CG lighting before beginning. This tutorial is valid for any exterior and interior lighting.
Create HDRI material
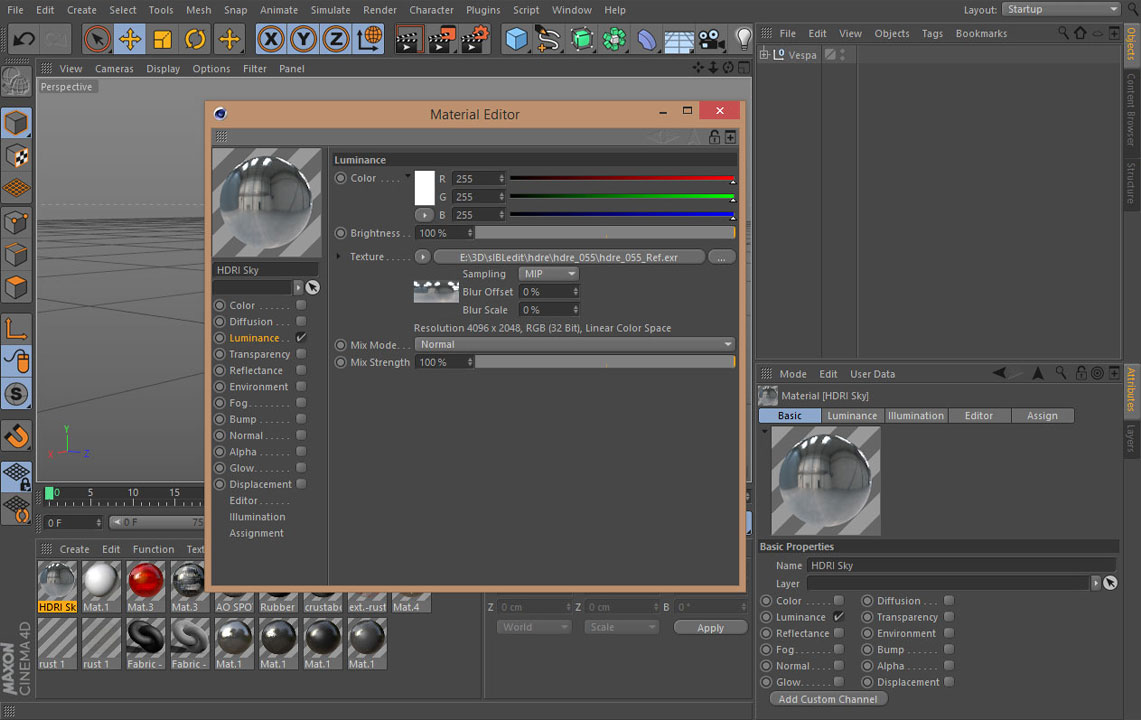
To open Material Editor, double-click the material icon after creating a new one. Give it a moniker, like HDRI Sky.
In the material characteristics, simply check Luminance; uncheck Color and Reflectance.
Open a 32-bit.hdr or.exr map in the Luminance window. You may view the file’s attributes, including resolution, depth, and color space, under file input. Verify that everything appears as it does in the picture.
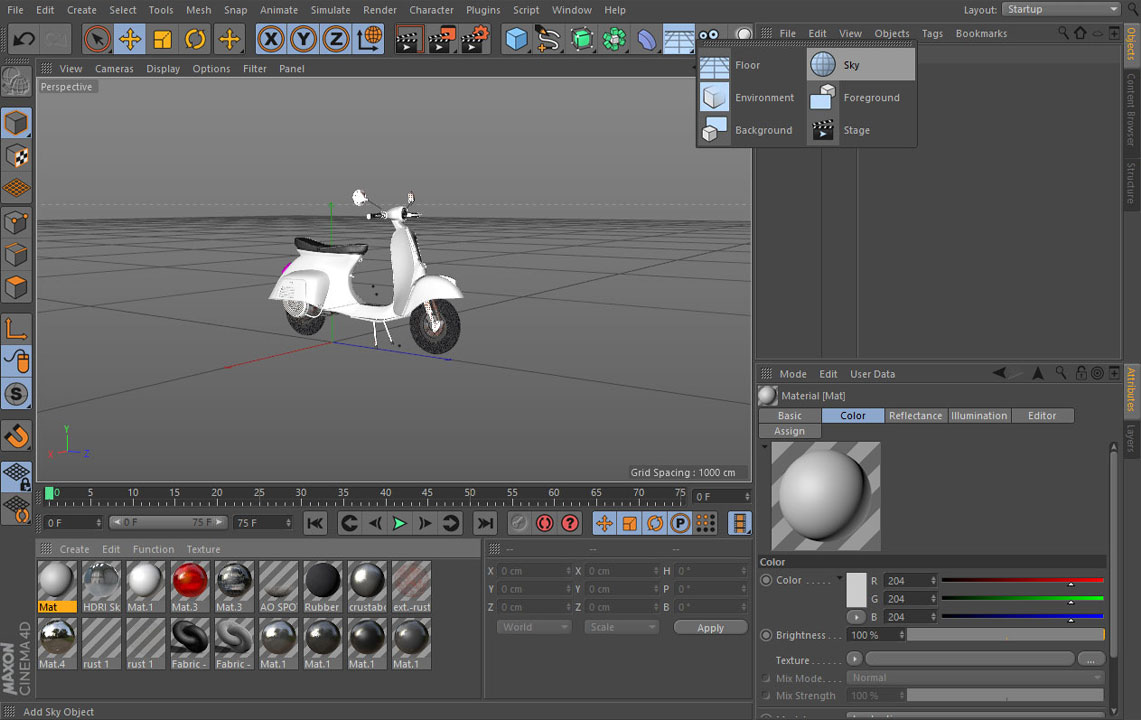
Create a sky object and apply materials
Set up Sky Object in the scene. By clicking on the tiny arrow in the lower right corner, you can choose it from the Floor menu.
After dragging and dropping HDRI Sky material over the Sky symbol, it will become part of the Sky Object.
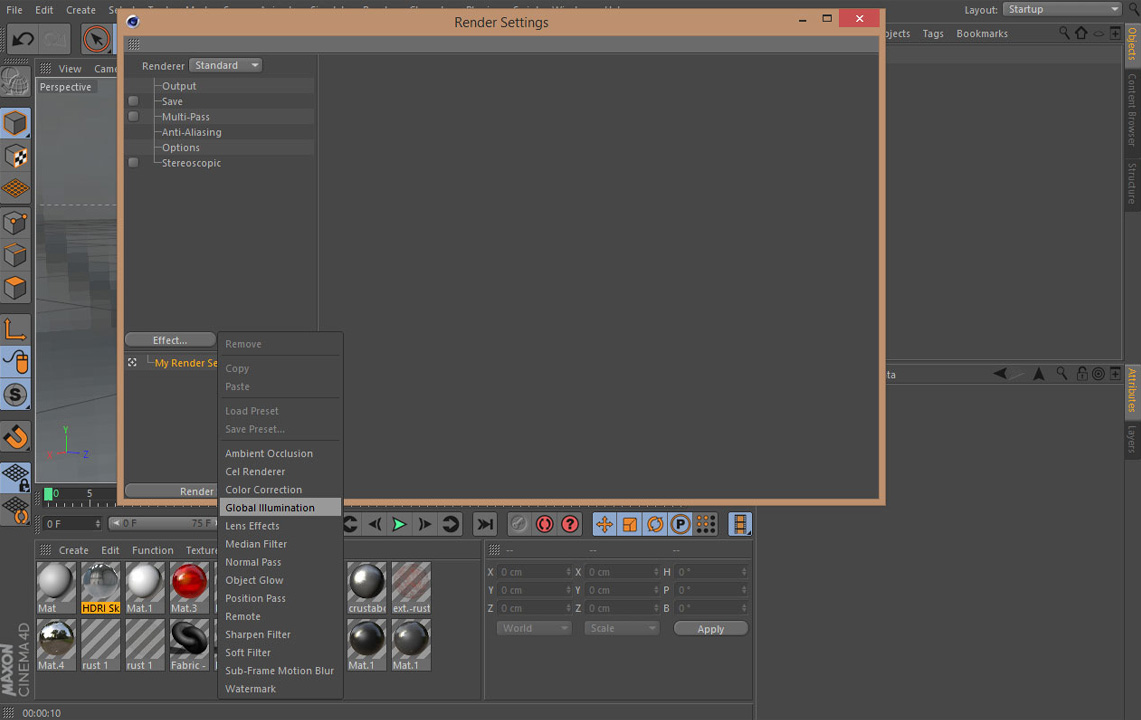
Turn on Global Illumination
Because Global Illumination is not turned on by default in Cinema 4D, you won’t see any results when you press the Render button. You must add Global Illumination to the Effect setting under Render > Edit Render Settings in order to accomplish this. You can select a preset based on the type of scene you are in the General tab, or you can keep it at Default.
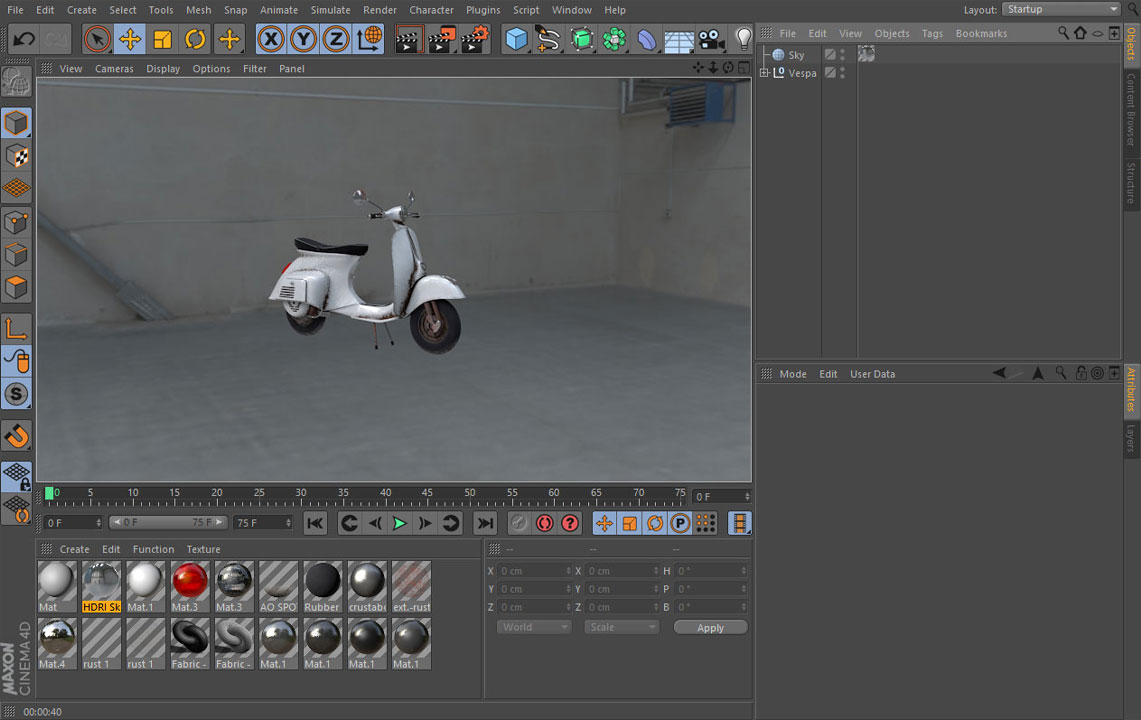
Test render
If you hit the Render View button you will see that HDRI is lighting nicely your scene now, but unfortunately, there is no shadow under the model. To fix it you need to create a shadow catcher.
Shadow Catcher
Just beneath the model, create a Floor object, then move it and the model to match the floor seen in the HDR background. After that, apply the Compositing Tag to the floor by going to Tags > Cinema 4D Tags > Compositing. Compositing Background and Compositing Background for HDR Maps should be checked in Tag Properties. You can see lovely shadows beneath your model by firing a render right now.
Futher Configurations
Add a Compositing Tag to the Sky Object and deselect Seen By Camera to render the HDRI invisible. You can add an additional Sky Object with an additional map; I would recommend adding a tone-mapped HDRI map that is only visible to the camera and to Reflection, Refraction, and Transparency.
iRender- The best cloud rendering for Cinema 4D
iRender provides you a high-performance and configurable server system for 3D rendering, AI Training, VR & AR, simulation, etc. iRender speeds up your projects with unlimited GPU rendering resources. Our GPU render farm houses the most powerful 3D rendering machines. Configure from 1 to 8 GPU with RTX 4090/RTX 3090, Threadripper Pro CPUs, 256GB RAM, and 2TB SSD storage.
As an official partner of Maxon, we provide pre-installed Cinema 4D and Redshift machines. Therefore, each user can use 1 our Redshift/ Cinema 4D license. You can watch our the workflow here:
If you have more GPUs, the render time will reduce more. However, it sometimes depends on your projects.
Let’s see our test with Cinema 4D on our package 8 x RT4090s:

In case you have any problems or questions, don’t hesitate to contact the 24/7 support team. We will be happy to help you with your questions and problems at all times.
This month, we are running a SPECIAL OFFER: 100% Additional Bonus for new clients who register an account and make a top-up within 24 hours after their registration.
Register an account today to experience our service.
Or contact us via the email [email protected] or WhatsApp: (+84) 912075500 for advice and support.
Thank you & Happy Rendering!
Source and images: hdrmaps.com
Related Posts
The latest creative news from Cinema 4D Cloud Rendering , V-Ray Cloud Rendering