How to transfer things from one Cinema 4d version to another
There’s a lot you might want to switch from version to version, which takes a long time to re-do every time you switch Cinema 4D versions. But you know, there are some simple ways to transfer all this custom content from one version to another!
There are different techniques for each type of thing you want to transfer, so let’s explore with iRender how to transfer your content from Cinema 4D version to version, by type of content:
Layout
While using Cinema 4D, you may want to modify the layouts you use to personalize your experience. You may even have used Cinema 4D’s “Save as Startup Layout” feature so that you can use the custom layout without having to switch layouts at all.
To transfer your custom layouts to a new version, just go to Window > Cutomization > Save Layout As and save the layout file to your desktop, or whichever folder you’d like to save it in.
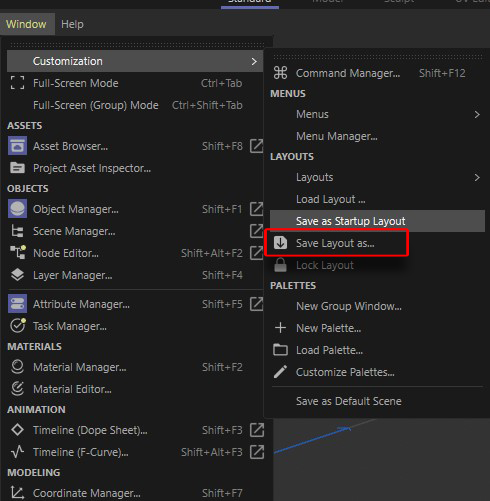
You can then choose “Load Layout” in the new Cinema 4D release to load that Layout into the new version. Once you’ve done this, you can also choose “Save As Startup Layout” as well so you don’t have to switch layouts after launching Cinema 4D.
Custom Assets
If you have custom assets saved to a local Asset Browser on your machine, you can simply load these same assets into new versions of Cinema 4D. To do that you just need to go into the Asset Browser and from the Create Menu choose “Mount Database“
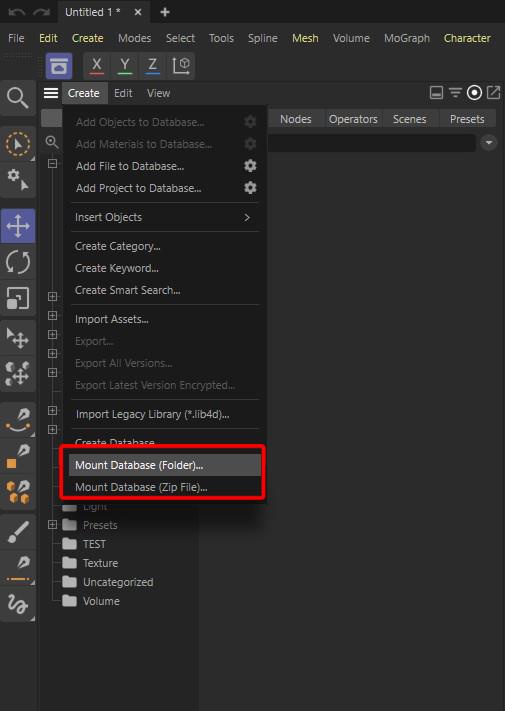
Then choose the folder where your assets live, and click “Select Folder”. You will need to close and re-open Cinema 4D, to load the database properly, but after that they should all load in, same as your previous version.
Preferences
You may have also set up some custom Preferences to make your Cinema 4D experience a little more personalized. These are a bit trickier to transfer over than other things, but the good news is it can still be done fairly easily!
First, go to Edit > Preferences in Cinema 4D and then click “Preferences Folder” on the bottom left:
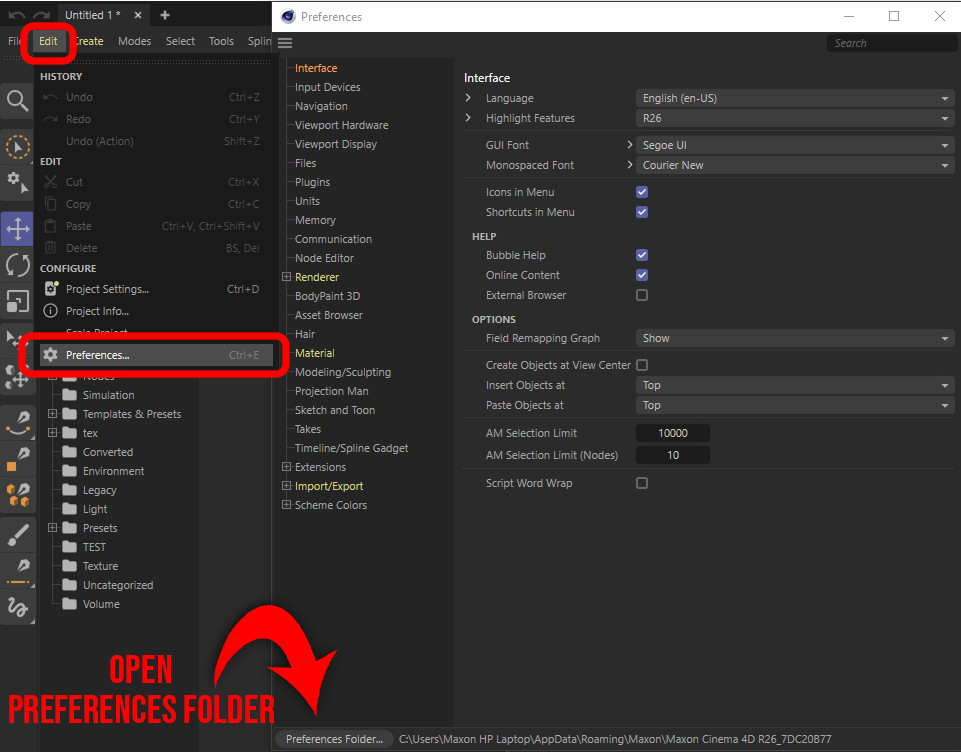
This will open a Finder (Mac) or Explorer (Windows) window.
Once this window is open, you need to close Cinema 4D. Do not skip this step, it is very important!
You’ll also need to open this folder for the Cinema 4D version you’re transferring preferences to. Again, once you do this, make sure Cinema 4D is closed down.
Once that’s done, follow these steps:
Look for the Maxon Cinema 4D R2*_******* folder.
- There may be another folder with a _ letter after the random characters, but you’ll want to be in the folder without an _ letter. For example, Cinema 4D R2*_*******_c is the preference folder for Team Render Client, Cinema 4D R2*_******* is for Cineam 4D.
- Go into the Cinema 4D R2*_******* folder.
- Copy all folders and files in this folder.
- Go back one folder in the hierarchy
- Now go into the Cinema 4D R2*_******* folder you are trying to move the custom prefs to
- Delete all the files and folders
- Paste the copied files and folders into the current preference folder.
Plugins
Much like custom assets, you can load plugins into Cinema 4D quite easily just by pointing Cinema 4D at the plugins folder you used before.
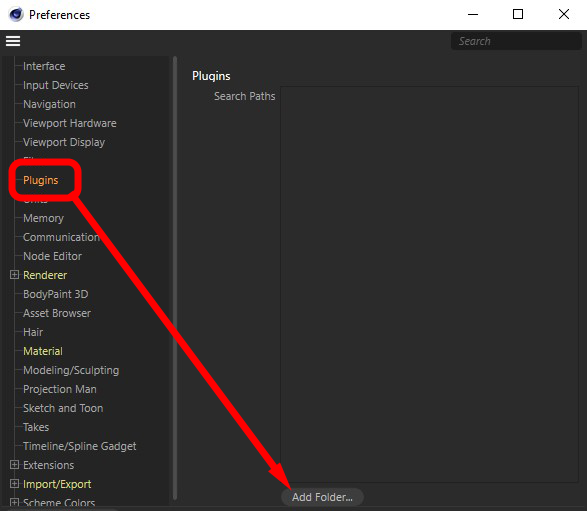
Just go to Edit > Preferences, and go to the Plugins section. In here, click “Add Folder” and then find your Cinema 4D plugins folder and choose OK. Once you close and re-open Cinema 4D, all of your plugins should load back in!
Note that this will NOT work if you manually created a “plugins” folder in your Cinema 4D installation folder (C:\Program Files\Maxon Cinema 4D *** on Windows, and Applications/Maxon Cinema 4D *** on Mac where *** is the Cinema 4D release number). If you used this method, you can copy this folder to the new Cinema 4D version’s installation folder and then close and re-open Cinema 4D and you’re all set!
Also, note that many plugins will need to be updated to work with new versions of Cinema 4D, so even though you’ve done this properly, it may not work for all plugins! If it’s not working, try contacting the plugin developer and see if the plugin is compatible with the release of Cinema 4D you’re trying to upgrade to.
iRender - The Best Cloud Rendering Solution for Cinema 4D
iRender is proud to be a professional GPU Accelerated Cloud Rendering Service provider in HPC optimization for Render, CGI, and VFX tasks with more than 25,000 clients. We are appreciated in many global rankings (e.g. CGDirector, Lumion Official, Radarrender, InspirationTuts CAD, All3DP, BlenderBaseCamp, VFX Rendering.)
Our Services
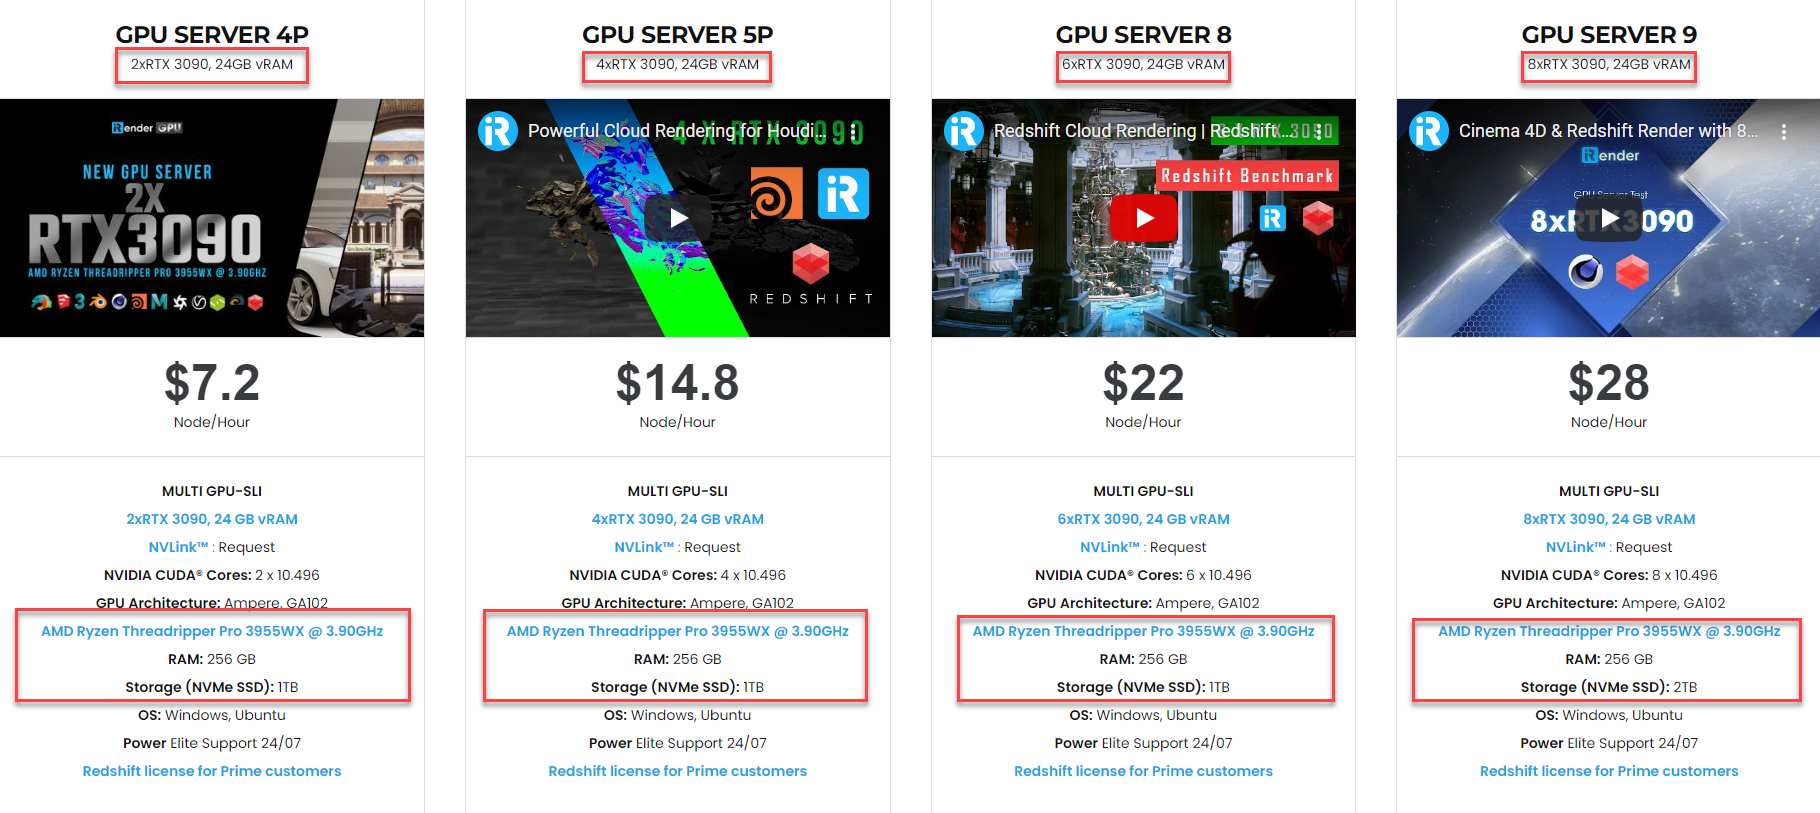
We have developed multiple RTX 3090 server packages that are specifically configured and optimized for GPU rendering. With a range of GPU servers from a single RTX 3090 to multiple 2/4/6/8 x RTX 3090, you can choose a server that meets your needs and your software to start the rendering process. All information on the server configuration is publicly posted on our website. You can know exactly what the server specification contains, the type of CPU and GPU it has, and its cost as well.
We are currently providing Redshift Floating license and OctaneRender Enterprise license for our Prime customers. Let’s enjoy working on our RTX 3090 beast machine with the provided licenses. Moreover, we are running a SPECIAL OFFER: 20% Additional Bonus for new users who register an account and make a top-up within 24 hours after registration.
If you have any questions, please do not hesitate to reach us via Whatsapp: +(84) 972755742. Register an ACCOUNT today and get FREE COUPON to experience our service. Or contact us via WhatsApp: +(84) 972755742 for advice and support.
iRender – Happy rendering
Source & pictures: maxon.com
Related Posts
The latest creative news from Cinema 4D Cloud Rendering , Redshift Cloud Rendering, Octane Cloud Rendering, 3D VFX Plugins & Cloud Rendering.