Improve Your Renders With the dForce Wind Node in Daz Studio
Have you been trying to make your Daz Studio renders better? When considering the dForce Wind Node’s capabilities carefully, it may be a way to avoid uncanny characters in our renderings indirectly, improve the realism of our compositions, and add a fun dynamic to our creation. Let’s explore dForce Wind Node in Daz Studio today with iRender.
What Is dForce in Daz Studio?
To accurately reproduce the physical collisions and interactions of soft materials like cloth and hair, the physics engine dForce was created for Daz Studio. dForce Wind Node in Daz Studio is capable of a wide range of tasks and can contribute to the realistic, natural appearance of your outputs.
dForce is included by default in your download of Daz Studio.
If you are using dForce-enabled objects, you’ll quickly be able to start running simulations, during which the desired objects will simulate the effects of gravity, air resistance, and realistic collision with other objects.
dForce is handled through the Simulation Settings panel in Daz Studio.
Where’s the dForce Wind Node Located?
Like most users, you probably scoured the simulation settings panel and couldn’t find anything about the wind node. This is due to the wind node’s slightly different operation. It can be used independently without the need for gravity simulations or the other settings you’ll generally use when performing dForce simulations.
And like a point light or a camera, the dForce Wind Node is a real in-scene component. It won’t render, but it’s still there in your scene. It’s interesting to note that, unlike simulated gravity, the wind node doesn’t apply evenly throughout the entire scene. Instead, the wind is concentrated to a specific spot, with specifically set start and fall-off points. You will set up your dForce Wind Node similarly to how you set up a point light or a spot light.
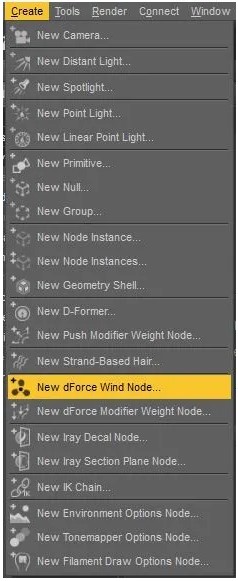
To add a dForce Wind Node to your scene, navigate to Create > New dForce Wind Node.
How to Use Proper Wind Node Settings?
Once the new wind node has been added to your scene, you should see a wireframe object that looks like this:
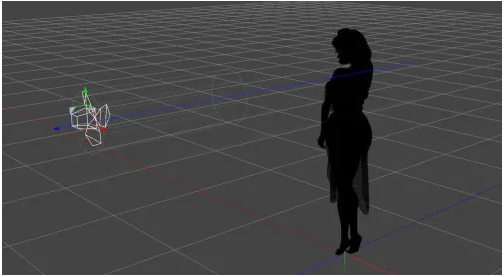
If you look closely, you should see a wireframe fan with fan blades. There’s also a cylindrical structure with two parts coming out of the front end of the fan. Think of this cylinder as a wind tunnel. It’s demonstrating the area the wind node will affect.
Within the cylinder, you can see two rings or donut-like shapes. The first demonstrates the radius of the effect, as well as the point where the effect will begin. The final ring shows the fall-off point at which the wind effect will conclude. This can be a point of confusion when configuring and troubling shooting your dForce wind node, so we’ve clearly illustrated the zone of effect in this image here:
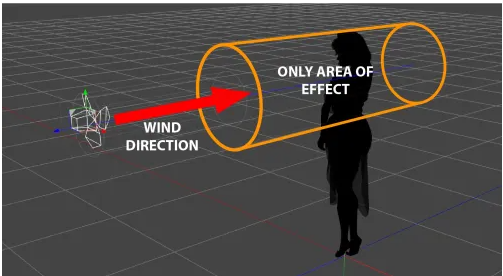
As you configure your wind node, ensure that the radius is wide enough and the wind tunnel is long enough to capture the entire area you want the wind to affect.
Important settings to consider are:
- Strength (mph): This setting determines the strength of the effect.
- Diameter: This sets the overall size of the wind tunnel effect.
- Diameter Falloff: This setting dictates the size of the inner rings on the tunnel. From the start of the inner ring, to the edge of the outer ring, the wind effect is going to begin to fall off, i.e. weaken. Outside of the cylinder, wind strength will be zero.
- Falloff Start (m): This is where the effect begins.
- Falloff Length (m): This dictates where the dForce wind effect ends.
As you set the wind strength and other settings, make sure to move your perspective view to different angles and ensure that all aspects of your scene that you want to be impacted by dForce Wind falls within the area of the effect. You may set a wind strength but get undesirable results due to fall off or part of your figure being outside the area of effect entirely.
Run the Simulation
Once you’ve got the wind tunnel configured, go ahead and run a simulation, just like you would with a standard dForce simulation. You can do this by clicking on the blue Simulate button located at the upper right corner of the Simulation Settings panel. If you’re only adding wind, default settings will suffice.
From here, it’s no different than running a standard dForce simulation; however, this time, Daz Studio will calculate the effect of the wind tunnel on your dForce-compatible objects.
One word of caution — after running the simulation, you may encounter amounts of poke-through depending on the character and clothing items you used. Fixing this shouldn’t be an issue with Daz Studio’s variety of shaping sliders.
For reference, here’s the same pose with and without the wind node applied. In some cases, the extra details may be subtle, but these little details can really add a lot to your image!
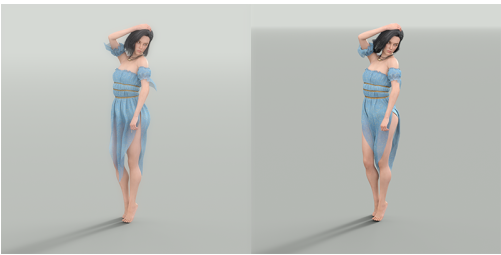
Overall, this is a fantastic approach to enhance your render’s realism and intrigue. It goes well with accessories like draperies and more, as well as with apparel and hair.
iRender - The Best Cloud Rendering Solution for Daz Studio
iRender is proud to be a professional GPU Accelerated Cloud Rendering Service provider in HPC optimization for Render, CGI, and VFX tasks with more than 25,000 clients. We are appreciated in many global rankings (e.g. CGDirector, Lumion Official, Radarrender, InspirationTuts CAD, All3DP, BlenderBaseCamp, VFX Rendering.)
Our Services
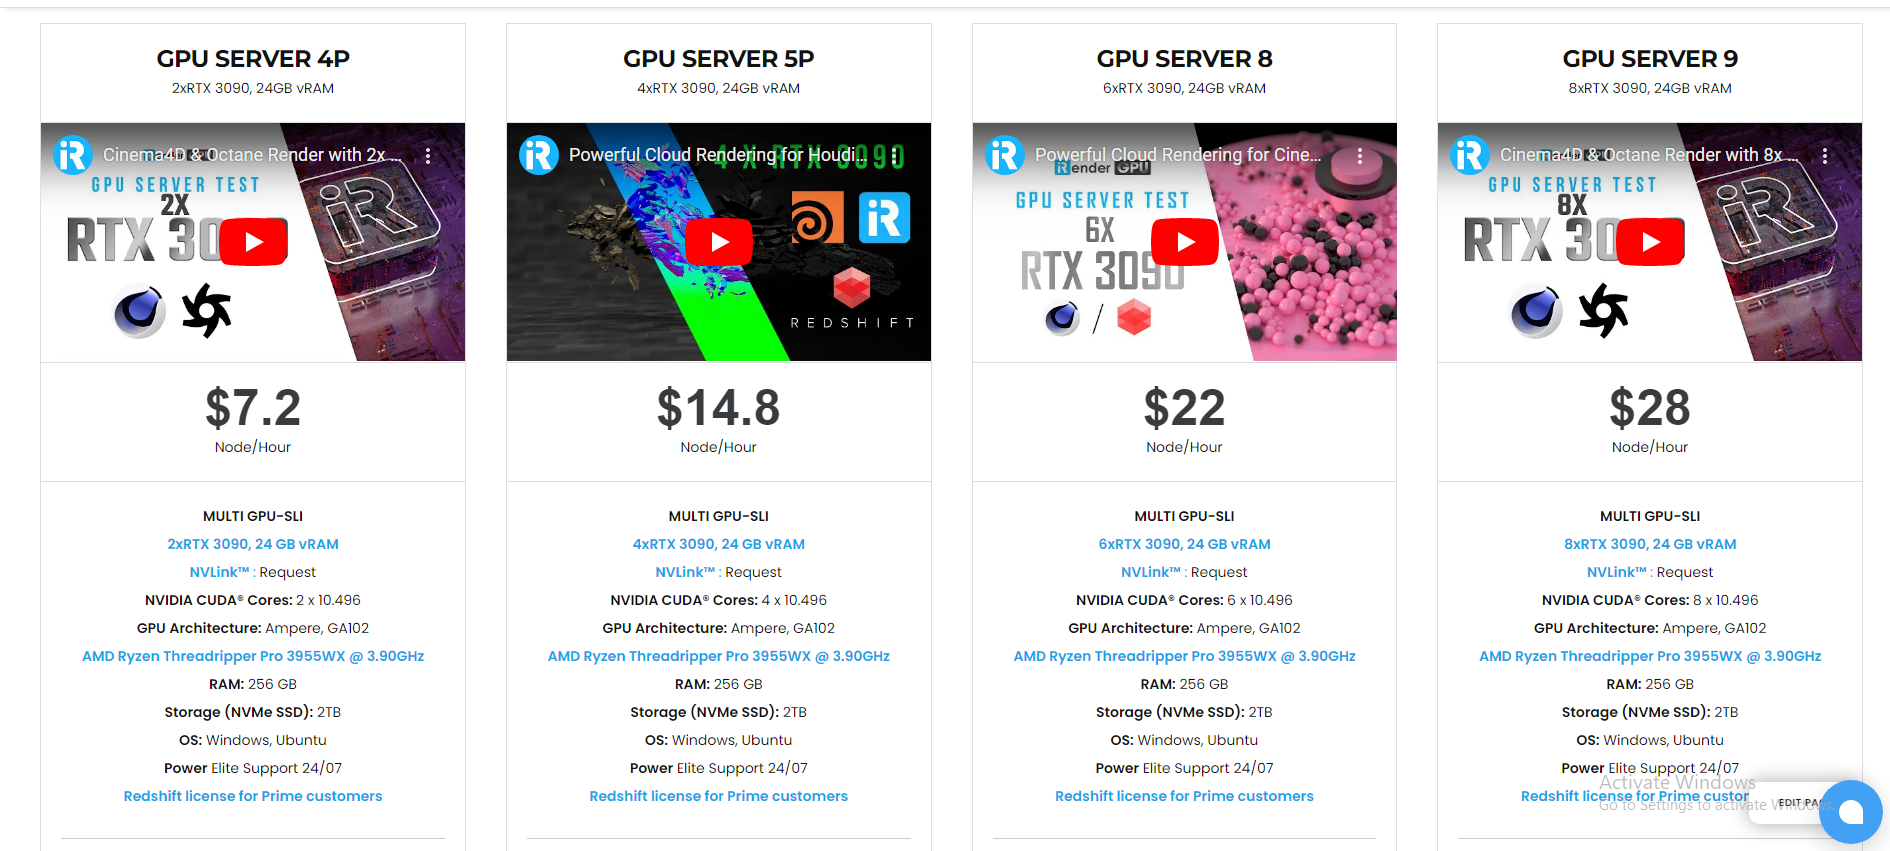
We have developed multiple RTX 3090 server packages that are specifically configured and optimized for GPU rendering. With a range of GPU servers from a single RTX 3090 to multiple 2/4/6/8 x RTX 3090, you can choose a server that meets your needs and your software to start the rendering process. All information on the server configuration is publicly posted on our website. You can know exactly what the server specification contains, the type of CPU and GPU it has, and its cost as well.
If you have any questions, please do not hesitate to reach us via Whatsapp: +(84) 972755742. Register an ACCOUNT today and get FREE COUPON to experience our service. Or contact us via WhatsApp: +(84) 972755742 for advice and support.
iRender – Happy rendering
Source & Picture: Daz3D Blog
Related Posts
The latest creative news from Daz3d Cloud Rendering, Nvidia Iray Cloud Rendering , Octane Cloud Rendering, V-Ray Cloud Rendering , 3D VFX Plugins & Cloud Rendering.