Lighting in Rhino and Enscape with iRender
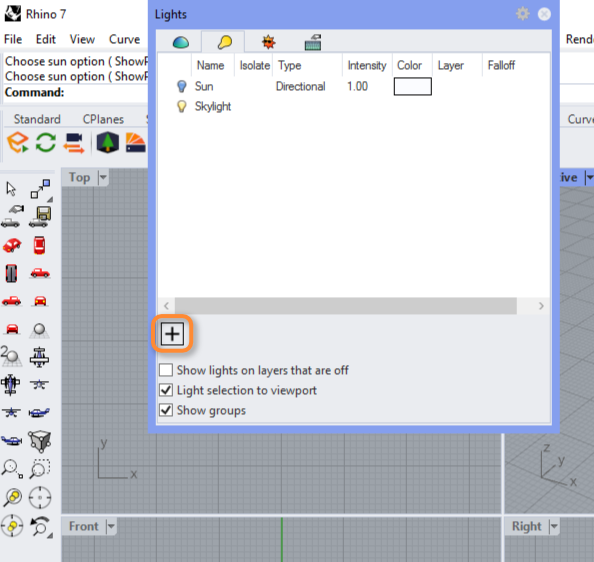
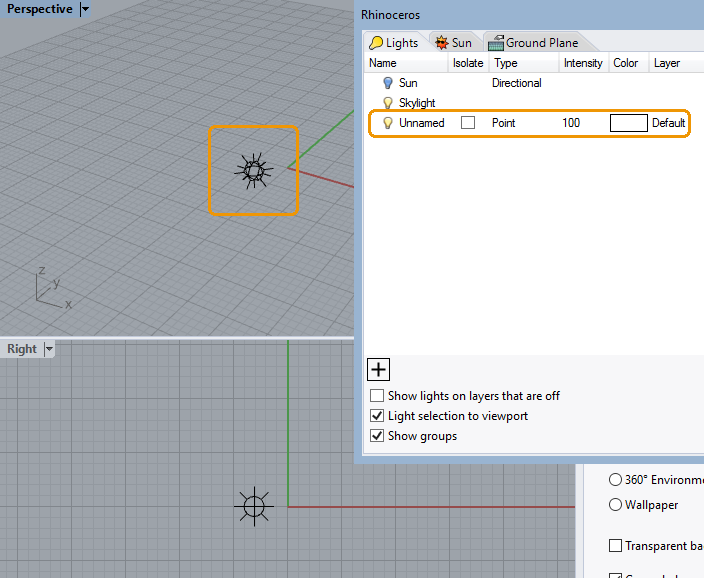
The quickest and easiest way to open and start working with Lighting in Rhino is to type Lights in Rhino command line, after which Rhino’s Lights panel will open. You can also open the Lights panel in Rhino via the Rhino Panels menu.
The Lights panel opens with two default lights already listed. These are the Sun and Skylight. To place an artificial light in Rhino, click the + sign near the bottom of the Rhino Lights window and a menu will appear that lists all the different types of lights available in Rhino. Not all of these lights listed are supported by Enscape however.The last thing of note is that currently Enscape is not supporting IES Lighting in Rhino.
The lights that are available in Enscape are:
- Point Light – Emits light equally in all directions from a single point in space
- Spot Light – Directs a narrow beam of light with Falloff
- Linear Light – Imitates a fluorescent light tube
- Rectangular Light – Inserts a rectangular light object that emits light from an array of points in a set direction.
When you place a light in the scene, it becomes listed in Lighting in Rhino panel along with some of the light’s properties, such as it’s intensity, color, and also on which layer in Rhino it is residing.
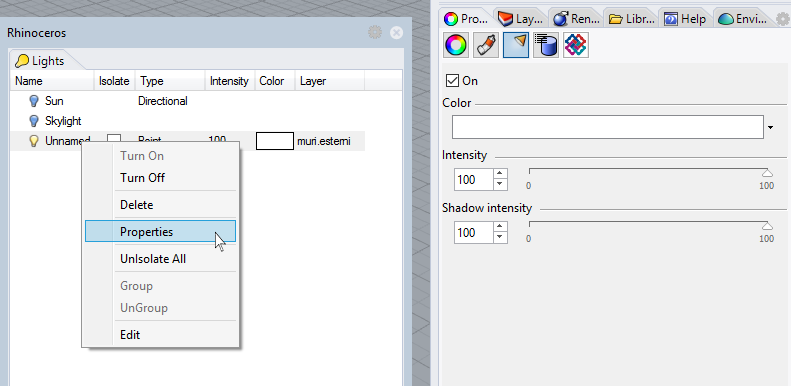
When right-clicking a light in Rhino’s Light panel, you are given the option to show the lights Properties panel, and this offers some extra options for a light if available for that light type. Any changes to a light’s properties will be instantly seen in Enscape as long as Enscape’s Live Update option is enabled.
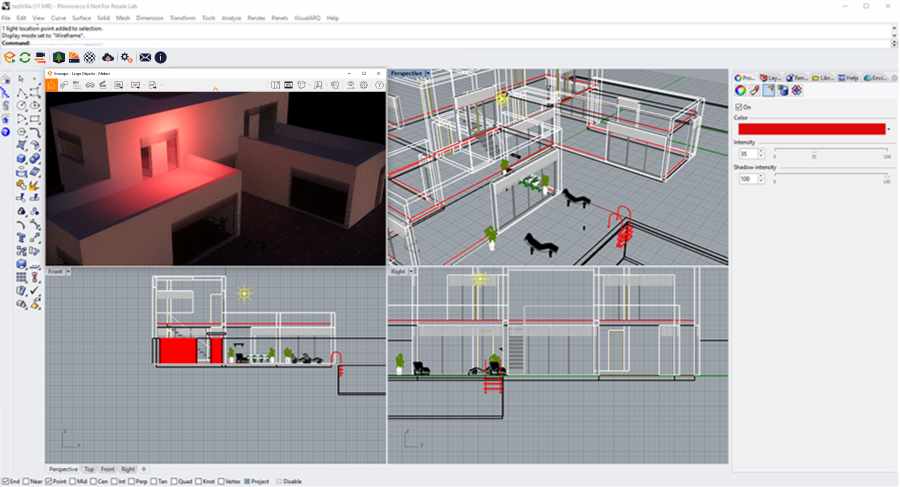
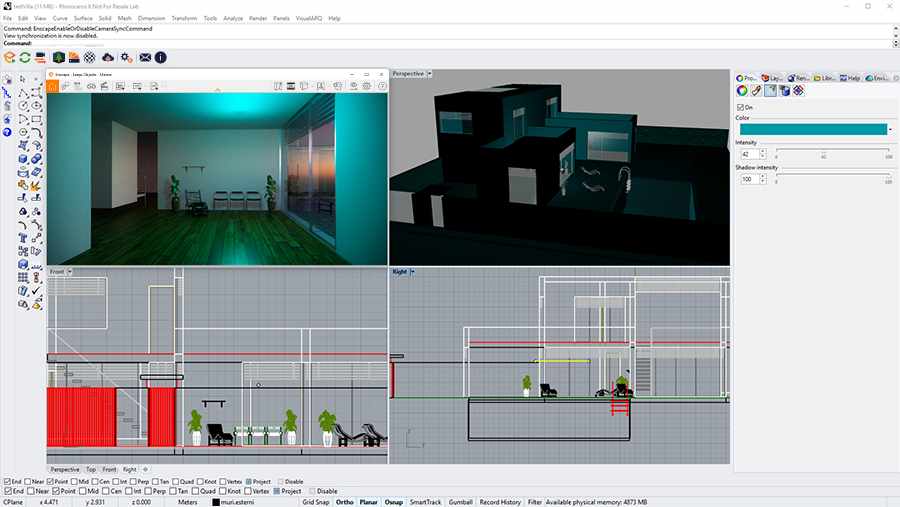
1. Point Light
Here, you can see a point light has been inserted into a scene (displayed in yellow) and it’s intensity and color have been adjusted from the Light’s Properties panel. These changes will be visible in the Enscape window instantly if Enscape’s Live Updates are enabled.
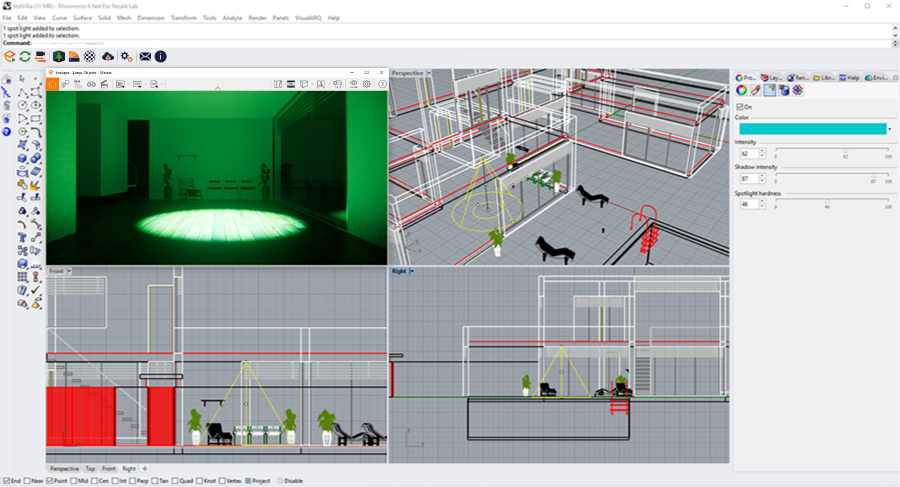
2. Spot Light
When placing a Spot Light in Rhino, the first click will define the lights cone base and the second click will define the cone direction. After placing the light Rhino provides a number of control points for you to adjust the light.
Furthermore, once placed, spotlights can have the Color, Intensity, Shadow intensity, and Spotlight hardness adjusted.
3. Linear lights
Linear lights are easily placed with two clicks, the first click will define the start point and the second click defines the length of the linear light.
4. Emissive Lights
There is one other type of lighting option that is available in Rhino that has not been mentioned.
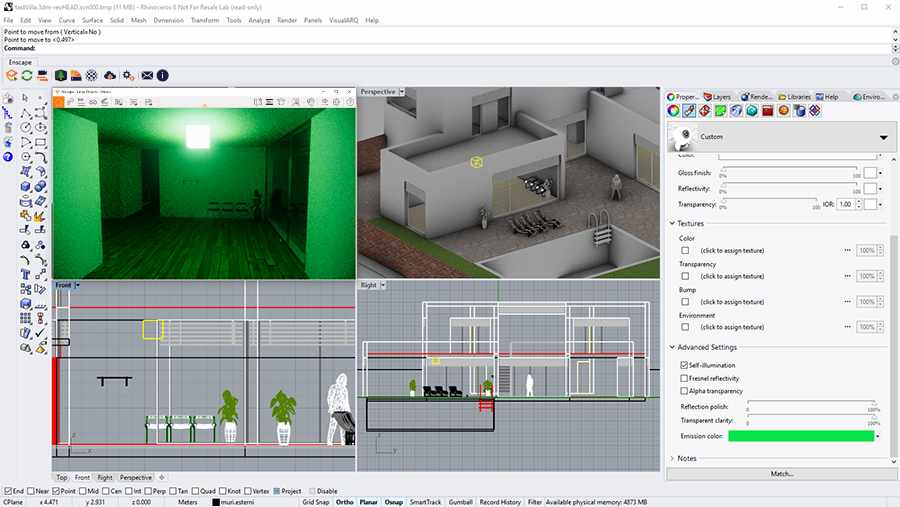
Emissive lights, that are not available via Rhino’s Light panel section, must be considered an additional lighting option. An Emissive light will act in a similar way as a Point Light in that it will emit light equally in all directions, but instead of emitting that light from one point, the light is emitted from the entire surface where the material is applied.
In the example screenshot below you can see that a cube object has been placed in the scene, highlighted in the Rhino Viewport as a yellow cube. This object initially requires that a default material is assigned to one or all of it’s surfaces and that the Material Type is set to Custom in the Rhino Material panel, or to Enscape if you want to use the Enscape Material Editor to adjust the emissive material.
Under the Advanced Settings section of the Material panel, make sure that Self-illumination is checked. Then set the Emission color. Additionally, if editing the material in the Enscape Material Editor, then you can also adjust the materials luminosity. To see the emissive surface in action, set the time of day in the Enscape window to night hours.
5. Cloud rendering service for Enscape and Rhino
iRender provides a high performance and configurable server system for 3D rendering, AI Training, VR & AR, simulation, etc. With our server, you can install any software you need, add your license, and do whatever you like with your project. These tools above are no exception. Most tools for fluids are computationally expensive. Understanding that, we have different config and package compatible with them, from CPU to single GPU, dual and even multi-GPUs.
You can see that our Server 3 configuration completely matches these above requirements for choosing a computer for Enscape. Let’s look at them in more detailed:
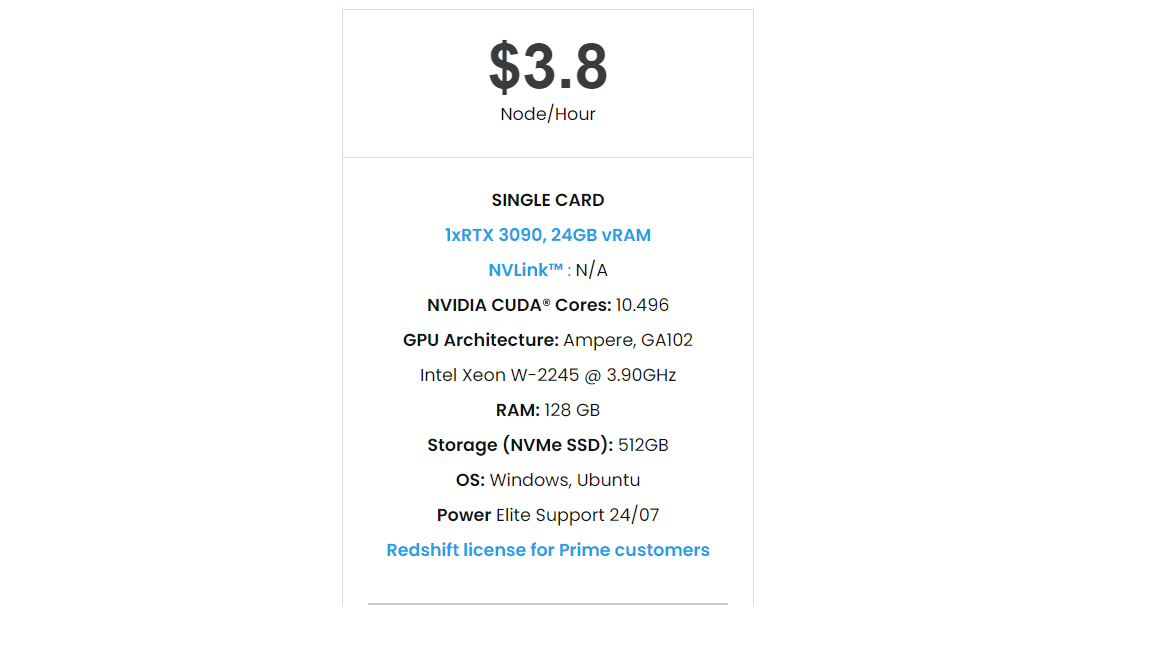
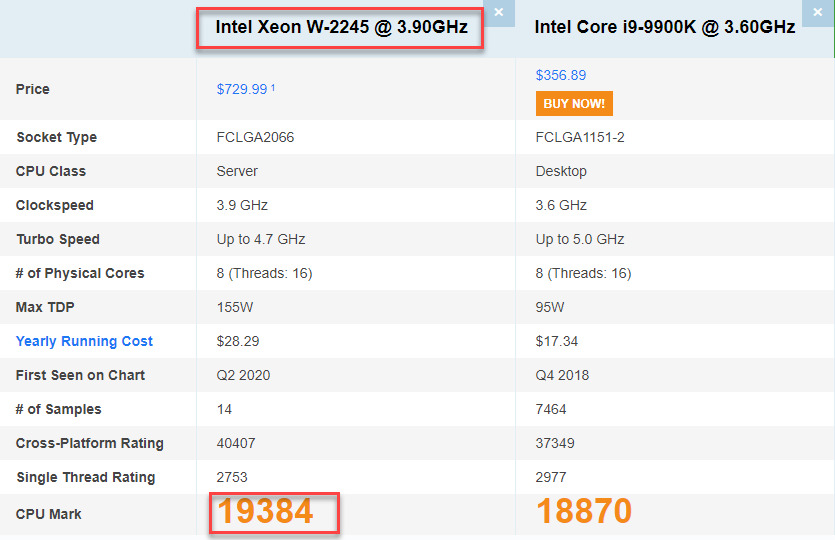
- Operating System of GPU SERVER 3: Once again, we need to confirm that Enscape use GPU card to render. However, a good CPU can speed up Enscape’s loading times. Because of this reason, iRender exclusively provide the Intel Xeon W-2245 with a strong processor base frequency which is 9GHz – 4.7GHz, 8 cores and 16 threads on GPU server 3. According to Bricsys, the minimum CPU is intel corei5. Here at GPU server 3 of iRender,the CPU is intel xeon W-2245 which can be compared to intel corei9 9900k
- The recommended GPU for Enscape is NVIDIA GeForce GTX 1660 or AMD equivalent with 4GB VRAM or higher. But more than that, the GPU of our server 3 is Gefore RTX 3090 having twice the power of Geforce GTX 1660 with 24GB vRAM.
Let’s see rendering tests with Enscape on server RTX 3090 the latest NVIDIA CARD RTX 3090 with 24GB VRAM will help you reduce your render time very much at iRender:

Moreover, iRender has many more to offer.
- Free and convenient transfering tool: iRender offers a powerful and free file transfer tool: Gpuhub Sync. With fast file transfer speed, large data capacity, and completely free. You can transfer all the necessary data into our Gpuhub Sync tool at any time without connecting to the server. The data will be automatically synchronized in the Z drive inside the server, ready for you to use.
- Flexible price: You can always save from 10% to 40% with our Fixed Rental feature. For those who’s in need of server more than a day, or have extremely large project, we advise to choose daily/ weekly/monthly rental package. The discount is attractive (from 10 to 40% depends on your package), and you don’t have to worry about over-charging if you forget to shutdown the server. In this July, we offer a discounted price for GPU server 3 and other servers, users will take advantage of these to level up their renders.
- Real human 24/7 support service, helping you to handle the problem quickly, effectively, saving you both time and money.
If you have any questions, please do not hesitate to reach us via Whatsapp: +(84) 916017116. Register an ACCOUNT today and get FREE COUPON to experience our service. Or contact us via WhatsApp: +(84) 916017116 for advice and support.
Thank you & Happy Rendering!
Source: enscape3d.com
Related Posts
The latest creative news from Enscape Cloud rendering, Lumion Cloud rendering, SketchUp Cloud Rendering , Twinmotion Cloud Rendering , 3D VFX Plugins & Cloud Rendering.