Pivot Point in Blender: All You Need to Know (2025)
If you are new to Blender, knowing how to perform object transformations is essential. Rotating and scaling depend on a reference point to perform the relevant action, this point is called a pivot point. Using pivot point may seem easy if you have worked with 2D software like After Effects or Photoshop. But with Blender, it is a bit more difficult.
So let’s learn everything you need to know about pivot point in Blender in 2025, what they are, and how they work. Let’s get started!
What is Pivot Point in Blender?
In Blender, a pivot point is a point around which objects are rotated, scaled, or translated. It acts as a reference point for transformations, and you can change its position to affect how objects are manipulated. For example, we can rotate selected parts of a mesh around a point in edit mode, or scale an object, or divide the distance between objects relative to the pivot point. By default, the pivot point is the origin of the selected object or the midpoint between multiple origins of the selected object. It is the small orange dot placed at the center of the object. But we can use many other points as pivot point to transform around.
To change the pivot point in the Blender viewport, go to the 3D Viewpoint header and find the transform pivot point menu between the transform orientation options and the snapping options. Click on it and select the element you want to set as the pivot point. And there are no additional settings to set a pivot point; after all, it’s just a point in space. We just need to set which point is the active pivot point for our object and work on it.
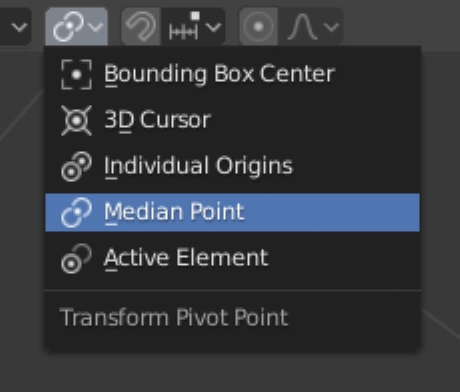
Overview of Pivot Point Types
As you can see, there are 5 types of pivot point. Let’s find out what they are specifically and how they work.
Bounding Box Center
Each object has a bounding box around it. The geometry location determines its size and will be the exact size needed to fit all the mesh inside. With this setting, the pivot point is at the center of the bounding box.
In object mode, the pivot point becomes the center of the bounding box around the selected object’s origin points, not their geometry. This means that if you select a single object, the pivot point will be the same as the object’s origin point, which can be customized and not necessarily at the center. But if you select multiple objects, the pivot point becomes the center of an imaginary box around their origin points. In edit mode, the pivot point becomes the center of the bounding box around the selected mesh elements. However, the median point may give a different result. View the bounding box by going to the 3D Viewpoint Header > Pivot Point > Bounding Box Center. For mesh objects, it’s the yellow box icon.
3D Cursor
The 3D Cursor is a point in space that has both position and rotation, and can be used as a pivot point. This is a flexible pivot point because we can quickly move the 3D Cursor around precisely. For example, we can quickly move it to our current selection by pressing Shift+S and choosing “Cursor to selected item”. In the 3D Viewpoint, it is a circle with alternating white and red stripes. View the 3D Cursor by going to 3D Viewpoint Header > Pivot Point > 3D Cursor.
Individual Origins
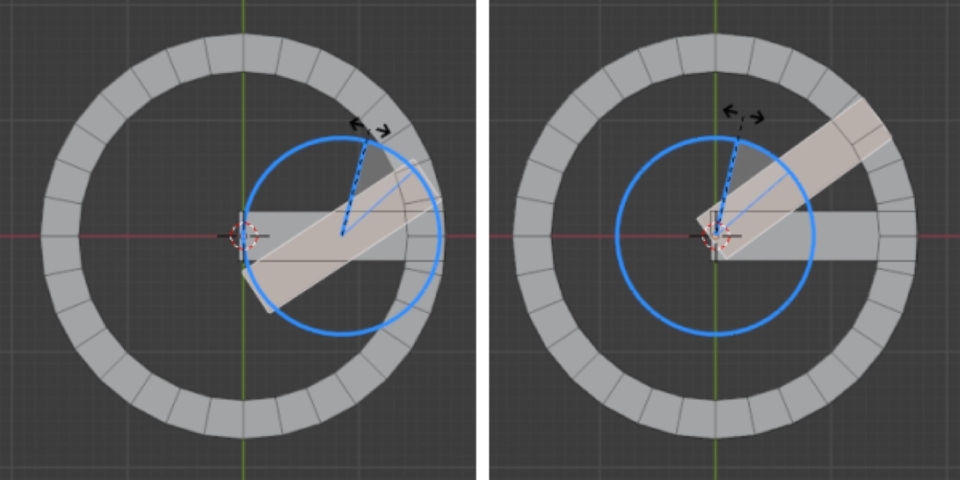
Individual origins is a special mode because it uses the origin of each individual selected object or selected mesh. If we select multiple objects and double-tap R to rotate the trackball, we will know how this mode works. And each object rotates individually around its own origin instead of rotating all the objects around a single point. So it is very useful when performing batch operations.
In object mode, each object is transformed around its origin. This is a freely selected point and does not have to be in the middle. In edit mode, each selected element is transformed around its own center point. Furthermore, when you transform adjacent faces or edges, they are not disconnected and act as a single element. Go to this mode by heading to 3D Viewpoint > Pivot Point > Individual Origins.
Median Point
The median point is the average position of the selected items. This is the default option. This is different from the bounding box, which just takes the center of everything selected without any weight and uses it as the pivot point. In object mode, the median point is the average position of the origin of the selected objects. With the shape and size of the object not taken into account. The origin can be freely selected and is outside the object geometry. So the median point is not always what you want. In edit mode, the median point is the average position of the selected vertices. This means that the pivot point will shift towards the densest geometry, as they have a higher ‘weight’. View this mode by selecting 3D Viewpoint Header > Pivot Point > Median Point.
Active Element
The active element is the last selected element. For example, if you select multiple objects in a row by holding Shift, you will see that the last selected object has a lighter outline, that is the active element. This will be the point used as the pivot point. In object mode, rotation and scaling take place around the origin of the active element. In edit mode, the pivot point will be the median point of the last selected element. In vertex selection mode, this is the last selected vertex. However, for edges, this is the edge’s location. And for faces, this is the median point of the vertices connected to the face. It is suitable for precise control, especially in edit mode when working with vertices or faces. See this mode by going to 3D Viewpoint Header > Pivot Point > Active Element.
How to Change the Pivot Point?
There are many ways to change the pivot point depending on your purpose. You can refer to the 3 ways below.
Manual Way
The pivot can be manually adjusted, so it won’t automatically line up with your model or anything in the scene. Most of the time, but not always, this solution will work. This is how you go about it:
- Choose the item whose pivot point needs to be altered.
- Press the TAB to enter edit mode.
- Move (G) the selected object to your desired location after selecting all vertices (A).
- Now that you have altered the object’s pivot, exit edit mode (TAB).
Using an Empty
Although it is not a permanent alteration, there is an additional method for manually altering an object’s pivot in Blender. You can make the empty act as the pivot point by creating an empty and parenting it to your chosen object. If you are working with a heavy model and are unable to enter edit mode without it slowing, this can be helpful.
- To access Plain Axes (or any other option; it’s merely a visual representation), press Shift + A.
- Move the Empty to the pivot point location of your choice after selecting it.
- Shift-click the Empty after clicking on the object.
- To choose Object (Keep Transform), press CTRL + P.
- You can now use the Empty to rotate the object.
Using 3D Cursor
The 3D cursor can also be used as a global pivot point; however, keep in mind that everything that uses it as a pivot will also revolve around it. Therefore, if there are several items dispersed around the scene, they will all revolve around the same point.
Using the 3D cursor as a global pivot point
- Press the icon that resembles two chain links in the middle top toolbar (apart from the dropdown menu that says “Global”).
- Choose 3D Cursor from the option that drops down.
- To adjust the 3D cursor’s position, shift + right-click anywhere in the scene.
- To position the 3D cursor at the chosen point, you can alternatively enter edit mode, pick a vertex, edge, or face, press SHIFT + S, and choose “Cursor to selected.”
- Now, everything will revolve around the 3D pointer.
Using the 3D cursor to assign a new pivot point for an object
However, what if you wish to alter the pivot to an object’s vertex permanently? Actually, it’s not all that different from the previously mentioned steps. Just make sure that the 3D cursor in the upper middle menu has been replaced with the pivot point set back to Median Point.
- After choosing your object, select Edit Mode (TAB).
- Choose a face, edge, or vertex.
- To exit edit mode (TAB), use SHIFT + S > Cursor to Selected.
- Locate “Object” in the menu on the upper left. Object > Configure Origin > Origin of the 3D cursor
- Hit SHIFT + S > To return the 3D pointer to the center, move it to the World Origin.
Final Thoughts
And that’s it, we’ve covered the concept and how pivot point works. At first, mastering the pivot point settings in Blender may seem trivial, but it can really improve your 3D modeling workflow. Whether you’re rigging a character, modeling an architectural asset, or creating complex animations, knowing how to control pivot point will make your life easier.
And once you’ve completed your laborious 3D model, you’ll want to render it perfectly. But if your workstation isn’t up to the task, a cloud render farm can be a lifesaver for your project without breaking the bank.
Why Should You Use iRender for Blender Projects?
iRender is the best cloud render farm for Blender and all its render engines and plugins, ensuring you have a smooth workflow that is unmatched by any other render farm.
The Most Powerful Cloud Rendering Setup on the Market
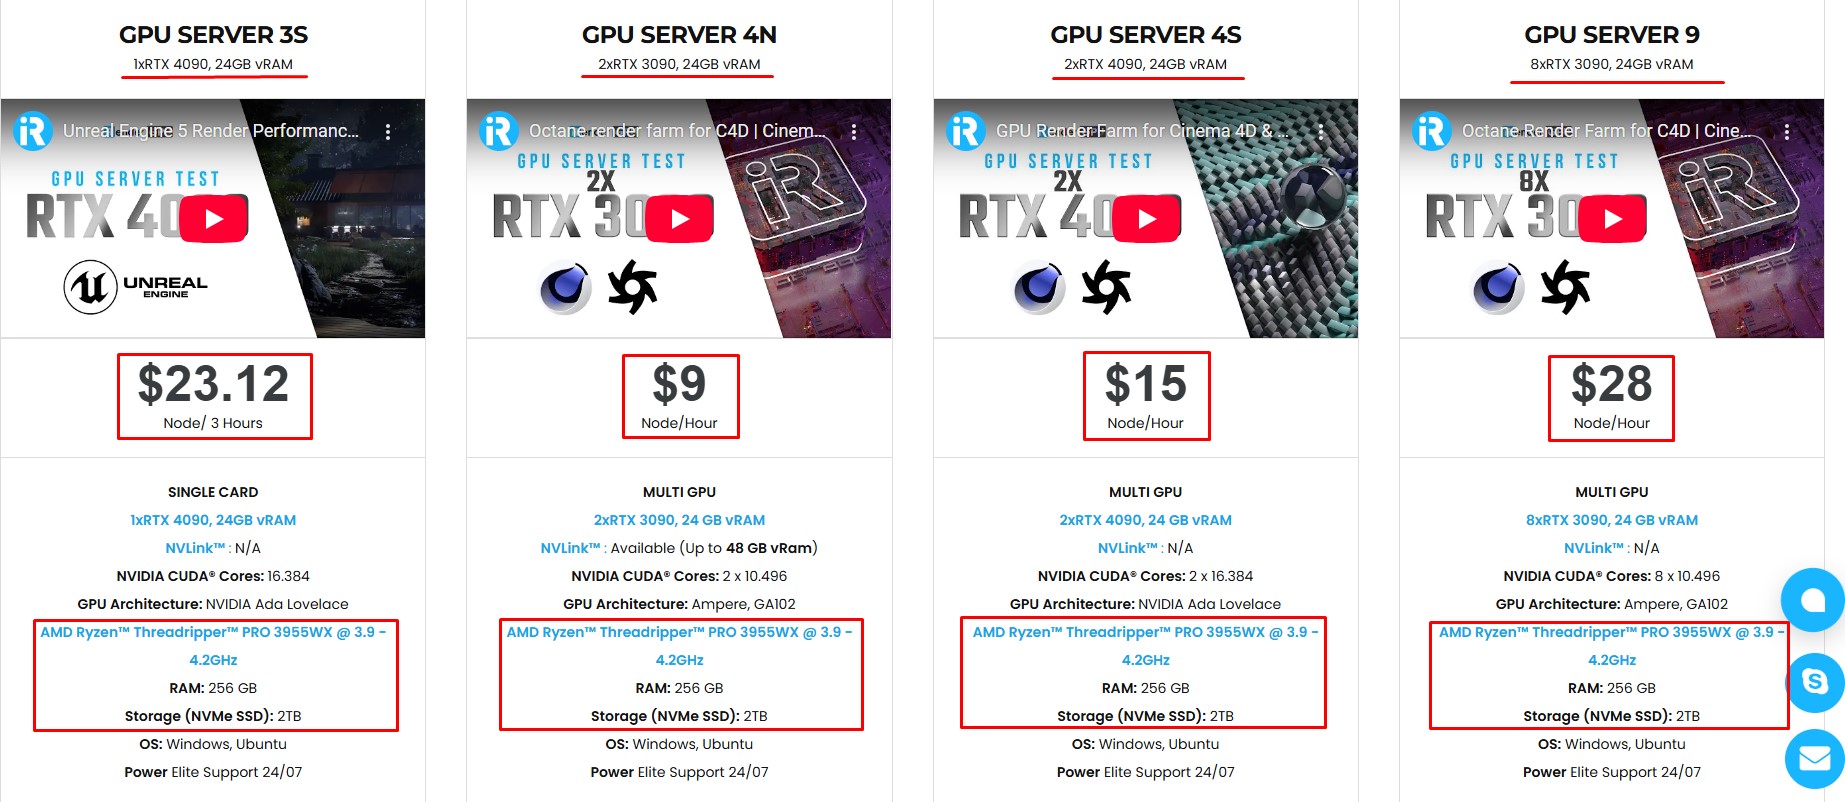
Our powerful servers come with high configurations, so you can freely choose the one that matches your project requirements and budget.
- 1/2/4/6/8x RTX 3090/4090 GPUs packages
- AMD Ryzen™ Threadripper™ PRO 3955WX @ 3.9 – 4.2GHz
- AMD Ryzen™ Threadripper™ PRO 5975WX @ 3.6 – 4.5GHz
- 256GB RAM
- 2TB NVMe SSD
Simple Your Workflow with Blender Preinstalled
Our servers have Blender 4.4.1 preinstalled. You just need to transfer your files, connect to the remote machine. Then you can render yourself like the way you do on your local PC. Setting up ONCE and your working environment will be saved and ready to use at any time.
Why choose iRender?
Unlike other services, iRender lets you upload and download files without starting the server, saving you both time and money.
We offer a Desktop app for Windows with a full feature set and a simple Drive app for macOS for easy file transfers. Here’s why iRender is a top choice for your rendering needs:
- 100% Software Support: We support all 3D software, their plugins, and render engines.
- Full Control: Our service will give you full control over the servers you rent. Therefore, you are free to create your own working environment.
- Go Green: We are committed to using 100% solar renewable energy towards environmental sustainability.
- Real-human 24/7 Support: Our professional support agents and technicians guarantee to bring you the best rendering experience.
Let’s see our latest performance test for Blender Cycles on our servers, you’ll definitely see the difference!

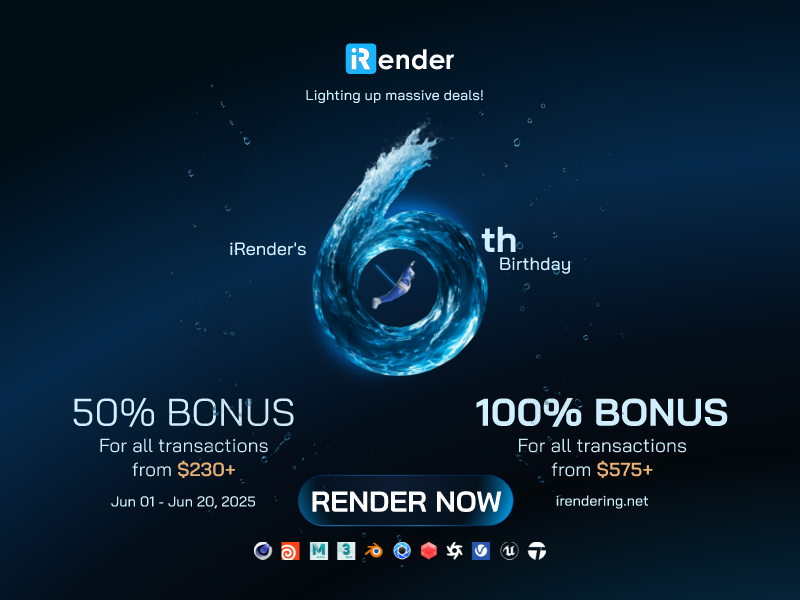
If you still wonder if this is the right place for your project, REGISTER NOW to get a trial and receive a 100% bonus promotion for your first transaction within 24 hours of registration with us.
This June, let’s celebrate our 6th anniversary with the biggest offer ever!
iRender – Happy Rendering!
References: docs.blender.org, digitalarthub.net, artisticrender.com
Related Posts
The latest creative news from Blender Cloud Rendering.