
Save Time Rendering with Blender’s View Layers Settings
View Layers can help you composite images, change a scene, and render final images without having to re-render after any alterations. In Blog’s Today, we will find out more about what View Layers can do for your composite render.
1. How Layers Are Separated in Blender
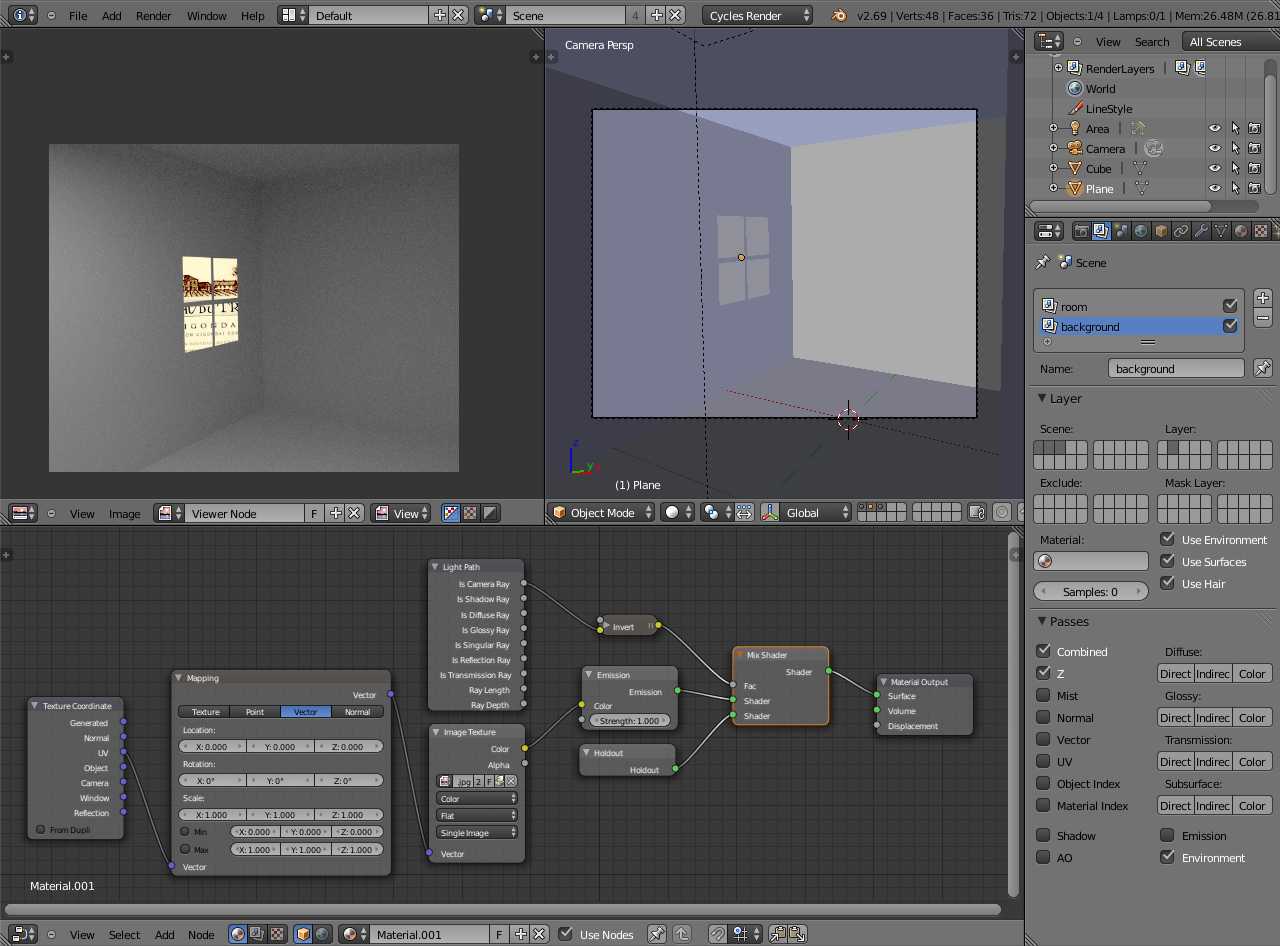
When starting a new .blend file, you will find yourself heavily relying on your Outliner, which is where you can keep track of all your file’s data. Your data may be split up into scenes, with each having one or more layers called View Layers. Each of these layers may then have one or more collections.
Originally referred to as Render Layers in Blender 2.7, View Layers in Blender 2.8 onward performs the same purpose, but with streamlined simplicity and efficiency. View Layers helps you to more easily and efficiently separate the objects, lights, and cameras you want to be visible, and more importantly, rendered in your final scene. In many instances, due to either memory or time constraints, it’s more advantageous to split your scene into parts that will be rendered separately from the other elements in your scene and once all elements have been rendered, assemble the resulting images together in a layered composition.
2. View Layer Panel
It’s possible to create, rename, and remove layers. In the top right of Blender, there is a drop-down menu for View Layers. You can access the ability to create or delete a layer on the right side of the drop-down.
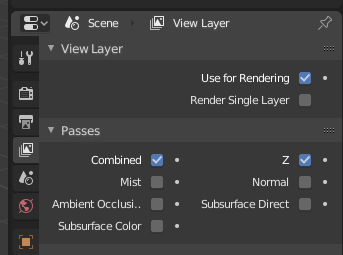
The View Layer panel found in the View Layer Properties tab is where you can access settings for the active layer.
- Use for Rendering: Check this option to use the active layer during rendering.
- Render Single Layer: Check this option to only render the active layer.
Before Blender 2.8, objects would be sent to different physical layers that could be called upon in a render or be manipulated independently from other objects by switching to its specific layers. From 2.8 onward, all objects share the same outliner but can be separated into collections. View Layer can be set so that only specified collections and the objects therein are rendered. Each collection also has settings that can be adjusted for each layer.
- Disable from View Layer: This option removes a collection from the active layer. Objects included in the collection are rendered with the active layer.
- Enable in View Layer: This option adds a collection to the active layer. Objects included in the collection are rendered with the active layer.
- Set Indirect Only: This option restricts objects in a collection so that they only contribute to the render through shadows and reflections.
- Clear Indirect Only: This option clears the Set Indirect Only flag, so that objects in a collection can fully contribute to the render.
- Set Holdout: This option allows objects in a collection to generate a holdout/mask in the active layer.
- Clear Holdout: This option clears the Set Holdout flag.
You can adjust the way the render engine renders the objects located in each collection. Based on your preferred render engine (internal or third-party), different parameters for each collection can be set. These settings can be accessed from the Outliner, but are hidden. To find them, go to the Filters pop-over in the Outliner header and enable the visibility “restriction toggles.”
3. Compositing
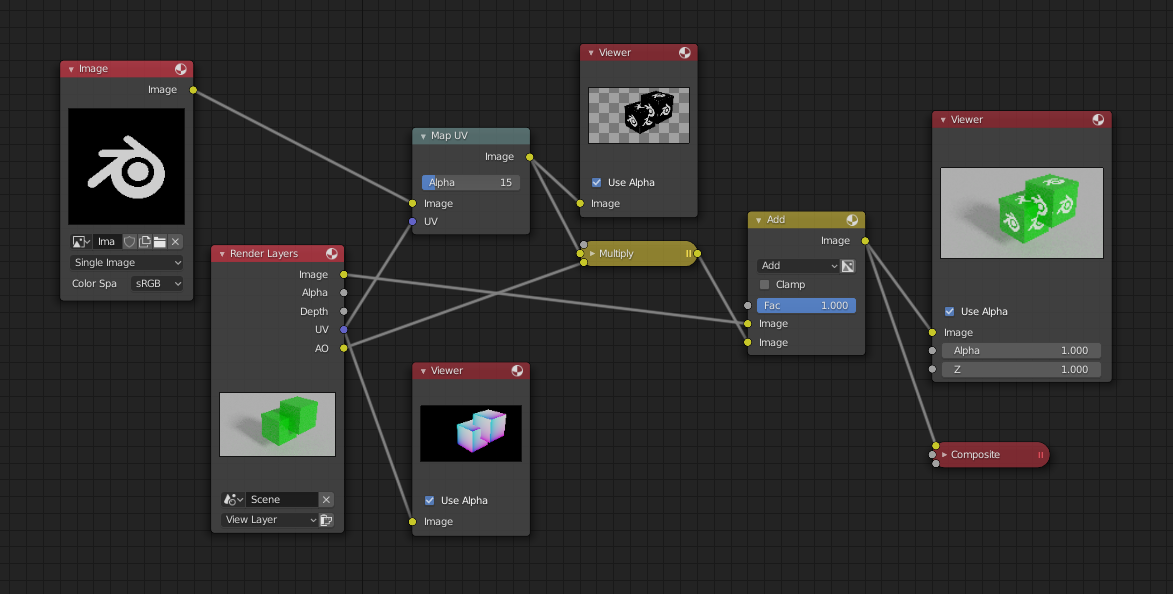
Blender’s compositor allows you to assemble and enhance an image using multiple images or image sequences to complete a final composited image. Using composition nodes, you can take two images or cuts of rendered footage together and filter, colorize, and finalize it all at once. Just like the Material creation workflow, Blender’s compositor is also node-based. You can change anything in your images using nodes. Every augmentation and alteration appears in real time.
Depending on your way of working, a familiar way to build up an image is to think of Photoshop’s layering system. The bottom layer in the layer space represents the back of the image, and the top layer represents the front of the image. When compositing, you should think about layering using camera depth: foreground, middle ground, and background. The compositor can mix images of any size, but you should pay close attention to your individual image’s size and resolution. Distortion and color muting are possible when mixing images with different color depth and resolution parameters.
Additional rules apply when the compositor works with inputs of differently sized images:
- The output size is defined by the first/top image input socket
- The composite is centered by default, unless you use a Translate node to assign a translation to a buffer
You can easily save your image by selecting Image > Save Image (or Alt+S) once you’re satisfied with your composite. The saved image’s settings will match the image format settings on the Render Properties panel.
4. The Professional Cloud Rendering Service For Blender
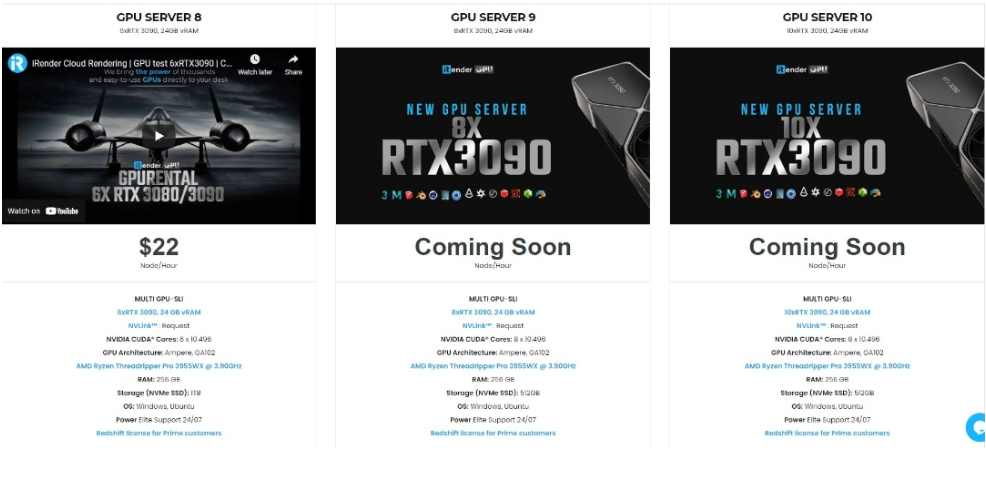
iRender is a GPU-Acceleration Cloud Rendering Service for Multi-GPU Rendering with Powerful Render Nodes: 2/4/6x RTX 3090/3080/2080Ti, provides high computing performance on the model of IaaS (Infrastructure-as-a-Service). Blender users can easily choose their machine configuration from recommended system requirements to high-end options, which suit all your project demands and will speed up your rendering process many times.
High-end hardware configuration
- Single and Multi-GPU servers: 1/2/4/6x RTX 3090/3080/2080Ti. Especially, NVIDIA RTX 3090 – the most powerful graphic card.
- 10/24 GB vRAM capacity, fitting to the heaviest images and scenes. NVLink/SLI requested for bigger vRAM.
- A RAM capacity of 128/256 GB.
- Storage (NVMe SSD): 512GB/1TB.
- Intel Xeon W-2245 or AMD Ryzen Threadripper Pro 3955WX CPU with a high clock speed of 3.90GHz.
- Incredibly, iRender supports NVLink (Request) which helps you increase the amount of VRAM to 48GB. This is a technology co-developed by Nvidia and IBM with the aim of expanding the data bandwidth between the GPU and CPU 5 to 12 times faster than the PCI Express interface.
Let’s see rendering tests with Blender on multi-GPU at iRender:


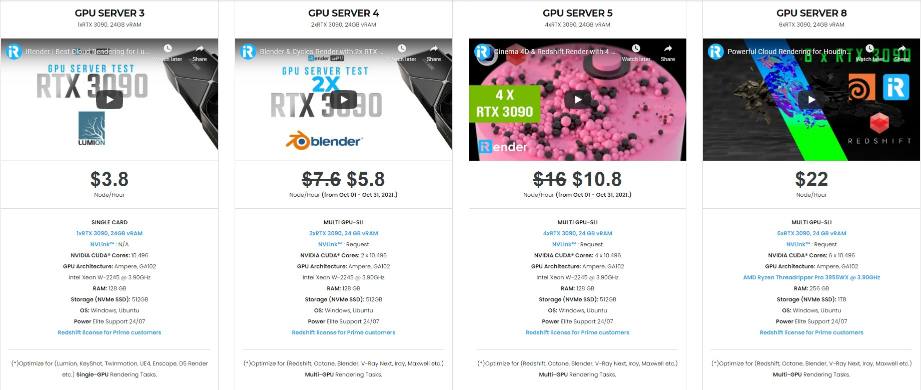
- Reasonable price
iRender provides high-end configuration at a reasonable price. You can see that iRender’s package always costs much cheaper than packages of other render farms (in performance/price ratio). Moreover, iRender’s clients will enjoy many attractive promotions and discounts. For example, this October, we offer a promotion for new users and discounted prices for many servers, users will take advantage of these to level up their renders.
SPECIAL OFFER for this October: Get 50% BONUS for all newly registered users.
If you have any questions, please do not hesitate to reach us via Whatsapp: +(84) 916017116. Register an ACCOUNT today and get FREE COUPON to experience our service. Or contact us via WhatsApp: +(84) 916017116 for advice and support.

Thank you & Happy Rendering!
Source: renderpool.net
Related Posts
The latest creative news from Blender Cloud Rendering.


