Utilizing Keyshot Realcloth to create Custom Weave Patterns
When using KeyShot RealCloth, you might want to experiment with additional custom weave patterns. You may need to do this if your design’s cloth requires a minor alteration, a completely different cloth, or if you simply want to experiment with alternative color, warp, and weft combinations.
Custom Weave Patterns
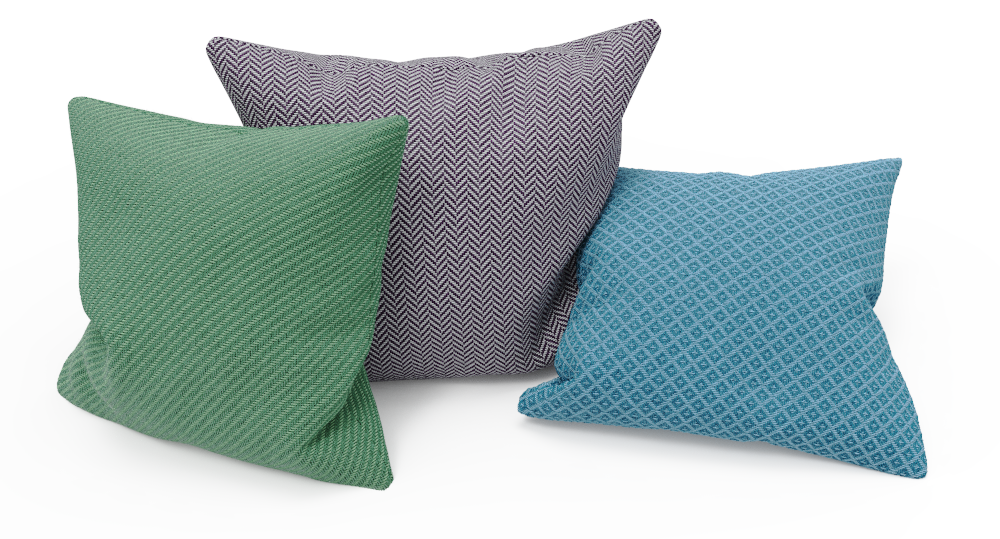
You can use the RealCloth procedural material to produce woven fabrics with custom weave patterns that are detailed down to the ply level. With flyaway fibers, the material will appear even more haptic.
The warp refers to the long strands that are held taut during weaving. The weft is the thread that runs across the width of the cloth, passing through the warp threads.
This is accessible via the Edit Weave Pattern panel. To alter (or customize) your weave pattern, there are basically two options.
1. Weave Patterns in RealCloth
The first place to alter the weave pattern is in the Project window, Material tab, Properties subtab, which is available to both HD and Pro users.
You’ll do the most of your RealCloth material editing from here. You alter the color, roughness, and translucency of the warp and weft threads. Or you can change the geometry display settings, alter the geometry, and apply transparency to your material.
You may also add and change flyaway fibers to better match a real-world material, and you can adjust a range of additional factors through the Advanced section at the bottom of your properties if you would like more control.
2. Advanced Weave Patterns in RealCloth
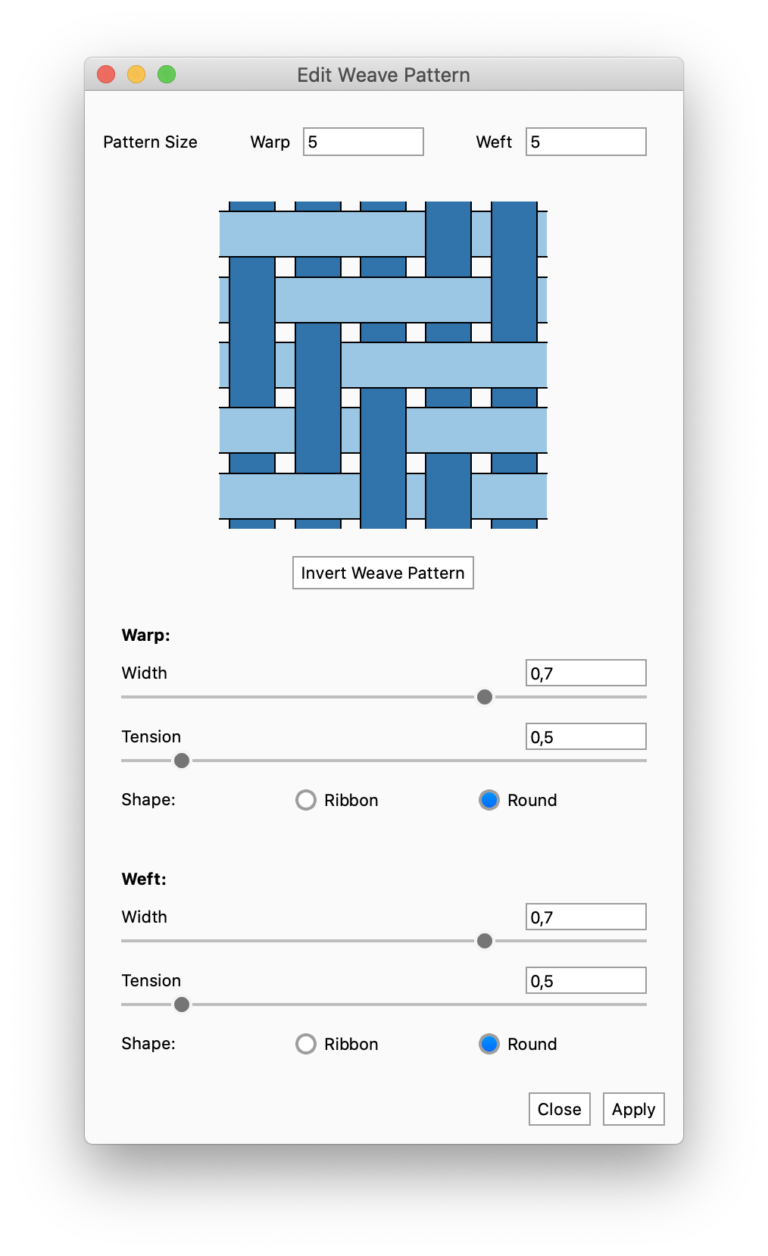
The Edit Weave Pattern window is the second place where you can change the look of your RealCloth. There are two options at the top of the Properties subtab. There’s a dropdown menu with ten distinct preset Weave Pattern selections, as well as an Edit button with a woven material icon. (The settings are available in both KeyShot HD and KeyShot Pro, but the Edit button in KeyShot HD is grayed out.)
You may open the Edit Weave Pattern window with KeyShot Pro by selecting Edit. You can adjust the Warp (number of threads along the length) and Weft (number of threads along with the breadth) Pattern Sizes from here, as well as preview the weave pattern below these settings.
You can further adjust how the threads cross in the weave pattern preview by clicking on the individual threads for an endless array of unique weave options.
Additional options for adjusting the Width, Tension, and Shape of your threads are located just below the interactive weave preview. Width affects a material’s transparency and, when combined with Ribbon-shaped thread, helps to give it a gloss that more closely resembles a satin-like textile.
Using Edit Weave Pattern in KeyShot Pro also allows you to create custom cloth and mesh patterns that can be materialized using the Material Graph.
Limitations and Prerequisites of RealCloth
- Your geometry must have UV coordinates in order to use the RealCloth material. If your part’s UVs aren’t very good, you can use the Unwrap UV tool.
- Labels are not supported by the RealCloth material.
- RealCloth cannot employ flyaway fibers on Cutaway Caps.
- In Render NURBS Mode, displacement and flyaway fibers on RealCloth are currently not supported.
Useful tips for you:
- The UV coordinates should be “in proportion,” meaning that one unit in the U direction should equal one unit in the V direction.
- Consider the UV map as a cut pattern on the fabric; any warping in the UV coordinates will result in stretched fabric.
Overall, using the edit weave pattern window gives your RealCloth applications a whole new level of versatility, allowing you to not only replicate existing real-world patterns but also build new ones in real-time.
Create Custom Weave Patterns with The Professional Cloud Rendering Service iRender
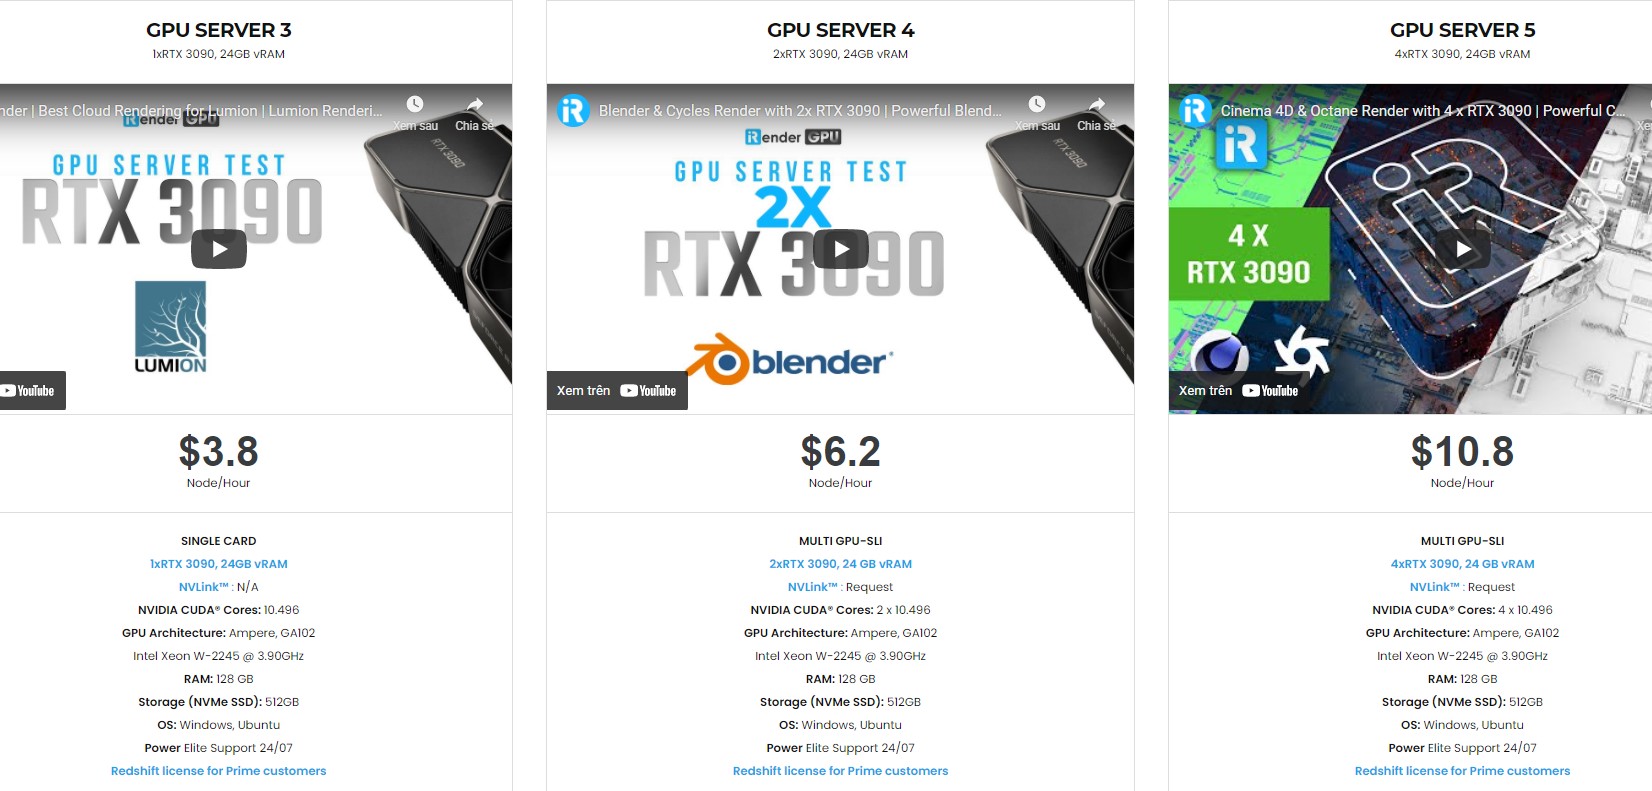
iRender is a GPU-Accelerated Cloud Rendering Service with Powerful Render Nodes: 1/2/4/6/8x RTX 3090. On the basis of the IaaS paradigm, we deliver high computing performance (Infrastructure-as-a-Service). Keyshot Users can easily choose their machines configuration, ranging from recommended system requirements to high-end options, which suit all your project demands and will speed up your rendering process many times.
High-end hardware configuration
- Single and Multi-GPU servers: 1/2/4/6/8x RTX 3090.
- 24 GB vRAM capacity, fitting to the heaviest images and scenes. NVLink/SLI requested for bigger vRAM.
- A RAM capacity of 128/256 GB.
- Storage (NVMe SSD): 512GB/1TB.
- Intel Xeon W-2245 or AMD Ryzen Threadripper Pro 3955WX CPU with a high clock speed of 3.90GHz.
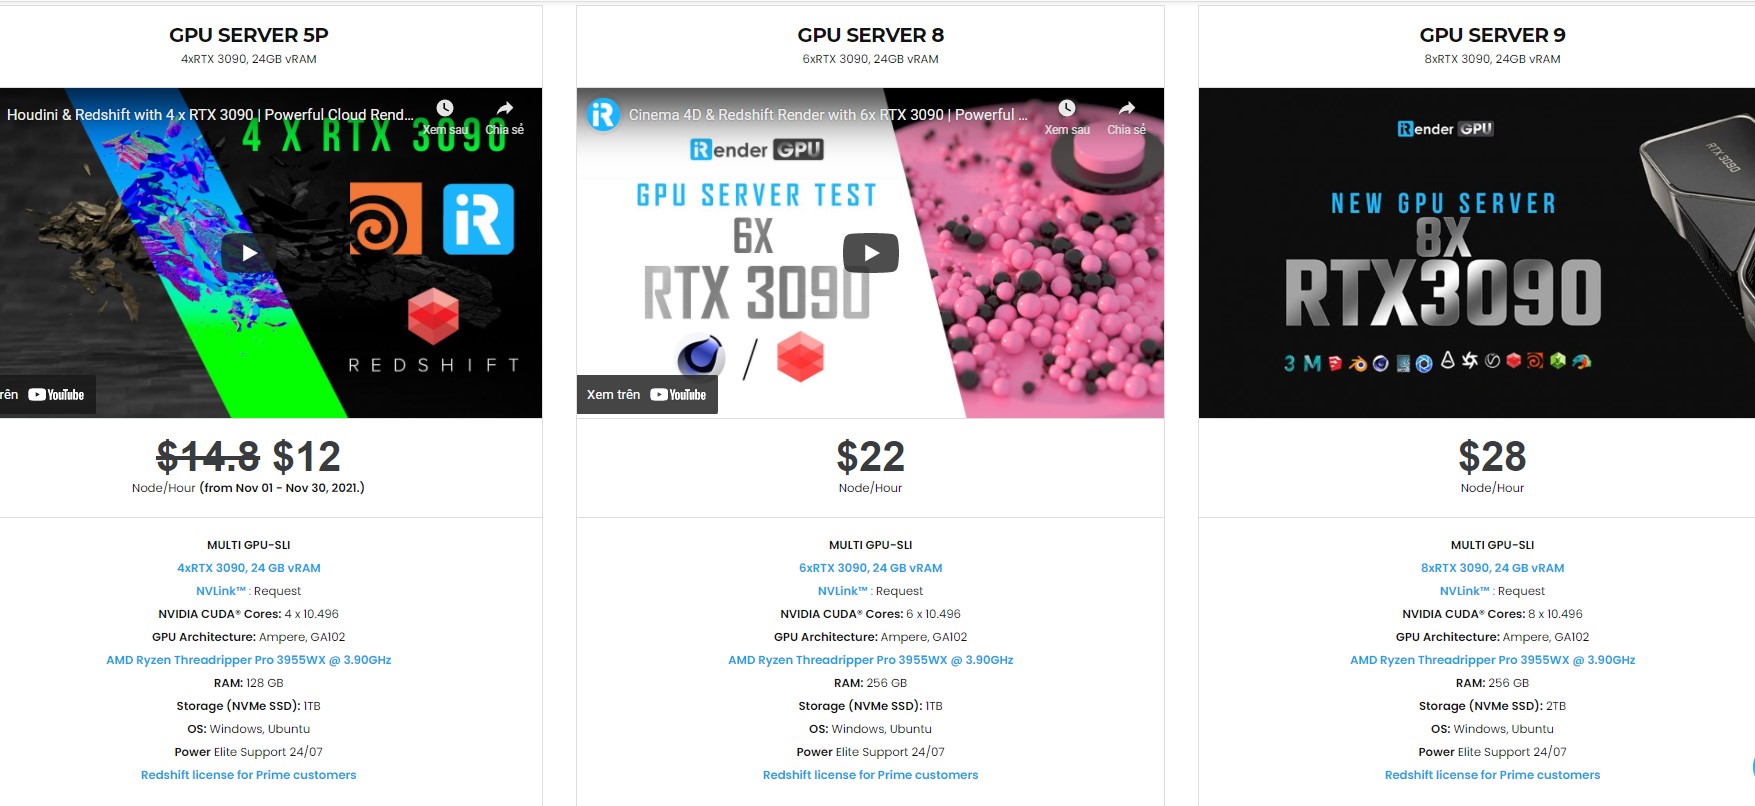
Incredibly, iRender supports NVLink (Request) which helps you increase the amount of VRAM to 48GB. This is a technology co-developed by Nvidia and IBM with the aim of expanding the data bandwidth between the GPU and CPU 5 to 12 times faster than the PCI Express interface.
Let’s look at some Keyshot rendering tests on single and multi-GPU (NVLink) servers at iRender.


iRender – Happy Rendering!
The Reference: blog.keyshot.com
Related Posts
The latest creative news from KeyShot Cloud Rendering , Cinema 4D Cloud Rendering , 3D VFX Plugins & Cloud Rendering.