What's new in JupyterLab 3.0?
The Jupyter Notebook is a very famous web-based interactive computing platform, which receives love from many of us. However, there’s a latest web-based interactive development environment for notebooks, code, and data – JupyterLab – which is worth a chance to check. You will love your transition to JupyterLab to perform your data science tasks, trust me.
In this article, we will introduce you some of the updates and changes that you can see in JupyterLab 3.0, the latest version of it.
1. How to install JupyterLab 3.0
If you already use JupyterLab then just use the following commands to upgrade your JupyterLab
With pip:
pip install --upgrade jupyterlab
With conda:
conda update jupyterlab
If you’re new, you will need to install pip or Anaconda/ Miniconda on your system.
Then use the following commands to install JupyterLab
With pip:
pip install jupyterlab==3
With conda:
conda install -c conda-forge jupyterlab=3
2. Changes/Improvements in JupyterLab 3.0
2.1. Debugger
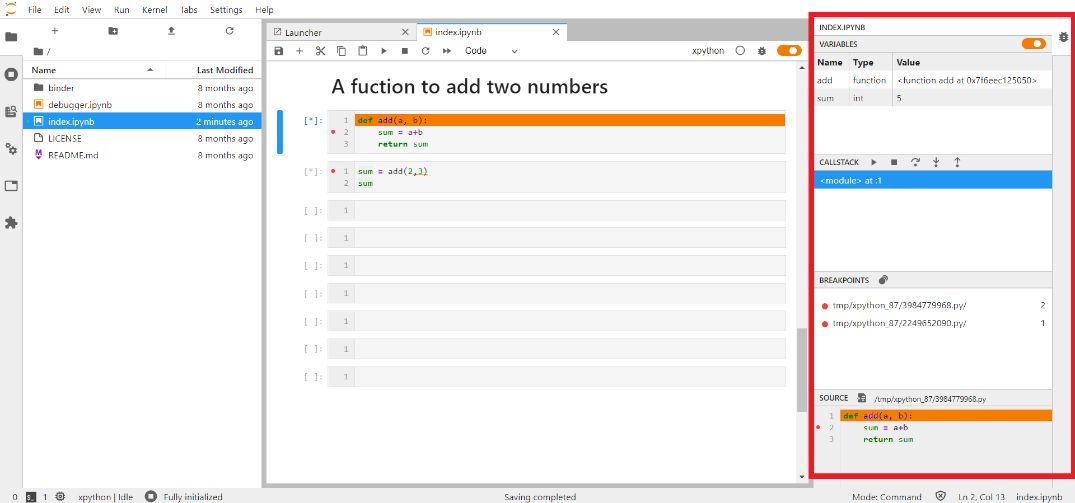
JupyterLab 3.0 now comes with a front-end debugger by default, which allows you to debug notebooks, code consoles, and files from JupyterLab directly.
In order to use this debugger, you’ll need a kernel that supports debugging. For example, for python, we have xeus-python, commonly known as xpython, which is the only Python kernel that supports debugging and is compatible with JupyterLab now. You need to install it first, then follow the following commands for installation of xeus-python.
With Conda:
The safest usage is to create an environment named jupyterlab-debugger with your miniconda installation
conda create -n jupyterlab-debugger -c conda-forge jupyterlab=3 xeus-python
conda activate jupyterlab-debugger
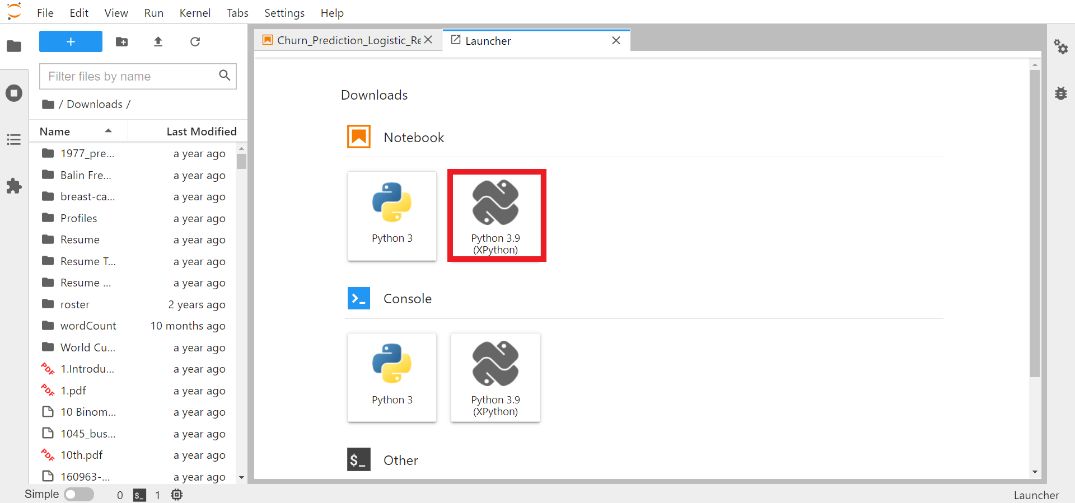
After installing this, you can just select this kernel from the launcher
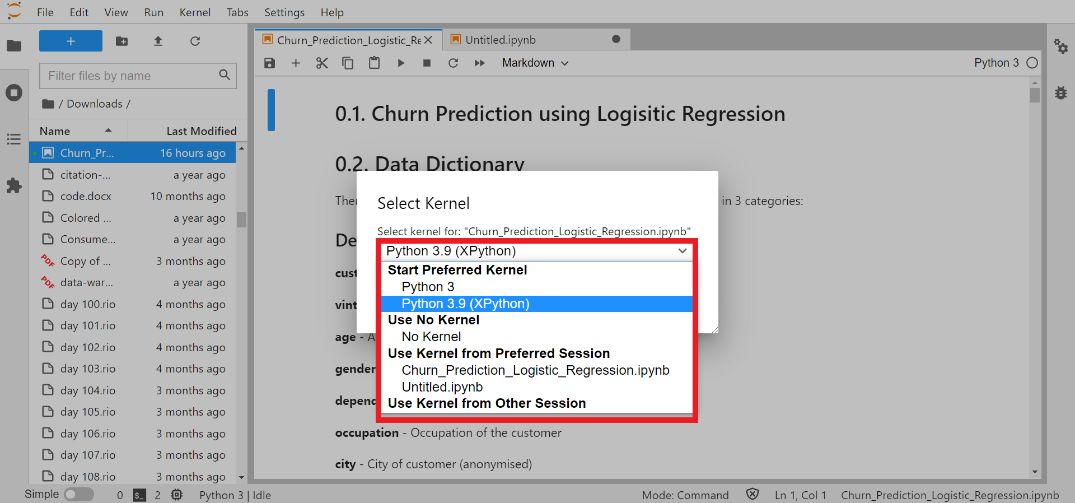
or you can switch to the xpython kernel using the kernel selection dialog:
And then you’re all set to debug your code
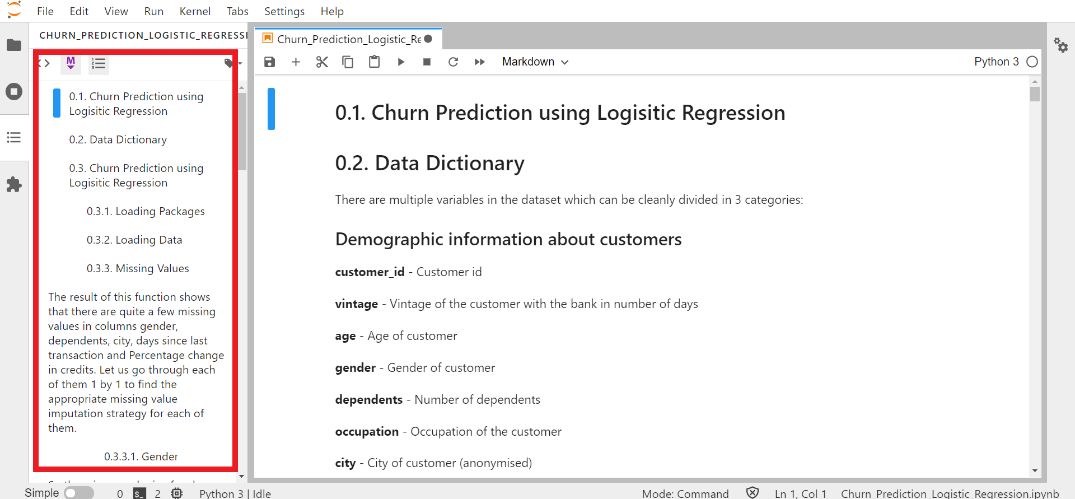
2.2. Table of contents
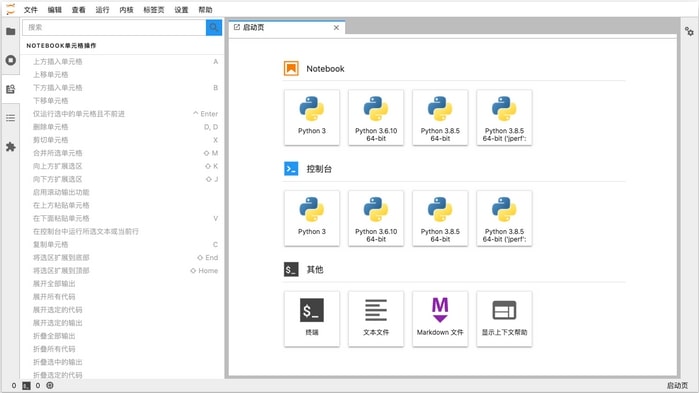
This upgrade is very simple but effective, which helps you see and navigate through the structure of your document easily. When you click on the Toggle Auto-numbering, you will see a table of content. If you wanna see the description of one content, just click this Toggle Markdown Text cells (notice the small button with alphabet M).
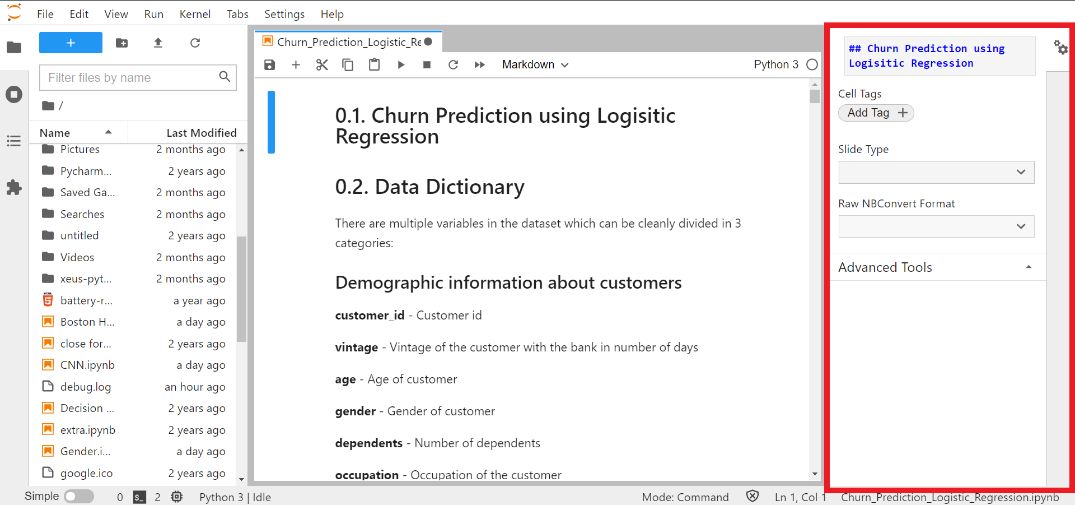
2.3. Changes in the Interface
There have been several changes in the user-side interface. The property inspector moved to the right sidebar now
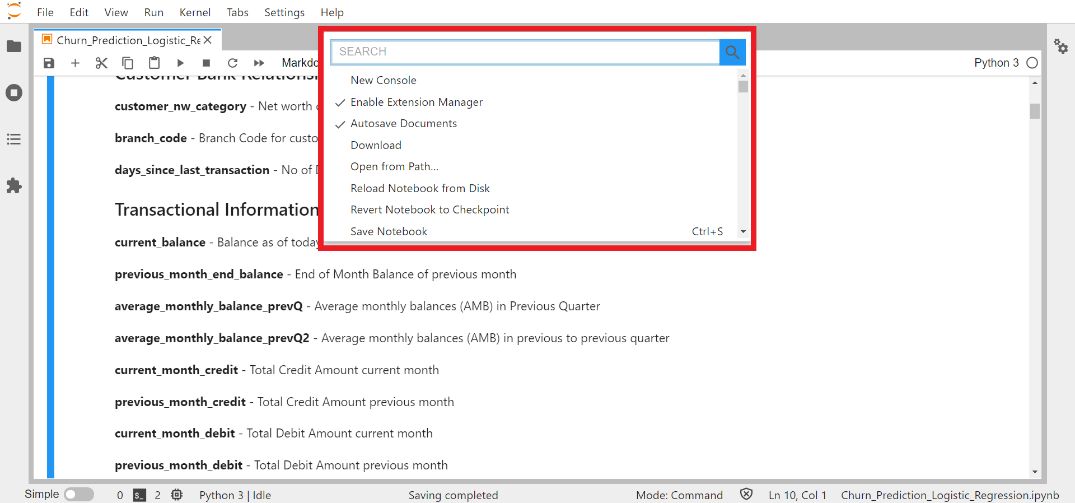
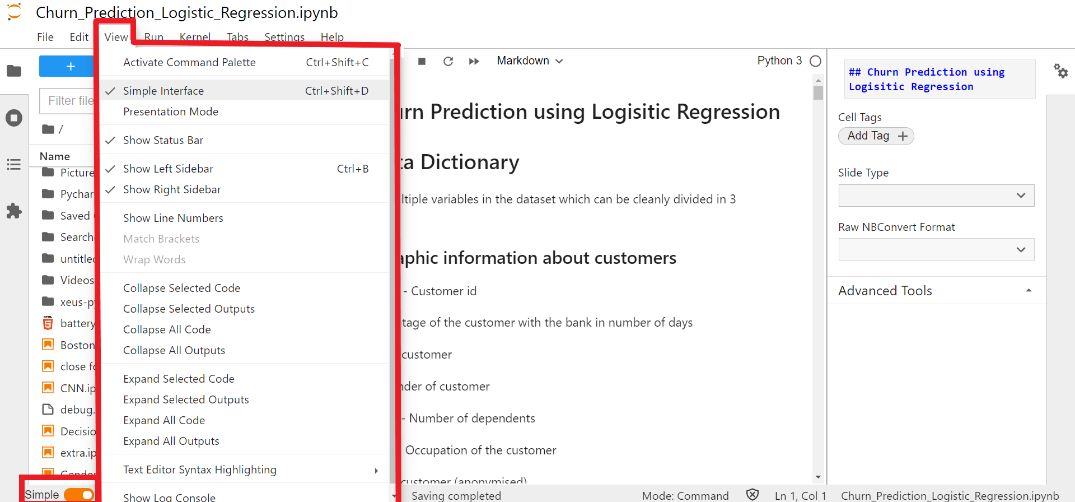
The command palette now comes floating on the center of the top of the window. This enables users to quickly invoke a command while keeping the sidebar closed or switching sidebar panels. You now can use the View menu or use the shortcut Ctrl + Shift + C to access the command palette.
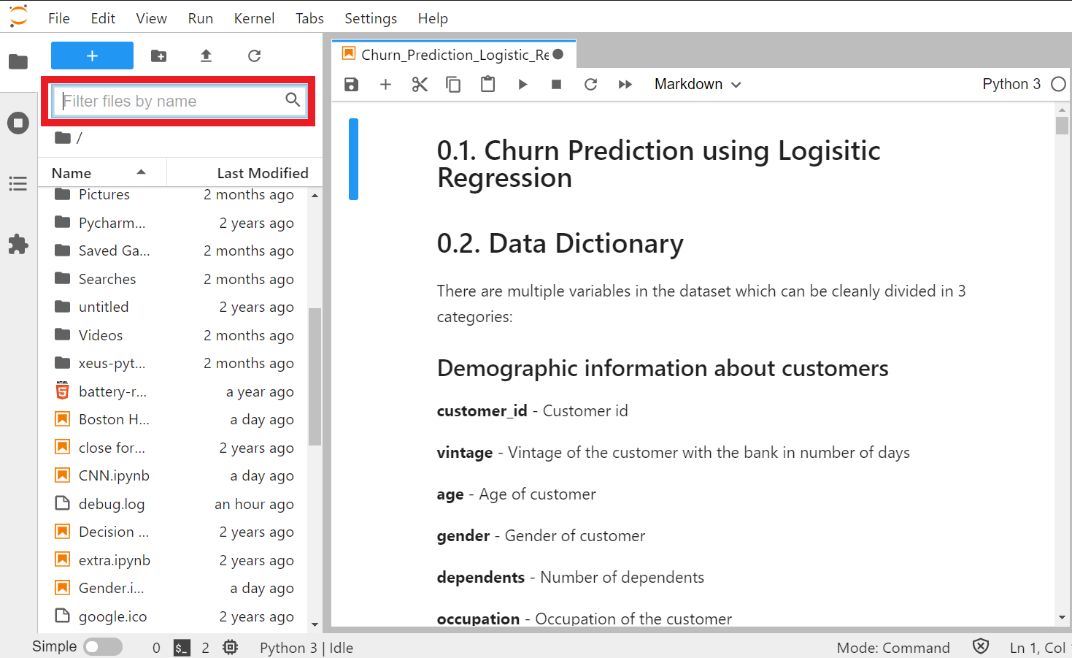
The file browser now has a filter input which filters the list of files using the same fuzzy matching as the command palette
Now, you can also access Simple interface mode easily by using the toggle on the command prompt. It has been updated for a more targeted, documented-oriented feel.
You can select Simple Interface mode from the View menu, or you can just directly press shortcut Ctrl+Shift+D
2.4. Multiple languages support
A big update in this version of JupyterLab is that now you can change your interface and view contents in your language. First you will need to install a language pack (see the list of available packs here), following this command (example with Chinese language)
With pip:
pip install jupyterlab-language-pack-zh-CN
With conda:
conda install -c conda-forge jupyterlab-language-pack-zh-CN
When you install these language packs, only the language code gets changed and the rest of the command remains the same. Once you’ve installed the language pack all you need to do now is to change the interface.
You go to:
Settings> Language> Chinese(Simplified China)
A confirmation pop-up will appear. You should accept that and then refresh your page. Now you will see everything on the screen in your selected language (Chinese in this case).
2.5. Another method to install extensions
JupyterLab is designed as an extensible environment. JupyterLab extensions can customize or enhance any part of JupyterLab. Earlier, you can install source extension packages from npm using the Extension Manager in JupyterLab and the jupyter labextension. And installing a source extension requires Node.js and a JupyterLab rebuild to activate.
You can still use this method, but now there’s another and easier way, which is using Python pip and conda packages.
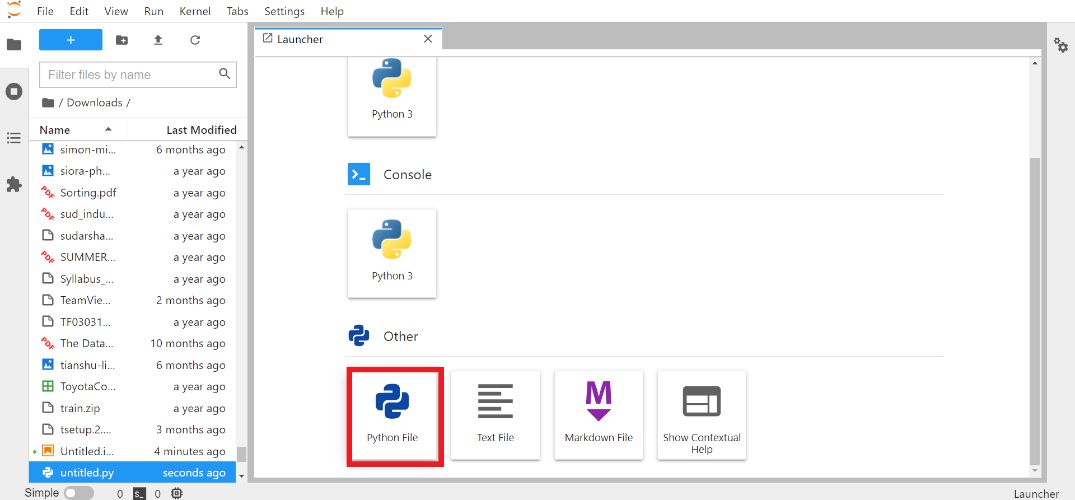
One of the examples of extension is Debugger, which is the 2.1 part. Another simple example of a Jupyter Lab extension is a Python file. In order to install this extension, you should use the following command
With pip:
pip install jupyterlab-python-file
With conda:
conda install -c conda-forge jupyterlab-python-file
As simple as that! and after successfully running this command you’ll see that the launcher now has an option of python file in it.
Here is the official documentation on how to install and manage extensions of JupyterLab.
You can also check all the JupyterLab changelog in version 3.0 here in this link. It also contains some changes from developers’ end, bugfixes, etc.
3. iRender - Powerful Cloud Computing for AI/ Deep Learning
At iRender, we provide you multiple GPUs for renting with state-of-the-art RTX3090. Our remote machines are Optimized for Scientific Computing, Machine Learning, Deep Learning.
We support all AI IDEs & Libraries such as: TensorFlow, Jupyter, Anaconda, Python, MXNet, PyTorch, Keras, CNTK, Caffe and so on.
This is our packages tailored for AI/ Deep Learning:

Just a few clicks, you are able to get access to our machine and take full control of it. Your model training will speed up times faster.
Moreover than that, we provide other features like NVLink if you need more VRAM, Gpuhub Sync to transfer and sync files faster, Fixed Rental feature to save credits from 10-20% compared to hourly rental (10% for daily rental, 20% for weekly and monthly rental).
You can create an account via this link to experience our service. And don’t hesitate to contact us via WhatsApp: (+84) 916806116 for advice and support.
Thank you & Happy Training!
Source: analyticsvidhya.com
Related Posts
The latest creative news from Cloud Computing for AI,