3D E-Commerce: How to Build a Virtual Try-On Feature from Blender to WebGL
In this article, iRender will walk through the basic workflow for building a Virtual Try-On system, starting from creating and optimizing a 3D model in Blender, then bringing the product to a website using WebGL so users can interact with it directly.
As you may know, in e-commerce, simply displaying beautiful product images is no longer enough to convince customers to make a purchase. Users often hesitate because they cannot clearly imagine how the product will look in real life, especially for items such as fashion, eyewear, or accessories. That is why Virtual Try-On (VTO) technology is becoming increasingly popular among brands. By combining 3D modeling, WebGL, and device cameras, customers can view products displayed directly on their body or face right inside the browser.
Stage 1: Preparing the 3D Product in Blender
For a clothing item or fashion product to display smoothly on the web, the model must not only look good but also be performance-optimized. This is a critical factor when building 3D e-commerce or virtual try-on experiences.
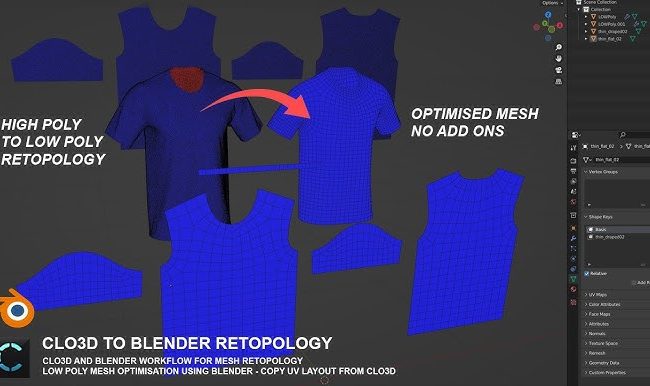
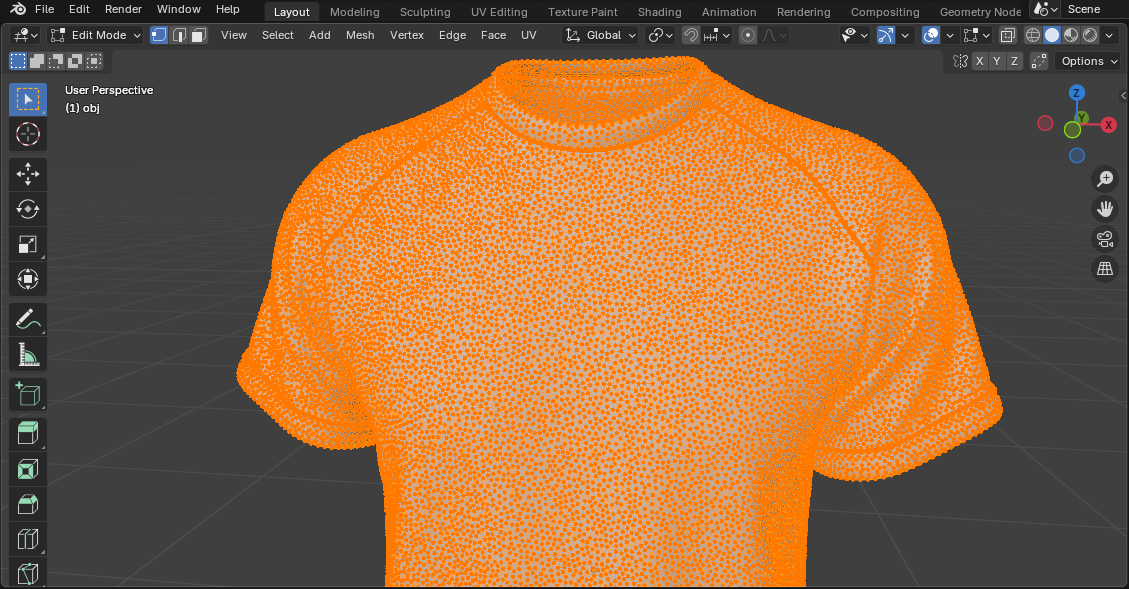
1. Modeling & Retopology – The Art of Optimization
In film or animation production, 3D models can contain millions of polygons to achieve high detail. However, in a web environment this becomes problematic because:
- The webpage loads slowly
- Browsers must process heavy geometry
- User experience decreases
Key Principle
Models designed for WebGL should be Low-Poly while still maintaining accurate shapes.
Common Optimization Technique
A widely used workflow includes:
- Creating a High-Poly model with full details
- Creating a Low-Poly model
- Baking Normal Maps from High-Poly to Low-Poly
Normal maps help reproduce details such as:
- Stitching lines
- Fabric folds
- Material surface details
This allows the model to appear detailed without increasing polygon count.
Useful Tools in Blender
Several tools can help optimize models effectively:
- Decimate Modifier – intelligently reduces polygons
- Retopology tools – rebuild mesh topology
- Subdivision + Bake – create details before optimization
The final result is a much lighter model that still maintains the realism needed for web display.
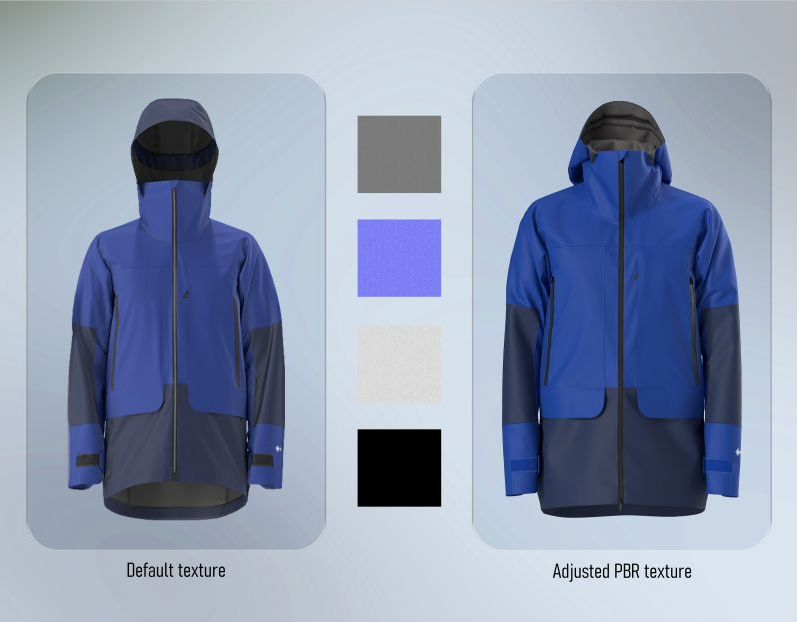
2. PBR Texturing – Bringing Materials to Life
To ensure a 3D product appears realistic in WebGL, using PBR (Physically Based Rendering) is essential.
PBR simulates how light interacts with real-world materials, creating a more realistic visual experience.
A basic PBR texture set typically includes:
Base Color
The true color of the material. Examples include:
- Cotton fabric color
- Leather color
- Metal color
Roughness
Defines the surface roughness or shininess. Examples:
- Rough fabric → high roughness
- Silk or satin → low roughness
Metallic
Defines the reflectivity of metallic surfaces. Commonly used for details such as: Zippers, Buttons, Jewelry
Texture Optimization for Web
To ensure fast website loading, texture resolution should be optimized:
- Recommended: 1024 × 1024
- Maximum: 2048 × 2048
Large textures can lead to:
- Larger file sizes
- Slower page loading
- Poorer user experience
3. Exporting .GLB – The Standard Format for Web 3D
After completing the model and textures, the next step is exporting the 3D file. The most commonly used format for web today is: GLB (or glTF)
Why Use GLB?
GLB files have several advantages:
- Contains the 3D model
- Includes textures
- Can include animations
Everything is packaged into a single file, which helps:
- Simplify website integration
- Reduce deployment errors
- Improve loading speed
In Blender, simply go to: File → Export → glTF 2.0 → select GLB format
Stage 2: Displaying the 3D Model on the Web with WebGL
Once you have the .GLB file, the next step is displaying the 3D product on a website. This is where WebGL comes into play.
What is WebGL?
WebGL is a technology that allows web browsers to render real-time 3D graphics without installing additional plugins. WebGL powers many modern experiences such as:
- Virtual Try-On
- 3D product viewers
- AR shopping experiences
Using Three.js to Display Models
One of the most popular libraries for working with WebGL is Three.js. Three.js allows developers to easily:
- Load GLB files
- Set up cameras
- Add lighting
- Render 3D models
The typical workflow includes:
- Creating a scene
- Adding a camera
- Setting up lighting
- Loading the GLB model
- Rendering it on the webpage
Once displayed, users can:
- Rotate the product 360°
- Zoom in or out
- Interact with the model directly
What if You Don’t Know How to Code?
The good news is that you don’t have to be a developer to display 3D models on a website. Some tools make this extremely simple. One example is Google Model Viewer.
You can embed a 3D model into your website with a single line of code:

After that, the 3D product can:
- Auto-rotate
- Work on both mobile and desktop
- Display directly inside the browser
iRender’s Perspective: The Power Behind Perfect Models
In real-world 3D asset production for e-commerce, the most resource-intensive steps are often:
- Baking textures
- Rendering previews
- Processing large batches of products
For major fashion brands, the number of products can reach hundreds or even thousands of SKUs.
If done on a personal computer, you may encounter:
- CPU/GPU running at full capacity for long periods
- Slow rendering speeds
- Interrupted workflows
That is why many 3D studios and e-commerce brands choose cloud rendering solutions.
iRender – Maximize Your Blender Rendering Performance
Why iRender is a great solution:
If you’re working with Cycles or Eevee Next on large-scale projects, let iRender help you accelerate rendering, reduce hardware costs, and focus on creativity instead of waiting.
iRender proudly offers high-performance workstation configurations optimized for Blender, giving you an incredible rendering experience without the limitations of traditional render farms. With iRender, you can enjoy full control over your remote workstation, just like using your personal computer, but on the cloud. Blender comes pre-installed and ready to go so that you can start immediately.
Fully Compatible with Blender
iRender allows you the freedom and flexibility to work the way you want, without restrictions.
- Install any version of Blender you need.
- Add your favorite plugins or specialized render tools.
- Whether you use OctaneRender, Redshift via Houdini Bridge, or export USD for Arnold, you can set up your environment exactly like your local machine.
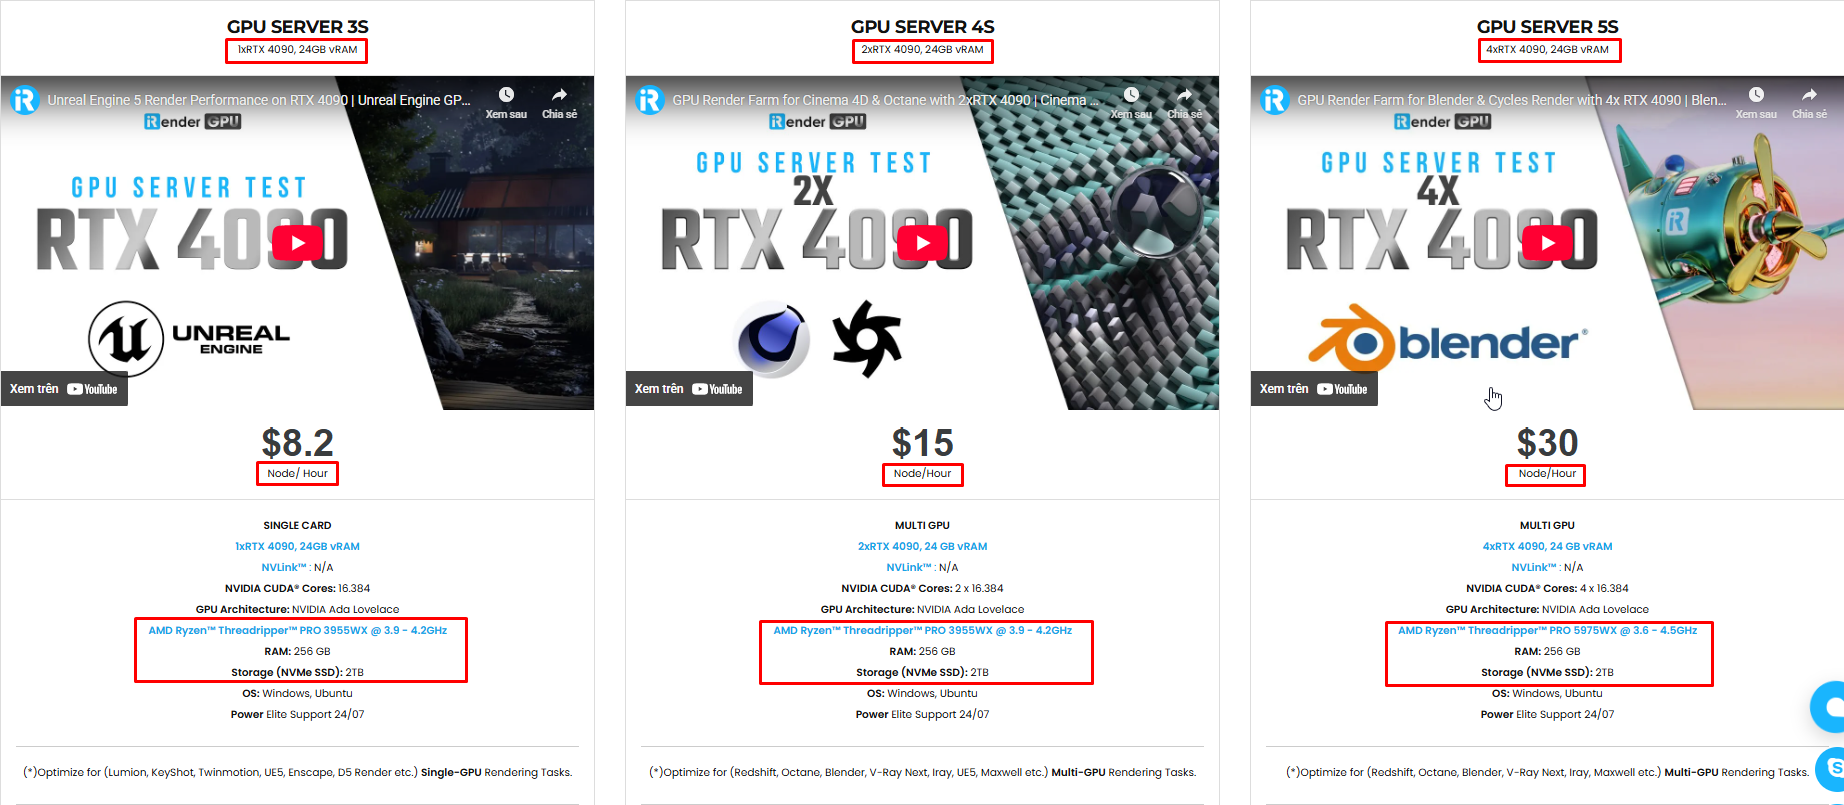
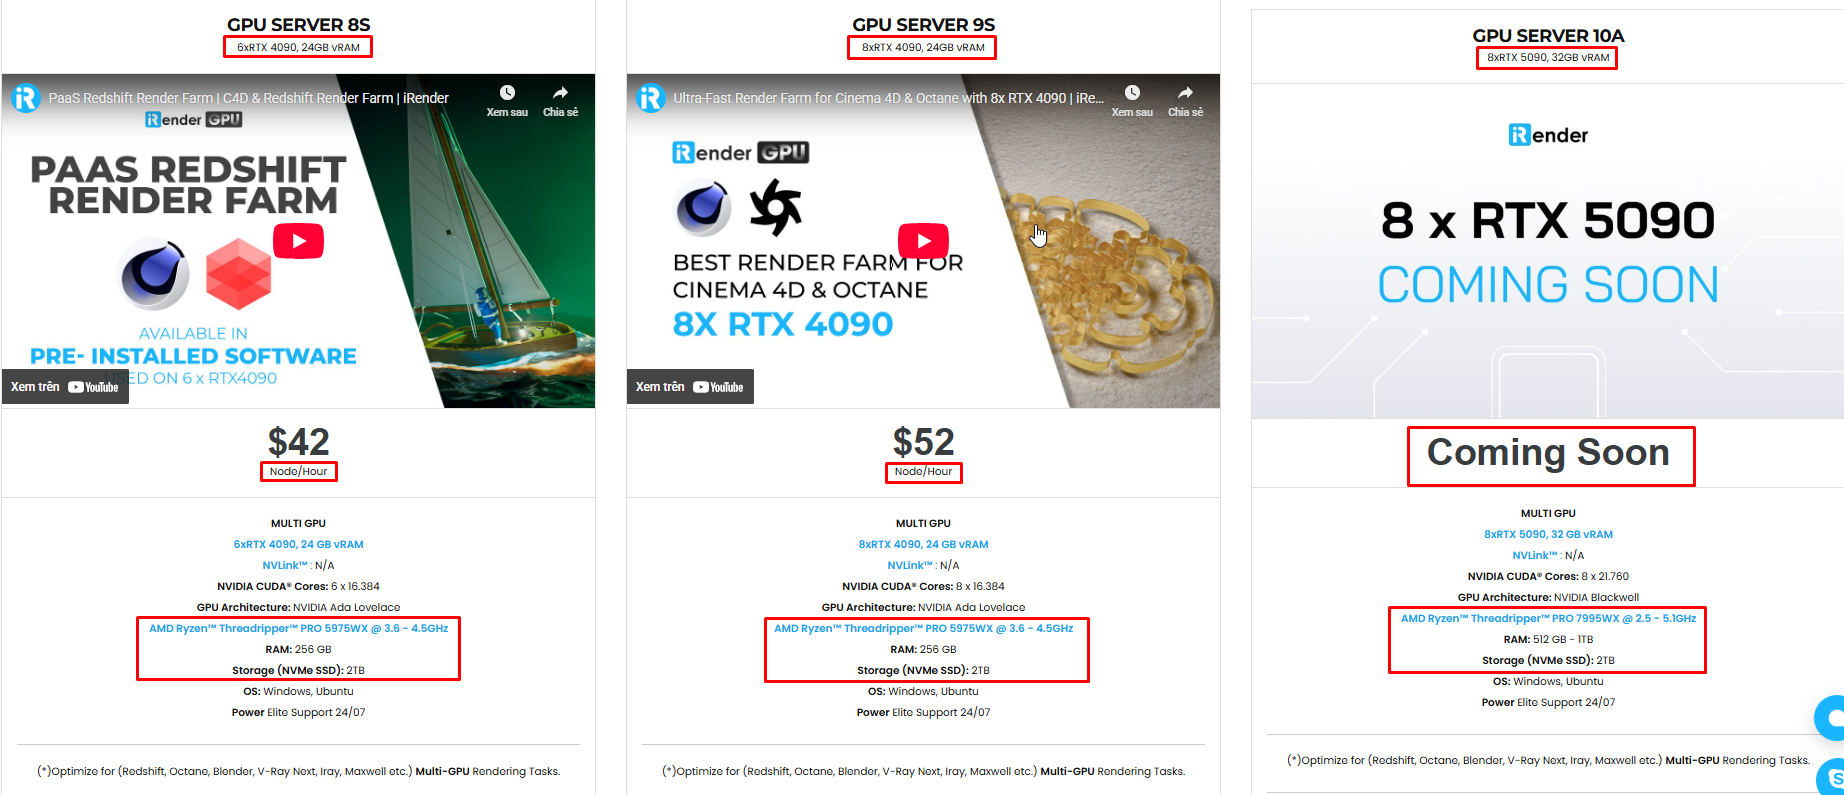
Powerful Multi-GPU Workstations
iRender offers virtual machines with up to 8x RTX 4090, or high-VRAM GPUs for large scenes. These configurations are perfect for:
- OctaneRender: Linear scaling across multiple GPUs, ultra-fast path tracing.
- Redshift: Biased rendering optimized for animation, saving you time.
- Arnold GPU: Smooth OptiX multi-GPU support.
- V-Ray GPU: Trusted by archviz professionals for both stills and animations.
Scalable & Affordable Pricing
One of the biggest barriers to multi-GPU rendering is the upfront cost of hardware. With iRender, you pay only for the time you use, making it highly cost-effective whether you’re a freelancer rendering a single scene or a studio handling large projects with tight deadlines.
You can see the information about iRender’s service packages here.
iRender is currently offering a SPECIAL PROMOTION: enjoy a 100% bonus on your first top-up. This means your first deposit will be doubled, and your points never expire, allowing you to use them whenever you need.
We’re always happy to help you with any questions. If you have any problems or questions, don’t hesitate to contact our 24/7 support team. Or via WhatsApp: 0912 785 500 for free advice and support.
Sign up for an account today to experience and enjoy our services.
Thank you & Happy Rendering!

Related Posts
The latest creative news from Blender Cloud Rendering