Best Iray settings for fast rendering in Daz Studio
Render times in Daz Studio can vary greatly depending on the project’s complexity. While the ideal settings may still result in longer renders, default configurations could neglect opportunities for us to optimize the renders using the available system resources. In this article, we will look deeper at the best settings in Iray for fast rendering in Daz Studio.
Why should we use the Iray rendering in Daz Studio?
When rendering in Daz Studio, we can choose two render engines between 3Delight and NVIDIA Iray.
3Delight, Daz’s original render engine, is CPU-based. It has almost a cartoonish look since it fakes rendering 3D objects with something that is not compatible with physically based rendering (PBR).
Iray, which comes from NVIDIA, has increased creative abilities within Daz. More importantly, Iray is compatible with PBR maps, which can typically get more realistic renders. It has become tremendously popular as part of the Daz Studio workflow.
For optimal performance, Iray requires an NVIDIA GPU. If you use AMD (even top-tier) GPU, Iray won’t function as expected, unfortunately. However, if you use an NVIDIA GPU, Iray is a game-changer render engine. The Daz community has wholeheartedly embraced Iray, ensuring strong support and the ability to use new rendering capabilities with existing assets. Iray helps render faster, leverages HDRI technology, and gives full control over detailed scene elements.
Best Iray settings for fast rendering in Daz Studio
Let’s now explore the numerous settings within Iray. Iray operates exactly according to its configured parameters. As an unbiased renderer, it requires defining specific criteria. This is determined solely through its render settings.
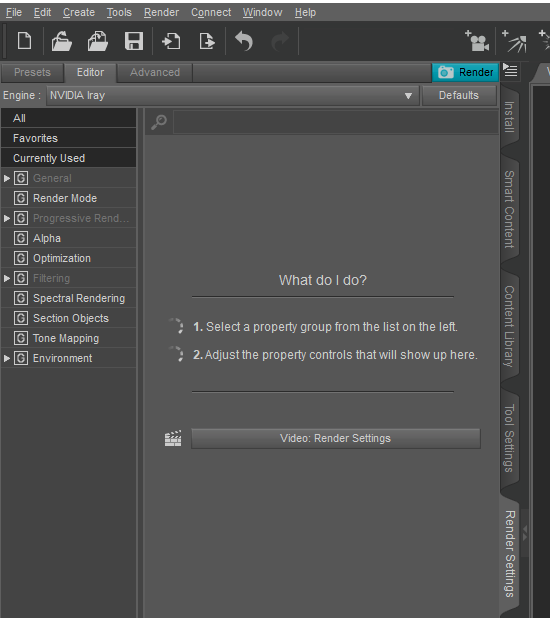
Open Daz Studio, and go to the Render Settings tab, which contains various sub-sections that we will break down in the following sections.
General settings
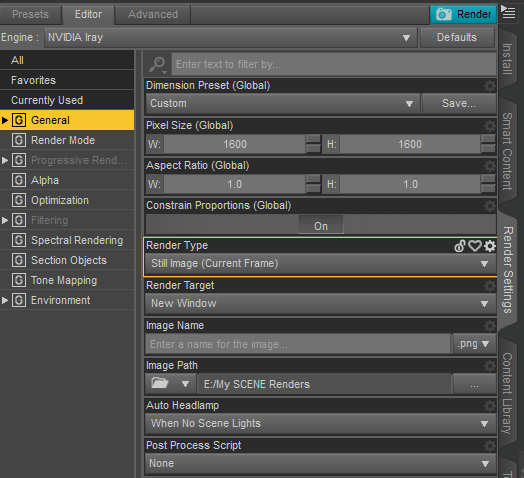
This section covers Dimension Preset, Pixel Size, Aspect Ratio, Render Type, Render Target, Image Name, Image Path, and Auto Headlamp. Each significantly impacts resolution, file-saving location, lighting effects, etc.
For example, the Auto Headlamp setting. Unlike many others that relate mainly to the output file, this is an important option frequently overlooked by new users, yet it can directly affect the render appearance. This is usually enabled by default we can see the scene view even when no lights are manually added to it. While it is helpful for rendering in Daz Studio, we should turn it off.
Render mode
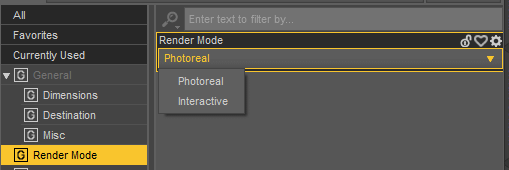
There are two options for the render mode – Photoreal and Interactive. Each has different settings that impact both render speed and quality. If you want the highest results, Photoreal is recommended. However, Interactive is a better option for fast iterations. Interactive uses different algorithms to calculate the final render result and it is much faster, but at the expense of the quality.
Note that available settings will change depending on the render modes we choose.
Progressive Rendering
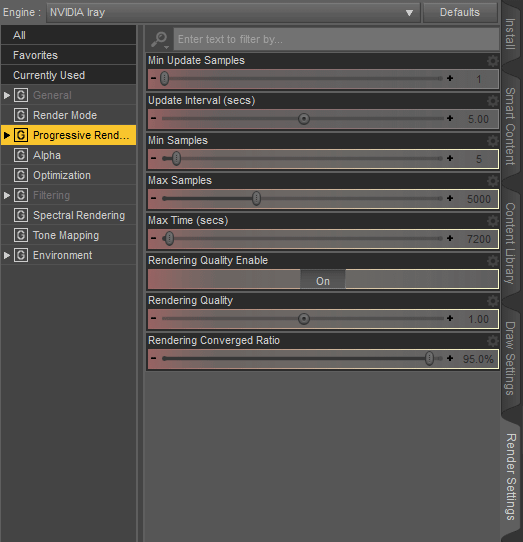
Progressive Rendering is the most important tab to change the render time. This section includes Update and Completion Settings, which control the number of samples and time allocated for iterative rendering loops.
Update Configuration
This refers to Min Update Samples and Update Interval (secs). The sample count determines the number of samples generated per rendering iteration. Concurrently, the interval provides important guidance to the renderer about how much time to dedicate to each render call. Longer intervals typically increase efficiency while shorter intervals produce more frequent updates.
Completion Configuration
This category includes Min Samples, Max Samples, and Max Time (secs). The minimum sample count sets a baseline for the rendering loop to progressively conclude. In contrast, Max Samples guides the renderer on the highest number of samples to produce per loop. Increasing the allocated time per loop extends overall render time but allows the renderer more processing time before loop termination and transition to the next loop.
Converged Quality and Ratio in Progressive Rendering
By default, these settings are set to 1 and 95% respectively. Increasing the quality value demands more thoroughly converged pixels, extending render time. Render times show an approximately linear relationship with the specified value, so doubling the quality nearly doubles render time.
Note that choosing a value above the default 0.95 could potentially lead to greatly prolonged render time. The rendering converged ratio is an estimation updated periodically, not after every render loop.
Optimization
Settings like Caustic Sampler and Guided Sampling can help optimize your render by influencing lighting effects and quality.
Caustics involve the refraction or reflection of light rays by a curved surface, creating characteristic effects. While Daz Studio produces caustic-like effects naturally, enabling the Caustic Sampler setting can enhance these effects, especially for glass or liquids.
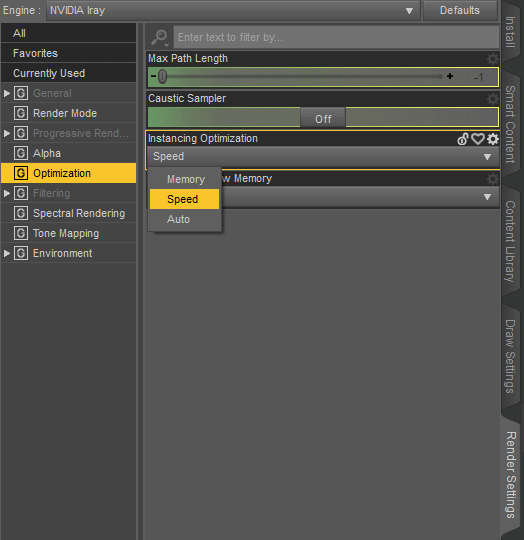
At times, activating this setting may improve both quality and reduce render times. When the caustic sampler is not in use, enabling Guided Sampling can notably boost quality, especially when paired with Firefly Filter. However, it may heavily impact system memory usage. NVIDIA recommends using Guided Sampling for strongly obscured light sources blocked by walls or environment maps, volumetric rendering, soft shadows from large area lights if tessellated, and moderate caustics (though very sharp caustics still require the Caustic Sampler.)One important setting in this Optimization section is the Instancing Optimization. You can set it to “Speed”. In theory, this may improve render time.
Filtering
Settings like Firefly Filter and Noise Degraining Filter help eliminate unwanted artifacts and noise.
Fireflies refer to randomly scattered bright white pixels in complex lighting areas. The Firefly Filter effectively removes these.
The Noise Degraining Filter operates differently in Iray based on the render mode. In Photoreal, it can be set from 1 to 5, with five settings of increasing aggressiveness: pixel clipping, smart median, smart average, limited blur, and limited auto blur. A setting of zero deactivates the filter entirely. Modes 1 to 3 are more conservative, focusing on eliminating noise in complex scene areas without compromising image sharpness. Modes 4 and 5 are more aggressive, so you should use them cautiously. Based on the scene’s requirements, you should also do some Experimentation.
In Interactive Render Mode, these controls are not accessible. Instead, a simple filter is available, defaulting to a Gaussian filter that subtly blurs the image to reduce noise artifacts.
Tone Mapping
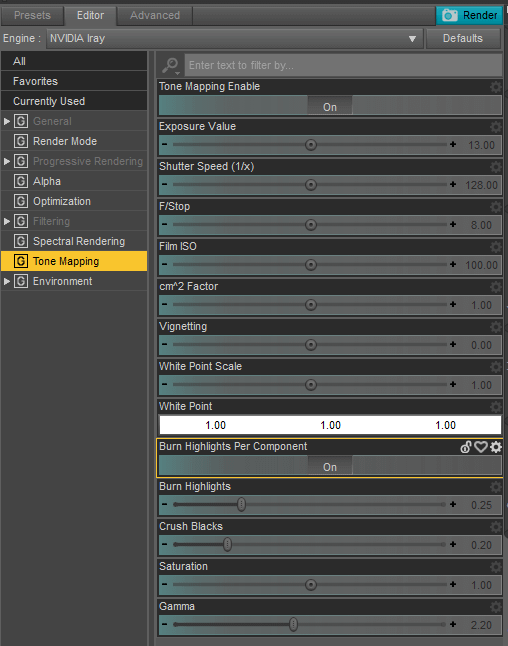
Near the bottom is the “Tone Mapping” tab, which contains options you typically don’t want to modify.
This is because these controls compress the image’s dynamic range, similar to post-production adjustments like exposure, gamma, saturation, and film ISO. You should use other software instead for these edits. However, if you don’t use other software, you can still test with different values.
For example, the Exposure affects brightness of your render. If your render looks too dark, you can reduce this value. Note that, light sources of all kinds, including whether camera headlamps are on or off, also impact the final look.
Adjusting tone mapping settings directly affects the final render right away. If the render doesn’t meet your expectations, you will need to render it again, which might take a long time.
However, note that it’s best to leave tone mapping On rather than Off, to avoid broken renders.
Use GPU or GPU(s) for faster rendering in Daz Studio
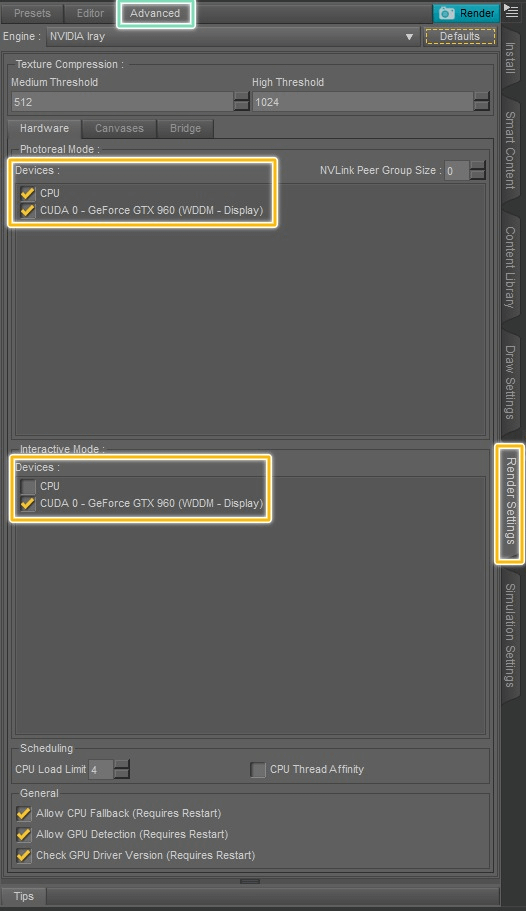
In the Rendering Settings menu, there is an Advanced section. There you can find some advanced settings. In the Hardware tab, we can and should turn on the GPU there, as the GPU is significantly better than the CPU for Iray rendering in Daz Studio.
We can also try the hybrid by using both GPU and CPU at the same time. However, in some cases, it can make things worse, and lead to slower performance.
Speed up Iray rendering in Daz Studio with iRender
iRender provides high-performance remote servers for various creative workflows from 3D rendering, AI training, Video editing, Simulation, VR/AR development, and more. We understand that each project and individual’s creative process is unique and local limitations can restrict one’s tools and vision. We address this by giving our users complete control over our servers where they can install any software.
Once renting our server, you can use it as your computer to set up your private creative working environment. You just need to install the software once for the first time; everything will be saved and ready to use next time.
Transferring your files is straightforward, too. Our dedicated file transfer applications streamline the process of uploading and downloading your vast Daz content libraries, complex project files, and rendered outputs whether you’re using the server.
Additionally, we provide flexible pricing with an hourly rental paying only for pay-as-you-go usage, or daily/weekly/monthly rental at a discounted 10-20% rate.
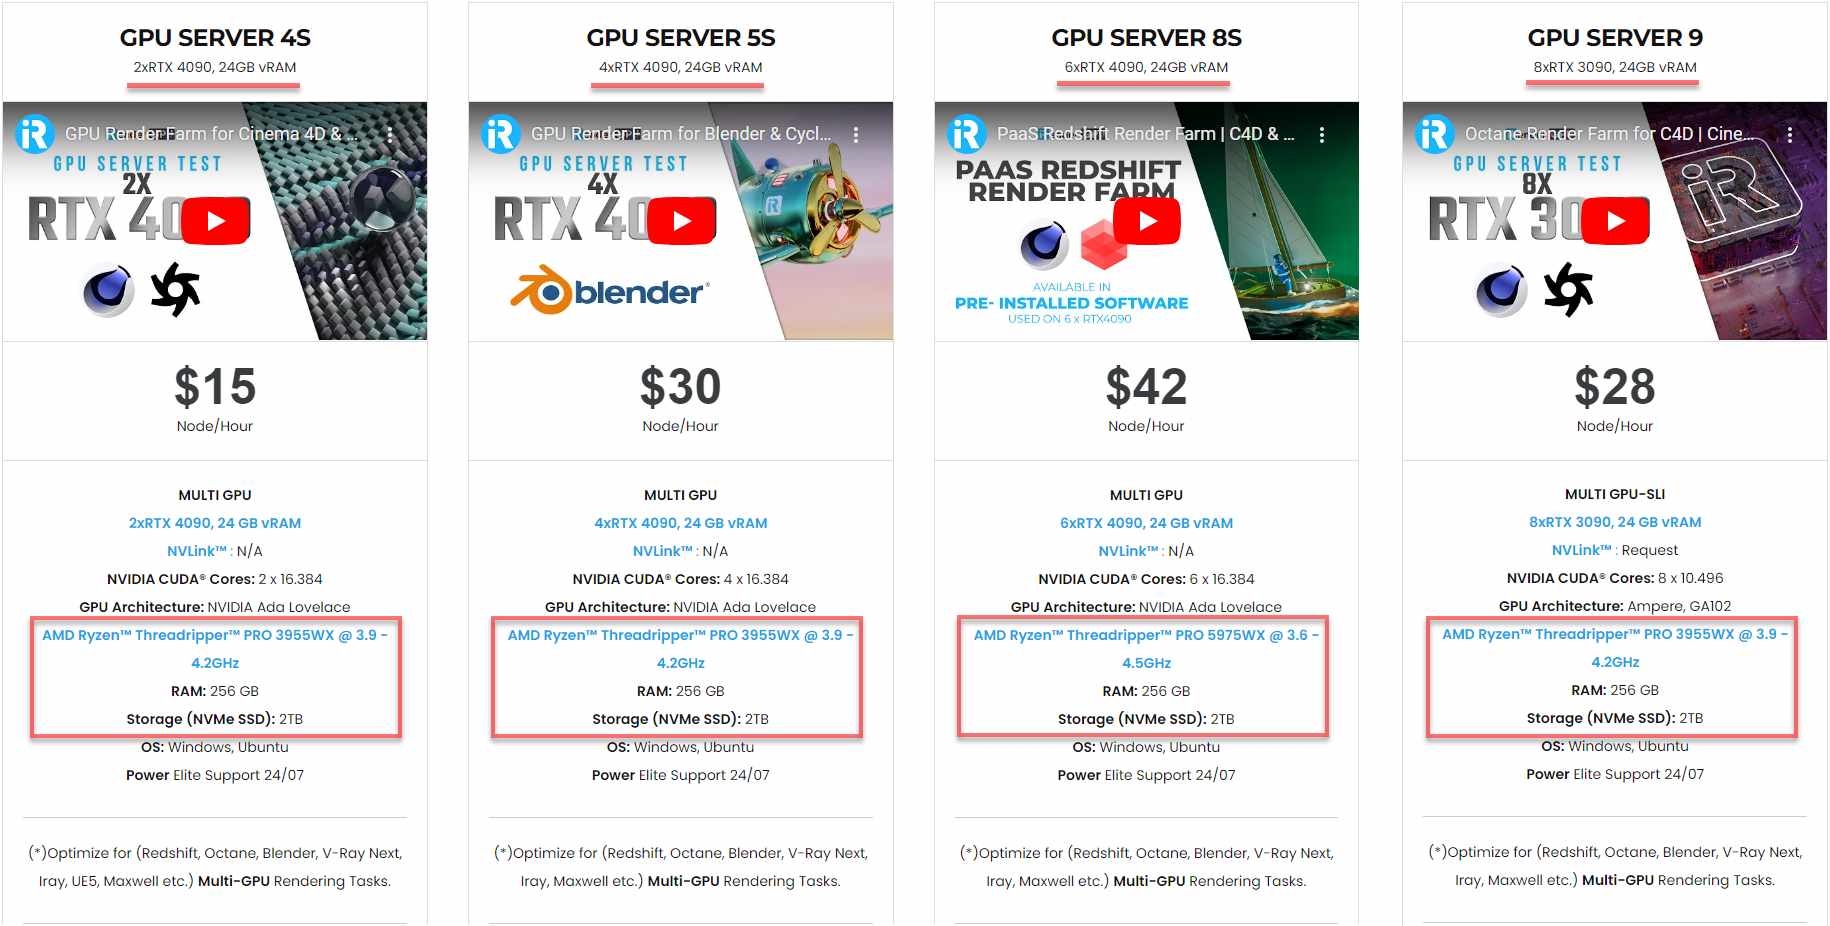
Let’s see how Iray speeds up rendering on our multiple GPU servers:
Join iRender now to start your FREE TRIAL and render faster!
For further information, please do not hesitate to reach us at [email protected] or mobile: +84915875500.
iRender – Happy Rendering!
Reference source: daz3d.com
Latest News
The latest creative news from Daz3d Cloud Rendering, Nvidia Iray Cloud Rendering , Cinema 4D Cloud Rendering , V-Ray Cloud Rendering , Redshift Cloud Rendering, Octane Cloud Rendering, 3D VFX Plugins & Cloud Rendering.

