
Exploring Blender’s New Light Linking Feature
For most 3D artists, lighting is a crucial factor in creating the scene’s realism. Reasonable lighting control is critical to creating high-quality 3D content that meets the artist’s vision. Recently in the new release of Blender (Blender 3.6), there is a new feature related to lighting. This feature gives artists control over their projects, improving the look and render times. In this article, we’ll explore Blender’s new light linking feature.
Introduction to Light Linking in Blender

Image Source: Yacine3Dz
Artists can select which objects a light in a scene impacts by using Light linking. The function is frequently used to speed up render speeds and fine-tune lighting on particular scene elements. Commercial render engines like Arnold and V-Ray have had this feature for a long time. This is a new feature that has been brought to Blender and this one is a must in lighting it’s called light linking. This will make it possible to include and exclude light on certain objects. However, it only becomes available in Blender in experimental feature builds. Currently, the feature is scheduled to be released with Blender 4.0.
Light linking works by limiting the light of each specific object. Besides, light linking is implemented in two ways by Blender, using two different kinds of light linking groups.
The first type lets artists decide the things that will receive lights. The light has an impact on an object in the group but does not affect objects outside the group.
The second type gives artists the option to select shadow-blocking elements for light. Any item designated as a blocker will cast light-sourced shadows. In addition, it’s crucial to note that objects can be configured to be excluded from shadow production, allowing light to travel through them and illuminate items behind them as well as strike them directly. Through these settings, artists are given more creative freedom at the expense of the renderer’s physically precise computations.
How to use Light Linking
For example, you have this scene ready and you want to link all the objects to this slide. Let’s select the light and go to object properties shading and you’ll find the Light Linking option. Now we can drag and drop our objects from the outliner or we could select all the objects in the 3D viewport.

Image Source: Yacine3Dz
Then select the light and then shift-click the light again to deselect it then drag and drop all the objects from the outliner at once. An easier way is just to select all your objects and then select the light and press Ctrl l and choose Light Linking.
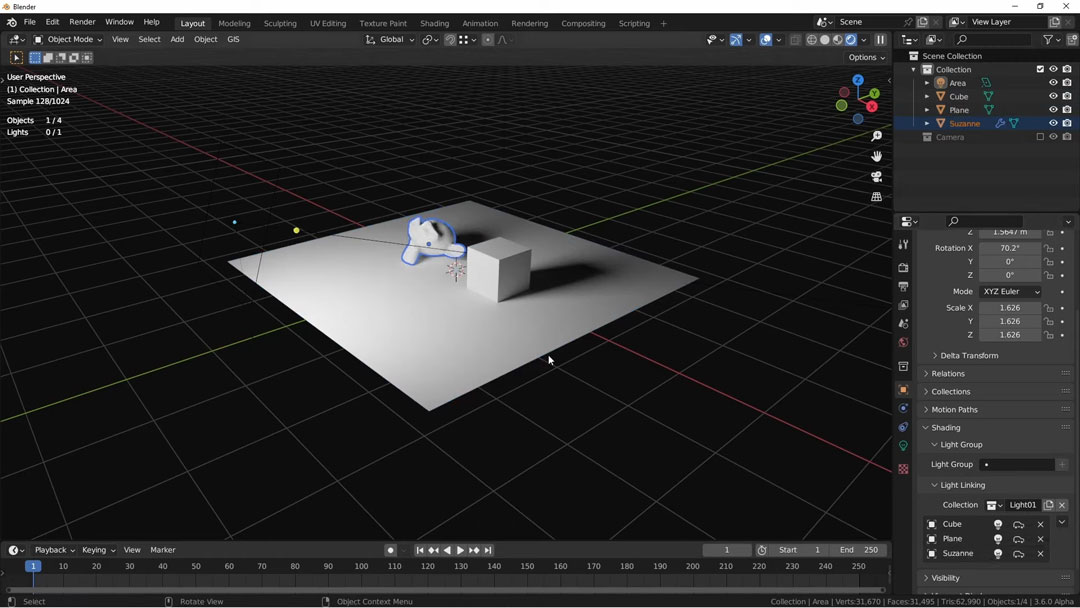
Image Source: Yacine3Dz
Let’s say you add a new object that you want to add to the light collection. You just select it and then select the light, press Ctrl l then choose Light Linking.
Benefits of using Light Linking
1. Light Linking boots rendering with Cycles X in Blender
Blender’s use in the film and television industries has advanced significantly with CyclesX’s addition of light linking. This feature can help speed up the production process and save time and effort by letting artists concentrate on certain elements of a scene without influencing others. This feature gives animators more control over the lighting in their scenes, enabling them to produce more visually attractive and realistic animations. Blender is clearly a great software in the field of 3D animation and modeling when combined with other cutting-edge features in CyclesX and the existing extensive toolkit offered in Blender.
2. Light Linking for better light control during the rendering process
In the past, lighting specific objects in a Blender scene would be done by Cycles in Blender. This process is often combined by many different light groups. Besides, there are also a number of add-ons that support light processing in Blender such as Pro Lighting Studio, Gaffer, and Blender light manager. With the introduction of Light linking, creative lighting decisions will become much easier for artists using Blender.

Light Linking (Image Source: Blender Community)
In Blender, we can choose any light and pick Light Linking from the Object Properties Panel’s Shading menu. We can manage all of the light connecting options for the light from here.
3. Light Linking helps to optimize scenes
Another advantage of light linking is reduced render times and render costs. You will select certain light for each object or area then complex path calculations can be cut down and noise reduction still be achieved with the best image quality.
Wrap up
Light Linking is a great feature that adjusts the lighting impact on each scene/object in the rendering process. Integrating this feature directly into Blender’s Cycles rendering engine will be a “big jump” for Blender users and lighting artists. The feature is currently in beta, but you can track its progress here on Blender’s project tracker. In the near future, this feature will be built into Blender 4.0. The Blender community grows and changes day by day. You can use the new features to upgrade your project. However, some complex scenes in Blender still require the processing of a powerful enough workstation to handle! So if you are looking for a render farm to start rendering your projects in Blender, let’s join with iRender.
iRender is willing to handle the most complicated scene in Blender
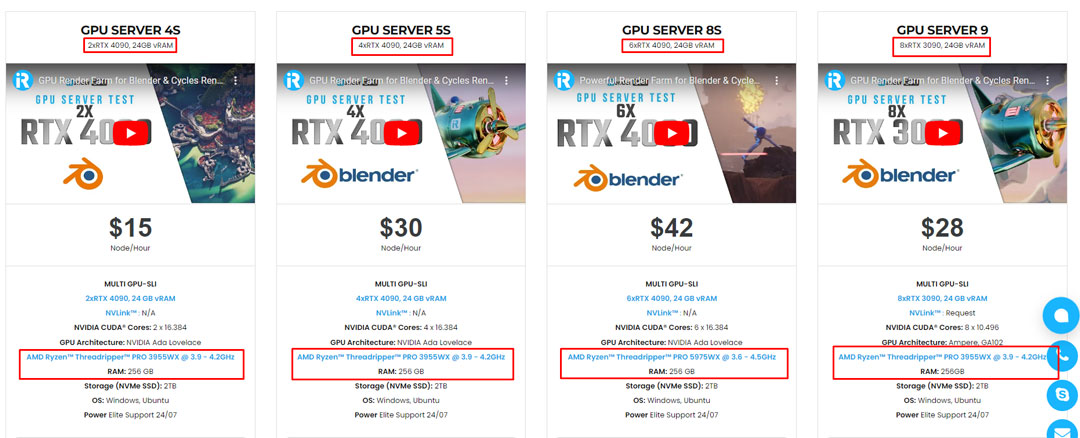
iRender is proud to be one of the best GPU service providers on the market. You can find a lot of options suitable for your Blender project. iRender offers from 1/2/4/6/8 RTX 4090s and 3090s. In addition to offering powerful configurations, all servers at iRender are also equipped with AMD Ryzen™ Threadripper™ PRO 3955WX @ 3.9 – 4.2GHz or AMD Ryzen™ Threadripper™ PRO 5975WX @ 3.6 – 4.5GHz, 256GB RAM, 2TB Storage NVMe SSD. The high-end configuration is extremely suitable for complex Blender projects.
Let’s see how our RTX4090 performs when rendering with Blender scenes:

Recently, we have just released an iRender GPU desktop application, allowing you to fully utilize our services easier, and more efficiently. You can watch this video for better understanding.

The price is very flexible and suitable for Blender projects from small to large. Moreover, iRender always has a 24/7 online Support Team to help you handle problems immediately.
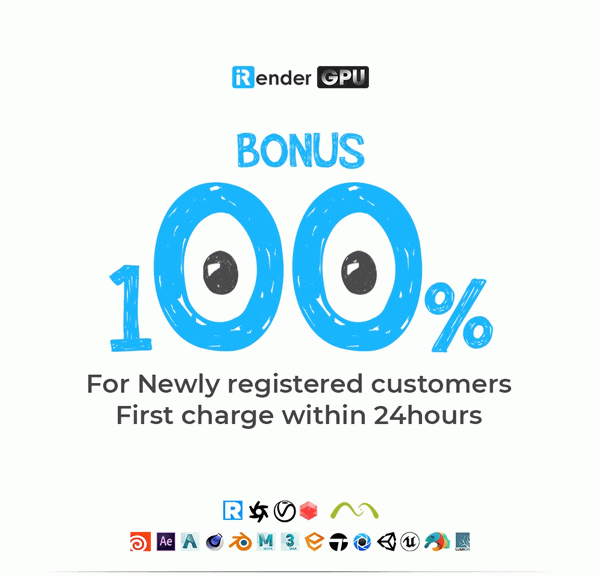
In this month, we have SPECIAL DEAl: For your first transaction within 24 hour since your registration, you will receive a 100% bonus.
Let’s create an ACCOUNT and try our render beast for your Blender projects. For further information, please do not hesitate to reach us at [email protected] or mobile/ WhatsApp: +(84) 916017116, Skype: Lina iRender
iRender – Happy Rendering!
Reference source: Yacine3Dz, Blender Community
Related Posts
The latest creative news from Blender Cloud rendering.


