Fixing error “Redshift isn’t showing up in the toolbar” with iRender
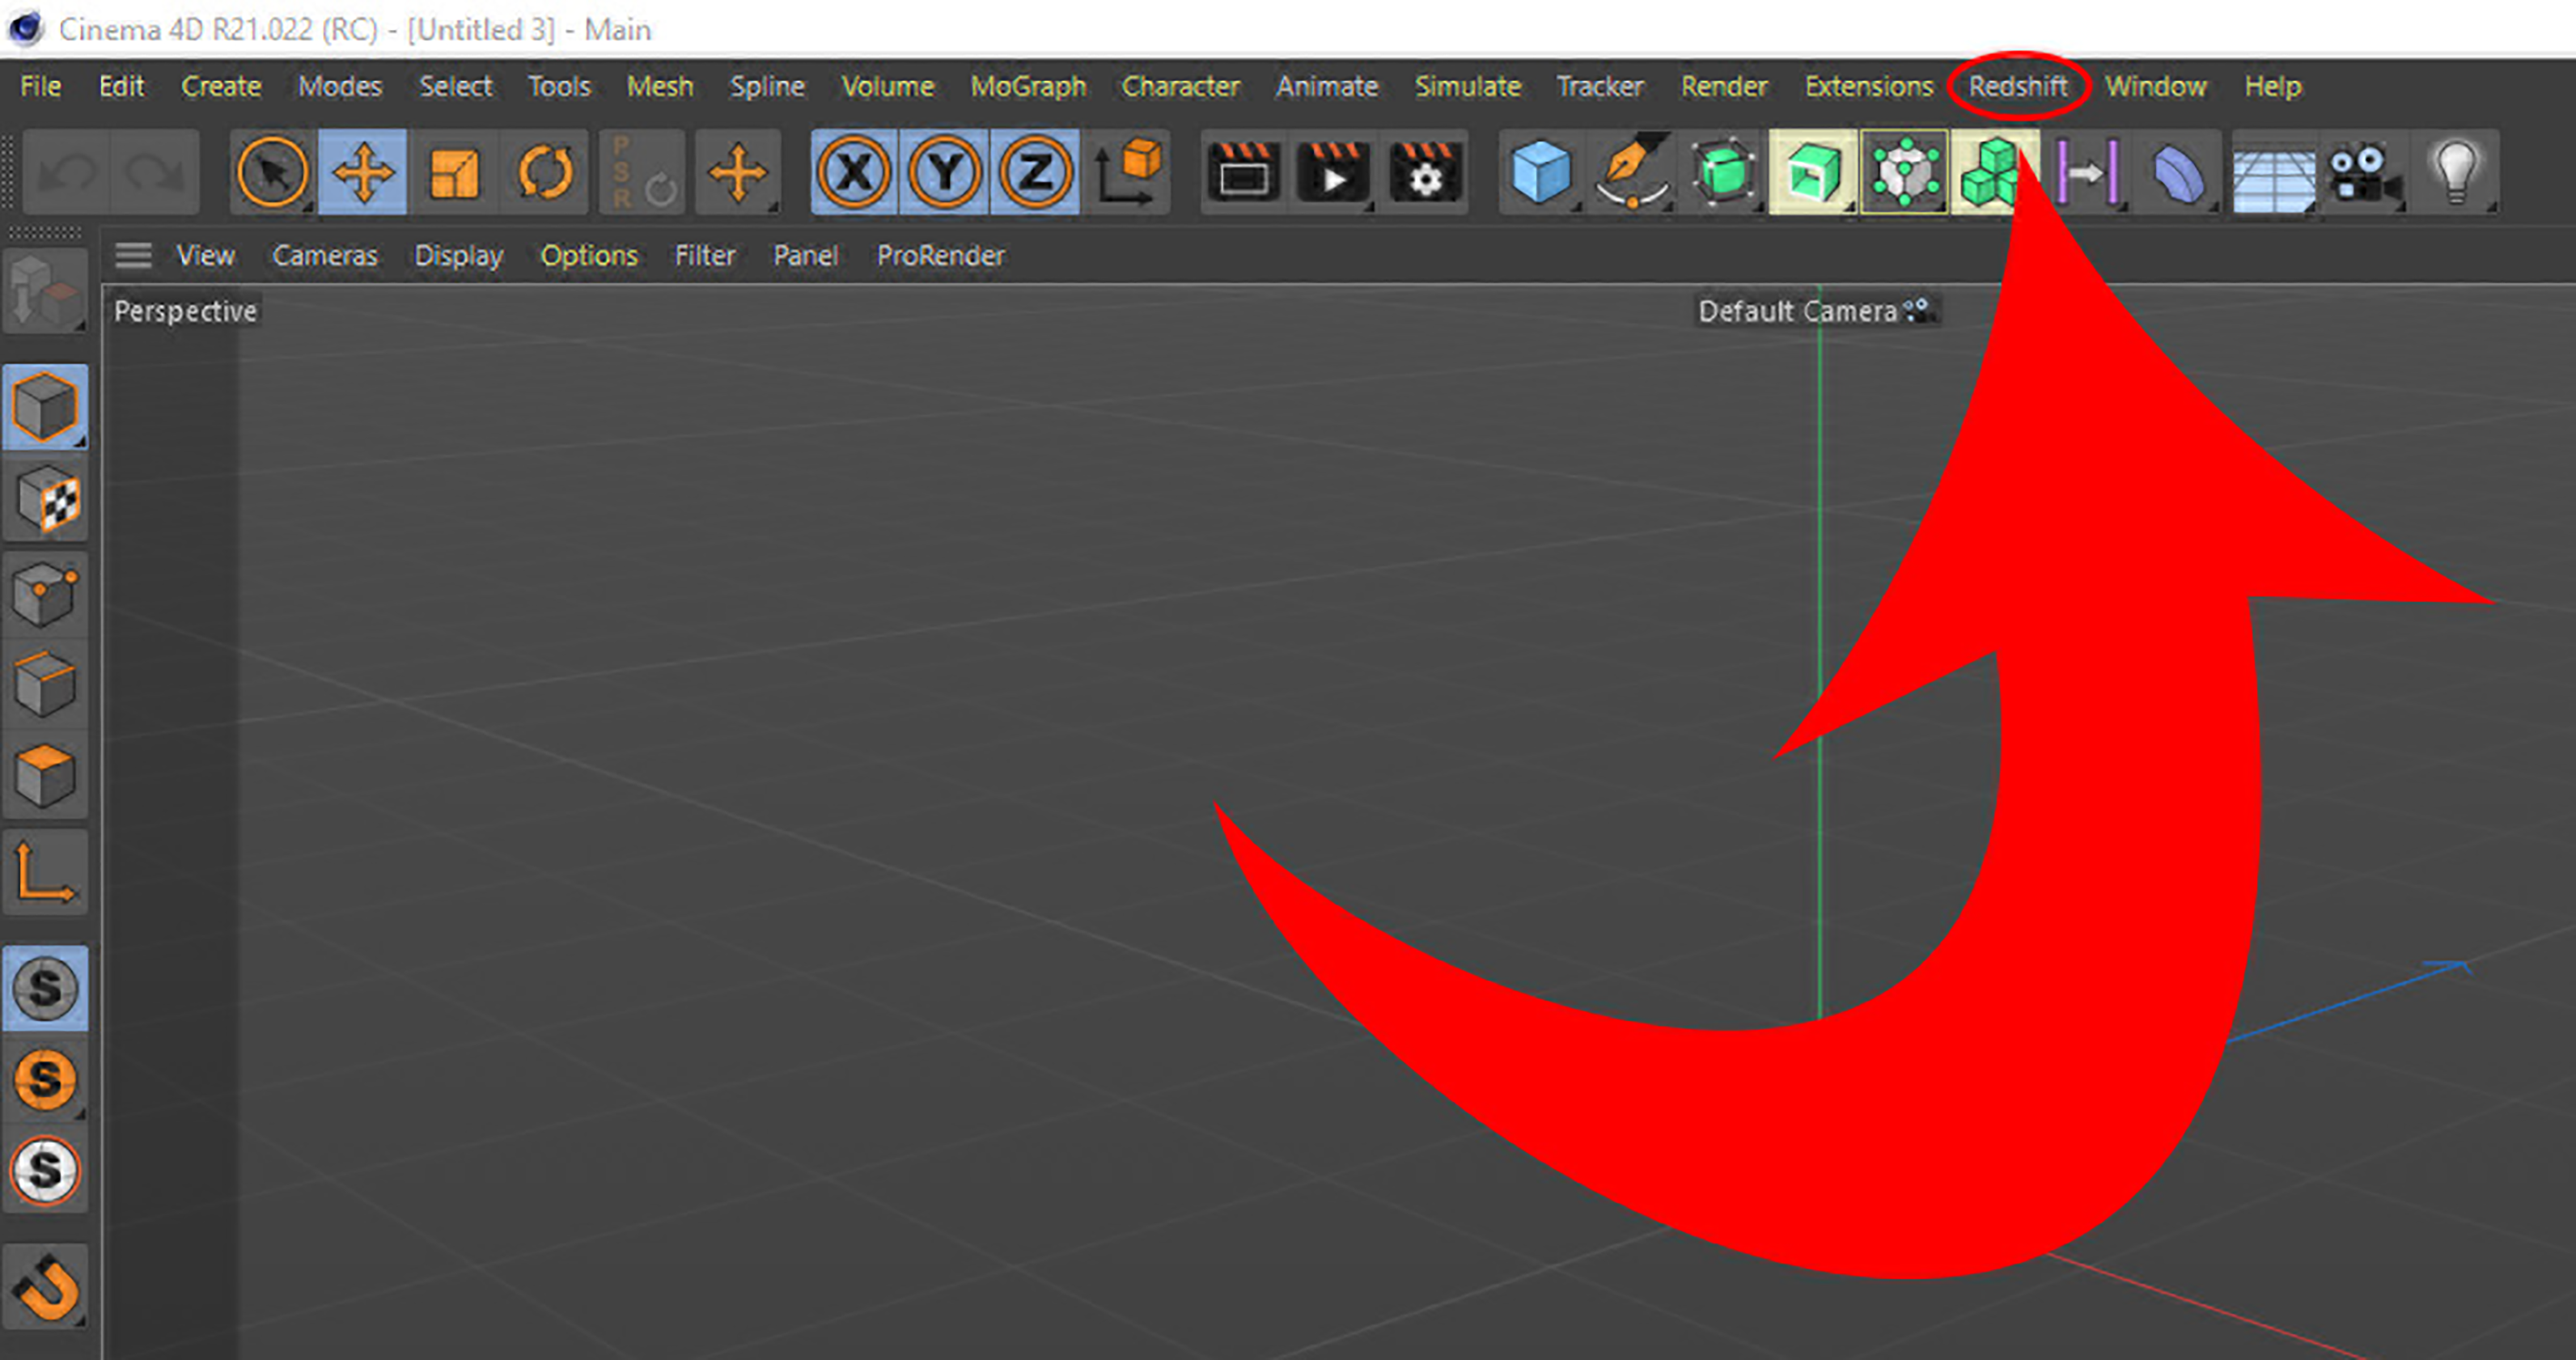
As you might know, Maxon Redshift is famous as a powerful GPU-accelerated renderer that works compatibly with Cinema 4D. When you install Redshift in Cinema 4D, you might feel odd not seeing Redshift showing up in your toolbar as a “plugin”, wonder what gone wrong. In this article, iRender will explain what should be done when this error occurs.
Redshift isn’t showing up in the toolbar, what’s wrong?
Firstly, please check whether your machine has suited to Redshift’s required specifications: https://www.redshift3d.com/product/system-requirements
Redshift still currently uses the old method of installing plugins which is to create a “plugins” folder in your Cinema 4D installation path (C:\Program Files\Maxon Cinema 4D R20\plugins on Windows, or Applications/Maxon Cinema 4D/plugins on Mac) and install Redshift there. Before the release of R20, this was the usual method of installing plugins.
But with the release of R20, MAXON created a new method of installing plugins that does not require you to use this old method. Although Redshift, by default, will try to use this old method, you can force it to use the new method instead; here’s how to do that:
- First, if you’ve already installed Redshift, uninstall it.
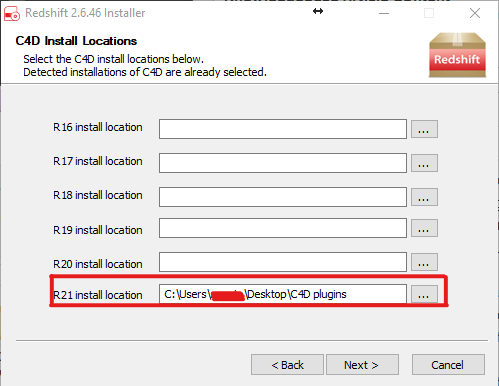
- Next, run the Redshift installer again. This time instead of installing to the default location, create a new folder on your computer and tell the Redshift installer to install Redshift there:
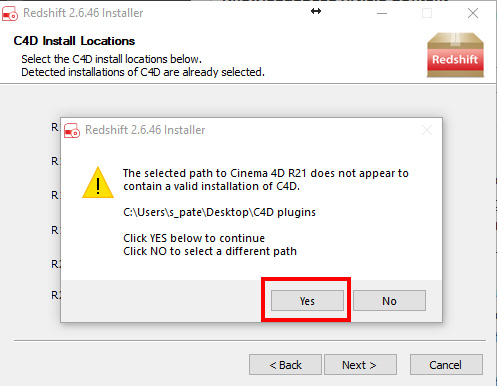
3. Install Redshift to that folder. The Redshift installer will warn you that no Cinema 4D installation was detected in that folder; this is fine. Click “Yes” and proceed with the installation:
4. Once the installation is complete, If you have your Redshift license through Redshift itself, you will need to run the licensing tool to license the plugin first. If you have a Cinema 4D + Redshift bundle subscription you can just quit the installer without running the Redshift licensing tool.
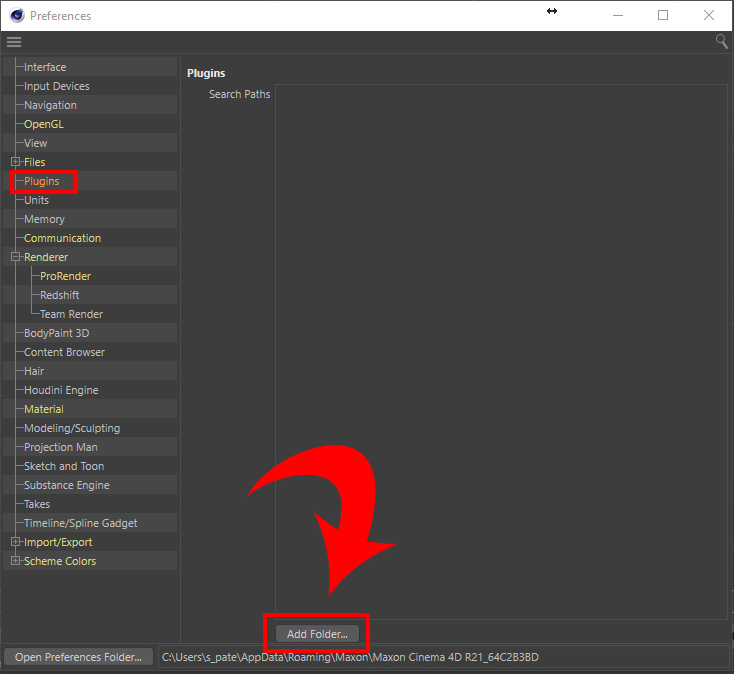
5. Once you’re done re-installing Redshift, launch Cinema 4D and go to the Edit menu and choose Preferences. In the Preferences window go to the Plugins section and click the Add Folder button near the bottom:
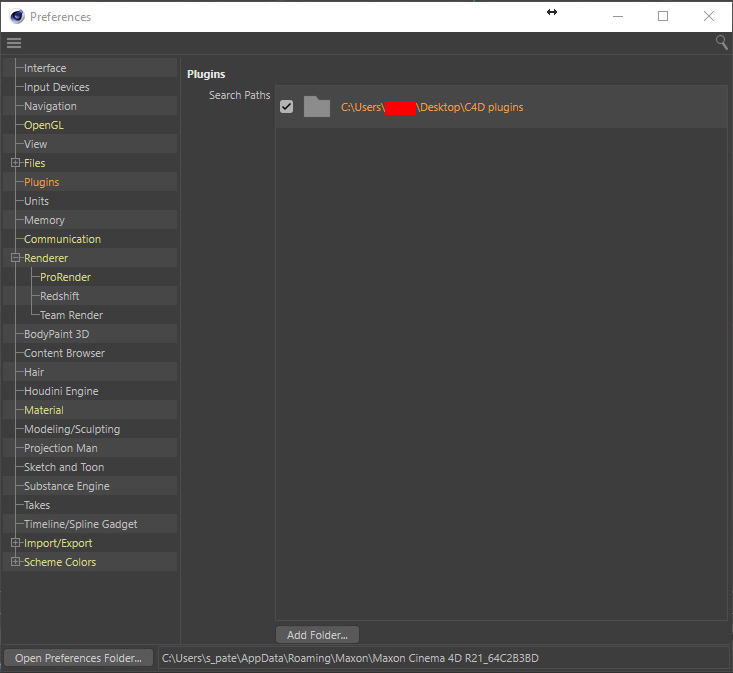
6. Select the folder you created and installed Redshift to earlier:
7. Restart Cinema 4D and you should see Redshift appear normally:
iRender - The Best GPU Render Farm for Cinema 4D and Redshift Renderer
iRender is proud to be a professional GPU Accelerated Cloud Rendering Service provider in HPC optimization for Render, CGI, and VFX tasks with more than 25,000 clients. We are appreciated in many global rankings (e.g. CGDirector, Lumion Official, Radarrender, InspirationTuts CAD, All3DP, BlenderBaseCamp, VFX Rendering.)
Our Services
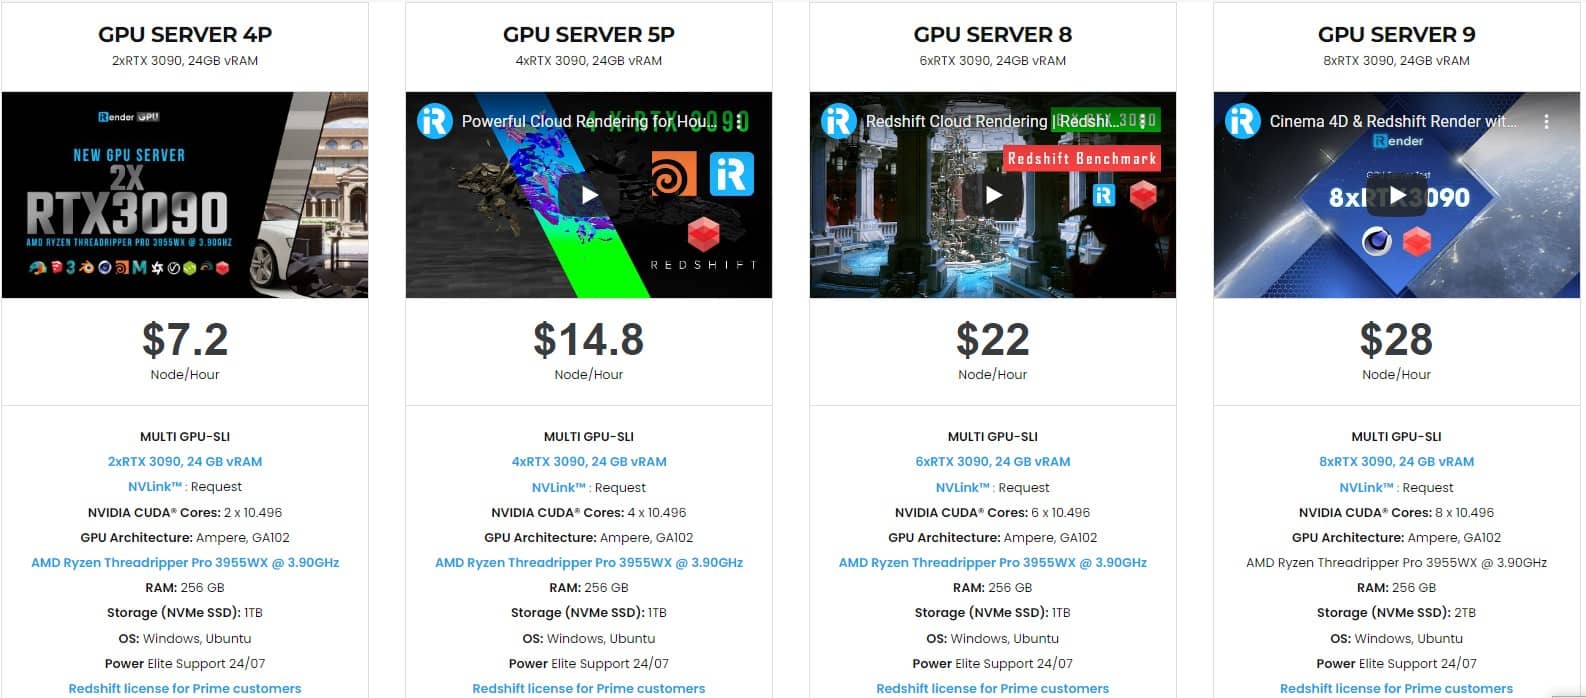
We have developed multiple RTX 3090 server packages that are specifically configured and optimized for GPU rendering. With a range of GPU servers from a single RTX 3090 to multiple 2/4/6/8 x RTX 3090, you can choose a server that meets your needs and your software to start the rendering process. All information on the server configuration is publicly posted on our website. You can know exactly what the server specification contains, the type of CPU and GPU it has, and its cost as well.
We are currently providing Redshift Floating license and OctaneRender Enterprise license for our Prime customers. Let’s enjoy working on our RTX 3090 beast machine with the provided licenses. Moreover, we are running a SPECIAL OFFER: 20% Additional Bonus for new users who register an account and make a top-up within 24 hours after registration.
If you have any questions, please do not hesitate to reach us via Whatsapp: +(84) 972755742. Register an ACCOUNT today and get FREE COUPON to experience our service. Or contact us via WhatsApp: +(84) 972755742 for advice and support.
iRender – Happy rendering
Related Posts
The latest creative news from Cinema 4D Cloud Rendering , Redshift Cloud Rendering, Octane Cloud Rendering, 3D VFX Plugins & Cloud Rendering.

