Houdini Optimization: How to Use Attribute Delete to Remove Unnecessary Data Before Caching
In Houdini, file caches becoming heavier after each project is almost unavoidable, especially when working with simulations such as Pyro, FLIP, Vellum, or RBD. The root cause is not necessarily overly complex simulation settings, but rather how Houdini manages and stores attribute data.
During simulation, Houdini generates a large number of attributes to support physical calculations, collisions, motion interpolation, and solver debugging. According to SideFX’s design, these attributes are not automatically removed once the simulation finishes. This means that if you connect the simulation output directly to a File Cache or ROP Geometry, all data, including attributes that are no longer useful, will be written to disk.
As a result, cache files quickly grow in size, scene load times increase significantly, internal networks can become bottlenecks when render farms access the data, and storage space is consumed rapidly after just a few projects.
To address this issue, SideFX provides a crucial but often overlooked SOP node: Attribute Delete. In this article, iRender will help you:
- Understand the true purpose of Attribute Delete based on SideFX documentation
- Learn how to use it correctly before writing cache files
- Apply a production-ready workflow
- See real-world results through a before/after cache size comparison
1. What Is Attribute Delete?
Attribute Delete is a SOP node designed by SideFX that allows users to remove unnecessary attributes from geometry explicitly. This node does not affect the shape or topology of the geometry; it only modifies the associated data. In other words, Attribute Delete helps reduce the “weight” of geometry before it is written to disk or sent to render.
According to the official SideFX documentation, Attribute Delete can remove attributes at four different levels:
- Point
- Vertex
- Primitive
- Detail
This structure reflects Houdini’s internal data model and explains why it is critical to understand which level an attribute exists on before deleting it. In real-world production, most redundant data typically resides in Point Attributes, since every point carries a full set of attributes.
2. The Correct Placement of Attribute Delete in the Workflow
To achieve optimal results, Attribute Delete should be placed after the final simulation node and before the File Cache node.
A standard workflow looks like this:
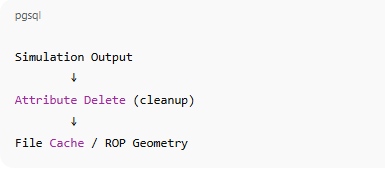
At this stage, the simulation has already finished, and solver-related attributes are no longer required. If Attribute Delete is placed too early, you risk removing critical data and breaking the simulation. If it is placed after File Cache, cleanup becomes meaningless because the data has already been written to disk.
Before deleting any attributes, SideFX recommends inspecting the geometry data by:
- Middle-clicking on the node
- Using the Geometry Spreadsheet
This step helps you clearly identify which attributes are required for rendering and which ones can be safely removed.
3. Understanding the Key Parameters of Attribute Delete
3.1. Attribute Groups
Attribute Delete separates attributes into four data levels:
- Point Attributes – data stored per point
- Vertex Attributes – data stored per vertex
- Primitive Attributes – data stored per primitive
- Detail Attributes – data stored for the entire geometry
Deleting attributes at the correct level is essential. If you target the wrong level, the node will have no effect.

3.2. Delete Non-Selected – Keeping Instead of Deleting
This is one of the most important options in Attribute Delete.
- When disabled: the node deletes exactly the attributes you specify
- When enabled: the node keeps the attributes you specify and deletes everything else
SideFX designed this option to support a workflow where you define what to keep, rather than listing dozens of attributes to delete, an approach that scales poorly in production.
4. Two Ways to Use Attribute Delete to Optimize File Caches
4.1. Manual Attribute Deletion
The first approach is manual deletion, where you directly enter the names of attributes to remove in fields such as Point Attributes or Primitive Attributes. This method works well for simple scenes or when you are already familiar with the attributes generated by the simulation.
For example, in Point Attributes:

The node will remove these attributes from the geometry.
However, as scenes become more complex and the number of attributes grows, this approach becomes inefficient and prone to missing redundant data.
4.2. Delete Everything, Keep Only What You Need (Best Practice)
This is the most commonly used approach in production. Attribute Delete supports wildcards (*) and exclusion characters (^), allowing you to select all attributes and then explicitly keep only the ones you need.
Example (Point Attributes):
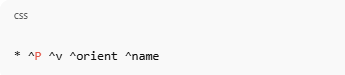
Explanation:
- *: select all attributes
- ^: exclude from deletion (keep)
This means:
- Delete everything
- Except:
- P – position
- v – velocity (motion blur)
- orient – orientation (instancing / RBD)
- name – piece name
This approach yields an extremely lightweight geometry after cleanup and significantly reduces the risk of leaving unwanted attributes behind as the pipeline becomes more complex.
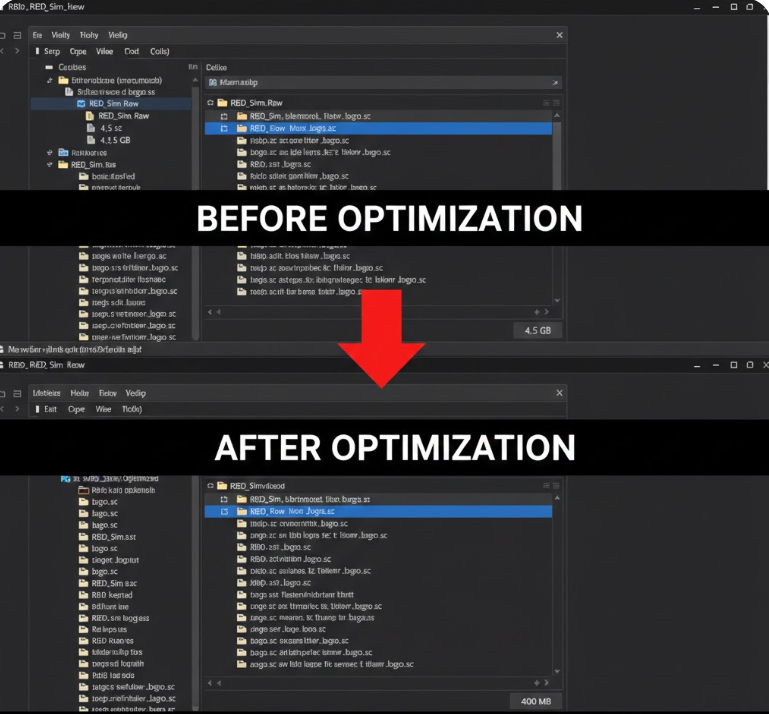
5. Real Case Study: Before and After Using Attribute Delete
In a Pyro Smoke project with approximately 3 million voxels and 240 cached frames in .bgeo.sc format:
Before optimization
The geometry contained many attributes such as density, temperature, vel, fuel, heat, rest, rest2, collision, force, and accel. The total cache size reached approximately 118 GB.
After using Attribute Delete
Only the attributes required for rendering were kept:
- density
- temperature
- vel (for motion blur)
Attribute Delete configuration:
* ^density ^temperature ^vel
After cleanup, the cache size was reduced to approximately 34 GB, representing a reduction of more than 70%, with no impact on render quality. Cache loading in Solaris and rendering with Karma or Redshift also became noticeably faster and more stable.
Conclusion
In Houdini, performance does not depend solely on hardware power or simulation complexity, but also on how efficiently you manage your data. Using Attribute Delete to remove unnecessary data before writing cache files may seem like a small optimization step, but it delivers significant benefits: lighter cache files, faster load times, more stable rendering, and a cleaner, more manageable pipeline.
However, in real-world projects, especially with Pyro, FLIP, Vellum, or high-resolution scenes, even well-optimized caches can still exceed the capabilities of many personal workstations. In such cases, combining an optimized Houdini workflow with powerful hardware infrastructure can save both time and cost.
This is where dedicated GPU rendering services like iRender truly shine. iRender provides high-performance GPU servers with large VRAM capacity, making them ideal for:
- running heavy Houdini simulations
- processing and rendering large cache files after optimization
- scaling resources quickly without long-term hardware investment
Once you optimize your file caches using Attribute Delete and deploy rendering on powerful infrastructure like iRender, your entire Houdini workflow becomes smoother, more stable, and more flexible, especially in production environments or under tight deadlines.
Smart Data Optimization Is the Key to Working Efficiently in Houdini with iRender
iRender is proud to provide suitable configuration packages for all software to bring you a great experience in the rendering process. With the benefits that iRender brings to you, as well as the configuration that is very suitable for all versions of Houdini, do not hesitate to use the service at iRender to have a great experience with your rendering time.
At iRender, we provide remote workstations where you can use them as your own computer. Under the IaaS (Infrastructure as a Service) model, you will have full control over the entire rendering process and use it as your personal machine. Therefore, you can install any software and plug-ins you want, add your license, and render or modify your project yourself.
Below is information about our packages, which are suitable for Houdini:
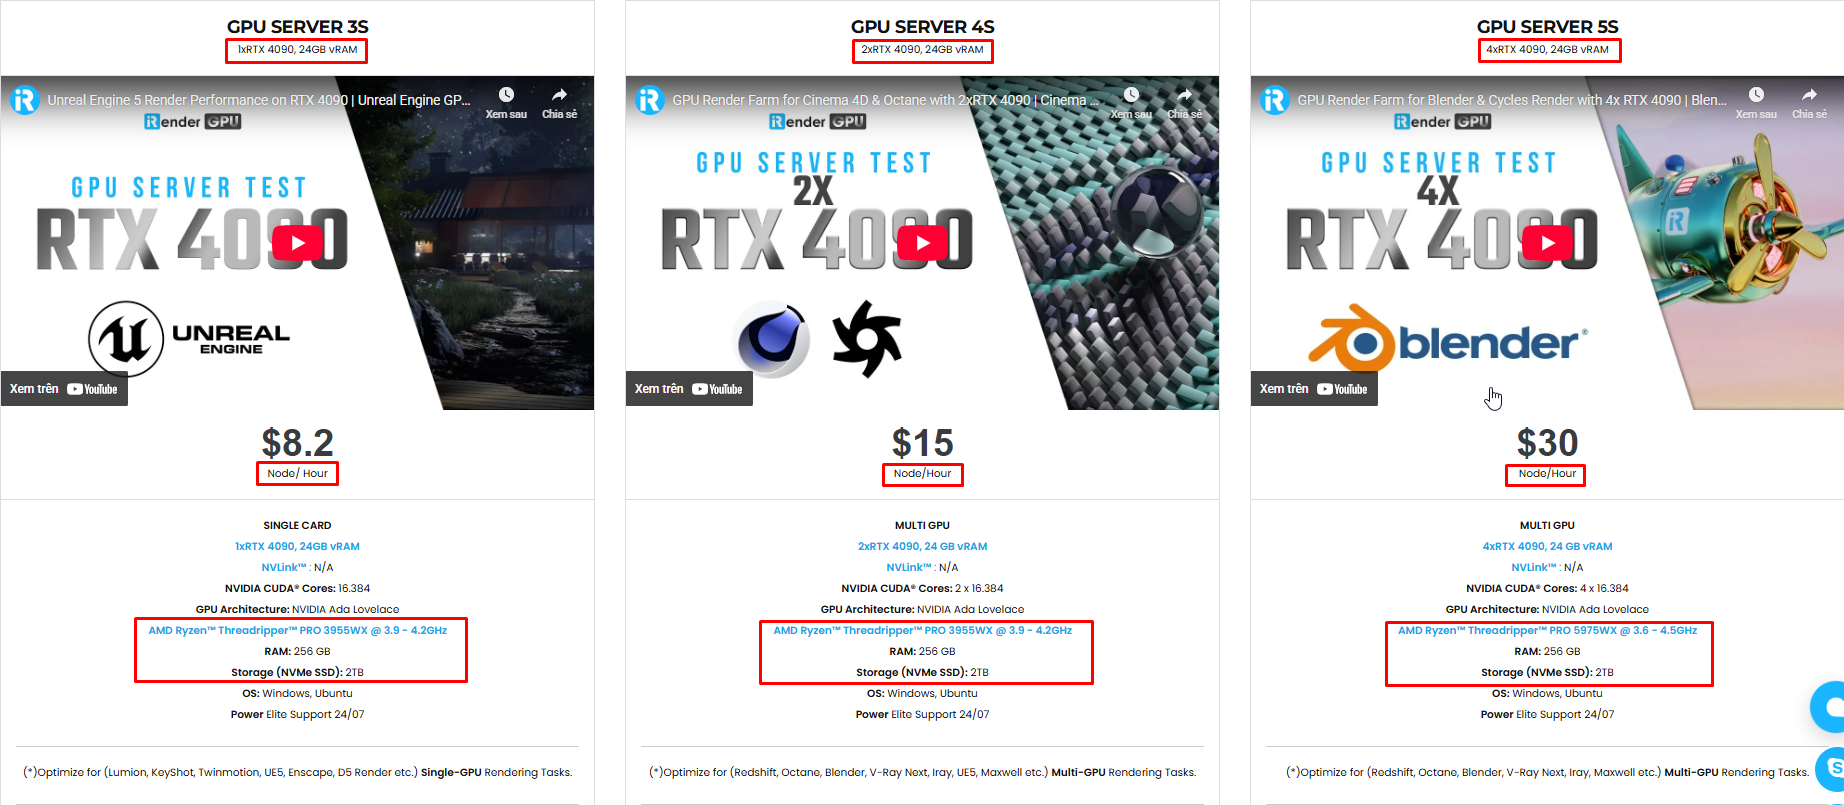

Not only does it have powerful configurations, but iRender also provides you with many more services. Free and convenient transfer tool iRender drive for macOS and Linux users. For Windows users, we recommend the iRender GPU application, you will not need to access our website anymore. The price at iRender is also very flexible with hourly rental (pay as you use), and daily/weekly/monthly rental with a 10-20% discount.
We’re always happy to help you with any questions. If you have any problems or questions, don’t hesitate to contact our 24/7 support team. Or via Whatsapp: 0912 785 500 for free advice and support.
iRender is currently offering a SPECIAL PROMOTION: enjoy a 100% bonus on your first top-up. This means your first deposit will be doubled, and your points never expire, allowing you to use them whenever you need.
Sign up for an account today to experience and enjoy our services.
Thank you & Happy Rendering!
Source and image:sidefx.com

Related Posts
The latest creative news from Houdini Cloud Rendering