How to convert an Image Sequence into a Video File in Blender?
If you’ve ever rendered an animation in Blender, you may have noticed that it typically outputs a series of individual images, called an image sequence, instead of a single video file. This may seem inconvenient at first, but image sequences actually give you more control over the final result because you can fix errors, adjust frames, or apply effects without having to re-render the entire animation. But how do you turn all those separate images into a smooth video file? Find out in this article with iRender!
Why should we use an image sequence instead of direct video rendering?
When working with animation or visual effects in Blender, you might wonder why many professionals prefer to render an image sequence instead of exporting a video directly. The main advantage is reliability, because if something goes wrong during rendering, you won’t lose the entire animation, just the frames that are corrupted. This makes troubleshooting much easier and saves a lot of time. We also recommend rendering frame-by-frame when using the iRender render farm.
Another benefit is flexibility in post-production. With individual frames, you can easily edit colors, add effects, or fix errors on specific frames without having to re-render the entire sequence. This high level of control is essential for longer and more complex animations. Furthermore, image sequences also support a wider range of formats, from PNG to JPEG to EXR. So you have more choices in quality, transparency, and workflow compatibility.
Once you have your image sequence ready, it’s time to convert it into a video, which we’ll cover step by step in the next section.
Preparing your image sequence for Blender
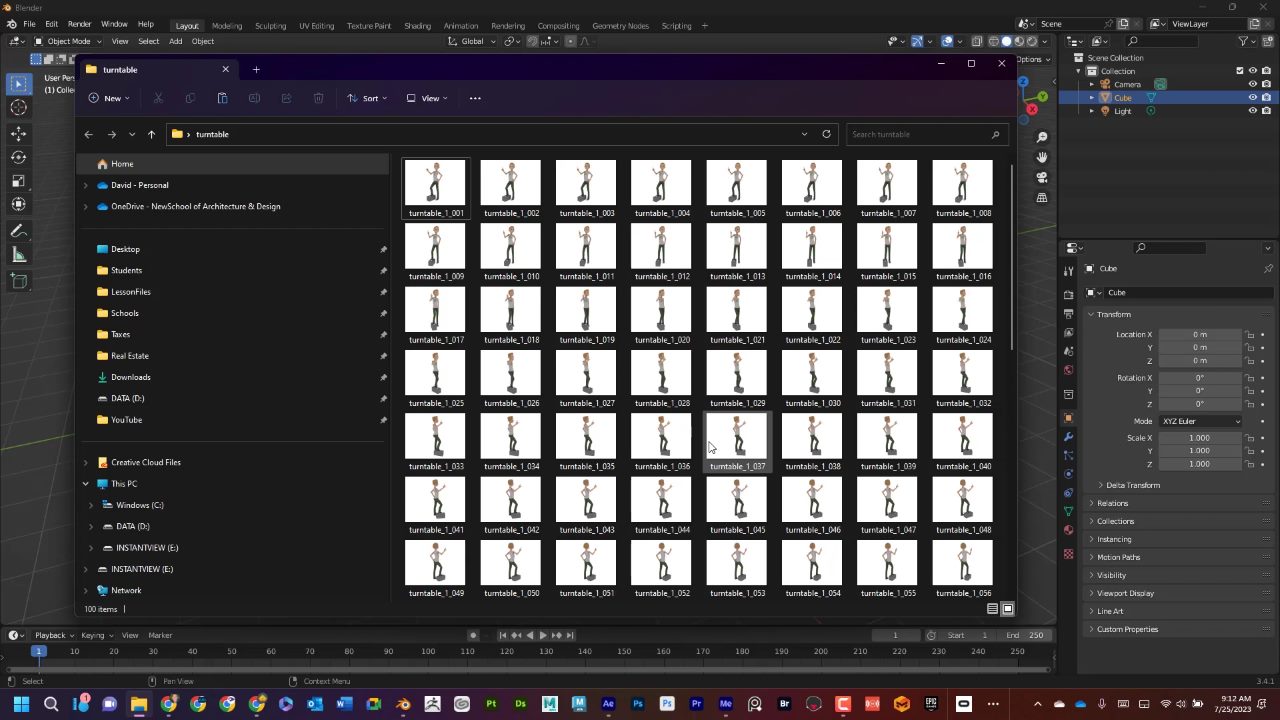
Before importing your image sequence into Blender, it is important to organize your files properly. First is the filename. Blender reads sequences based on numbered files, so using a consistent format like frame_0001.png, frame_0002.png, etc. will help Blender automatically detect the sequence and avoid missing or out-of-order frames when you load everything into the Video Sequencer.
Second is the image format. Blender supports many popular image formats, including PNG, JPEG, EXR, and TIFF, so you can choose the format that best suits your workflow. For example, PNG is good for general use while EXR is preferred for high-quality or VFX-heavy projects.
Third, put all frames in a separate folder, avoiding mixing them with other assets to help Blender load the right file and not pick the wrong image. Finally, double-check the resolution and frame rate of your frames. All images should be the same size, and the sequence should match the frame rate you plan to use in your final video.
How to convert an Image Sequence into a Video File in Blender?
Start by launching Blender. By default, you’ll see 3D Viewpoint, but for this task, we need the Video Sequencer. At the top of the screen, open the Workspace tab and switch to Video Editing. If it’s not at the top, create a new workspace using the plus icon.
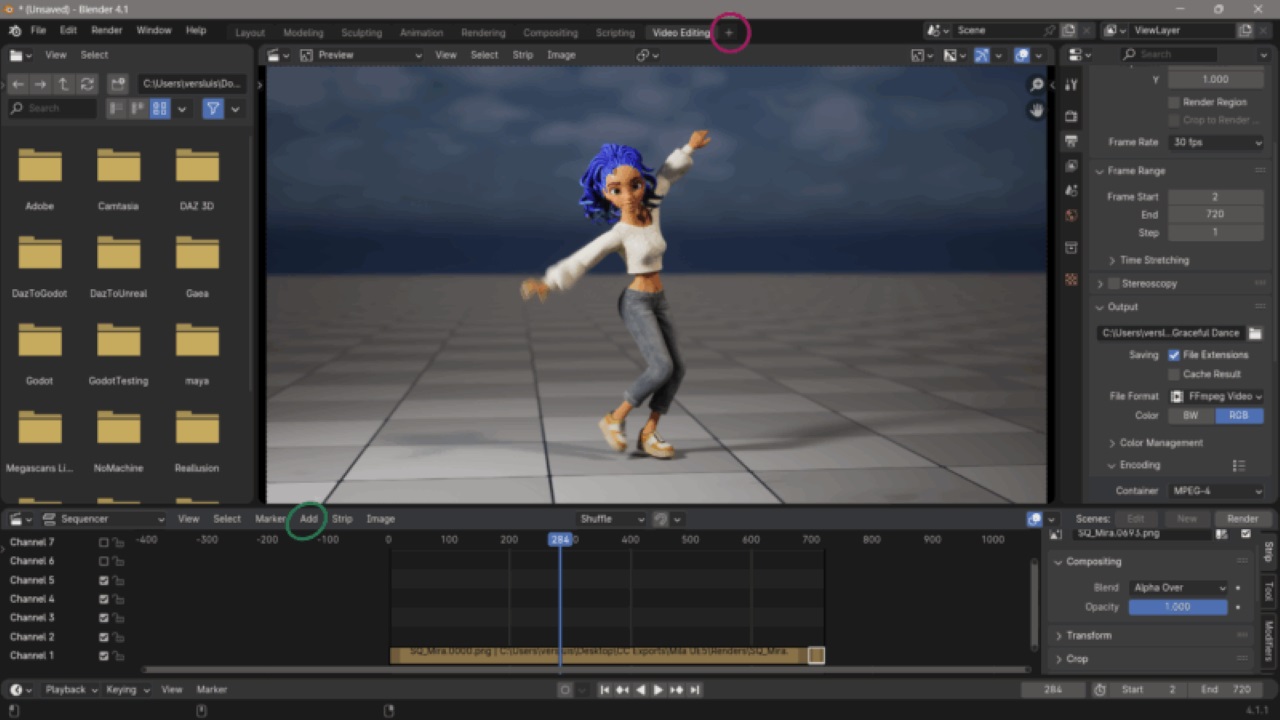
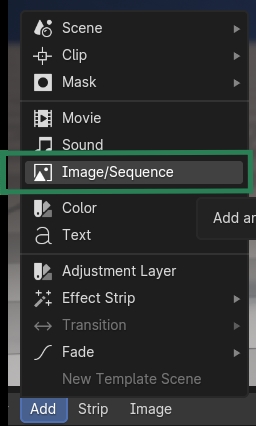
Next, to import a sequence of images, a single image, or even a video file, use the Add > Image/Sequence option above the video timeline. The file browser will open and navigate to the folder where your frames are stored.
Now, select all the images in the folder, and if they are numbered, Blender will be able to play them on the video timeline. Under Fit Method, select Original Size to get the exact aspect ratio and resolution of the original footage.
Before exporting, make sure your timeline is set up correctly. Blender needs to know how long your sequence is and at what speed it should play. Set the Frame Rate in the Output Properties panel > Scene Tab, with common choices being 24 fps, 30 fps, or 60 fps, depending on your project. You’ll also need to adjust the Start Frame and End Frame to match the length of your video sequence. For example, if you have 720 images, the End Frame should be 720.

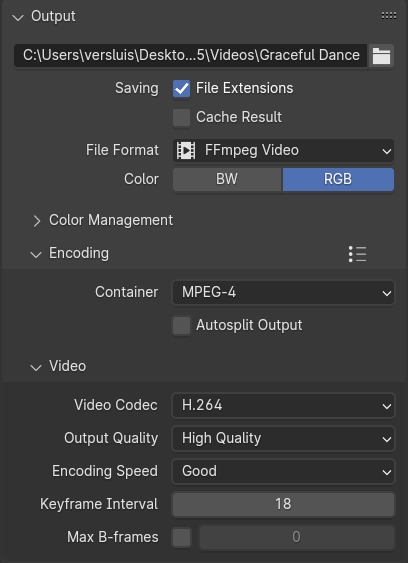
Now it’s time to configure how Blender will render your final video. In the Output Properties panel, select the Output Folder where Blender will save your video file and give it a name. Under File Format, choose FFmpeg Video, then choose a Container (MPEG-4 will create an MP4 file). You can also set the video codec and quality in this section.
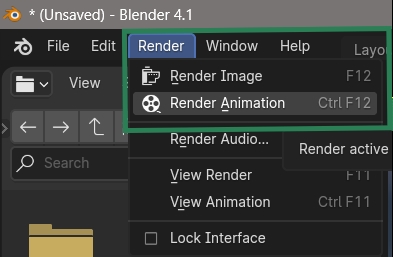
Once everything is in place, go to the top left corner and select Render > Render Animation, or press CTRL + F12. Blender will start stitching your frames together into a single video. You can see the progress in the Render window. When finished, open the output folder to check the final result.
Tips for dealing with different image sizes
If your images don’t fit the final output size, Blender will try to automatically scale them to fit the frame. This can result in clipping. If you don’t want this, use Crop and/or Offset in the Input panel to move and select an area of the image in the output. When you use Crop or Offset, auto-scaling is disabled, and you can manually re-scale by adding a Transform effect.
Conclusion
In summary, converting image sequences into a video file in Blender is actually quite simple, even for beginners, so we hope this guide has been helpful.
If you’re looking for a reliable render farm for your Blender projects, be sure to check out iRender for fast and efficient rendering.
iRender - The best render farm for Blender
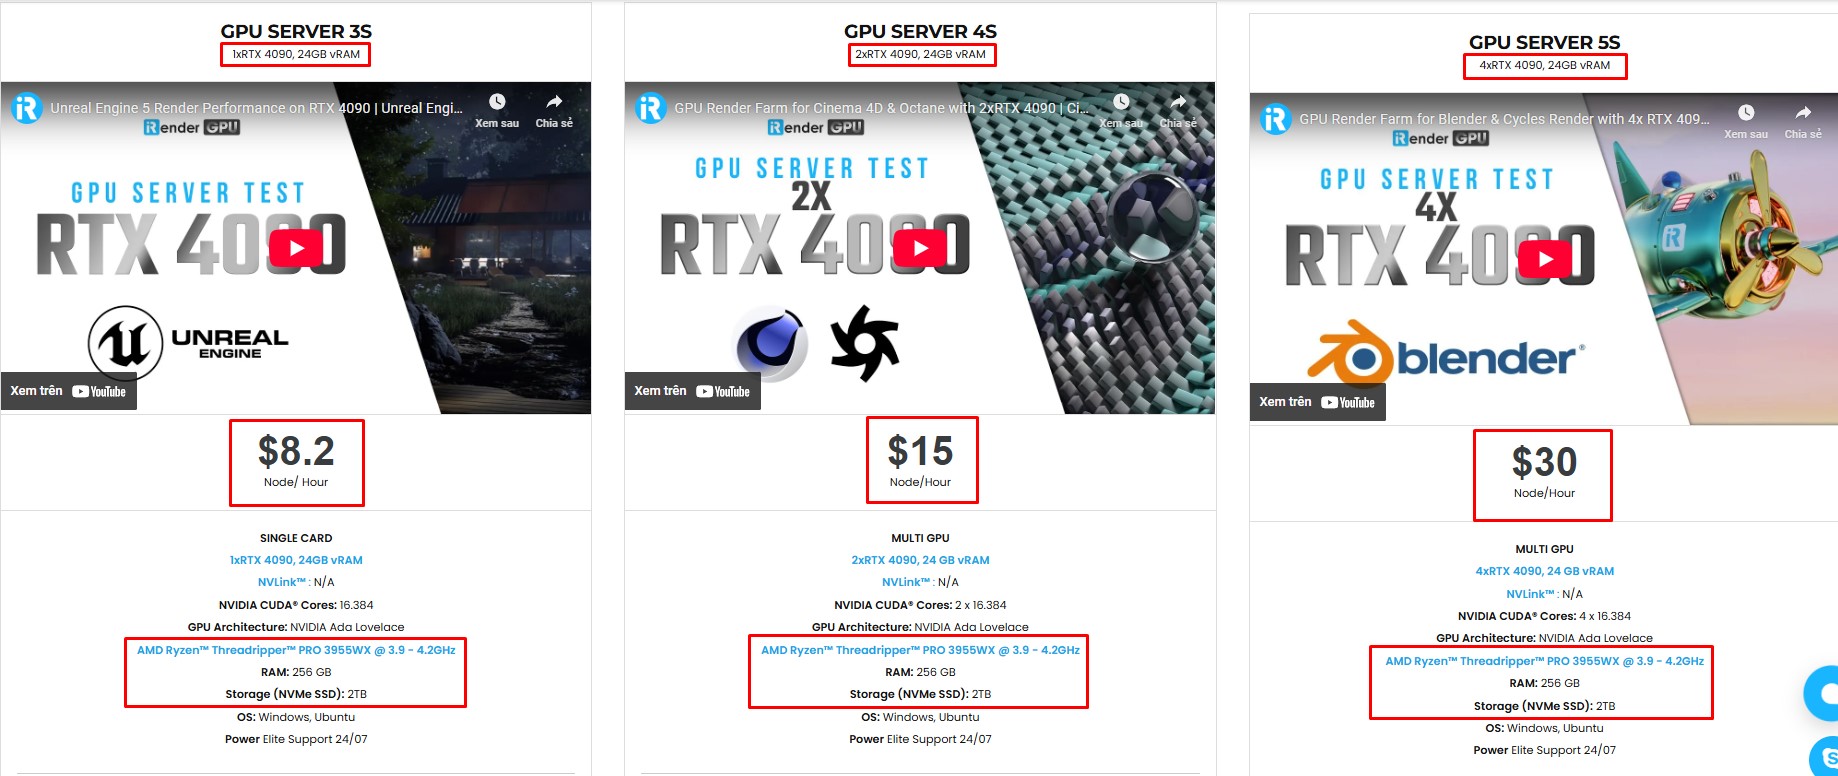
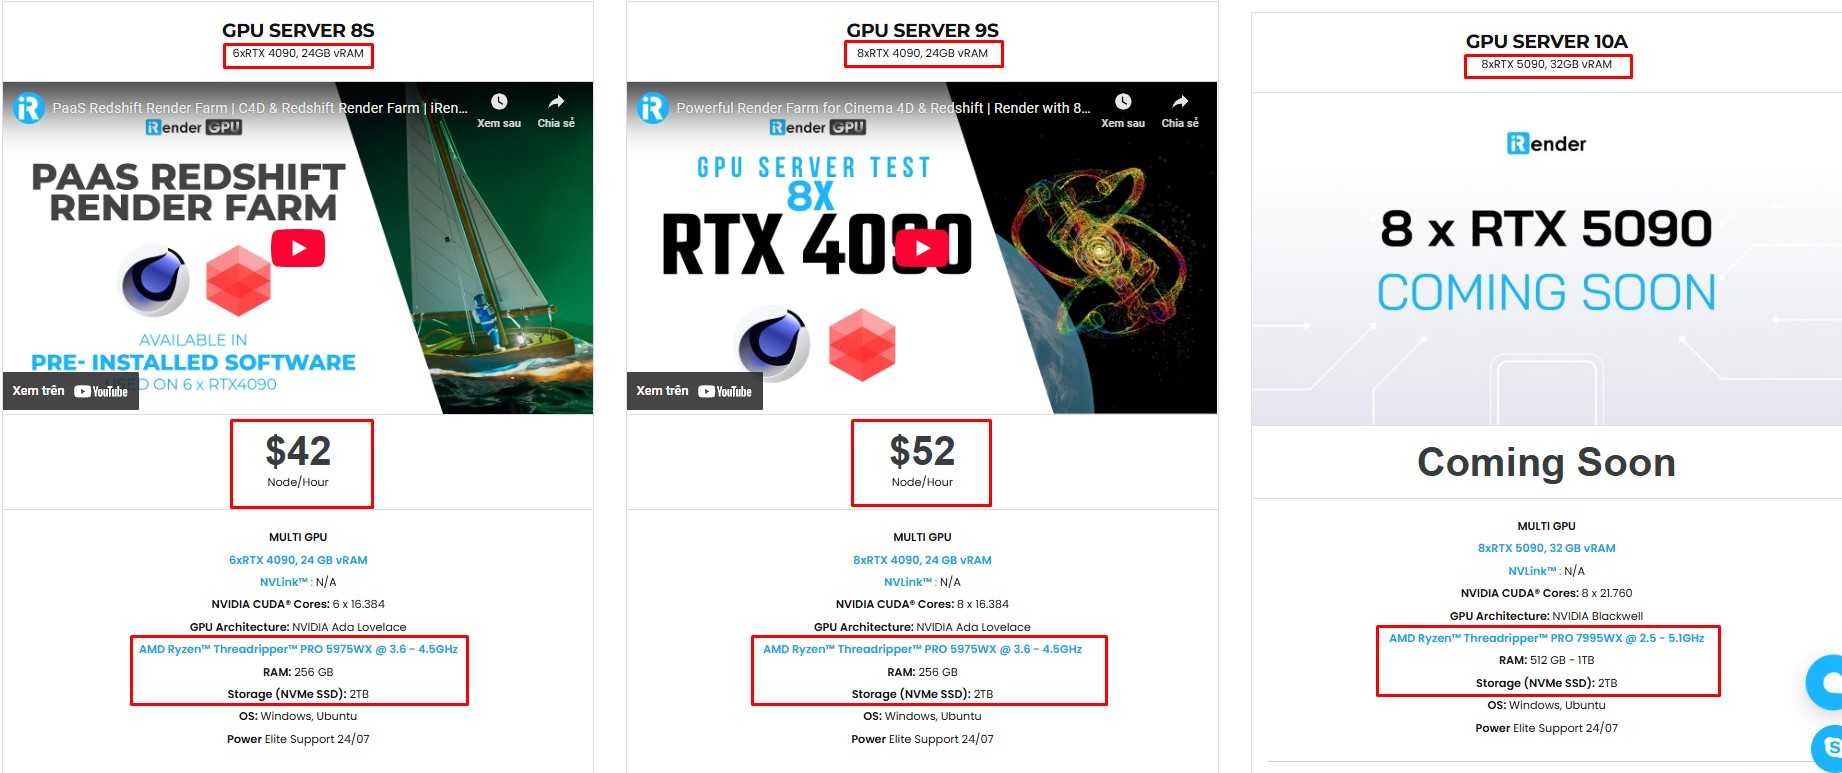
iRender is the best render farm for Blender with support for all Blender versions, and any render engines or plugins needed. We give you access to high-performance GPUs, so you can render faster and more efficiently, no need to upgrade your own hardware. All servers are equipped with:
- AMD Ryzen™ Threadripper™ PRO 3955WX (3.9-4.2GHz) or
- AMD Ryzen™ Threadripper™ PRO 5975WX (3.6-4.5GHz)
- 1/2/4/6/8x – RTX 4090
- 256GB RAM
- 2TB NVMe SSDs
Simple Your Workflow with Blender Preinstalled
Our servers have Blender latest version preinstalled. You just need to transfer your files, connect to the remote machine. Then you can render yourself like the way you do on your local PC. Setting up ONCE and your working environment will be saved and ready to use at any time.
Why choose iRender?
Unlike other services, iRender lets you upload and download files without starting the server, saving you both time and money. We offer a Desktop app for Windows with a full feature set and a simple Drive app for macOS for easy file transfers. Here’s why iRender is a top choice for your rendering needs:
- 100% Software Support: We support all 3D software, their plugins, and render engines.
- Full Control: Our service will give you full control over the servers you rent. Therefore, you are free to create your own working environment.
- Go Green: We are committed to using 100% solar renewable energy towards environmental sustainability.
- Real-human 24/7 Support: Our professional support agents and technicians guarantee to bring you the best rendering experience.
Let’s see our latest performance test for Blender Cycles on our servers! The results will surprise you!
If you still wonder if this is the right place for your project, REGISTER NOW to get a trial and receive a 100% bonus promotion for your first transaction with us.

For more detailed information, please contact us via Live chat 24/7 or WhatsApp: +(84) 912-785-500 or Email: [email protected].
iRender – Happy Rendering!
References: versluis.com, docs.blender.org
Related Posts
The latest creative news from Blender Cloud Rendering.