How to Create Static Renders with Unreal Engine 4
Unreal Engine is the world’s most open and advanced real-time 3D creation tool for photoreal visuals and immersive experiences. One of the popular applications of Unreal Engine is creating video game. However, creating and visualising architecture is not very different from the process of creating a video game: you import the models you’re going to use, prepare your 3D library, then enjoy positioning objects and characters in the scene. One of the phases involves obtaining static renders of your 3D models to view your project in the most realistic way.
In today’s blog, we will discover the easy way to generate static renders using Unreal Engine 4 with only 5 steps by sharing of Miguel Albo – an architect who specializes in creating 3D architecture with Unreal Engine 4.

1. Set up a camera
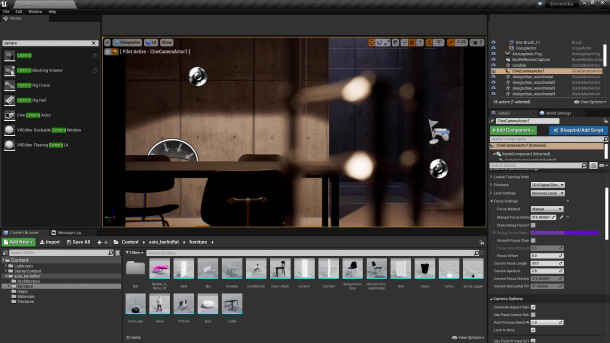
First set up your camera to capture the scene. Head to the search field on the left of the screen and find the best option for your project. Miguel Albo recommends using a film camera. Set it up to rotate easily, giving you a better view of the scene.
The small screen on the right of the interface shows what the camera sees and Details allows you to change camera settings, such as depth of field, proportion, the format or focal distance.
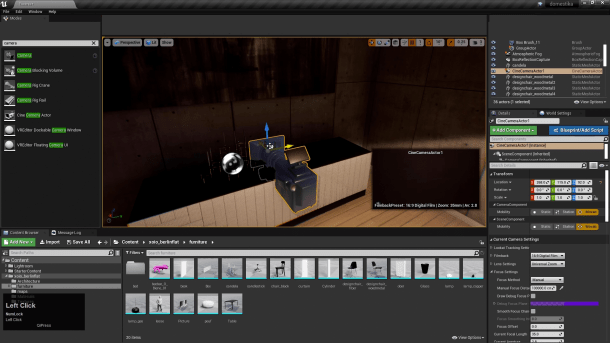
2. Focus the camera
Draw debug focus plane is very useful for establishing your focal point in terms of the focal distance. It allows you to set the focus plane by simply clicking on a point thanks to the dropper tool. Once you have it, you can adjust the value to place the focus anywhere you need. Deactivate the focus plane once it’s been set and adjust the focal distance or aperture settings.
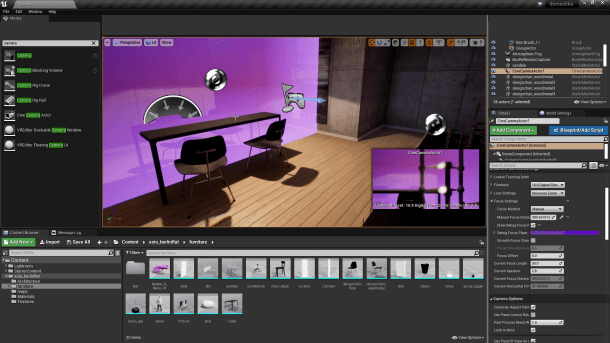
3. View the scene through the camera
Here’s a little trick for you. In the Perspective tab located in the top left of the Unreal Engine 4 interface on the home page, select your camera to look through it. This is very useful when you want to focus on details of the image you will obtain once the project has been rendered. Don’t forget to deactivate the camera control to move back through the scene.
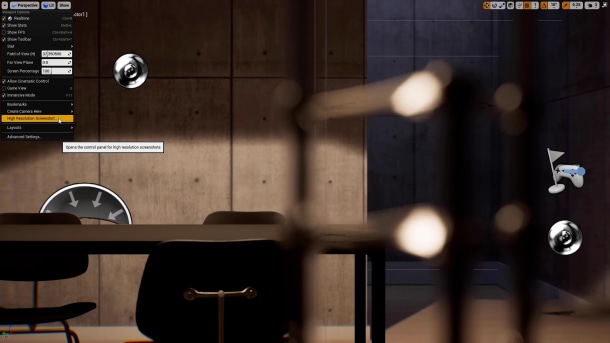
4. Capture the scene in high resolution
Once you have the camera in position and under control, press F11 to view the scene in full screen. Select the drop-down menu on the top left, then click High Resolution Screenshot to create a screen shot.
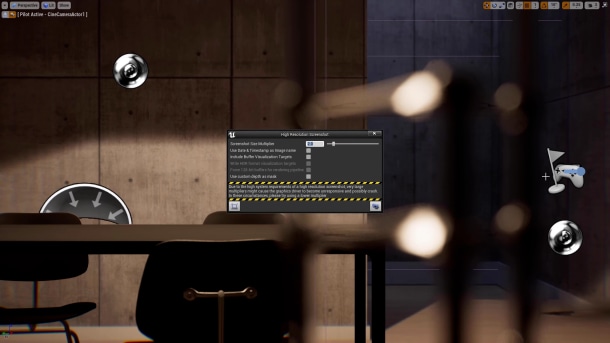
The machine will automatically open a tab where you’ll be able to modify the resolution of your render.
Remember that the screenshot will use your screen resolution by default, but you can change the multiplier. In other words, if you enter 1.0 in Screenshot Size Multiplier, you’ll obtain an image with the same resolution as your monitor. If you want to achieve a 4k image, you need to enter 2.0 in Screenshot Size Multiplier. Click Take a Screenshot which will open a path to the place where your rendered images have been saved. If you want to remove the render symbols, press G in the project tab and take a new screenshot.
5. Remove any render elements
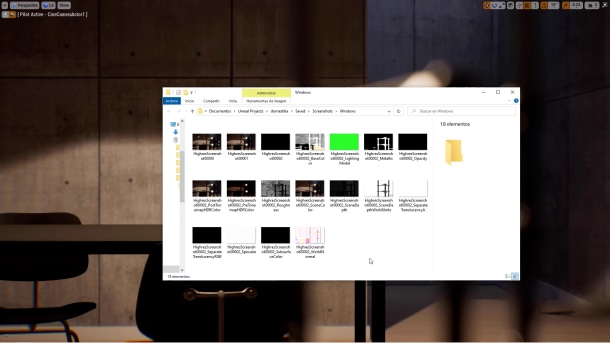
You can remove individual rendering elements that can then be used to post-process the image, create photomontages, etc. It’s very simple, simply select the Include Buffer Visualization Targets option then click Take a Screenshot. You’ll find all the render elements in the screenshot folder.
iRender - Powerful Cloud Rendering For Unreal Engine
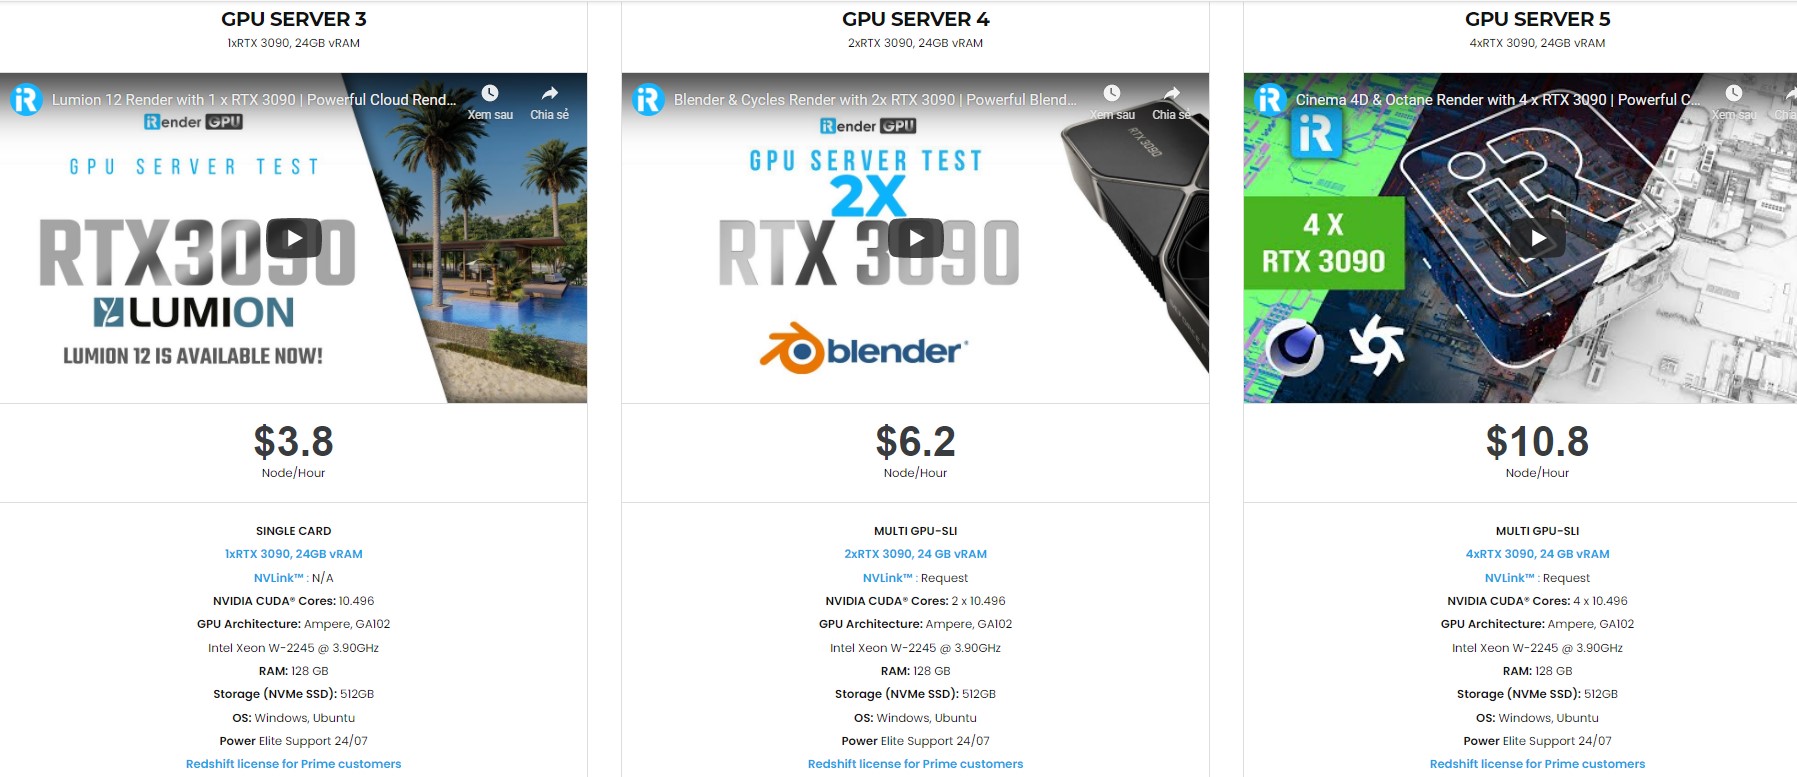
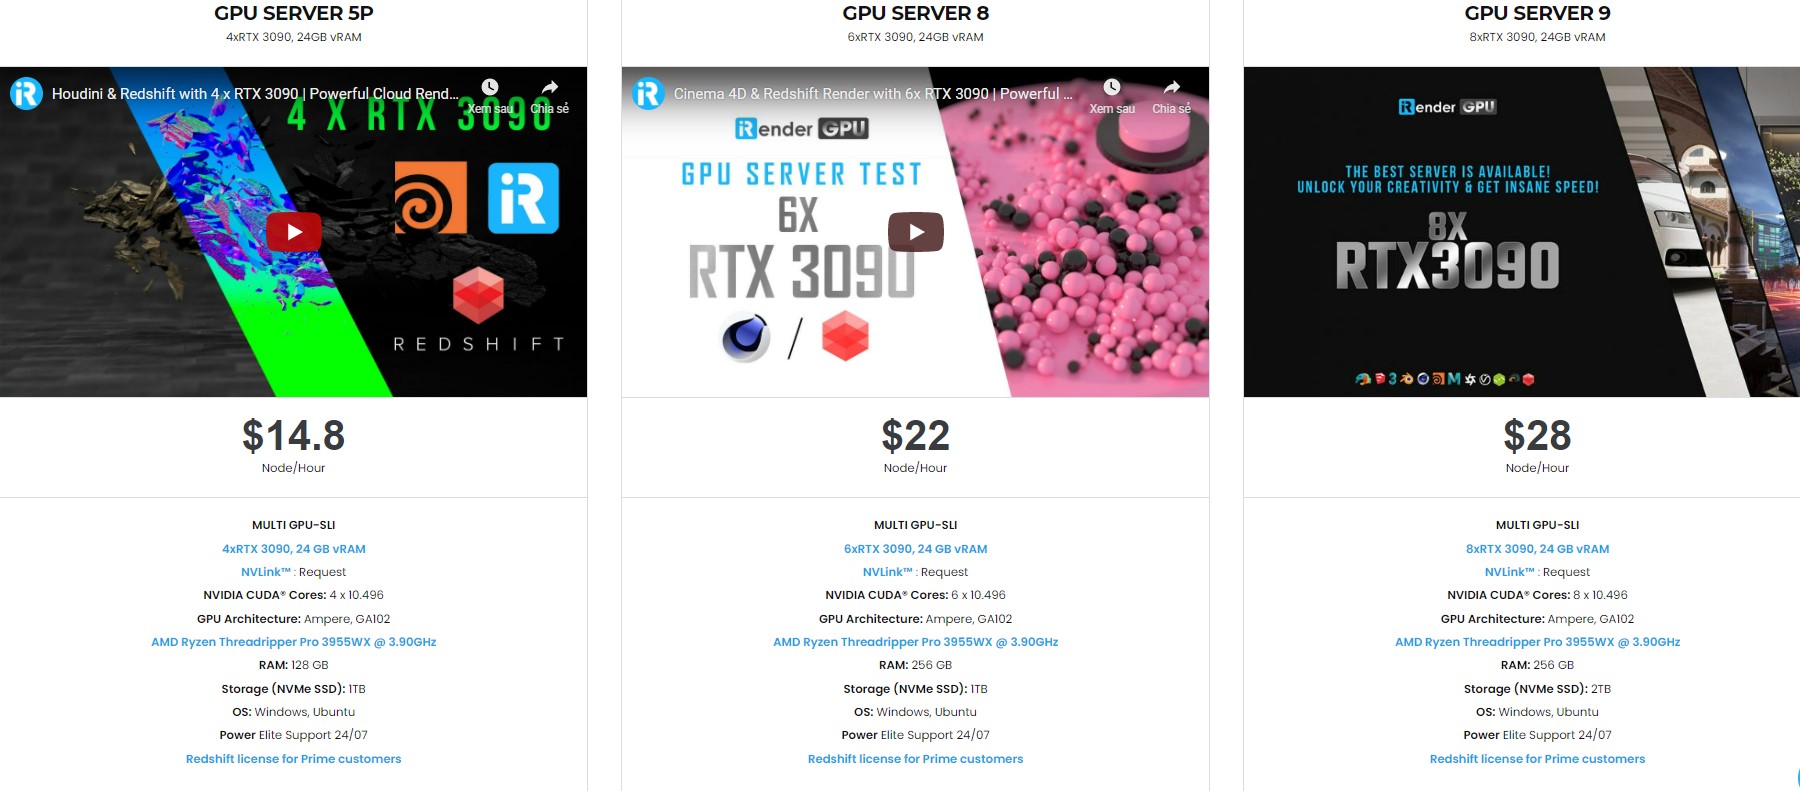
iRender is a GPU-Acceleration Cloud Rendering Service for Multi-GPU Rendering with Powerful Render Nodes: 2/4/6/8x RTX 3090, provides high computing performance on the model of IaaS (Infrastructure-as-a-Service). Users will remotely connect to our server, install any version of Unreal Engine only one time and easily do any intensive tasks like using their local computers.
High-end hardware configuration
- Single and Multi-GPU servers: 1/2/4/6/8x RTX 3090. NVIDIA RTX 3090 – the most powerful graphic card.
- 24 GB vRAM capacity, fitting to the heaviest images and scenes. NVLink/SLI requested for bigger vRAM.
- A RAM capacity of 128/256 GB.
- Storage (NVMe SSD): 512GB/1TB/2TB.
- Intel Xeon W-2245 or AMD Ryzen Threadripper Pro 3955WX CPU with a high clock speed of 3.90GHz.

Reasonable price
With all the outstanding advantages mentioned above, you must have found yourself the perfect choice for Unreal Engine . We provide unmatched support tailored to your specific needs and goals. SPECIAL OFFER for this January: Get 20% BONUS for all newly registered users. Let’s CHECK IT OUT!

For more advice and support, please do not hesitate to reach us via Whatsapp: +(84) 915875500. Register an ACCOUNT today and get FREE COUPON to experience our service.
Thank you & Happy Rendering!
Source: Miguel Albo via domestika.org
Related Posts
The latest creative news from Unreal Engine Cloud rendering.